
With the increasing concern about privacy and security, it’s no surprise that iPhone users are looking for ways to maintain their confidentiality. One important aspect of privacy is managing alerts and notifications on your iPhone and iPad. Whether it’s sensitive emails, personal messages, or app notifications, it’s crucial to control who can see them.
In this article, we will explore different methods to hide alerts and notifications on your iPhone and iPad, ensuring that your personal information remains private. From customizing privacy settings to using Do Not Disturb mode, we’ve got you covered. So, if you’re ready to take control of your notification privacy, keep reading!
Inside This Article
- Why Privacy is important on your iPhone and iPad
- How to Hide Alerts & Notifications on Your iPhone & iPad
- Method 1: Hide Alerts for Messages
- Method 2: Hide Alerts for Individual Contacts
- Method 3: Hide Alerts for Specific Apps
- Method 4: Hide Lock Screen Notifications
- Conclusion
- FAQs
Why Privacy is important on your iPhone and iPad
In today’s digital age, privacy has become a paramount concern for smartphone users. Your iPhone and iPad hold a treasure trove of personal information, from sensitive messages and emails to banking details and personal photos. It is crucial to understand the importance of privacy and take steps to protect your sensitive data from prying eyes.
One of the primary reasons why privacy is so important on your iPhone and iPad is to safeguard your personal information from unauthorized access. With the rise of cybercrime and data breaches, it is essential to protect your identity and prevent hackers from gaining access to your private information.
Your iPhone and iPad store not only your personal messages and emails but also a plethora of personal data, such as your location history, contacts, and even health data. Maintaining privacy ensures that this information remains confidential and is not misused or manipulated.
Privacy is also crucial for preserving your online reputation. With social media platforms and online services becoming ubiquitous, a breach of privacy can have severe consequences. By ensuring the privacy of your iPhone and iPad, you can prevent sensitive or compromising information from being exposed to unwanted individuals or the public.
Moreover, privacy is essential for maintaining a sense of autonomy and control over your personal data. By being in control of your privacy settings, you decide who has access to your information and how it is used. This level of control is empowering and allows you to use your iPhone and iPad without concerns about your data being exploited without your consent.
Lastly, privacy is crucial for fostering trust in the digital world. When you know that your iPhone and iPad are secure and your data is protected, you can confidently use various apps and services without fear of your information being misused. Privacy is the foundation for trust in the digital ecosystem.
How to Hide Alerts & Notifications on Your iPhone & iPad
Keeping your notifications private is crucial in today’s digital age. Fortunately, your iPhone and iPad offer numerous options to hide alerts and notifications, allowing you to maintain your privacy and avoid unnecessary distractions. In this article, we’ll explore different methods to hide alerts and notifications on your Apple devices.
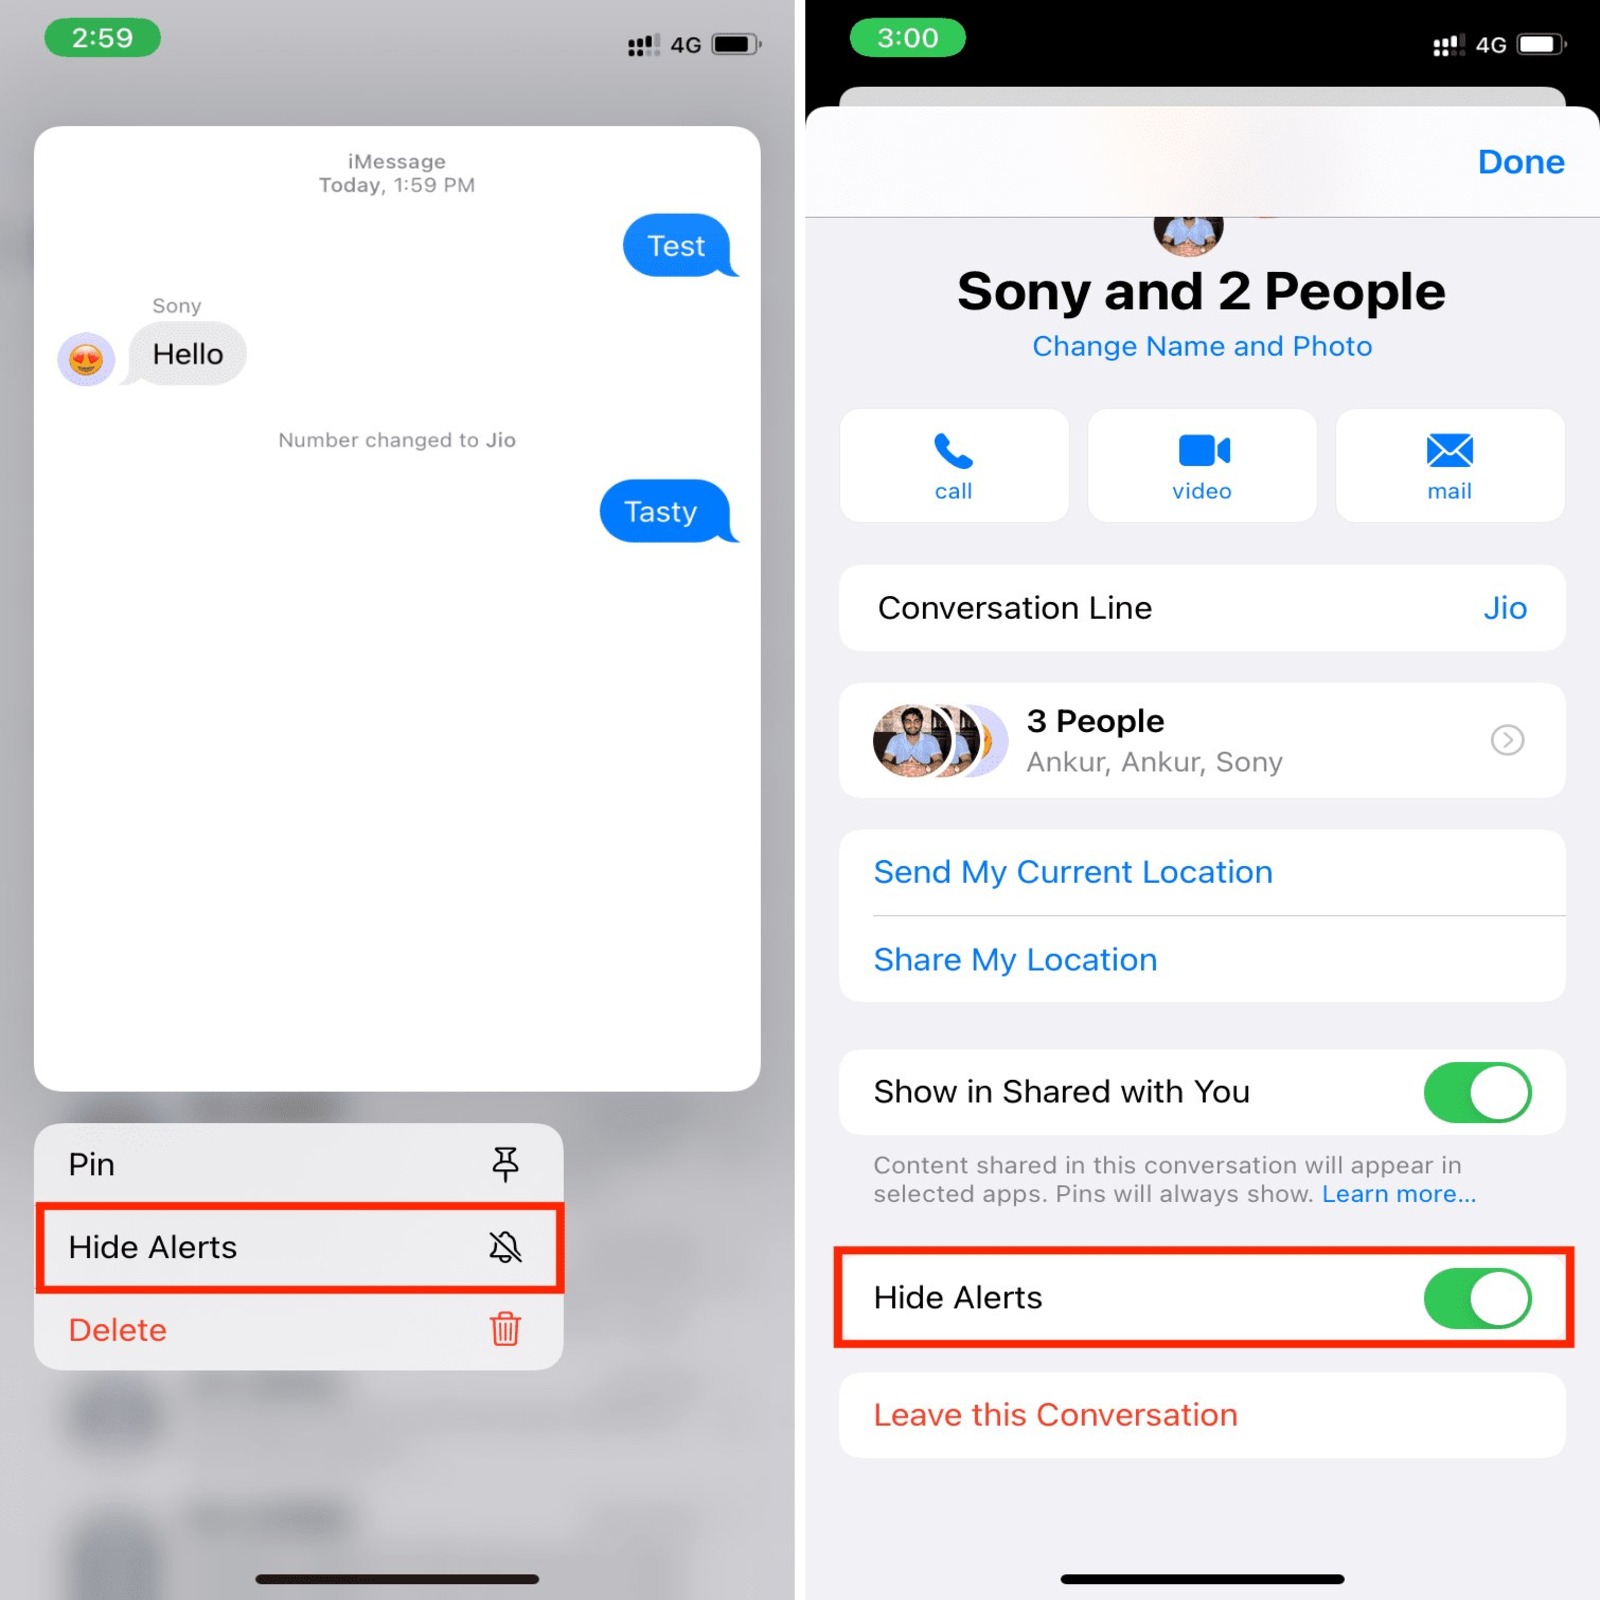
Method 1: Hide Alerts for Messages
When it comes to messages, you can easily hide alerts for specific conversations. Open the Messages app and locate the conversation you want to hide. Swipe left on the conversation and tap on “Hide Alerts.” By doing this, you will no longer receive notifications for that particular conversation. However, be mindful that you will still see the messages when you open the app.
Method 2: Hide Alerts for Individual Contacts
If you have certain contacts whose messages you want to avoid receiving alerts for, you can customize your settings accordingly. Open the Contacts app and select the contact you wish to hide alerts for. Tap on “Edit” in the upper right corner, then scroll down and tap on “Text Tone.” From there, choose “None.” This will disable alerts specifically for messages from that contact.
Method 3: Hide Alerts for Specific Apps
Are there specific apps that tend to send you frequent and disruptive notifications? You can easily hide alerts for these apps. Go to Settings, then scroll down and tap on “Notifications.” Select the app you want to customize, and then toggle off the “Allow Notifications” option. This will prevent the app from displaying any notifications on your lock screen or in the notification center.
Method 4: Hide Lock Screen Notifications
If you prefer to keep your lock screen notifications hidden, you can adjust this setting as well. Go to Settings, then tap on “Face ID & Passcode” or “Touch ID & Passcode,” depending on your device. Enter your passcode, then scroll down and toggle off the “Allow Access When Locked” option for notifications. This will ensure that your lock screen remains private and does not display any app or message previews.
By following these methods, you can take control of your notifications and maintain your privacy on your iPhone and iPad. Customize your settings to suit your preferences and minimize distractions, allowing you to focus on what matters most to you.
Remember, privacy is essential, and with these simple steps, you can have peace of mind knowing that your notifications are for your eyes only.
Method 1: Hide Alerts for Messages
When it comes to privacy on your iPhone or iPad, it’s important to have control over your alerts and notifications. If you want to keep your messages discreet and prevent others from seeing your message content on the lock screen, you can easily hide alerts for messages.
To hide alerts for messages, follow these simple steps:
- Open the “Settings” app on your iPhone or iPad.
- Scroll down and tap on “Notifications”.
- Tap on “Messages”.
- Toggle off the “Show Preview” option.
By toggling off the “Show Preview” option, you will no longer see message previews on the lock screen or in the notification banners. Instead, you will only see a generic notification that indicates a new message has arrived.
This can be particularly useful if you want to maintain your privacy or prevent others from reading your messages when your device is left unattended.
It’s worth noting that even with message previews disabled, you can still access your message content by unlocking your device and opening the Messages app. So, you won’t miss any important conversations even if your alerts are hidden!
Now that you know how to hide alerts for messages, you can take control of your privacy and ensure that your personal conversations remain confidential.
Method 2: Hide Alerts for Individual Contacts
If you want to keep your iPhone notifications discreet for certain individuals, you can easily hide alerts for specific contacts. This is particularly useful if you receive frequent messages from certain people and want to avoid repeated notifications popping up on your screen.
To hide alerts for individual contacts, follow these simple steps:
- Open the Contacts app on your iPhone.
- Select the contact for whom you want to hide alerts.
- Tap on the “Edit” button at the top-right corner of the screen.
- Scroll down and tap on “Text Tone.”
- Under the “Alerts” section, toggle the switch next to “Emergency Bypass” to enable it.
- Tap on “Done” to save the changes.
Once you’ve enabled Emergency Bypass for a specific contact, you will no longer receive notifications for text messages or phone calls from that person. This means that even if your iPhone is set to silent mode or Do Not Disturb, alerts from that contact will still come through.
By hiding alerts for individual contacts, you can ensure that only important notifications grab your attention, while keeping your phone’s home screen free from unnecessary distractions.
Method 3: Hide Alerts for Specific Apps
If you want to maintain your privacy while using certain apps on your iPhone or iPad, you can easily hide alerts and notifications for those specific apps. This is particularly useful if you receive sensitive or confidential information through certain applications.
To hide alerts for specific apps, follow these simple steps:
- Open the “Settings” app on your iPhone or iPad.
- Scroll down and tap on “Notifications.”
- You will see a list of all the installed apps on your device. Select the app for which you want to hide alerts and notifications.
- In the app’s notification settings, you can customize various options, including the alert style, sounds, and badges. To hide all alerts and notifications from this app, toggle the “Allow Notifications” switch off.
By turning off the “Allow Notifications” option for a specific app, you ensure that no alerts or notifications from that app will appear on your iPhone or iPad. This allows you to maintain your privacy and focus on other tasks without being disturbed by unnecessary alerts.
Should you wish to enable alerts and notifications for that app again, simply go back to the app’s notification settings and toggle the “Allow Notifications” switch on.
It’s important to note that by hiding alerts and notifications for specific apps, you may miss important information or updates from those applications. Therefore, make sure to periodically check the app manually if needed.
Now you can enjoy using specific apps on your iPhone or iPad without worrying about intrusive alerts and notifications.
Method 4: Hide Lock Screen Notifications
Lock screen notifications can be a privacy concern, especially if you’re in a public setting or just want to keep your messages and notifications for your eyes only. Fortunately, your iPhone and iPad provide options to hide lock screen notifications and protect your privacy.
To hide lock screen notifications, follow these simple steps:
- Open the Settings app on your iPhone or iPad.
- Scroll down and tap on “Notifications.”
- Select the app for which you want to hide lock screen notifications.
- Toggle the “Show on Lock Screen” option to off.
By turning off the “Show on Lock Screen” option for a specific app, you prevent the app’s notifications from showing up on your lock screen. This means that even if someone picks up your device, they won’t be able to read the content of your notifications without unlocking your device.
You can repeat this process for each app you want to hide lock screen notifications for, ensuring that your private information stays private.
It’s worth noting that while this method hides lock screen notifications, the notifications will still be accessible from the Notification Center once you unlock your iPhone or iPad. They will also appear on the Home Screen and in the app itself, depending on the app’s settings.
So, if you’re concerned about privacy and don’t want others to see your notifications when your device is locked, hiding lock screen notifications is a step you should take. It gives you peace of mind and keeps your personal information secure.
Conclusion
Having control over the notifications and alerts on your iPhone and iPad is essential for maintaining your privacy and enjoying a seamless mobile experience. By following the steps outlined in this article, you can easily hide alerts and notifications from prying eyes.
Whether you want to keep your messages private or ensure that sensitive information remains confidential, the options available on iOS devices give you the power to tailor your notification settings to your specific needs.
Remember, taking a proactive approach to managing your notifications can greatly enhance your privacy and prevent unnecessary disruptions throughout your day. So take a few moments to customize your notification settings and enjoy a more focused and secure mobile experience on your iPhone and iPad.
FAQs
1. How do I hide alerts and notifications on my iPhone or iPad?
To hide alerts and notifications on your iPhone or iPad, go to the “Settings” app and select “Notifications.” From there, you can customize the settings for each individual app, including choosing whether or not to show alerts, banners, and sounds.
2. Can I hide alerts for specific apps only?
Yes, you can easily hide alerts for specific apps on your iPhone or iPad. Simply go to the “Settings” app, select “Notifications,” and choose the app you want to customize. From there, you can turn off alerts, banners, sounds, and other types of notifications for that specific app.
3. Is there a way to temporarily hide all alerts and notifications?
Yes, there is a convenient feature called “Do Not Disturb” that allows you to temporarily hide all alerts and notifications on your iPhone or iPad. Simply swipe down from the top right corner of the screen (on iPhone X or newer) or swipe up from the bottom of the screen (on older iPhone models) to access the Control Center. Then, tap on the crescent moon icon to activate “Do Not Disturb” mode. This will silence all incoming alerts and notifications until you manually turn off the feature.
4. Can I customize the settings for specific contacts?
Yes, you have the option to customize the settings for specific contacts on your iPhone or iPad. This feature is called “Emergency Bypass.” To enable it, open the Contacts app, go to the contact you want to customize, tap “Edit,” and then tap “Ringtone” or “Text Tone.” From there, you can toggle on the “Emergency Bypass” switch, which will make sure you receive alerts and notifications from that particular contact even if your phone is on silent or “Do Not Disturb” mode.
5. What should I do if I don’t want to be disturbed at all?
If you don’t want to be disturbed at all, you can enable the “Silent Mode” on your iPhone or iPad. Simply toggle the switch on the side of your device to activate the silent mode, and all alerts and notifications will be silenced. Alternatively, you can also enable “Airplane Mode,” which will turn off all wireless connections and ensure that you won’t be disturbed by incoming calls, messages, or notifications.