
When it comes to backing up your iOS device, opting for a cloud service is one of the most convenient and recommended methods. Not only does it provide a secure storage solution, but it also ensures that your valuable data and files are safe and easily accessible whenever you need them. However, before diving into the backup process, it’s essential to follow the first step of ensuring a seamless experience. By taking this crucial initial step, you can set the foundation for a smooth and efficient backup procedure. In this article, we will explore the recommended first step for backing up an iOS device to a cloud service and understand why it is vital in safeguarding your data. So, let’s get started and make sure your precious iPhone or iPad is well protected!
Inside This Article
- Introduction
- Step 1: Verify Device Compatibility – Understanding iOS Device Compatibility with Cloud Services
- Step 2: Choose the Right Cloud Service- Evaluating different cloud service options for iOS device backup
- Step 3: Set up an Account – Exploring the process of creating an account for the chosen cloud service
- Step 4: Enable iCloud Backup on Your iOS Device
- Conclusion
- Conclusion
- FAQs
Introduction
Backing up your iOS device is crucial to ensure the safety and security of your data. With the advancement of cloud technology, cloud services have become the preferred method for iOS device backups. They offer convenience, accessibility, and a reliable solution for storing your valuable information. However, before diving into the process of backing up your iOS device to a cloud service, it’s important to know the recommended steps to ensure a smooth and successful backup.
In this article, we will guide you through the first recommended step when backing up an iOS device to a cloud service, providing you with the knowledge and understanding necessary to safeguard your data effectively.
By following this step, you can ensure that your iOS device is compatible with your chosen cloud service, enabling a seamless backup process and preventing any potential issues that may arise. So, let’s dive right in and explore the first step in backing up an iOS device to a cloud service.
Step 1: Verify Device Compatibility – Understanding iOS Device Compatibility with Cloud Services
When it comes to backing up your valuable data from your iOS device, using a cloud service is a convenient and reliable option. However, before you dive into the world of cloud backups, it is essential to understand the compatibility of your iOS device with various cloud services.
iOS devices, such as iPhones and iPads, have specific requirements and specifications that determine their compatibility with different cloud services. These requirements typically include the operating system version, device model, and available storage space.
To determine if your iOS device is compatible with a particular cloud service, you should first check the version of the iOS operating system running on your device. Cloud services often require specific iOS versions to ensure smooth integration and functionality. You can check the iOS version by going to the “Settings” app on your device, then selecting “General” and “About.” Look for the “Software Version” to see the exact iOS version installed on your device.
Next, consider the model of your iOS device. Different cloud services may have specific compatibility requirements based on the device model. For example, some cloud services may require newer device models with more advanced hardware capabilities.
Another important factor to consider is the available storage space on your iOS device. Cloud services typically require sufficient storage space to accommodate your data backups. If your device is running low on storage, it may not be compatible with certain services that require a minimum amount of free space.
Additionally, keep in mind that some cloud services are specifically designed for iOS devices, while others cater to multiple operating systems. It is essential to choose a cloud service that is optimized for iOS devices to ensure seamless integration and optimal performance.
By understanding the compatibility requirements of your iOS device, you can make informed decisions about which cloud services are best suited for your backup needs. Compatibility ensures that your device and the cloud service can work together effectively, providing a reliable and efficient backup solution.
When researching different cloud services, make sure to visit their official websites or consult with their customer support to gather accurate information about device compatibility. This will ensure that you choose a cloud service that is tailored to your specific iOS device.
Now that you have a clear understanding of the importance of verifying device compatibility, you are ready to explore the different cloud service options available for backing up your iOS device.
Step 2: Choose the Right Cloud Service- Evaluating different cloud service options for iOS device backup
When it comes to backing up your iOS device to a cloud service, choosing the right cloud service provider is crucial. Not all cloud services are created equal, and selecting the one that meets your specific needs is essential for a seamless backup experience. Here are some factors to consider when evaluating different cloud service options:
- Storage Capacity: The first thing to consider is the storage capacity offered by the cloud service provider. Make sure they offer sufficient space to accommodate your entire iOS device backup. The amount of storage you need will depend on the size of your device’s data, such as photos, videos, apps, and documents. Some providers offer a limited amount of free storage, while others have subscription plans with higher storage capacities.
- Security: Data security is paramount when it comes to cloud services. Look for a provider that utilizes advanced encryption methods to safeguard your data. Additionally, check if they have proper security measures in place, such as two-factor authentication and secure access protocols. Reading reviews and checking the provider’s reputation for data security can help you make an informed decision.
- Compatibility: Ensure that the cloud service you choose is compatible with iOS devices. Many popular cloud service providers have dedicated iOS apps that offer seamless integration with your device. This allows for automatic backups and easy access to your data across multiple devices.
- Ease of Use: User-friendliness is another essential factor to consider. Choose a cloud service provider with an intuitive interface and a straightforward backup process. The last thing you want is a complicated and confusing backup procedure that can lead to errors or difficulties in accessing your data.
- Additional Features: Some cloud service providers offer additional features that enhance the overall backup experience. This may include features like file syncing, file versioning, and the ability to share files with others. Consider your specific needs and prioritize the providers that offer features that align with those needs.
By carefully evaluating these factors, you can choose the right cloud service that fits your requirements and provides a reliable and secure backup solution for your iOS device. Remember, the goal is to have a seamless backup experience that ensures the safety of your valuable data.
Step 3: Set up an Account – Exploring the process of creating an account for the chosen cloud service
Now that you have chosen the right cloud service for backing up your iOS device, it’s time to set up an account. Creating an account will allow you to securely store and access your device’s data on the cloud. While the exact steps may vary slightly depending on the cloud service provider, the general process remains the same. Let’s explore the steps involved in setting up an account for the chosen cloud service.
- Visit the cloud service provider’s website: Start by visiting the official website of the cloud service you have selected. This is where you will find all the necessary information and instructions to set up your account.
- Click on “Sign Up” or “Create Account”: Look for a prominent “Sign Up” or “Create Account” button on the website. Click on it to begin the account creation process.
- Provide your personal information: Fill in the required information, including your name, email address, and a strong password. Make sure to choose a password that is unique and not easily guessable to ensure the security of your account.
- Verify your email: Some cloud service providers may require you to verify your email address by sending a verification link to the email you provided. Check your inbox for an email from the cloud service and follow the instructions to verify your account.
- Set up additional security measures: To enhance the security of your cloud storage account, consider enabling additional security measures such as two-factor authentication. This will add an extra layer of protection and prevent unauthorized access to your data.
- Agree to the terms and conditions: Before finalizing the account creation process, you will be asked to read and agree to the cloud service provider’s terms and conditions. Make sure to read through them carefully to understand your rights and responsibilities as a user.
- Complete the setup process: Once you have filled in all the required information and agreed to the terms and conditions, click on the “Create Account” or “Finish” button to complete the setup process. You may be redirected to a confirmation page or receive a confirmation email indicating that your account has been successfully created.
After setting up your account, you will have access to the cloud service’s features and functionalities, including the ability to back up your iOS device. It’s important to note that some cloud service providers offer both free and paid plans, with different storage capacities and additional features. Consider your storage needs and budget when selecting the appropriate plan for your iOS device backup.
By setting up an account with the chosen cloud service, you are one step closer to securing your iOS device data in the cloud. You can now move on to the next step: enabling iCloud backup on your iOS device.
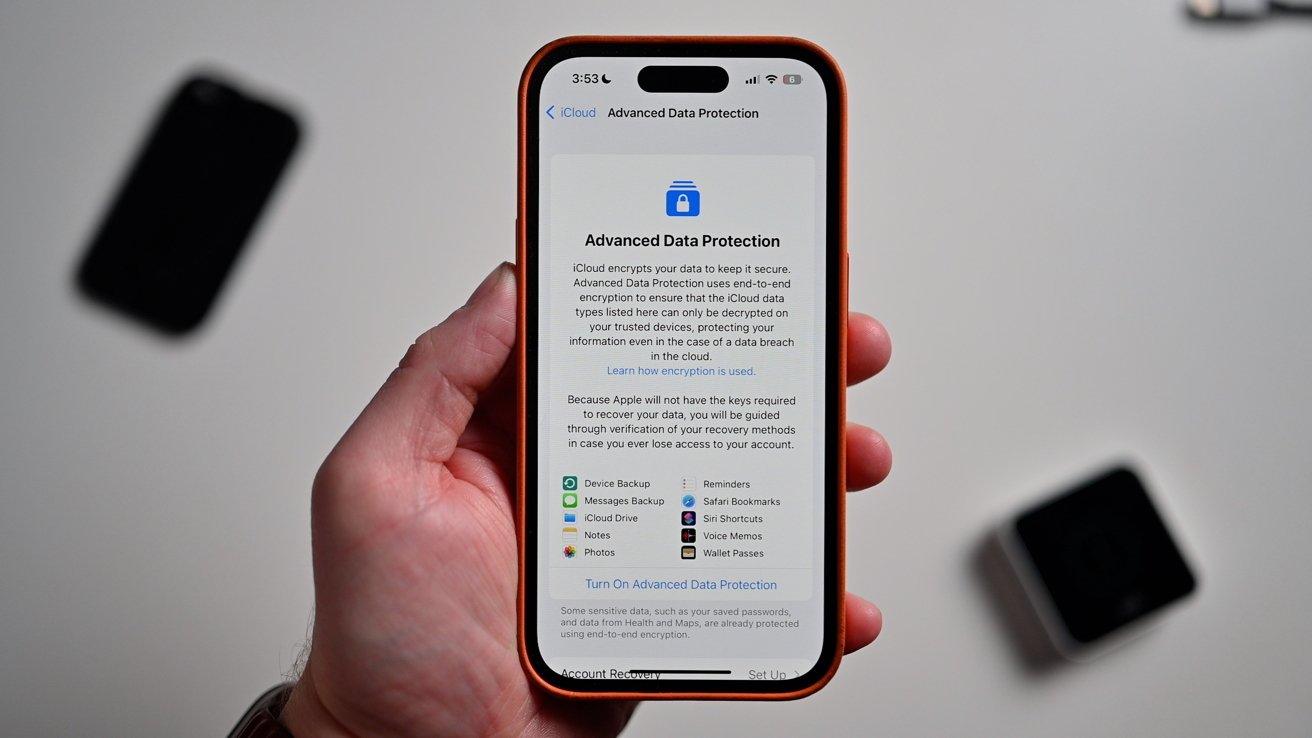
Step 4: Enable iCloud Backup on Your iOS Device
Enabling iCloud backup on your iOS device is a crucial step to ensure that your data is safely backed up and readily accessible whenever you need it. Follow these simple steps to enable iCloud backup:
- Connect to a Wi-Fi network: In order to back up your iOS device using iCloud, you need to be connected to a stable Wi-Fi network. This is because the backup process may require a large amount of data to be transferred, which could result in additional charges if done over cellular data.
- Open the Settings app: From your device’s home screen, locate and tap on the Settings app, which can be identified by the gear icon.
- Tap your Apple ID: At the top of the Settings menu, you should see your Apple ID profile picture or initials. Tap on it to access your Apple ID settings.
- Select iCloud: In the Apple ID settings menu, you’ll find various options related to your iCloud account. Tap on the “iCloud” option to proceed.
- Tap iCloud Backup: Scroll down until you find the “iCloud Backup” option. Tap on it to access the backup settings.
- Turn on iCloud Backup: You’ll see a switch next to the “iCloud Backup” option. Tap on the switch to enable iCloud backup. It should turn green, indicating that the feature is now active.
- Start the backup: Once you have enabled iCloud backup, you can initiate the backup process by tapping on the “Back Up Now” button. Your iOS device will start backing up your data to iCloud. The time it takes to complete the backup will depend on the amount of data being backed up and the speed of your internet connection.
- Verify the backup: After the backup process is complete, you can verify that your data has been successfully backed up by going back to the iCloud Backup settings page. Under the “Back Up Now” button, you should see the date and time of your most recent backup.
It’s important to note that the first backup may take some time, especially if you have a large amount of data on your device. However, subsequent backups will be faster, as only new or changed data will be uploaded to iCloud.
Enabling iCloud backup on your iOS device provides peace of mind knowing that your data is securely stored in the cloud. This means that if you ever need to restore your device or switch to a new one, you can easily retrieve your data and settings from iCloud.
Now that you have enabled iCloud backup on your iOS device, you can rest assured that your important data is protected and easily accessible whenever you need it.
Conclusion
In conclusion, backing up your iOS device to a cloud service is a critical step to safeguard your data and ensure its accessibility and security. By following a few simple steps, you can easily set up and enable cloud backup on your iOS device, making it a seamless and automated process.
First and foremost, it is crucial to verify the compatibility of your iOS device with the cloud service you plan to use. This ensures that your device supports the necessary features and requirements for a successful backup.
Next, choose the right cloud service that suits your needs and preferences. Evaluate different options based on factors such as storage capacity, ease of use, security features, and additional functionalities.
Once you have made your choice, proceed to set up an account for the selected cloud service. Follow the provided instructions and fill in the necessary details to complete the registration process.
Finally, enable iCloud backup on your iOS device by going to the settings menu and selecting the iCloud section. From there, activate the backup feature and make sure that all the necessary data categories are selected for backup.
By enabling iCloud backup, your iOS device will automatically create regular backups of your data, ensuring that it remains safe and easily recoverable in the event of any unfortunate incidents such as device loss, damage, or software issues.
Remember to periodically check your cloud storage to ensure that you have sufficient space available for backups. Delete any unnecessary or redundant data to optimize storage and free up space for new backups.
By following these steps and making a habit of regularly backing up your iOS device to a cloud service, you can have peace of mind knowing that your important data is protected and easily accessible whenever you need it.
So, don’t delay any further. Take the necessary steps now to back up your iOS device and protect your valuable data. Start enjoying the benefits and convenience of cloud backup today!
Conclusion
Backing up your iOS device to a cloud service is the first recommended step to ensure the safety of your data and guarantee peace of mind. With the plethora of cloud services available, such as iCloud, Google Drive, and Dropbox, you have ample options to choose from. By taking advantage of these services, you can easily store your photos, videos, documents, and more, without the fear of losing them.
Cloud backups provide a convenient and secure way to access your data from any device, anytime, and anywhere. Whether it’s an accidental data loss, a device malfunction, or even if you upgrade to a new device, having a backup in the cloud ensures that your valuable information is always protected. Additionally, by regularly backing up to the cloud, you can easily restore your data to a new device, saving you both time and effort.
Remember, always make backing up your iOS device a priority. It’s a simple and effective way to safeguard your important data and prevent any potential loss. So, take the time to set up a cloud backup service and enjoy the peace of mind that comes with knowing that your data is safe and secure.
FAQs
1. Why is backing up my iOS device important?
Backing up your iOS device is crucial for safeguarding your valuable data. With regular backups, you can protect your photos, videos, contacts, messages, and other important files from potential loss or damage. In the event of an accidental deletion, device malfunction, or theft, having a backup ensures that you can restore your data and continue seamlessly from where you left off.
2. What is a cloud service and why should I back up my iOS device to one?
A cloud service is a remote server that allows you to store and access data over the internet. By backing up your iOS device to a cloud service, such as iCloud, Google Drive, or Dropbox, you can enjoy multiple benefits. Firstly, cloud storage offers a reliable and secure platform to store your data, reducing the risk of losing it. Secondly, it provides convenience by allowing you to access your files from various devices, anytime and anywhere. Lastly, cloud backups make it easier to transfer your data to a new device or restore it after a factory reset.
3. How do I back up my iOS device to a cloud service?
To back up your iOS device to a cloud service, follow these steps:
1. Connect your iOS device to a stable Wi-Fi network.
2. Go to “Settings” from your device’s home screen.
3. Tap your name at the top of the Settings menu.
4. Select “iCloud” or the respective cloud service option.
5. Enable the toggle switch for “Backup” or “Backup and Sync.”
6. Tap “Back Up Now” to initiate an immediate backup or set up automatic backups by enabling “iCloud Backup” or the similar option.
7. Wait for the backup process to complete. Make sure your device remains connected to Wi-Fi and has sufficient battery power.
4. How long does it take to back up an iOS device to a cloud service?
The time it takes to back up an iOS device to a cloud service depends on various factors, including the size of your data, the speed of your internet connection, and the efficiency of the cloud service provider’s servers. Typically, the first backup may take longer as it includes all your data, while subsequent backups are incremental and faster. It’s recommended to keep your device connected to Wi-Fi and ensure it has sufficient battery life to ensure a successful and efficient backup process.
5. Can I access my iOS device backup on multiple devices?
Yes, if you back up your iOS device to a cloud service, you can access your backup on multiple devices associated with the same account. For example, if you use iCloud to back up your iPhone, you can restore that backup on another iPhone, iPad, or iPod Touch using the same iCloud account. This allows for seamless data transfer and synchronization across multiple devices, ensuring that important information is available whenever and wherever you need it.