
Power Bi is a powerful business intelligence tool that allows users to analyze and visualize data from various sources. One common task in Power Bi is appending data, which involves combining multiple data sources into a single dataset. This can be incredibly useful when working with large datasets or when needing to update an existing dataset with new information.
Appending data in Power Bi allows users to create a unified view of their data, enabling them to perform in-depth analysis and make informed business decisions. In this article, we will explore the step-by-step process of appending data in Power Bi, providing you with a comprehensive guide to successfully merge datasets and enhance your data analysis capabilities.
Inside This Article
- Steps to Append Data in Power BI
- Method 1: Using Power Query Editor
- Method 2: Using Power BI Desktop
- Method 3: Using Power BI Service
- Conclusion
- FAQs
Steps to Append Data in Power BI
Data appending is a crucial process in Power BI that allows you to combine multiple datasets into one cohesive entity. This feature is particularly useful when you have separate tables representing different aspects of your data and you want to analyze them holistically. Fortunately, Power BI provides a simple and efficient way to append data using its Power Query editor. Here are the steps to append data in Power BI:
-
Step 1: Prepare your data sources
Before you can append data in Power BI, it is essential to ensure that your data sources are compatible. The tables you want to combine should have similar column names or fields that can be used to establish relationships between them. Additionally, it is important to clean and transform your data to eliminate any inconsistencies or discrepancies.
-
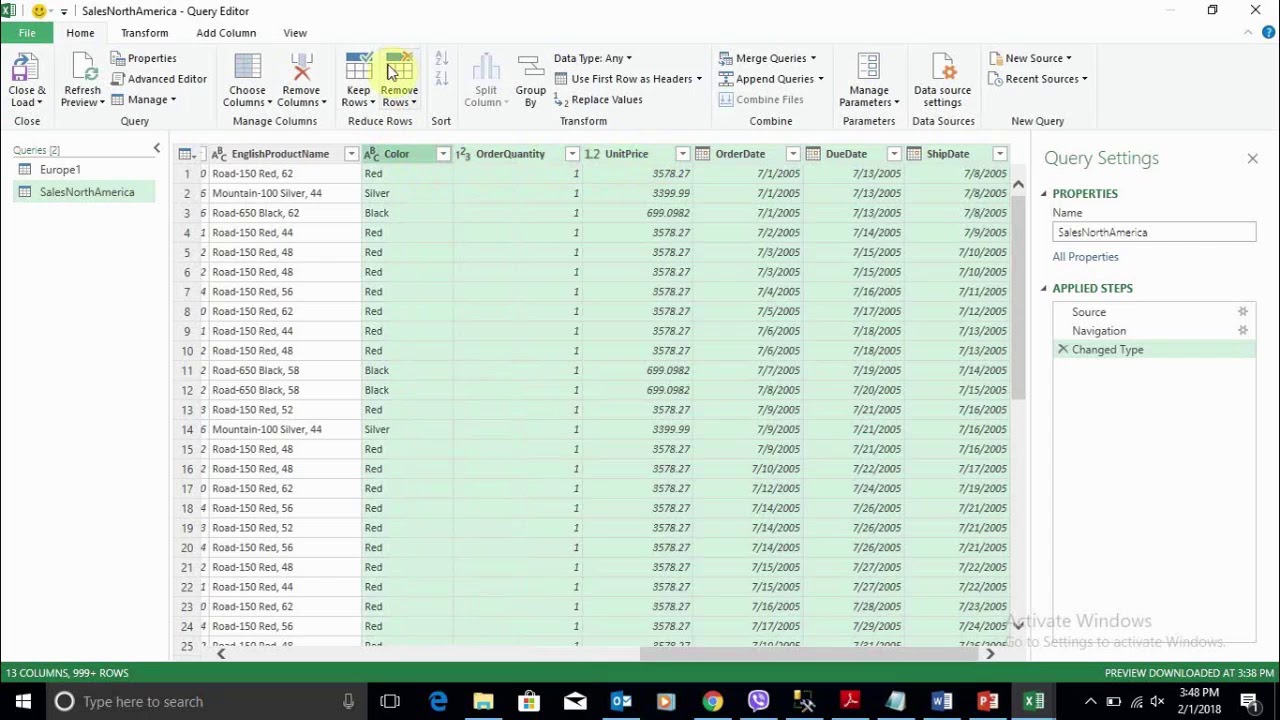
Step 2: Access the Power Query Editor
In Power BI, the Power Query Editor is a powerful tool that allows you to shape and transform your data. To access it, click on the “Edit Queries” button in the Home tab of the Power BI ribbon. This will open the Power Query Editor window, where you can manipulate your data before appending it.
-
Step 3: Create append queries
In the Power Query Editor, you can create append queries to combine multiple tables into one. To do this, select one of the tables you want to append to, and then click on the “Append Queries” button under the “Home” tab. From there, you can choose the tables you want to append and click “OK” to perform the append operation.
-
Step 4: Apply transformations and filters
While creating append queries, you have the option to apply transformations and filters to the data. This can be useful if you want to exclude certain rows or modify the data before appending it. Simply select the desired table, click on the “Transform Data” button, and apply the necessary transformations using the Power Query Editor’s interface.
-
Step 5: Manage the appended data
Once you have appended the data tables, it’s crucial to manage them effectively within the Power BI data model. This includes organizing the appended tables, establishing relationships between them using common fields or columns, and defining appropriate measures and calculations. By properly managing the appended data, you can ensure accurate and meaningful visualizations and insights.
-
Step 6: Refresh and update the data
Finally, it’s important to regularly refresh and update the appended data to ensure that your visualizations and analyses are up-to-date. Power BI provides various options for data refresh, including scheduled refreshes and manual updates. Choose the appropriate method based on your data sources and requirements.
By following these steps, you can easily append and combine multiple datasets in Power BI, enabling you to gain comprehensive insights and make data-driven decisions.
Method 1: Using Power Query Editor
The Power Query Editor is a powerful tool within Power BI that allows you to transform, clean, and append data with ease. Follow these steps to append data using the Power Query Editor:
Step 1: Access the Power Query Editor
To begin, open your Power BI file and navigate to the “Edit Queries” button located on the Home tab. Clicking this button will launch the Power Query Editor.
Step 2: Load the Data Tables
In the Power Query Editor, select the tables that you want to append. You can do this by checking the checkboxes next to the table names. Once selected, click the “Append Queries” button on the Home tab.
Step 3: Choose the Append Method
After clicking the “Append Queries” button, a dialog box will appear. Here, you can choose the append method that suits your needs. There are three options:
- Append (adds the rows from the selected tables)
- Append Queries as New (creates a new table with the appended data)
- Append Queries with Auto Naming (creates a new table with an automatically generated name)
Step 4: Configure the Appended Table
Once you have chosen the append method, Power BI will create a new table with the appended data. In the Power Query Editor, you can further configure the appended table by applying any necessary transformations, filters, or data type adjustments.
Step 5: Load the Appended Data into Power BI
After configuring the appended table, click the “Close & Apply” button on the Home tab to save the changes and load the data into Power BI. The appended data will now be available for visualization and analysis in your Power BI report.
By following these steps, you can easily append data using the Power Query Editor in Power BI. The Power Query Editor provides a user-friendly interface and a wide range of data transformation options to ensure accurate and seamless integration of multiple data tables into your analysis.
Method 2: Using Power BI Desktop
Power BI Desktop is a powerful tool that allows you to create and manipulate data visuals, and it also provides a seamless way to append data in your Power BI projects. Here’s how you can do it:
1. Start by opening Power BI Desktop and creating a new project or opening an existing one. Make sure you have the necessary data sources added to your project.
2. In the Power BI Desktop interface, navigate to the ‘Home’ tab and click on the ‘Enter Data’ option. This will open a new window where you can manually enter data for appending.
3. Enter the data for the new table that you want to append to your existing dataset. Ensure that the number and order of columns match the existing dataset for seamless appending.
4. Once you have entered the data, click on the ‘Load’ or ‘Close & Apply’ button to append the data to your existing dataset. Power BI Desktop will automatically recognize the append operation and add the new data to your project.
5. To verify the append operation, navigate to the ‘Data’ pane on the right-hand side of the Power BI Desktop interface. Here, you will see all the tables in your project, including the newly appended table.
6. You can now use the appended data in your visuals and reports. Power BI Desktop will treat the appended table as part of your dataset, allowing you to create meaningful insights and analysis.
Remember to save your Power BI Desktop project after appending data to ensure the changes are preserved. You can also refresh the data in the future to keep your insights up to date.
Using Power BI Desktop is an efficient and convenient way to append data in Power BI. With its intuitive interface and robust features, you can seamlessly merge additional data tables into your existing dataset to gain deeper insights and make more informed business decisions.
Method 3: Using Power BI Service
If you prefer the convenience and accessibility of working with Power BI in the cloud, you can use the Power BI Service to append data. The Power BI Service is a web-based platform that allows you to create, view, and share Power BI reports and dashboards.
Here’s how you can append data using Power BI Service:
- Start by logging into your Power BI Service account and navigating to the workspace where your dataset is located.
- Open the dataset that you want to append data to.
- In the dataset view, click on the “…” (ellipsis) icon next to the dataset name.
- From the dropdown menu, select “Append data”.
- A new window will open, allowing you to specify the source of the data you want to append. You can choose to append data from a file, a database, or other available sources.
- Select the desired source and follow the prompts to connect to the data.
- Once connected, you will be presented with a preview of the data. Review the preview to ensure that the columns and data types match your existing dataset.
- If needed, you can apply any necessary transformations or filters to the appended data.
- Click “Append” to combine the new data with your existing dataset.
- Power BI Service will analyze the data and append it to your dataset. Once the process is complete, you will be able to see the updated dataset in the workspace.
Using Power BI Service to append data offers the advantage of seamless collaboration and sharing with other users. Once the data is appended, you can create reports and dashboards based on the combined dataset and share them with colleagues or stakeholders.
Remember to refresh your dataset periodically to ensure that the appended data stays up-to-date. You can set up scheduled refreshes or manually refresh the dataset when new data becomes available.
Now that you know how to use Power BI Service to append data, you have another powerful tool at your disposal for creating comprehensive and dynamic reports and dashboards.
Conclusion
Appending data in Power BI is a crucial skill that can greatly enhance your data analysis capabilities. By utilizing the Append Queries feature, you can easily combine multiple datasets to create a more comprehensive and insightful view of your data.
Throughout this article, we have explored the step-by-step process of appending data in Power BI. From understanding the requirements for appending queries to performing the actual append operation, we have covered all the necessary information to help you confidently integrate and consolidate your data.
Remember, appending data in Power BI allows you to bring together diverse datasets and leverage their collective insights. Whether you want to merge data from different sources, combine data from various time periods, or simply create a more comprehensive analysis, appending queries in Power BI provides a powerful solution.
By mastering the art of appending data in Power BI, you can unlock new possibilities for data exploration, visualization, and decision-making. So, go ahead and start appending your data, and experience the power of comprehensive analysis in Power BI!
FAQs
1. Can I append data in Power BI?
Yes, you can append data in Power BI. Power BI allows you to combine and consolidate data from multiple sources into a single dataset. This can be useful when you have new data that you want to add to an existing dataset.
2. How can I append data in Power BI?
To append data in Power BI, you can use the “Append Queries” option in the Power Query Editor. First, you need to load the data you want to append into Power Query Editor. Then, select the existing dataset that you want to append the data to. Finally, use the “Append Queries” option to combine and merge the datasets.
3. Can I append data from different sources in Power BI?
Yes, Power BI allows you to append data from different sources. You can connect to multiple datasets or data sources, and then use the “Append Queries” option to combine and merge the data from these different sources into a single dataset.
4. Is there a limit to the amount of data I can append in Power BI?
Power BI has certain limitations on the amount of data that can be appended. The maximum number of rows that can be appended in Power BI is approximately 1 billion rows. However, you should consider the performance impact when dealing with large datasets.
5. Are there any precautions I should take when appending data in Power BI?
Yes, there are a few precautions you should take when appending data in Power BI. Ensure that the data you want to append has the same structure and column names as the existing dataset. Also, be cautious when appending large datasets, as it may impact the performance of your Power BI reports and dashboards.