
Are you tired of dealing with unsightly cables and limited connectivity options? If so, a wireless HDMI cable may be the solution you’ve been searching for. With advancements in technology, it’s now possible to transmit high-definition audio and video signals wirelessly, providing you with greater flexibility and convenience.
In this article, we’ll guide you through the process of making a wireless HDMI cable, allowing you to stream content from your devices to your TV or projector without the hassle of cords. Whether you want to watch movies on your big screen or give presentations in a professional setting, a wireless HDMI cable can offer you the freedom to enjoy seamless connectivity without compromising on quality.
So, if you’re ready to say goodbye to tangled wires and limited placement options, let’s dive into the world of wireless HDMI and discover how you can create your own cable.
Inside This Article
- Materials Needed
- Step 1: Gathering the Equipment
- Step 2: Setting up the Transmitter
- Step 3: Setting up the Receiver
- Step 4: Testing the Connection
- Conclusion
- FAQs
Materials Needed
Before you embark on the journey of creating a wireless HDMI cable, it’s important to gather all the necessary materials. Here’s a list of items you’ll need to complete this project:
- High-quality HDMI cables: Ensure that you have two HDMI cables that are compatible with your devices. Look for cables with solid build quality and good shielding to minimize signal loss.
- Wireless HDMI transmitter and receiver: These are the heart of your wireless HDMI setup. Make sure to choose a reputable brand that offers good signal quality and range. Check for additional features like support for 4K resolution or multiple inputs.
- Power adapters: Most wireless HDMI kits require power to function. Make sure you have the necessary power adapters to connect the transmitter and receiver units to a power source.
- TV or monitor with HDMI input: You’ll need a display device with an HDMI input to receive the wireless signal. Ensure that the display device is turned off during the setup process.
- Source device with HDMI output: Connect the source device, such as a laptop, gaming console, or Blu-ray player, to the wireless HDMI transmitter. It should have an HDMI output to transmit the audio and video signals.
Once you have all these materials ready, you’re all set to start setting up your wireless HDMI cable. With the right components and a little bit of technical know-how, you’ll be able to enjoy wireless connectivity between your devices in no time!
Step 1: Gathering the Equipment
Before you can start setting up your wireless HDMI cable, you’ll need to gather all the necessary equipment. Here are the items you’ll need for this project:
1. HDMI Transmitter: This is the device that will transmit the audio and video signals from your source device to the receiver. Make sure to choose a transmitter that is compatible with your source device and supports wireless HDMI technology.
2. HDMI Receiver: This is the device that will receive the audio and video signals from the transmitter and send them to your display or TV. Again, ensure that the receiver is compatible with your display and supports wireless HDMI technology.
3. HDMI Cables: You will need HDMI cables to connect your source device (such as a laptop, Blu-ray player, or gaming console) to the transmitter and the receiver to the display or TV. Make sure to choose high-quality HDMI cables that are long enough to reach your desired setup location.
4. Power Adapters: Both the transmitter and the receiver will require power to function. Ensure that you have the necessary power adapters or cables to connect them to a power source.
5. Source Device: Don’t forget to have your source device ready, be it a laptop, gaming console, Blu-ray player, or any other device you wish to transmit audio and video from.
Now that you have gathered all the necessary equipment, you are ready to move on to the next step: setting up the transmitter.
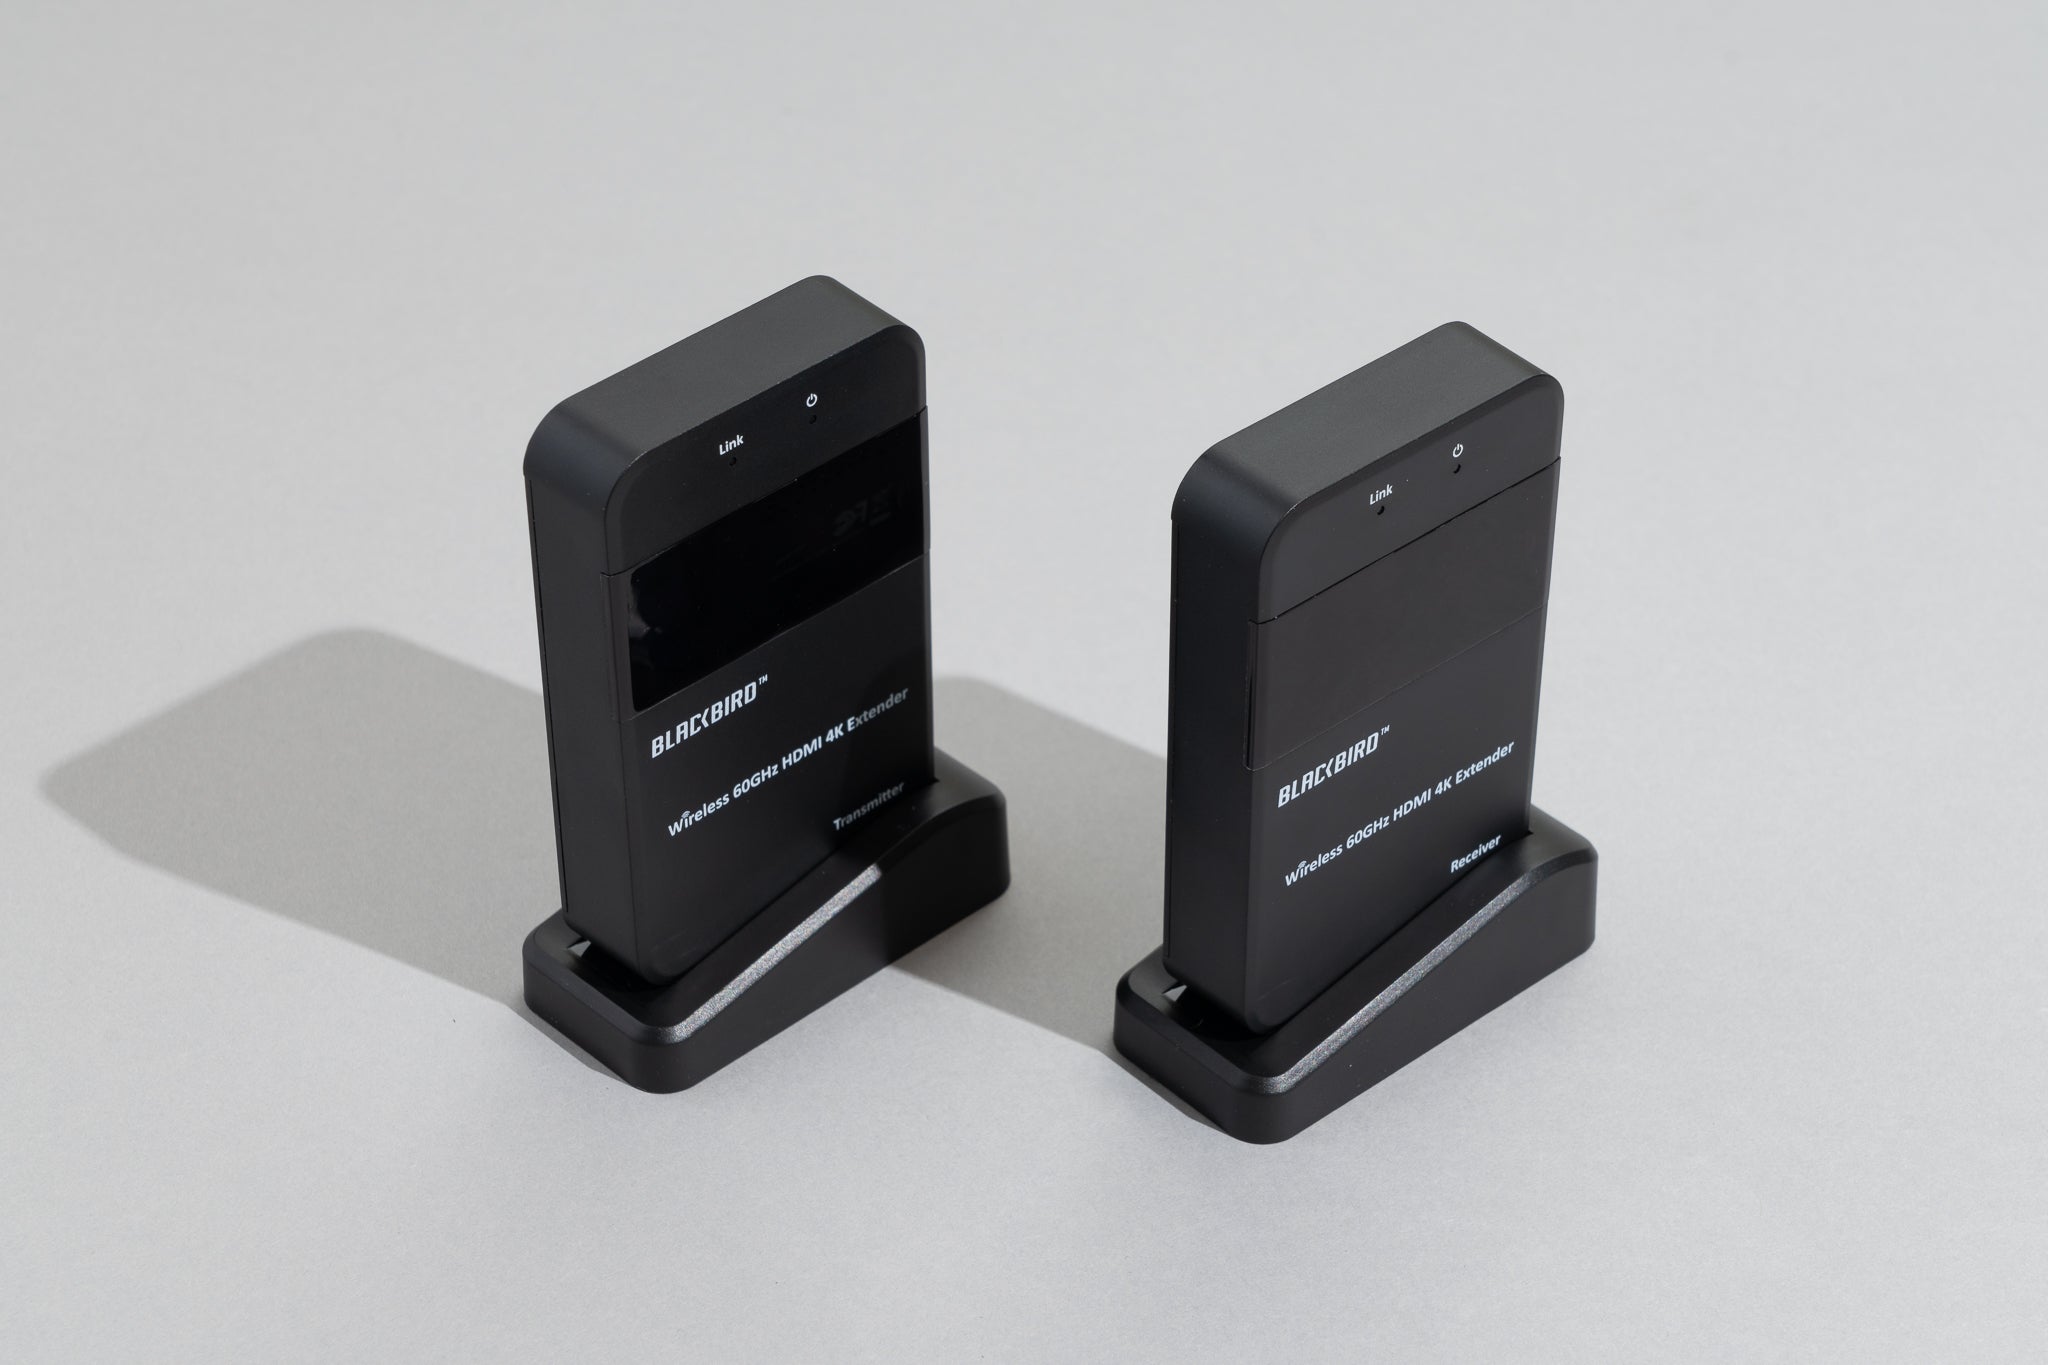
Step 2: Setting up the Transmitter
Now that you have gathered all the necessary equipment to create your wireless HDMI setup, it’s time to move on to the next step: setting up the transmitter. The transmitter is the device that will receive the HDMI signal from your video source, such as a Blu-ray player or gaming console, and wirelessly transmit it to the receiver.
1. Start by locating the HDMI input port on the transmitter. This is where you will connect the HDMI cable from your video source. The HDMI input port is typically labeled as “Input” or “Source”. Once you have located the port, insert one end of the HDMI cable into it.
2. The next step is to connect the power adapter to the transmitter. Locate the DC input port on the transmitter and plug in the power adapter. Make sure the power adapter is securely connected.
3. Once the transmitter is connected to power, turn it on using the power button or switch. The power button or switch is usually located on the side or back of the transmitter. You should see a power indicator light turning on, indicating that the transmitter is now powered on.
4. After the transmitter is powered on, it’s time to pair it with the receiver. Most wireless HDMI kits come pre-paired, but if they don’t, you may need to manually pair them. Refer to the instruction manual provided with your kit for specific pairing instructions.
5. Finally, position the transmitter in a location that is within range of your video source and the receiver. It’s important to ensure that there are no barriers or obstructions blocking the wireless signal between the transmitter and receiver.
And that’s it! You have successfully set up the transmitter for your wireless HDMI cable. Now you can move on to the next step of setting up the receiver and testing the connection.
Step 3: Setting up the Receiver
After successfully setting up the transmitter for your wireless HDMI cable, it’s time to move on to the receiver. The receiver is the device that receives the wireless signal and transmits it to your TV or display.
Here are the steps to set up the receiver:
- Locate a suitable spot near your TV or display where you can place the receiver. Make sure it is within range of the transmitter and has a clear line of sight.
- Connect the HDMI cable from the receiver to the HDMI port on your TV or display. Ensure that the cable is securely plugged in.
- Connect the power adapter to the receiver and plug it into a power outlet. Make sure the receiver is receiving power.
- Check the receiver’s settings to ensure it is set to the correct input source. This may vary depending on the receiver model. Consult the user manual if needed.
- Turn on your TV or display and switch it to the corresponding input source for the HDMI connection. This will allow you to see the signal from the transmitter.
- If necessary, configure any additional settings on the receiver, such as audio output or resolution settings. This will ensure the best viewing experience.
- Finally, test the connection by playing a video or streaming content. If the connection is successful, you should see the content on your TV or display without any noticeable lag or quality loss.
Once you have completed these steps, your wireless HDMI cable setup should be fully operational. Enjoy the freedom of wirelessly transmitting high-definition content from your source device to your TV or display.
Step 4: Testing the Connection
Once you have finished setting up the transmitter and receiver for your wireless HDMI cable, it’s time to test the connection. Testing the connection will ensure that the video and audio signals are being transmitted and received properly, providing you with a seamless viewing experience.
To test the connection, follow these steps:
- Make sure that both the transmitter and receiver are powered on.
- Check that the HDMI source device is properly connected to the transmitter.
- Ensure that the HDMI display device is connected to the receiver.
- Turn on the HDMI display device.
- Select the appropriate HDMI input on the display device.
- Verify that the video and audio signals are being transmitted to the display device.
During the testing process, pay close attention to any issues or interruptions in the video or audio playback. If you encounter any problems, double-check all the connections and ensure that the transmitter and receiver are positioned properly within the wireless range.
If the connection is successful and you are experiencing smooth and uninterrupted playback, congratulations! You have successfully set up and tested your wireless HDMI cable. Now you can enjoy your favorite movies, TV shows, and more, without the hassle of cables cluttering your space.
However, if you encounter any difficulties or the connection is not working as expected, don’t worry. Troubleshooting tips and support documentation are usually provided by the manufacturer. Refer to the user manual or visit the manufacturer’s website for guidance on resolving common connectivity issues.
Remember, the performance and range of your wireless HDMI cable might vary depending on factors such as the quality of the equipment and the distance between the transmitter and receiver. Experiment with placement and ensure that there are no obstructions between the devices for optimal performance.
Now that you have successfully tested the connection and resolved any issues, you can sit back, relax, and enjoy the convenience and freedom that a wireless HDMI cable provides.
Conclusion
In conclusion, making a wireless HDMI cable is a great way to eliminate the clutter of cables and experience the convenience of wire-free connectivity. With advancements in technology, wireless HDMI solutions offer reliable and high-quality performance, allowing you to seamlessly connect devices and enjoy your favorite content on a larger screen.
Whether you’re looking to stream movies, play games, or make professional presentations, a wireless HDMI cable provides the flexibility and freedom you need. By following the steps outlined in this guide, you can easily create your own wireless HDMI cable and enjoy the benefits it brings.
Remember, it’s important to choose the right components and ensure compatibility between your devices to achieve optimal performance. So, unleash the power of wireless connectivity and say goodbye to tangled cables with your very own homemade wireless HDMI cable.
FAQs
1. What is a wireless HDMI cable?
A wireless HDMI cable, also known as a wireless HDMI transmitter and receiver, is a device that allows you to transmit high-definition audio and video signals wirelessly from one source device, such as a laptop or Blu-ray player, to a display device, such as a TV or projector. It eliminates the need for physical HDMI cables, providing a clutter-free and convenient solution for connecting devices.
2. How does a wireless HDMI cable work?
A wireless HDMI cable works by utilizing wireless technology, such as Wi-Fi or Bluetooth, to transmit uncompressed audio and video signals from the source device to the receiver device. The source device is connected to the transmitter, which wirelessly sends the signals to the receiver connected to the display device. The receiver then decodes the signals and displays the content on the screen.
3. What are the benefits of using a wireless HDMI cable?
Using a wireless HDMI cable offers several benefits, including:
- Convenience: No need for long and unsightly HDMI cables running across the room.
- Flexibility: You can easily move your source device around without worrying about cable limitations.
- Easy installation: No need to drill holes or hide cables, making setup quick and hassle-free.
- High-quality transmission: Wireless HDMI cables are designed to transmit uncompressed HD signals, ensuring excellent video and audio quality.
- Compatibility: Wireless HDMI cables work with various devices, including laptops, game consoles, and media players.
4. Can I use a wireless HDMI cable for gaming?
Yes, you can use a wireless HDMI cable for gaming. However, it’s important to consider the latency (delay) that may occur during transmission. Some wireless HDMI systems may introduce a slight delay, which can affect real-time gaming. If low latency is crucial for your gaming experience, it’s advisable to choose a wireless HDMI cable specifically designed for gaming or consider a wired connection.
5. Are there any limitations to using a wireless HDMI cable?
While wireless HDMI cables offer convenience, there are a few limitations to consider:
- Range: The distance between the transmitter and receiver can affect the signal quality. It’s essential to check the operating range of the wireless HDMI cable to ensure optimal performance.
- Interference: Wireless signals can be affected by other electronic devices in the vicinity, which may cause signal degradation. It’s advisable to place the transmitter and receiver away from sources of potential interference.
- Power supply: Both the transmitter and receiver require a power source, either through battery or AC power, so make sure you have access to power outlets or consider battery-operated options if needed.
- Compatibility: While wireless HDMI cables work with most devices, it’s crucial to check the compatibility of your source device and display device with the specific wireless HDMI system you plan to use.