
Are you looking to change the Apple ID on your iPhone 13? Whether you're selling your device, sharing it with a family member, or simply need to update your information, knowing how to change your Apple ID is essential. Your Apple ID is the key to accessing the App Store, iCloud, and various Apple services, so it's crucial to keep it updated. In this article, we'll guide you through the process of changing your Apple ID on your iPhone 13, ensuring that you can seamlessly transition to a new account without losing access to your essential apps and services. Let's dive into the step-by-step process and explore everything you need to know about changing your Apple ID on the iPhone 13.
Inside This Article
- Creating a New Apple ID
- Changing Apple ID on iPhone 13
- Updating Apple ID Settings
- Troubleshooting Apple ID Issues
- Conclusion
- FAQs
Sure, here's the content for "Creating a New Apple ID" section:
Creating a New Apple ID
Creating a new Apple ID is a straightforward process that enables you to access and enjoy the full range of Apple services and products. Whether you’re setting up a new iPhone 13 or simply want to have a separate Apple ID for different purposes, it’s essential to follow the steps carefully to ensure a seamless experience.
To create a new Apple ID, start by opening the “Settings” app on your iPhone 13. Scroll down and tap on “Sign in to your iPhone” at the top of the screen. Next, select “Don’t have an Apple ID or forgot it?” and then tap on “Create Apple ID.”
Once you’ve initiated the process, you’ll be prompted to enter your first and last name, along with your date of birth. After providing this basic information, you’ll need to choose your email address, which will serve as your Apple ID. If you don’t have an email address, you can create a new one right from your iPhone by selecting “Get a free iCloud email address.
After entering your email address, set a secure password for your Apple ID. Make sure to use a combination of uppercase and lowercase letters, numbers, and special characters to enhance the security of your account. Once you’ve created a strong password, re-enter it to confirm. This step ensures that you’ve accurately entered your chosen password.
Once your password is set, you’ll need to verify your phone number. This is an important security measure that allows Apple to send you a verification code for account recovery and security purposes. After entering and verifying your phone number, you’ll be asked to agree to the Terms and Conditions. Be sure to review these carefully before proceeding.
After agreeing to the Terms and Conditions, your new Apple ID will be created, and you’ll have access to a wide array of Apple services, including the App Store, iCloud, Apple Music, and more. With your new Apple ID, you can seamlessly integrate your iPhone 13 with the Apple ecosystem and enjoy a host of features and benefits tailored to your preferences.
Changing Apple ID on iPhone 13
Changing your Apple ID on your iPhone 13 is a straightforward process that allows you to customize your device to your preferences. Whether you’re looking to update your personal information or switch to a new Apple ID, the iPhone 13 provides a user-friendly interface to manage these changes.
Before changing your Apple ID on your iPhone 13, it’s essential to ensure that you have access to the email address associated with your current Apple ID. This is necessary to verify your identity and complete the transition smoothly. Additionally, it’s advisable to back up your device to prevent any data loss during the process.
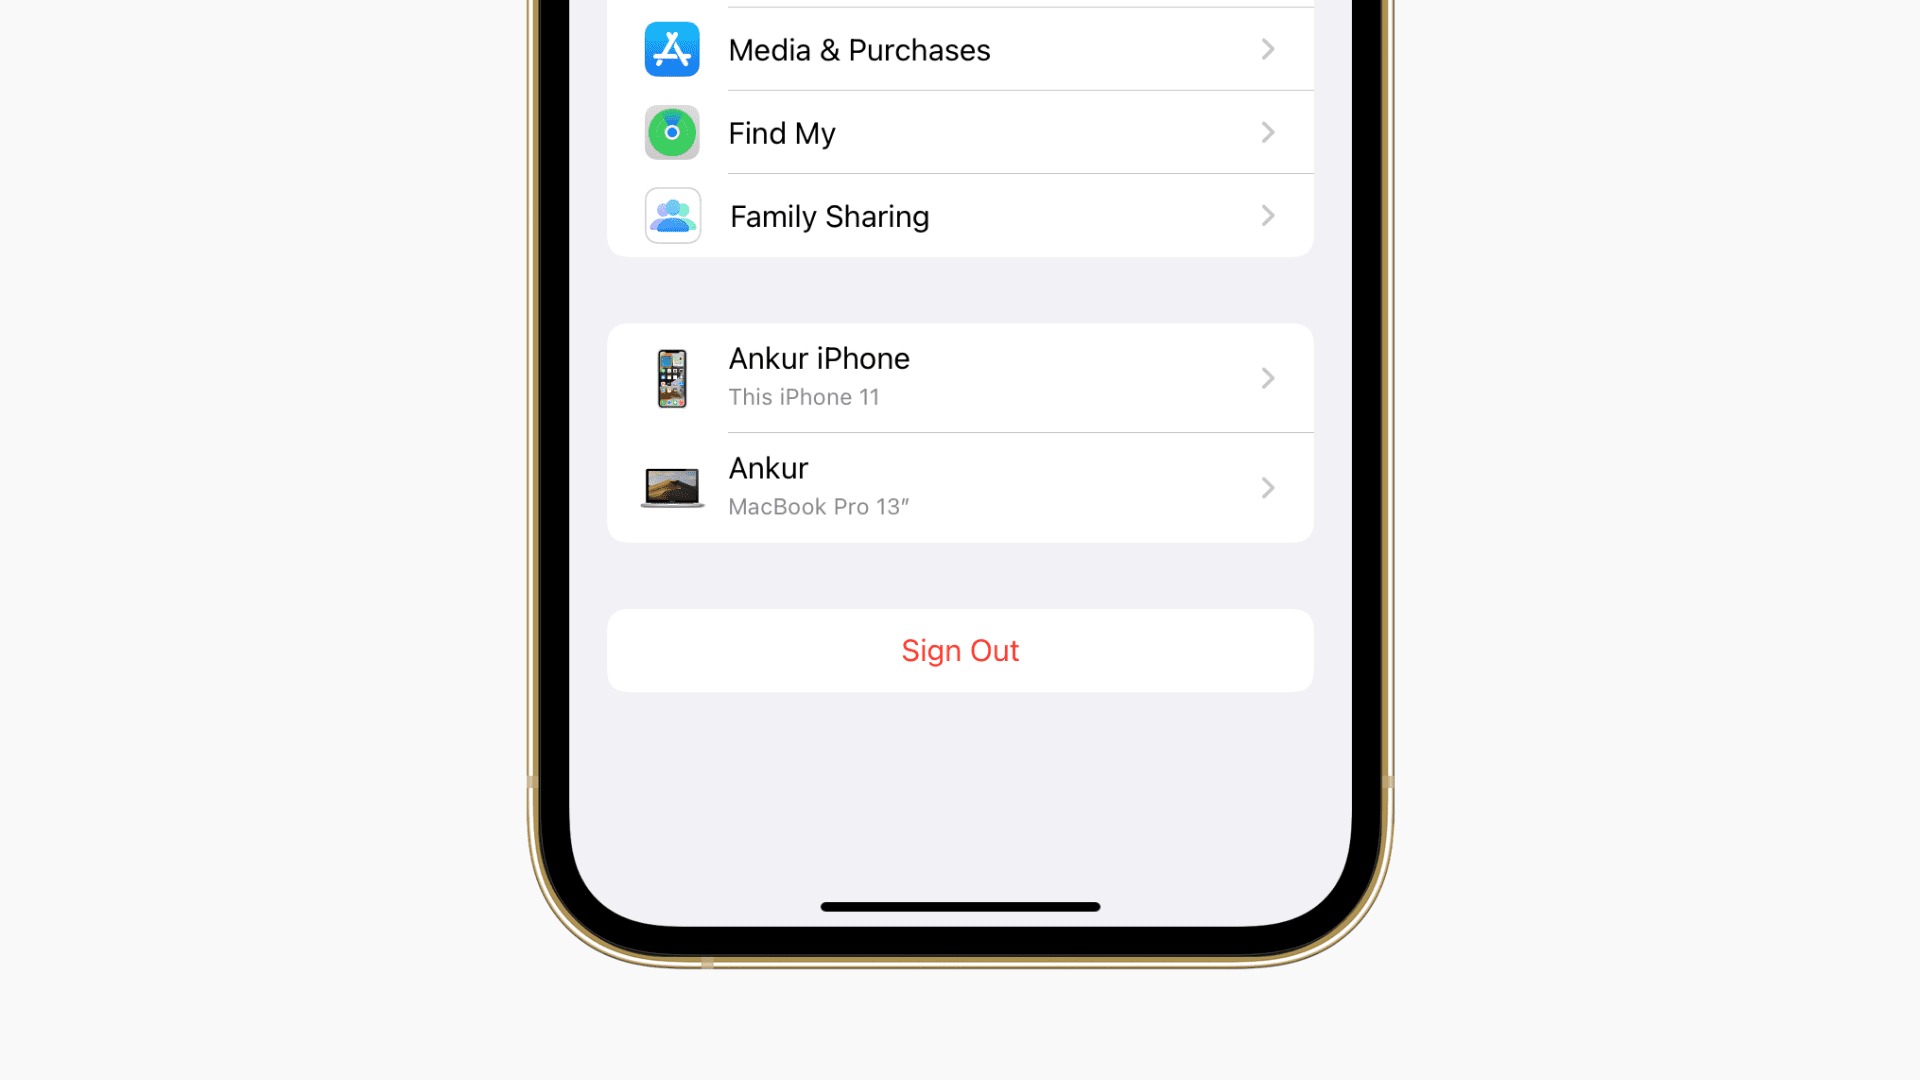
To change your Apple ID on the iPhone 13, start by opening the “Settings” app and tapping on your name at the top of the screen. Next, select “Sign Out” at the bottom of the page. You will be prompted to enter your current Apple ID password to proceed with the sign-out process.
Once you have successfully signed out of your current Apple ID, you can proceed to sign in with a new Apple ID. Simply select “Sign in to your iPhone” and enter the credentials for the new Apple ID that you wish to use. After providing the required information, your iPhone 13 will be associated with the new Apple ID, granting you access to its features and services.
After changing your Apple ID on the iPhone 13, it’s important to review and update your iCloud, App Store, and iTunes settings to ensure that they reflect your preferences accurately. This includes adjusting your payment information, iCloud storage plan, and other relevant settings to align with your new Apple ID.
By following these simple steps, you can seamlessly change your Apple ID on the iPhone 13, empowering you to personalize your device and access Apple’s ecosystem with your preferred account. Whether you’re transitioning to a new Apple ID or updating your existing one, the iPhone 13 offers a convenient platform to manage these changes effectively.
Updating Apple ID Settings
Once you’ve successfully changed your Apple ID on your iPhone 13, it’s essential to update your Apple ID settings to ensure a seamless experience across all your Apple devices.
To update your Apple ID settings, navigate to the “Settings” app on your iPhone 13 and tap on your name at the top of the screen. Next, select “Media & Purchases” to manage your payment information, purchase sharing settings, and more. You can also access “iTunes & App Store” to update your Apple ID for purchases and subscriptions.
Additionally, it’s crucial to review and adjust your iCloud settings. By tapping “iCloud” in the Settings app, you can manage your storage, device backups, and app-specific data storage. This ensures that your Apple ID is properly linked to your iCloud account, allowing for seamless synchronization of photos, contacts, and other data across your devices.
Furthermore, don’t forget to update your Apple ID password and security settings. Under the “Password & Security” section in the Settings app, you can change your password, set up two-factor authentication, and manage trusted devices. This is vital for safeguarding your Apple ID and maintaining the security of your personal information.
Troubleshooting Apple ID Issues
If you encounter problems with your Apple ID on your iPhone 13, don’t panic! There are several troubleshooting steps you can take to resolve the issues and get back to enjoying your device seamlessly.
First, ensure that you are entering the correct Apple ID and password. Typos and incorrect credentials can often be the cause of login failures. If you’re certain that your credentials are accurate, try resetting your password through the “Forgot Apple ID or password” option.
Another common issue is a disabled Apple ID due to security concerns. If you receive a message stating that your Apple ID has been disabled, follow the prompts to regain access. This may involve answering security questions or verifying your identity through email or other means.
Occasionally, you may encounter issues with app purchases, iCloud access, or other services linked to your Apple ID. In such cases, ensure that your payment method is up to date and that there are no outstanding payments or billing issues associated with your account.
If you’re still experiencing problems, consider signing out of your Apple ID and then signing back in. This can help refresh the connection and resolve any temporary glitches that may be affecting your account.
Lastly, if none of the above steps resolve the issue, reaching out to Apple Support can provide personalized assistance and troubleshooting tailored to your specific situation. Apple’s support team is equipped to handle a wide range of Apple ID issues and can guide you through the necessary steps to resolve them.
**
Conclusion
**
Changing your Apple ID on the iPhone 13 is a straightforward process that allows you to customize your device to your preferences. Whether you’re looking to update your personal information or switch to a new email address, navigating the settings to modify your Apple ID is a valuable skill for iPhone users. By following the steps outlined in this guide, you can seamlessly manage your Apple ID and ensure that your iPhone 13 reflects your current details. Remember to keep your login credentials secure and accessible, as your Apple ID is integral to accessing various Apple services and maintaining the functionality of your device. With the flexibility to update your Apple ID as needed, you can personalize your iPhone 13 experience to align with your evolving preferences and digital identity.
FAQs
Q: Can I change my Apple ID on iPhone 13?
Yes, you can change your Apple ID on your iPhone 13. Changing your Apple ID allows you to use a different account to access Apple services and make purchases from the App Store, iTunes Store, and Apple Books.
Q: Will changing my Apple ID affect my data?
Changing your Apple ID will not affect the data stored on your iPhone 13. However, any content or purchases associated with your previous Apple ID will not be accessible with the new Apple ID unless you authorize them.
Q: Can I merge two Apple IDs into one on my iPhone 13?
It is not possible to merge two Apple IDs into one. Apple recommends using a single Apple ID to access all Apple services and make purchases. If you have content or purchases associated with multiple Apple IDs, you can authorize them to be accessed with a single Apple ID.
Q: Do I need to sign out of iCloud to change my Apple ID on iPhone 13?
Yes, it is recommended to sign out of iCloud before changing your Apple ID on iPhone 13. This ensures a smooth transition to the new Apple ID and prevents any potential issues with iCloud synchronization and data access.
Q: Can I use a different Apple ID for iCloud and iTunes on iPhone 13?
While it is technically possible to use different Apple IDs for iCloud and iTunes on your iPhone 13, it may lead to complications with app purchases, music, and other content. It is generally recommended to use a single Apple ID for all Apple services to avoid any issues.