
Are you excited about your new iPhone 13 and eager to explore its advanced features? One of the standout features of the iPhone 13 is the fingerprint sensor, which provides an added layer of security and convenience. In this article, we will guide you through the step-by-step process of setting up fingerprint recognition on your iPhone 13. Whether you’re a tech-savvy individual or a novice iPhone user, our comprehensive instructions will ensure a smooth and hassle-free setup. By the end of this article, you’ll be able to unlock your iPhone 13 with just a touch of your finger, protecting your privacy and streamlining your mobile experience.
Inside This Article
- Setting up Touch ID on iPhone 13
- Enabling Touch ID for App Store and Apple Pay
- Managing fingerprint settings on iPhone 13
- Troubleshooting fingerprint setup on iPhone 13
- Conclusion
- FAQs
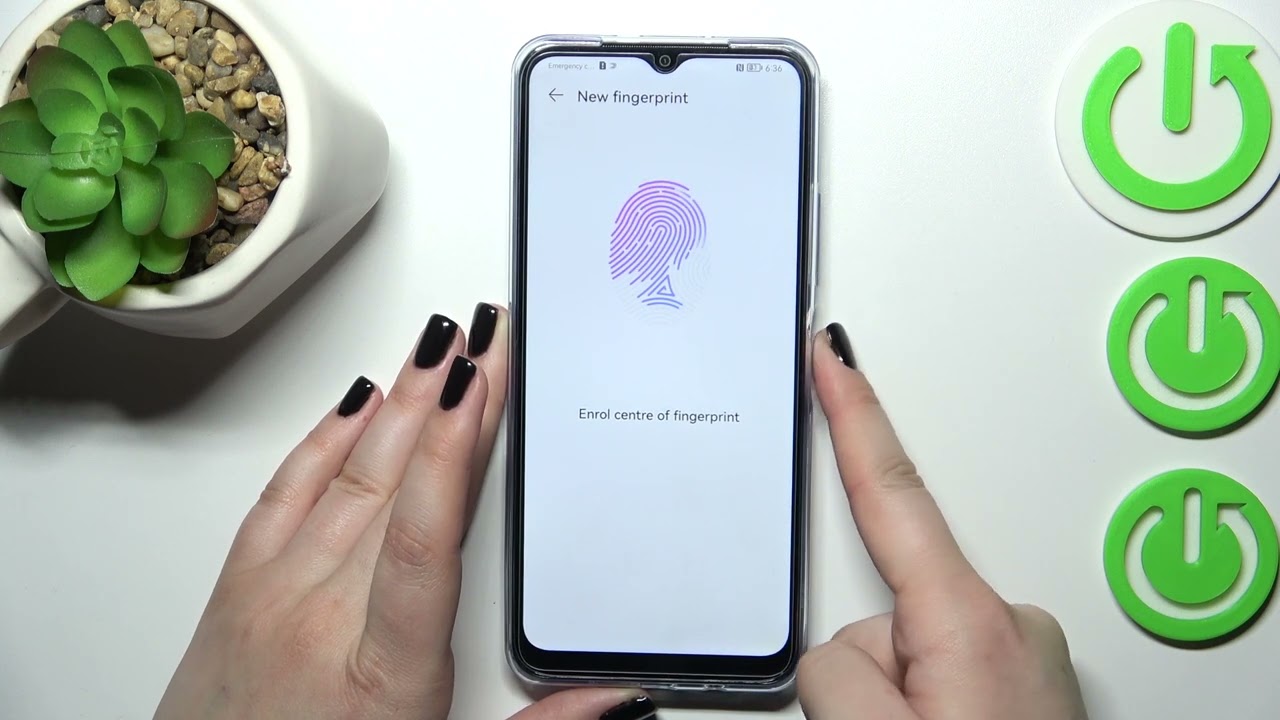
Setting up Touch ID on iPhone 13
The iPhone 13 comes equipped with a convenient and secure feature called Touch ID that allows you to unlock your device and authorize app purchases using your fingerprint. Setting up Touch ID on your iPhone 13 is a quick and straightforward process. Follow the steps below to get started:
- Open the “Settings” app on your iPhone 13.
- Scroll down and tap on “Touch ID & Passcode”.
- If prompted, enter your device passcode.
- Tap “Add a Fingerprint”.
- Place your finger on the Home button and follow the instructions on the screen to scan your fingerprint.
- Lift and replace your finger on the Home button multiple times to capture different angles of your fingerprint.
- Once the scan is complete, you can adjust your grip and tap “Continue” to scan additional portions of your fingerprint.
- After you have finished scanning your fingerprint, tap “Done”.
Congratulations! You have successfully set up Touch ID on your iPhone 13. Now, you can simply place your finger on the Home button to unlock your device or authorize purchases without having to enter your passcode every time.
Enabling Touch ID for App Store and Apple Pay
With the advanced technology of the iPhone 13, you can conveniently use your fingerprint to authenticate purchases on the App Store and make secure payments with Apple Pay. Setting up Touch ID for these features is a breeze, and it provides an added layer of security for your digital transactions.
To enable Touch ID for the App Store and Apple Pay on your iPhone 13, follow these simple steps:
- Open your iPhone 13’s Settings app.
- Scroll down and tap on “Touch ID & Passcode”.
- You will be prompted to enter your passcode as a security measure.
- Once you have entered your passcode, toggle the switches next to “iTunes & App Store” and “Apple Pay” to turn on Touch ID for these services.
By enabling Touch ID for the App Store, you no longer have to enter your Apple ID password every time you download apps or make purchases. Simply place your finger on the Touch ID sensor, and you’re good to go.
Similarly, when using Apple Pay, you can authorize payments by placing your finger on the Touch ID sensor. This provides a quick and secure way to complete transactions, without the need to manually enter your credit card details each time.
Remember to register your fingerprint in the initial setup process, if you haven’t already done so. A registered fingerprint will serve as your unique identifier whenever you use Touch ID for authentication purposes.
It’s worth noting that the Touch ID feature on the iPhone 13 is incredibly accurate and secure. The technology behind it has advanced to the point where it can recognize and authenticate your fingerprint within milliseconds, making it not only convenient but also reliable.
So, if you want to enhance the security and convenience of your App Store purchases and Apple Pay transactions, don’t forget to enable Touch ID on your iPhone 13. It’s a simple process that takes just a few taps, but the benefits are significant.
Managing fingerprint settings on iPhone 13
Once you have set up your fingerprint on your iPhone 13 using Touch ID, you may want to manage your fingerprint settings to ensure a seamless and personalized user experience. Here are some tips on how to manage your fingerprint settings:
Add additional fingerprints: If you want to add more than one fingerprint to your iPhone 13, you can easily do so by going to the Settings app and selecting Touch ID & Passcode. From there, you can select “Add a Fingerprint” and follow the on-screen instructions to scan and register additional fingerprints.
Remove fingerprints: In case you want to remove any previously registered fingerprints from your iPhone 13, you can do so by going to the Touch ID & Passcode settings. Select the fingerprint you wish to remove and tap on “Delete Fingerprint” to remove it from your device.
Change default fingerprint: By default, the first fingerprint you register on your iPhone 13 becomes your default fingerprint for unlocking your device and authorizing app purchases. However, if you want to change the default fingerprint, you can do so by going to the Touch ID & Passcode settings and selecting the “Default Fingerprint” option. From there, you can choose a different fingerprint from the ones you have registered on your device.
Enable or disable fingerprint for specific features: You can choose to enable or disable the use of your fingerprint for specific features on your iPhone 13. For example, you can enable Touch ID for unlocking your device but disable it for making App Store purchases. To manage these settings, go to the Touch ID & Passcode settings and toggle on or off the options for specific features like iPhone Unlock, iTunes & App Store, and Apple Pay.
Improve fingerprint recognition: If you are experiencing issues with the fingerprint recognition on your iPhone 13, there are a few things you can try to improve it. Clean your fingers and the Touch ID sensor to ensure there are no dirt or smudges that might affect the recognition. You can also try rescanning your fingerprint or adding multiple instances of the same finger to improve accuracy.
By managing your fingerprint settings on your iPhone 13, you can customize your device to fit your needs and preferences. Whether it’s adding additional fingerprints, changing the default fingerprint, or enabling/disabling fingerprint for specific features, these settings allow you to enhance the security and convenience of using Touch ID.
Troubleshooting fingerprint setup on iPhone 13
Setting up Touch ID on your iPhone 13 is a convenient way to unlock your device and authenticate purchases. However, like any technology, there may be instances where you encounter issues during the fingerprint setup process. Don’t worry, we’ve got you covered! In this section, we’ll explore some common troubleshooting steps to help you resolve any problems you may face.
1. Clean your fingers and the Touch ID sensor: It’s important to ensure that both your fingers and the Touch ID sensor are clean. Use a microfiber cloth or an alcohol wipe to gently clean the sensor and remove any dirt, dust, or residue that may be interfering with the detection process.
2. Try different fingers: If you’re having trouble registering a fingerprint, try using a different finger. Sometimes, certain fingers may not register accurately due to factors such as the positioning or condition of your fingerprint. Experiment with different fingers to find the one that works best for you.
3. Adjust your finger placement: When setting up your fingerprint, make sure you’re placing your finger properly on the sensor. Ensure that your finger covers the entire sensor and that you’re applying enough pressure for the device to detect your fingerprint accurately.
4. Reboot your iPhone: Sometimes, a simple restart can resolve many software-related issues. Try restarting your iPhone 13 and then attempt the fingerprint setup process again. This can help refresh the system and potentially fix any temporary glitches.
5. Update your iPhone’s software: Keeping your iPhone’s software up to date is crucial for optimal performance. Check for any available software updates by going to Settings > General > Software Update. If an update is available, install it and then try setting up your fingerprint again.
6. Delete and re-add fingerprints: If you’re still experiencing issues, you can try deleting your current fingerprints and re-adding them. Go to Settings > Touch ID & Passcode, enter your passcode, and select the fingerprints you want to remove. Once deleted, follow the on-screen instructions to add your fingerprints anew.
7. Reset your Touch ID: As a last resort, if none of the above steps work, you can try resetting your Touch ID settings. Go to Settings > Touch ID & Passcode, enter your passcode, and toggle off the options for iPhone Unlock, Apple Pay, and iTunes & App Store. Restart your device and then toggle the options back on. This will reset your Touch ID settings and give you a fresh start.
By following these troubleshooting steps, you should be able to resolve any issues you encounter during the fingerprint setup process on your iPhone 13. Remember, if the problem persists, it’s always a good idea to reach out to Apple support for further assistance. Enjoy the convenience and security of Touch ID on your device!
Overall, setting up the fingerprint on your iPhone 13 is a straightforward process that adds an extra layer of security to your device. With the advanced Touch ID technology, you can quickly and conveniently unlock your phone, authorize payments, and access secure apps and features.
By following the simple steps outlined in this guide, you can easily configure and manage your fingerprint settings, ensuring that only you have access to your device. Whether you’re a new iPhone user or a seasoned veteran, setting up fingerprint recognition on the iPhone 13 is a valuable feature that enhances the overall user experience.
So, take advantage of this convenient and secure method of unlocking your device and protecting your personal information. Enjoy the peace of mind that comes with knowing your iPhone 13 is safeguarded by the power of your unique fingerprint!
FAQs
Q: Can I still use a passcode if I set up fingerprint on iPhone 13?
Yes, setting up fingerprint on your iPhone 13 does not disable the use of a passcode. You can still use a passcode as a backup security measure.
Q: How do I setup fingerprint on my iPhone 13?
To set up fingerprint on your iPhone 13, go to Settings > Touch ID & Passcode. Tap on “Add a Fingerprint” and follow the on-screen instructions to scan your fingerprint.
Q: Can I set up more than one fingerprint on my iPhone 13?
Yes, you can set up multiple fingerprints on your iPhone 13. This can be useful if you want to allow another authorized user, such as a family member, to unlock your device using their fingerprint.
Q: What is the advantage of using fingerprint on iPhone 13?
Using fingerprint on your iPhone 13 provides a more convenient and secure way to unlock your device. It offers quick access to your phone without having to remember a passcode. Additionally, fingerprints are unique to each individual, making it difficult for others to bypass the security measures.
Q: Can I use fingerprint to authenticate app purchases or payments?
Yes, with Touch ID enabled on your iPhone 13, you can conveniently use your fingerprint to authenticate app purchases and payments, making the process faster and more secure.