
Have you ever wanted to capture the breathtaking beauty of the moon with your iPhone 13 Pro? With its advanced camera features and cutting-edge technology, taking stunning pictures of the moon has never been easier. Whether you’re a photography enthusiast or simply want to capture a mesmerizing moonlit scene, this article will guide you through the steps to capture the perfect shot. From understanding the ideal settings for moon photography to utilizing helpful accessories, we’ll provide you with expert tips and tricks for taking exceptional lunar images. Say goodbye to blurry or washed-out moon photos and get ready to explore the celestial beauty with your iPhone 13 Pro camera.
Inside This Article
- Settings and Preparation
- Using Night Mode on iPhone 13 Pro
- Adjusting Exposure and Focus
- Enhancing the Image Quality
- Conclusion
- FAQs
Settings and Preparation
Taking a picture of the moon with your iPhone 13 Pro requires a little bit of preparation and some adjustments to your settings. Here are some tips to help you capture a stunning moonshot:
1. Choose a clear night: Before you begin, make sure you pick a night when the sky is clear and the moon is visible. This will provide the best opportunity to capture a crisp and detailed image.
2. Find a stable surface: To prevent any camera shake, it’s important to place your iPhone 13 Pro on a stable surface. Use a tripod or rest it against a solid object to ensure maximum stability.
3. Enable the “Do Not Disturb” mode: Avoid any interruptions or notifications while shooting by activating the “Do Not Disturb” mode on your iPhone. This will ensure that your focus remains solely on capturing the perfect moon image.
4. Disable the flash: It’s best to turn off the flash when taking pictures of the moon, as it can wash out the details and create an unnatural lighting effect. Keep the flash disabled to capture the moon’s natural beauty.
5. Use the built-in camera app: The iPhone 13 Pro is equipped with a powerful camera app that offers various functions and settings. Launch the camera app to access all the features you’ll need to capture an incredible moon image.
6. Switch to the “Night” mode: To optimize your iPhone’s camera for low-light conditions, switch to the “Night” mode. This setting enables the camera to capture more light and detail, resulting in a beautifully exposed moon photograph.
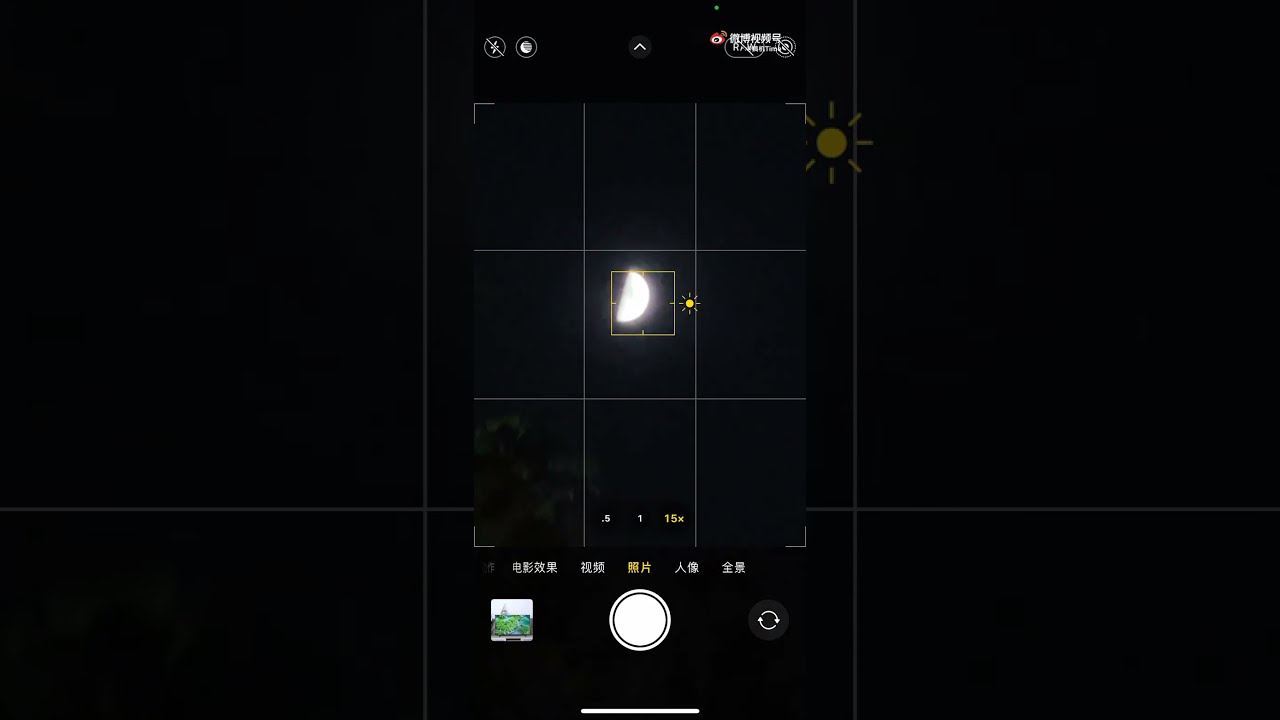
7. Adjust the exposure and focus: Tap on the screen where the moon is located to adjust the exposure and focus. You can manually slide the exposure bar up or down to achieve the desired brightness level; tap and hold to lock the focus on the moon.
8. Use the self-timer: To further minimize camera shake, utilize the self-timer feature on your iPhone 13 Pro. Set the timer to a few seconds, then press the shutter button. This allows you to step away from the device and eliminate any potential movement.
By following these settings and preparation tips, you’ll be ready to capture awe-inspiring shots of the moon with your iPhone 13 Pro. Remember to experiment with different angles and compositions to create stunning lunar photographs!
Using Night Mode on iPhone 13 Pro
One of the standout features of the iPhone 13 Pro is its impressive Night Mode. This advanced camera technology allows you to capture stunning photos in low-light conditions, including taking breathtaking pictures of the moon.
When using Night Mode on your iPhone 13 Pro, make sure to keep your hands steady to avoid any blurriness or shaking in your photos. A tripod or stable surface can be particularly helpful for this type of photography.
To activate Night Mode, open the Camera app and select the desired camera mode. Night Mode will automatically activate when the camera detects low light, indicated by the yellow moon icon in the top left corner of the screen.
Once Night Mode is activated, the iPhone 13 Pro intelligently adjusts the settings to capture more light and detail. It combines multiple exposures, allowing you to capture the nuances and textures of the moon’s surface.
For optimal results, experiment with different exposure times by swiping the Night Mode dial on the screen. This allows you to find the perfect balance between brightness and detail, enhancing the overall quality of your moon photos.
In addition, you can manually adjust the focus by tapping on the screen. This ensures that the moon is sharp and in focus, resulting in clear and crisp images.
Remember to take your time when capturing moon photos using Night Mode on the iPhone 13 Pro. Patience is key in achieving the best possible outcome.
Lastly, explore different angles and compositions to add visual interest to your images. Whether it’s a close-up shot or a wide-angle view, the iPhone 13 Pro’s Night Mode allows you to unleash your creativity and capture stunning photos of the moon like never before.
Adjusting Exposure and Focus
When it comes to capturing a picture of the moon with your iPhone 13 Pro, one crucial step is adjusting the exposure and focus. Here’s how you can do it:
1. Tap and Hold to Set Focus
Start by opening the Camera app on your iPhone 13 Pro and positioning the moon within the frame. Tap and hold on the moon to set the focus manually. This allows you to ensure that the moon is in sharp focus and eliminates any blurriness caused by automatic focus adjustments.
2. Swipe Up or Down for Exposure Adjustment
Next, swipe up or down on the screen to adjust the exposure. You may notice that the default exposure settings might underexpose or overexpose the moon, resulting in a poorly balanced image. Experiment with different exposure levels to find the right balance that captures the moon’s details without losing the surrounding context. Swipe up to increase the exposure and make the moon appear brighter, or swipe down to decrease the exposure and add more contrast to the image.
3. Use the Exposure Compensation Slider
If you want more precise control over the exposure, you can use the exposure compensation slider. Tap on the screen to reveal the control icons, and then slide the exposure compensation slider to manually adjust the exposure. This gives you greater flexibility in fine-tuning the exposure to achieve the desired result.
4. Lock the Exposure and Focus
Once you have adjusted the exposure and focus to your liking, you can lock them to maintain consistency throughout the shooting process. To do this, simply tap and hold on the moon again until you see a yellow AE/AF lock indicator at the top of the screen. This ensures that the exposure and focus settings remain constant even if you adjust the framing or move your device.
By taking the time to adjust the exposure and focus settings, you can capture stunning pictures of the moon with your iPhone 13 Pro. Experiment with different settings and techniques to find the perfect balance and unleash your creativity in capturing the beauty of the lunar landscape.
Enhancing the Image Quality
Once you have captured a picture of the moon using your iPhone 13 Pro, you may want to enhance its image quality further. Here are a few tips to help you achieve stunning results:
-
Use Editing Apps: There are several photo editing apps available for iPhone that can take your moon photos to the next level. Apps like Adobe Lightroom, Snapseed, and VSCO offer advanced editing tools and filters that can help enhance the overall appearance of your moon photo.
-
Adjust Brightness and Contrast: One way to enhance the image quality is by adjusting the brightness and contrast levels. Increasing the brightness can bring out more detail in the moon, while adjusting the contrast can help enhance the overall depth and definition of the photo.
-
Sharpen the Image: Sometimes, moon photos can appear slightly soft or blurry. You can use the sharpening tool in your preferred editing app to increase the clarity and sharpness of the image. Be cautious not to overdo it, as excessive sharpening can create artifacts.
-
Reduce Noise: When capturing the moon at night, there may be some inherent noise in the photo. You can use the noise reduction feature in your editing app to decrease the noise and make the image appear smoother and more refined.
-
Adjust Saturation and Vibrance: Adjusting the saturation and vibrance levels can help make the moon’s colors pop. Increase the saturation slightly to intensify the moon’s natural hues, and adjust the vibrance to enhance the overall richness and depth of the image.
-
Crop and Straighten: Sometimes, there might be unnecessary elements in your moon photo that can detract from the main subject. Consider cropping the image to remove any distractions and create a more focused composition. Additionally, ensure that the horizon line is straightened if it appears tilted.
Remember, enhancing the image quality of your moon photos is a matter of personal preference. Experiment with different editing techniques and find the style that best suits your vision. With the advanced capabilities of the iPhone 13 Pro and the right editing tools, you can transform your moon photos into visually captivating masterpieces.
Conclusion
In conclusion, taking a picture of the moon with the iPhone 13 Pro is an incredible experience. The advanced camera capabilities, combined with the powerful image processing technology, allow you to capture stunning lunar shots with ease. Whether you are a professional photographer or an amateur enthusiast, the iPhone 13 Pro provides the tools you need to achieve impressive results.
Remember to follow the tips and techniques mentioned in this article to maximize your chances of capturing that perfect moon shot. Experiment with different settings, compositions, and angles to add your unique touch to the photographs.
With its impressive camera features and user-friendly interface, the iPhone 13 Pro is undoubtedly the perfect device for capturing the beauty of the moon. So, grab your phone, head outside on a clear night, and let the iPhone 13 Pro unleash your photography skills like never before.
FAQs
-
Can I take a clear picture of the moon with an iPhone 13 Pro?
Absolutely! The iPhone 13 Pro is equipped with advanced camera technology, including powerful lenses and image stabilization features, which allow you to capture stunning pictures of the moon. -
What settings should I use to photograph the moon with an iPhone 13 Pro?
To capture the moon’s details, it is best to use manual settings on your iPhone 13 Pro camera. Set the exposure to a lower value to compensate for the brightness of the moon and adjust the focus manually to ensure clarity. -
Do I need any additional accessories to photograph the moon with an iPhone 13 Pro?
While the iPhone 13 Pro’s built-in camera capabilities are impressive, using additional accessories like a tripod or lens attachment can further enhance your moon photography. A stable platform such as a tripod will help eliminate camera shake, resulting in sharper images of the moon. -
Is there a specific time or phase of the moon that is best for capturing photos?
The phase of the moon can dramatically impact the appearance of your photos. Many photographers prefer capturing the moon during its crescent or gibbous phase as it highlights the moon’s craters and surface details. Additionally, photographing the moon during twilight can create a beautiful contrast between the lunar landscape and the sky. -
What editing techniques can I use to enhance my moon photos taken with an iPhone 13 Pro?
After capturing your moon photos with the iPhone 13 Pro, you can further enhance them using photo editing apps like Snapseed or Adobe Lightroom. Adjusting the brightness, contrast, and sharpness can bring out the moon’s details while maintaining a natural look. Experimenting with black and white filters can also produce striking results.