
Are you fascinated by the beauty of the moon and want to capture its magnificence with your iPhone? Look no further, as we have the ultimate guide to help you take clear and breathtaking pictures of the moon. With the advancements in technology, especially in mobile phone cameras, it is now possible to capture stunning images of objects that were once thought to be reserved for professional photographers. In this article, we will delve into the techniques and settings you need to master to achieve optimal results when capturing the moon. Whether you’re a seasoned photographer or just starting out, we will provide you with practical tips and tricks that will enable you to capture the moon in all its glory. So, grab your iPhone, and let’s dive into the world of astrophotography!
Inside This Article
- Understanding the Camera Settings
- Using a Tripod or Stable Surface- Benefits of using a tripod- Alternatives for stability
- Utilizing the iPhone’s Optical Zoom- Using the telephoto lens- Digital zoom limitations
- Capturing the Moon in Different Phases- Tips for photographing a full moon- Techniques for capturing crescent and gibbous phases
- Editing and Enhancing Moon Photos on iPhone- Using editing tools in the Photos app- Exploring third-party editing apps
- Conclusion
- FAQs
Understanding the Camera Settings
When it comes to taking a clear picture of the moon with your iPhone, understanding and making adjustments to the camera settings can make all the difference. Here are three key settings to consider: adjusting exposure, setting focus, and enabling gridlines.
Adjusting Exposure
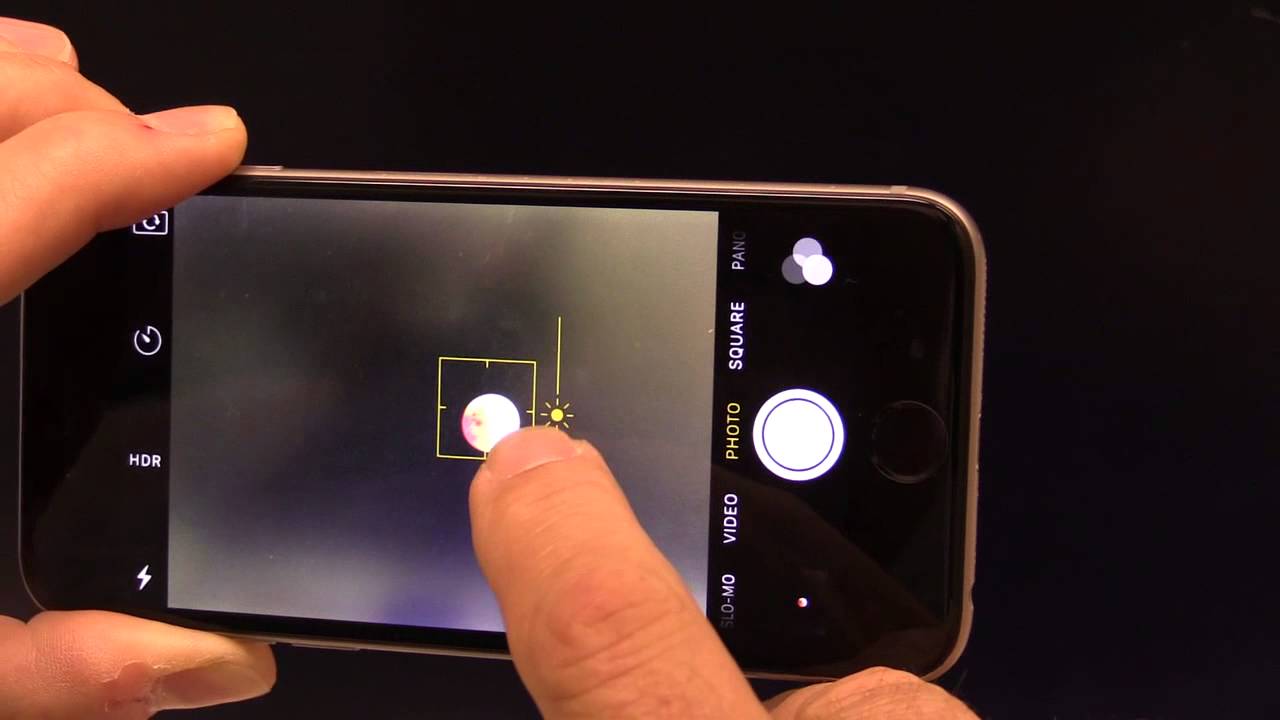
Exposure refers to the amount of light that enters the camera’s sensor. When capturing the moon, you want to ensure that the exposure is set properly to avoid overexposure or underexposure. On your iPhone, you can adjust exposure by tapping on the screen and sliding the exposure slider up or down. Experiment with different exposure levels to find the right balance that captures the details of the moon effectively.
Setting Focus
Setting focus is crucial for a clear moon picture. With the iPhone’s camera, you can tap on the area of the screen where the moon is located to set the focus. This will ensure that the moon appears sharp and defined in your photo. If necessary, you can also use the manual focus feature by tapping and holding on the screen until the AE/AF lock appears.
Enabling Gridlines
Enabling gridlines on your iPhone’s camera display can be beneficial for composition and alignment. Gridlines help you follow the rule of thirds, where you place key elements of your photo along the intersecting lines. To enable gridlines, go to your iPhone’s Settings, tap on “Camera,” and toggle on the “Grid” option. This will provide a helpful guide for positioning and framing the moon within your shot.
Using a Tripod or Stable Surface- Benefits of using a tripod- Alternatives for stability
When it comes to taking a clear picture of the moon with your iPhone, using a tripod or stable surface is essential. Here are some benefits of using a tripod:
- Improved Stability: By using a tripod, you can eliminate camera shake caused by unsteady hands. This will result in sharper, clearer images of the moon.
- Longer Exposure Times: With a tripod, you can use longer exposure times to capture more details of the moon’s surface. This is especially useful when shooting in low light conditions.
- Flexibility: Tripods allow you to adjust the height and angle of your iPhone, giving you more control over the composition of your shot.
While using a tripod is highly recommended, there are alternatives you can consider for stability if you don’t have one:
- Tabletop or Stable Surface: If you don’t have a tripod, placing your iPhone on a stable surface like a table or a wall can help reduce camera shake. Just make sure to use a timer or a remote shutter release to avoid any movement when taking the shot.
- Bean Bag or Sandbag: Another option is to use a bean bag or sandbag to stabilize your iPhone. Simply place your device on the bag to keep it steady while taking the photo.
- GorillaPod or Flexible Tripod: If you’re looking for a portable and flexible solution, you can consider using a GorillaPod or a flexible tripod. These tripods have adjustable legs that can be wrapped around objects or placed on uneven surfaces for added stability.
Remember, using a tripod or stable surface will greatly improve your chances of capturing a clear picture of the moon with your iPhone. It helps eliminate camera shake and allows for longer exposure times, resulting in sharper and more detailed images. If you don’t have a tripod, consider using an alternative method mentioned above to ensure the stability of your device during the photo-taking process.
Utilizing the iPhone’s Optical Zoom- Using the telephoto lens- Digital zoom limitations
One of the features that sets the iPhone apart from other smartphones is its built-in optical zoom capability. With the latest models, such as the iPhone 11 Pro and iPhone 12 Pro, you can take advantage of the telephoto lens to zoom in and capture stunning details of the moon.
The telephoto lens allows you to bring the moon closer to you without sacrificing image quality. This lens has a longer focal length, which means it can magnify distant objects and produce sharper images. To access the telephoto lens on your iPhone, simply switch to the 2x optical zoom mode in the camera app.
Keep in mind that the optical zoom has its limitations. The maximum optical zoom range on an iPhone may vary depending on the model. For instance, the iPhone 11 Pro offers 2x optical zoom, while the iPhone 12 Pro goes up to 2.5x optical zoom. However, even with these limitations, the telephoto lens can still help you capture clear and detailed shots of the moon.
It’s important to note that the iPhone also offers a digital zoom feature, which allows you to zoom in even further. However, unlike optical zoom, digital zoom relies on software processing to enlarge the image, which can result in a loss of image quality. The more you digitally zoom in, the more pixelated and less detailed the image may become.
For capturing a clear picture of the moon, it’s generally recommended to stick with the optical zoom and avoid using excessive digital zoom. The overall image quality and level of detail will be significantly better when using the optical zoom compared to the digital zoom.
Capturing the Moon in Different Phases- Tips for photographing a full moon- Techniques for capturing crescent and gibbous phases
Capturing the moon in different phases can add diversity and visual interest to your moon photography. Each phase presents its own unique challenges and opportunities. Here are some tips for photographing a full moon and techniques for capturing crescent and gibbous phases:
- Tips for photographing a full moon:
- Techniques for capturing crescent and gibbous phases:
1. Choose the right location: Find a location with a clear view of the horizon where you can capture the moon as it rises or sets. This will add a stunning backdrop to your shot.
2. Use a telephoto lens: A telephoto lens will allow you to capture the moon in all its detailed glory. Zoom in to focus on the moon and eliminate any distractions from the surroundings.
3. Set a low ISO: To avoid noise in your image, set a low ISO such as 100 or 200. This will help maintain sharpness and clarity.
4. Use a fast shutter speed: The moon moves relatively fast across the sky, so use a fast shutter speed to freeze the motion and capture a crisp image. Start with a shutter speed of around 1/250th of a second and adjust as needed.
5. Experiment with exposure compensation: The moon can be deceptive to the camera’s metering system, so try using exposure compensation to adjust the exposure for optimal results. Increase the exposure by around +1 to +2 stops to avoid an underexposed image.
1. Use a longer exposure: During the crescent and gibbous phases, the moon appears dimmer. To capture more light and details, use a longer exposure time. Start with a shutter speed of around 1/15th of a second and adjust as needed.
2. Bracket your shots: Bracketing involves taking multiple shots at different exposure settings. This technique helps to ensure that you capture the moon’s details and surrounding sky in a well-exposed image. Use exposure bracketing mode if available on your camera.
3. Consider using a tripod: Stability is crucial when shooting longer exposures. Use a tripod to keep your camera steady and reduce the risk of blurriness.
4. Take advantage of natural elements: Incorporate natural elements like trees, buildings, or landmarks into your composition to add depth and interest to your photographs.
By applying these tips and techniques, you can capture stunning images of the moon in all its different phases. Remember to experiment, be patient, and have fun with your moon photography!
Editing and Enhancing Moon Photos on iPhone- Using editing tools in the Photos app- Exploring third-party editing apps
Once you have captured stunning photos of the moon with your iPhone, the next step is to edit and enhance them to truly make them shine. Fortunately, the built-in Photos app on your iPhone offers a range of editing tools that can help you bring out the best in your moon photos.
To get started, open the Photos app and select the moon photo you want to edit. Tap on the “Edit” button, which will reveal a variety of editing options. Here are some of the key tools you can use:
- Adjustments: This tool allows you to fine-tune the exposure, brightness, contrast, and other parameters of your photo. Experiment with these adjustments to enhance the details of the moon and improve its overall appearance.
- Crop and Rotate: If you want to reframe your moon photo or straighten its orientation, the crop and rotate tool can come in handy. Use this tool to achieve the desired composition and make your photo visually appealing.
- Filters: The Photos app offers a variety of filters that can add different moods and effects to your moon photos. Try out different filters to see which one enhances the details and brings out the natural beauty of the moon.
- Retouch: If you notice any imperfections or distractions in your moon photo, you can use the retouch tool to remove them. Simply brush over the areas you want to retouch, and the Photos app will intelligently blend the pixels to make the edits seamless.
While the editing tools in the Photos app are powerful, you may also want to explore third-party editing apps that offer more advanced features and creative options. These apps often provide additional control over exposure, saturation, sharpening, and other parameters, allowing you to fine-tune your moon photos to perfection.
Some popular third-party editing apps for iPhone include Adobe Lightroom, VSCO, and Snapseed. These apps offer a wide range of editing tools, filters, and presets that can take your moon photos to the next level. Experiment with different apps and see which one suits your editing style and preferences.
Remember, editing is a subjective process, and there is no right or wrong way to enhance your moon photos. Trust your creative instincts and have fun exploring different editing techniques to bring out the beauty of the moon captured by your iPhone.
Conclusion
In conclusion, capturing a clear picture of the moon with your iPhone is not as challenging as it may seem. By following these simple tips and utilizing the powerful camera capabilities of your device, you can achieve stunning results. Remember to prepare adequately by researching the best time to photograph the moon, using a tripod or stable surface to reduce camera shake, adjusting exposure settings to optimize the image, and experimenting with different apps and editing tools. Additionally, taking advantage of additional accessories such as telephoto lenses and filters can further enhance your moon photography. With practice and patience, you’ll be able to capture breathtaking images of the moon that will astonish your friends and family. So grab your iPhone, head outside on a clear night, and unleash your creativity in capturing the beauty of the moon!
FAQs
1. Can I take a clear picture of the moon with an iPhone?
Yes, you can take a clear picture of the moon with an iPhone. The camera capabilities of newer iPhone models have improved significantly, allowing for better low-light photography. Additionally, using some helpful tips and techniques can further enhance the quality of your moon photos.
2. What settings should I use on my iPhone to capture the moon?
To capture a clear picture of the moon, you can try adjusting the exposure manually. Tap on the moon on your iPhone screen to lock the focus and exposure, then swipe down to decrease the exposure compensation. Experimenting with different exposure settings can help you achieve a well-exposed and detailed moon photo.
3. Should I use a tripod when taking pictures of the moon with an iPhone?
Using a tripod can greatly improve the stability of your shots and help minimize camera shake. When photographing the moon, it’s essential to keep the camera steady for sharper images. If you don’t have a tripod, try using a stable surface or even leaning against a solid object to steady your hands while capturing the moon.
4. Are there any recommended apps for moon photography with iPhones?
Yes, there are several apps available that can assist in capturing stunning moon photos on your iPhone. Some popular choices include NightCap Camera, ProCamera, and Camera+ 2. These apps offer manual controls, increased shutter speed options, and other features to enhance your moon photography experience.
5. How can I edit and enhance my moon photos taken with an iPhone?
Once you’ve captured your moon photo, you can use various photo editing apps on your iPhone to further enhance its quality. Apps like Adobe Lightroom, Snapseed, and VSCO provide tools for adjusting exposure, contrast, and sharpness. You can also experiment with cropping and adding filters to give your moon photo a unique touch.