
Sure, here's the introduction wrapped in the
tag:
Are you ready to capture the mesmerizing beauty of the moon with your iPhone 13 Pro? With its advanced camera capabilities, the iPhone 13 Pro is the perfect tool for taking stunning moon pictures. In this article, we’ll explore the best techniques and tips for capturing breathtaking moon photos with your iPhone 13 Pro. From understanding the optimal settings to utilizing accessories, we’ll guide you through the process of taking incredible moon pictures that will leave everyone in awe. Let’s embark on this celestial photography journey and unlock the secrets to capturing the moon’s enchanting allure with your iPhone 13 Pro.
Inside This Article
- Understanding the Lunar Cycle
- Planning Your Moon Photography
- Setting Up Your iPhone 13 Pro for Moon Photography
- Taking the Perfect Moon Shot
- Conclusion
- FAQs
Understanding the Lunar Cycle
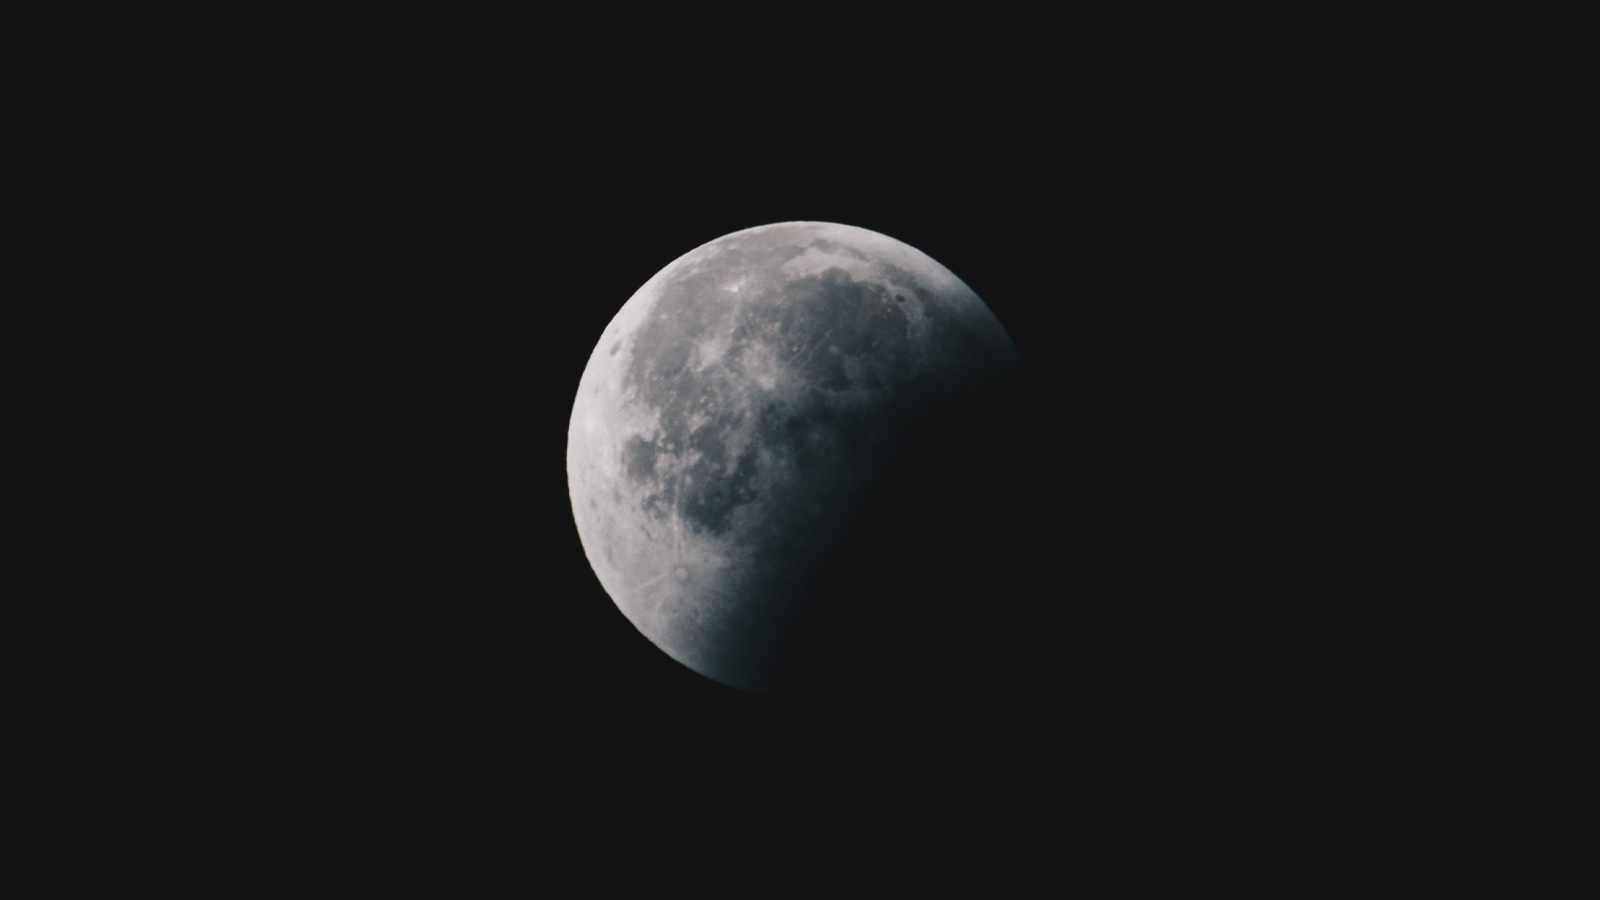
The lunar cycle, also known as the moon cycle, refers to the continuous transformation of the moon’s appearance as it orbits the Earth. This cycle encompasses the various phases of the moon, from the new moon to the full moon and back again. Each phase has its own unique characteristics, making it essential for photographers to comprehend the lunar cycle when capturing stunning moon pictures with their iPhone 13 Pro.
During the lunar cycle, the moon transitions through eight distinct phases: new moon, waxing crescent, first quarter, waxing gibbous, full moon, waning gibbous, last quarter, and waning crescent. These phases result from the interplay between the positions of the sun, Earth, and moon, leading to the varying illumination of the moon’s surface visible from our vantage point on Earth.
Understanding the lunar cycle is crucial for photographers aiming to capture the moon at its most visually captivating stages. By familiarizing yourself with the moon’s phases, you can anticipate the best times to embark on your moon photography endeavors, ensuring that you are well-prepared to immortalize the moon’s beauty with your iPhone 13 Pro.
Planning Your Moon Photography
Before you embark on your lunar photography journey with your iPhone 13 Pro, it’s essential to plan ahead. The moon’s appearance and position in the sky can vary significantly, so understanding the lunar cycle and the moon’s phases is crucial. By knowing when the moon will be full or in a particular phase, you can prepare for the ideal photography opportunities.
Consider using a reliable moon phase app to track the moon’s schedule. These apps provide valuable information, such as the moonrise and moonset times, as well as the moon’s phase on any given day. By utilizing this knowledge, you can schedule your photography sessions during the most visually compelling lunar phases.
Additionally, familiarize yourself with the moon’s trajectory in your location. Understanding where and when the moon will rise and set can help you choose the perfect vantage point for your photography. Whether you prefer a clear, unobstructed view or want to capture the moon against a stunning backdrop, planning your location in advance can significantly enhance the quality of your moon photography.
Setting Up Your iPhone 13 Pro for Moon Photography
Before you embark on your lunar photography journey with the iPhone 13 Pro, it’s essential to optimize your device’s settings for capturing the moon’s mesmerizing beauty. The advanced camera capabilities of the iPhone 13 Pro make it an ideal tool for this task, but proper configuration is key to achieving stunning results.
First, ensure that your iPhone 13 Pro is updated to the latest iOS version. This guarantees that you have access to the most recent camera features and optimizations, providing you with the best possible tools for capturing the moon in all its glory.
Next, familiarize yourself with the camera app’s settings. For moon photography, it’s advisable to disable the auto-flash feature and manually adjust the exposure to prevent overexposure of the moon’s bright surface. Additionally, consider enabling the gridlines feature to help with composition and alignment.
When preparing for moon photography, it’s crucial to stabilize your iPhone 13 Pro to minimize any blurring caused by hand movement. Utilize a tripod or a stable surface to ensure steady shots. If a tripod isn’t available, consider using a remote shutter or the built-in camera timer to reduce the risk of camera shake.
Furthermore, experiment with the focus and exposure settings to achieve optimal results. Tapping and holding on the moon in the camera frame can prompt the exposure and focus to adjust specifically for the lunar surface, enhancing the clarity of your moon shots.
Taking the Perfect Moon Shot
Now that you’ve planned and set up your iPhone 13 Pro for moon photography, it’s time to capture the perfect moon shot. Here are some tips to help you achieve stunning results:
1. Use a Tripod: Stability is crucial for capturing a clear moon shot. Mount your iPhone 13 Pro on a tripod to minimize camera shake and ensure sharp images. If you don’t have a tripod, stabilize your phone on a flat surface or use a makeshift support.
2. Enable Night Mode: The iPhone 13 Pro’s Night mode is designed to enhance low-light photography. When shooting the moon, Night mode can help bring out details and reduce overexposure. Experiment with different Night mode settings to find the best results.
3. Adjust Exposure: Tap and hold on the moon in the Camera app to lock the exposure. This prevents the camera from adjusting the exposure based on the surrounding dark sky, ensuring that the moon is properly exposed in your shot.
4. Use the 2x Optical Zoom: The iPhone 13 Pro’s telephoto lens allows for 2x optical zoom, which can help you capture a larger and more detailed image of the moon. Zoom in to fill the frame with the moon, but be mindful of over-zooming, which can reduce image quality.
5. Experiment with Composition: While a centered moon can result in a striking image, consider experimenting with different compositions. Incorporating elements such as trees, buildings, or landscapes in the frame can add visual interest and context to your moon shot.
6. Capture Details: If you want to highlight the details and textures on the moon’s surface, consider using a telescope or a telephoto lens attachment for your iPhone 13 Pro. These accessories can enhance the clarity and definition of your moon photographs.
7. Refine Your Settings: Continuously adjust your camera settings, such as exposure, focus, and white balance, to achieve the desired results. Don’t hesitate to take multiple shots with different settings and angles to increase your chances of capturing the perfect moon shot.
With these tips in mind, you’re well-equipped to take breathtaking moon photographs with your iPhone 13 Pro. Remember to be patient and persistent, as capturing the perfect moon shot may require some experimentation and fine-tuning.
**
Conclusion
**
With the advanced camera features and capabilities of the iPhone 13 Pro, capturing stunning moon pictures has never been easier. Whether you’re an amateur photographer or a seasoned professional, the combination of Night mode, ProRAW, and telephoto lens empowers you to unleash your creativity and capture the moon in all its glory.
By leveraging the tips and techniques outlined in this guide, you can elevate your moon photography to new heights, creating mesmerizing and awe-inspiring images that showcase the beauty of the night sky. So, grab your iPhone 13 Pro, head outside during the next full moon, and get ready to capture breathtaking lunar photographs that will leave everyone in awe.
FAQs
Q: Can the iPhone 13 Pro take good pictures of the moon?
A: Absolutely! The iPhone 13 Pro is equipped with advanced camera technology, including a powerful Night mode, which allows you to capture stunning moonlit scenes with remarkable clarity and detail.
Q: Do I need any additional accessories to take moon pictures with my iPhone 13 Pro?
A: While the iPhone 13 Pro’s built-in camera capabilities are impressive on their own, using a tripod can significantly enhance the stability of your shots, especially when capturing the moon or other low-light scenes. Additionally, consider using a telephoto lens attachment for even closer and more detailed moon shots.
Q: What settings should I use to capture the moon with my iPhone 13 Pro?
A: For optimal moon photography with the iPhone 13 Pro, it’s advisable to activate Night mode, adjust the exposure to prevent overexposure, and use the telephoto lens to zoom in on the moon. Experimenting with different exposure levels and manual focus can also help you achieve the perfect shot.
Q: Can I edit moon pictures taken with the iPhone 13 Pro?
A: Yes, the iPhone 13 Pro offers a range of powerful editing tools within the Photos app, allowing you to refine and enhance your moon pictures with ease. From adjusting exposure and contrast to applying creative filters, you can elevate the quality of your moonlit captures directly on your device.
Q: Are there any specific tips for capturing the moon with the iPhone 13 Pro?
A: Certainly! When photographing the moon with your iPhone 13 Pro, consider using the rule of thirds to compose your shots, leverage the grid overlay for precise alignment, and take advantage of the ProRAW feature for maximum flexibility in post-processing. Additionally, timing your shots during moonrise or moonset can yield captivating results due to the interplay of light and shadows.