
The iPhone 13 Pro Max is an exceptional device for capturing stunning photos, and its camera capabilities extend beyond your typical point-and-shoot experience. One of the exciting features of the iPhone 13 Pro Max is its ability to take breathtaking macro photos. Macro photography allows you to capture the intricate details of small subjects, revealing a whole new world of beauty that often goes unnoticed. In this article, we will delve into the world of macro photography with the iPhone 13 Pro Max, exploring techniques, tips, and tricks to help you master this captivating art form. Whether you want to photograph tiny flowers, insects, or intricate textures, we will guide you through the process of taking stunning macro photos and unlock the hidden potential of your iPhone 13 Pro Max camera.
Inside This Article
- Understanding Macro Photography
- Choosing the Right Subject
- Mastering Lighting Techniques
- Utilizing Manual Focus
- Enhancing Macro Photos with Editing Tools
- Conclusion
- FAQs
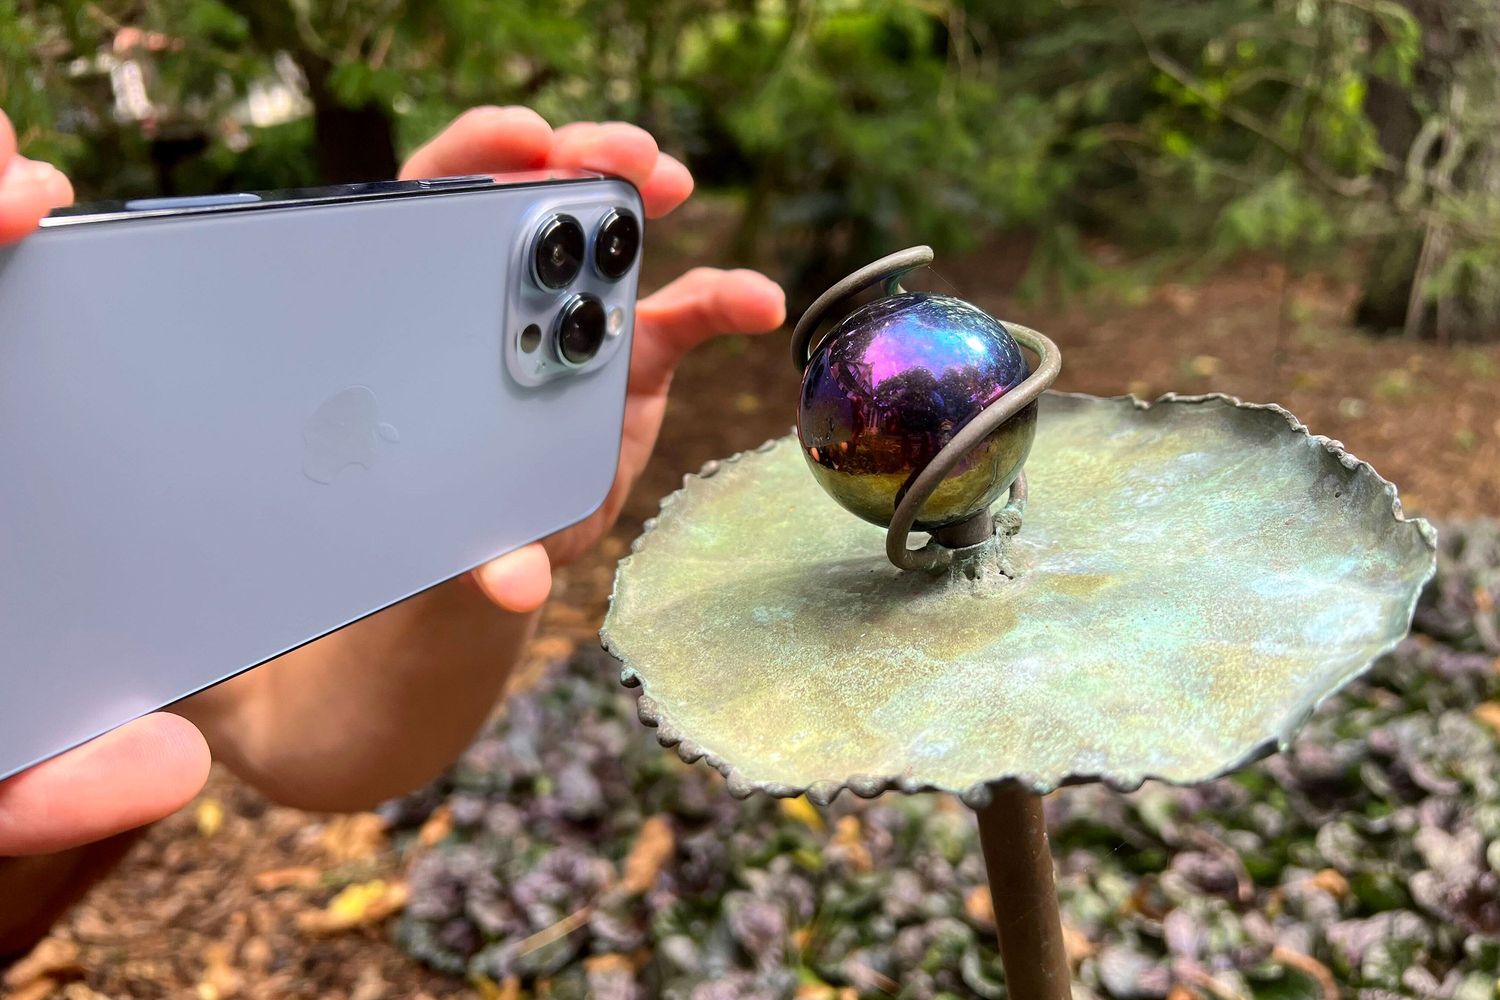
Understanding Macro Photography
Macro photography is a fascinating genre that allows photographers to capture intricate details of small subjects up close. It is a technique that magnifies the subject, revealing its textures, patterns, and beauty that often go unnoticed by the naked eye. With the advancements in smartphone technology, such as the iPhone 13 Pro Max, capturing stunning macro photos has become more accessible than ever before.
Macro photography is all about capturing subjects at a close range with a high level of magnification. The goal is to fill the frame with the subject, showcasing its smallest details. This genre is particularly popular for capturing nature, such as flowers, insects, and dewdrops, but it can also be applied to other subjects like food, jewelry, or even everyday objects.
To achieve great macro shots with your iPhone 13 Pro Max, you need to understand the equipment required and implement certain shooting techniques. Let’s dive into the essentials.
Choosing the Right Subject
When it comes to taking macro photos with your iPhone 13 Pro Max, one of the most crucial aspects is selecting the right subject. A good subject can make all the difference in capturing a striking macro image.
1. Flowers and Plants: Nature provides an abundance of subjects for macro photography. Flowers, with their vibrant colors and delicate textures, make for stunning macro shots. You can also focus on leaves, buds, or even insects that may be found among the foliage.
2. Food and Drinks: Capturing the intricate details of food and drinks can result in visually captivating macro images. Experiment with fruits, vegetables, spices, or even a drop of water on a glass to create unique compositions.
3. Textures: Look for interesting and intricate textures around you, such as fabric, wood, or stone. Macro photography allows you to reveal the finer details that may often go unnoticed.
4. Insects and Small Creatures: Get up close and personal with insects, spiders, or other small creatures to capture their world in stunning detail. Exercise caution and respect their space while photographing them in their natural habitat.
5. Jewelry and Accessories: Macro photography presents an opportunity to showcase the intricate details of jewelry and accessories. Capture the fine craftsmanship of a bracelet, the sparkle of a diamond, or the delicate patterns on a piece of lace.
6. Everyday Objects: Don’t overlook everyday objects that can be transformed into fascinating macro subjects. Keys, coins, buttons, or even a simple droplet of water can turn into a visually striking image when seen up close.
Remember, the key to choosing the right subject is to find something that interests you and offers unique details for your macro photography endeavors. Experiment with different subjects and let your creativity guide you.
Mastering Lighting Techniques
When it comes to taking macro photos with your iPhone 13 Pro Max, mastering lighting techniques is crucial. Proper lighting can make a world of difference in the final image, creating depth, contrast, and highlighting intricate details. Here are some tips to help you capture stunning macro photos by mastering lighting techniques:
1. Natural Lighting: Take advantage of natural light whenever possible. Find a well-lit area with diffused light, such as near a window or outdoors on a cloudy day. Avoid harsh direct sunlight, as it can create harsh shadows and overexposed areas in your macro shots.
2. Use Reflectors: Reflectors are a great tool to bounce light onto your subject and fill in any shadows. You can use a white foam board, a silver reflector disc, or even a piece of white paper to redirect light onto your subject and create more even lighting.
3. Experiment with Artificial Light Sources: If natural light is not available or sufficient, you can explore using artificial light sources. You can try using a small LED light panel, a ring light, or even a flashlight with a diffuser to provide the necessary illumination for your macro photography.
4. Diffuse Harsh Light: If you have a strong light source, such as a flashlight, that creates harsh shadows, you can soften the light by using a DIY diffuser. You can make a diffuser by attaching a thin white cloth or a translucent material, like baking paper, over the light source to create a softer, more diffused light.
5. Play with Shadows: Shadows can add drama and depth to your macro photos. Experiment with the position of your subject and the light source to create interesting shadow patterns and enhance the overall composition of your image.
6. Try Backlighting: Backlighting can create a beautiful glow and highlight the translucent qualities of certain subjects. Place the light source behind your subject and see how the light shines through, revealing intricate details that may have been unseen with front lighting.
7. Use Light modifiers: Light modifiers like mini softboxes or diffusers can help control and shape the light in your macro photography. These accessories can soften harsh light, reduce glare, and create a more controlled and professional-looking image.
8. Adjust Exposure: Use the exposure adjustment feature on your iPhone 13 Pro Max to fine-tune the brightness levels of your macro photos. This can help you bring out details in darker areas or tone down bright spots, ensuring a well-exposed and balanced image.
9. Shoot During Golden Hour: The golden hour, which occurs during the first and last hour of sunlight in a day, is known for its warm, soft, and golden light. Take advantage of this time of day to capture breathtaking macro photos with a beautiful natural glow.
10. Practice and Experiment: The key to mastering lighting techniques is practice and experimentation. Take the time to try different lighting setups, angles, and sources to see what works best for your macro subjects. Don’t be afraid to make mistakes and learn from them to refine your skills and develop your own unique style.
By mastering lighting techniques, you can elevate your macro photography with the iPhone 13 Pro Max. Remember to always keep an eye on the lighting conditions and be adaptable to capture the best possible images that showcase the intricate details of your subjects.
Utilizing Manual Focus
One of the key features of the iPhone 13 Pro Max is its ability to manually control the focus of your photos. This opens up a world of possibilities when it comes to capturing stunning macro shots. Manual focus allows you to adjust the focus point on your subject, resulting in crisp and detailed images.
To utilize manual focus on your iPhone 13 Pro Max, follow these simple steps:
- Open the Camera App: Launch the camera app on your iPhone 13 Pro Max and select the photo mode.
- Tap to Focus: Tap on the screen where you want to set the focus point. This will automatically activate the autofocus feature.
- Activate Manual Focus: Once the autofocus is engaged, a yellow box will appear around the focus point. To switch to manual focus, simply tap and hold on the screen until the yellow box becomes a yellow square.
- Adjust the Focus: With manual focus activated, you can now use the on-screen slider to fine-tune the focus. Slide your finger up or down to adjust the focus closer or farther away from the subject.
- Capture the Shot: Once you’ve achieved the desired focus, tap the shutter button to capture your macro photo.
Manual focus gives you full control over the depth of field and sharpness in your macro shots. Experiment with different focus points to create unique compositions and highlight specific details.
It’s important to note that manual focus works best when the subject is stationary or when using a tripod to minimize camera shake. Additionally, good lighting conditions are crucial for achieving sharp macro images.
With practice, you’ll become more adept at using manual focus on your iPhone 13 Pro Max, allowing you to capture breathtaking macro photos that showcase the intricate details of your subjects.
Enhancing Macro Photos with Editing Tools
Macro photography allows you to capture intricate details and bring out the beauty of small subjects. However, sometimes the raw images may not fully represent the essence of what you saw through the viewfinder. That’s where editing tools come in handy. With the right techniques, you can enhance your macro photos and make them truly stand out.
Here are some tips to help you get the most out of your macro images:
- Adjusting Brightness and Contrast: One of the first things you can do is adjust the brightness and contrast of your macro photo. This can help bring out the details and make the image more visually appealing. Use the curves or levels adjustment feature in your editing tool to fine-tune the brightness and contrast levels.
- Sharpening Details: Macro photography is all about capturing intricate details. To make those details pop even more, you can use the sharpening tool in your editing software. Be careful not to overdo it, as excessive sharpening can create a harsh and unnatural look.
- Color Correction: Sometimes, the colors captured in your macro photos may not be accurate. To fix this, you can use the color correction tool in your editing software. Adjust the temperature, tint, saturation, and hue to achieve the desired color balance.
- Removing Distractions: When capturing macro images, it’s common to have small distractions or imperfections in the frame. These can be distracting to the viewer. To remove such distractions, you can use the clone stamp or healing brush tool in your editing software. Carefully clone or heal the areas that need to be removed without altering the integrity of the image.
- Cropping and Composition: Sometimes, a macro photo may benefit from a slight crop or adjustment to the composition. Use the crop tool in your editing software to remove any unnecessary elements and improve the overall composition of the image.
- Adding Effects: To add a creative touch to your macro photos, you can experiment with various effects such as vignetting, selective focus, or adding a subtle blur. These effects can help to draw attention to the main subject and create a more visually captivating image.
Remember, the key to enhancing your macro photos with editing tools is to make subtle adjustments that enhance the natural beauty of the image, rather than creating an overly processed look. Take your time to experiment with different techniques and find the editing style that aligns with your artistic vision.
Conclusion
In conclusion, the iPhone 13 Pro Max proves to be a powerful tool for capturing stunning macro photos. With its advanced camera system and features like ProRAW and Night mode, users can unleash their creativity and take extraordinary close-up shots. Whether you are capturing the intricate details of a flower, exploring the textures of everyday objects, or immersing yourself in the world of tiny creatures, the iPhone 13 Pro Max delivers impressive macro photography results.
By following the tips and techniques outlined in this article, you can elevate your macro photography game and capture breathtaking images with your iPhone 13 Pro Max. Remember to experiment with different lighting conditions, subjects, and angles to truly push the boundaries of what your iPhone can achieve. So, grab your iPhone 13 Pro Max, venture into the world of macro photography, and unlock a whole new level of creativity.
FAQs
Q: Can the iPhone 13 Pro Max capture macro photos?
A: Yes, the iPhone 13 Pro Max is equipped with a powerful camera system that can capture stunning macro photos.
Q: How do I enable the macro mode on my iPhone 13 Pro Max?
A: The macro mode on the iPhone 13 Pro Max is automatically activated when you position the camera close to the subject. The device will recognize the close proximity and automatically adjust the focus to capture detailed macro shots.
Q: Are there any tips for getting the best macro photos with the iPhone 13 Pro Max?
A: Absolutely! To capture the best macro photos with your iPhone 13 Pro Max, make sure to hold the device steady to avoid any blurriness, experiment with different angles to find the most interesting perspective, and take advantage of natural lighting for optimal results.
Q: Can I use third-party apps to enhance my macro photography on the iPhone 13 Pro Max?
A: Yes, there are several third-party apps available on the App Store that offer advanced features and editing options specifically designed for macro photography. You can explore these apps to further enhance your macro shots.
Q: What are the benefits of capturing macro photos with the iPhone 13 Pro Max?
A: By capturing macro photos with the iPhone 13 Pro Max, you can uncover a whole new world of intricate details and textures, allowing you to document the beauty of small subjects up close. It’s a great way to expand your creativity and create visually stunning images.