
Opening the back of a Samsung Galaxy A tablet is a straightforward process that allows you to access the internal components for various purposes, such as replacing the battery or inserting a SIM card. Understanding how to safely open the back cover without causing damage is essential for maintaining the device's integrity. In this article, we will guide you through the step-by-step process of opening the back of a Samsung Galaxy A tablet. Whether you need to perform maintenance or simply explore the inner workings of your device, this guide will equip you with the knowledge and confidence to do so effectively. So, let's delve into the intricacies of accessing the back of your Samsung Galaxy A tablet and uncover the possibilities that lie within.
Inside This Article
- Tools Needed
- Removing the Back Cover
- Disconnecting the Battery
- Accessing the Internal Components
- Conclusion
- FAQs
Tools Needed
Before attempting to open the back of your Samsung Galaxy A tablet, it’s essential to have the right tools on hand. Here are the tools you’ll need:
1. Phillips screwdriver: This is crucial for removing the screws that secure the back cover in place.
2. Plastic opening tool: This tool helps to gently pry open the back cover without causing damage to the tablet’s frame or the cover itself.
3. Tweezers: These come in handy for handling small components and disconnecting delicate cables inside the tablet.
4. Anti-static wrist strap: To prevent any electrostatic discharge that could potentially damage the tablet’s internal components, it’s advisable to wear an anti-static wrist strap during the process.
5. Heat gun or hairdryer (optional): In some cases, applying heat to the edges of the back cover can soften the adhesive, making it easier to remove.
Having these tools ready will ensure that you can safely and effectively access the internal components of your Samsung Galaxy A tablet without causing any damage.
**
Removing the Back Cover
**
Removing the back cover of your Samsung Galaxy A tablet is a straightforward process that requires a few simple tools and careful handling. Before you begin, ensure you have a plastic opening tool or a guitar pick to avoid damaging the device’s exterior. Additionally, prepare a heat gun or hair dryer to soften the adhesive securing the back cover.
Start by powering off your tablet and laying it face down on a soft, clean surface. Apply gentle heat to the edges of the back cover to soften the adhesive. Once the adhesive is warmed, carefully insert the plastic opening tool or a guitar pick into the seam between the back cover and the main body of the tablet.
With the opening tool in place, gently slide it along the edge, gradually separating the back cover from the tablet’s frame. Exercise caution and patience to prevent any damage to the cover or the internal components. As you work your way around the edges, you will feel the adhesive releasing, allowing you to lift off the back cover.
Upon successfully releasing the back cover, set it aside in a safe place. Take a moment to inspect the interior for any signs of damage or wear. If everything appears intact, you can proceed with your intended maintenance or repair. When reattaching the back cover, ensure it aligns properly with the tablet’s frame and gently press around the edges to secure it in place.
Disconnecting the Battery
Before you proceed with disconnecting the battery of your Samsung Galaxy A tablet, it’s crucial to ensure that the device is powered off. This step is essential for your safety and to prevent any potential damage to the tablet’s internal components.
Once the tablet is powered off, you will need to carefully remove the back cover using the appropriate tools. Most Samsung Galaxy A tablets have a removable back cover, allowing you to access the battery and other internal components. However, it’s important to exercise caution and refer to the device’s manual or online guides for specific instructions related to your tablet model.
After successfully removing the back cover, you will be able to locate the battery within the tablet. To disconnect the battery, you may need to use a plastic spudger or a similar tool to gently pry the battery connector from its socket. It’s crucial to handle this process with care to avoid damaging the connector or the surrounding components.
Once the battery is disconnected, it’s advisable to wait for a few minutes before proceeding with any further steps. This brief waiting period allows any residual charge to dissipate, reducing the risk of accidental electrical discharge during subsequent operations on the tablet’s internal components.
Remember to keep track of the screws and components you remove, as well as the order in which they were removed. This will make the reassembly process much easier and help ensure that everything is properly secured and aligned when you put the tablet back together.
Accessing the Internal Components
Once you have removed the back cover and disconnected the battery, you can proceed to access the internal components of your Samsung Galaxy A tablet. This step requires caution and precision, as you will be handling delicate parts of the device.
Start by locating the screws that secure the internal components in place. Use the appropriate screwdriver to carefully remove these screws, ensuring that you keep them organized and separate from the other parts to avoid misplacement.
With the screws removed, gently lift the internal components from the tablet’s housing. Take note of the connections and cables attached to the components, as these will need to be disconnected to fully access the internal parts.
Using a plastic spudger or a similar tool, carefully disconnect the cables and connectors from the internal components. Exercise caution and avoid using excessive force to prevent damaging the delicate connectors.
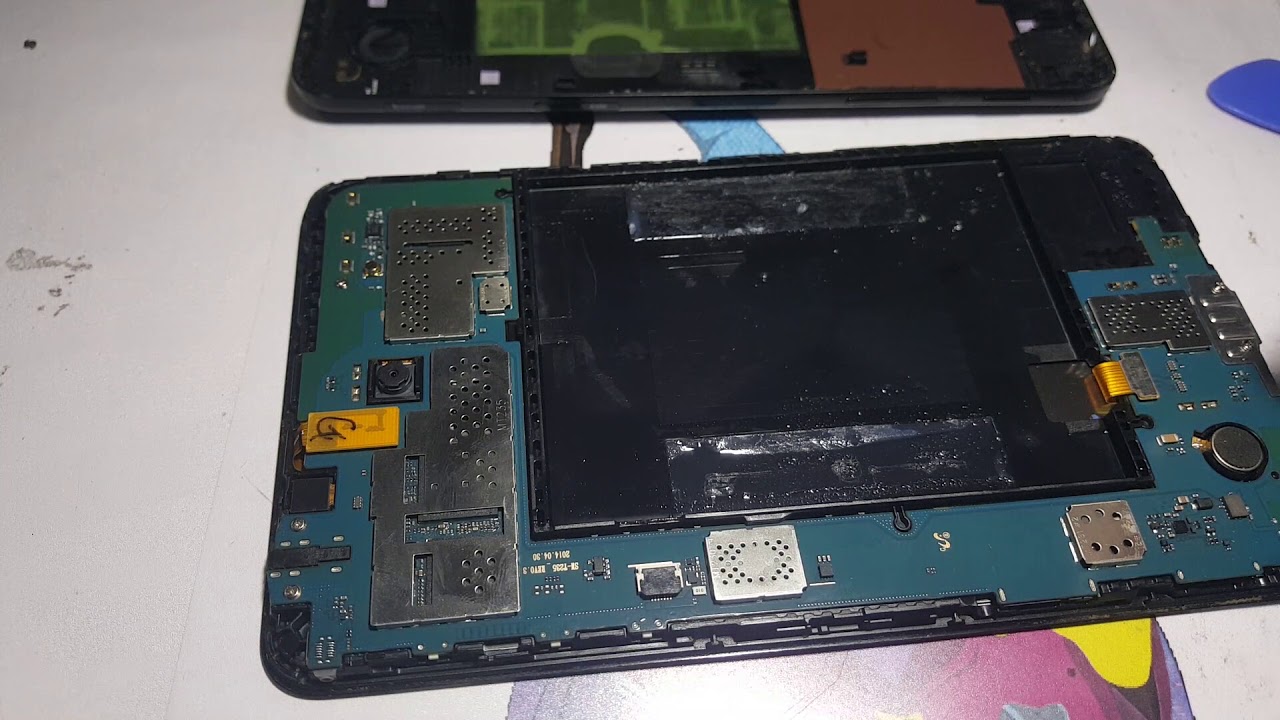
Once the cables are disconnected, you can now access the internal components, such as the motherboard, camera modules, and other essential parts of the tablet. Take your time to inspect and handle these components with care, as they are integral to the functionality of your device.
When accessing the internal components, it’s crucial to work in a clean and well-lit environment to minimize the risk of misplacing small parts or causing accidental damage. Additionally, take note of the orientation and placement of each component to ensure proper reassembly later on.
With the internal components accessible, you can perform maintenance or repairs as needed, such as replacing a damaged camera module or upgrading the storage capacity of your tablet. Remember to handle the components with care and refer to the appropriate guides or resources for specific procedures.
After completing the necessary tasks with the internal components, carefully reassemble the tablet by reconnecting the cables, securing the components in place, and reattaching the screws. Ensure that everything is properly aligned and secured before replacing the back cover of your Samsung Galaxy A tablet.
Conclusion
Opening the back of a Samsung Galaxy A tablet can seem daunting at first, but with the right tools and careful approach, it can be a manageable task. Remember to prioritize safety and take your time to avoid damaging the device. Whether you’re replacing the battery, inserting a SIM card, or troubleshooting an issue, following the steps outlined in this guide will help you navigate the process with confidence. Additionally, seeking professional assistance from authorized service centers is always a viable option if you’re uncertain about opening the back yourself. By mastering this skill, you can gain a deeper understanding of your device and address various maintenance needs effectively. With patience and attention to detail, you can successfully access the internals of your Samsung Galaxy A tablet whenever necessary.
FAQs
Q: How do I open the back of a Samsung Galaxy A tablet?
A: To open the back of a Samsung Galaxy A tablet, locate the small notch or slot along the edge of the device. Gently insert a fingernail or a plastic opening tool into the notch and carefully pry the back cover away from the tablet. It’s important to be gentle to avoid damaging the device.
Q: Can I use a metal tool to open the back of my Samsung Galaxy A tablet?
A: It’s not recommended to use a metal tool to open the back of a Samsung Galaxy A tablet, as this can lead to scratches or other damage to the device. Instead, opt for a plastic opening tool or a fingernail to avoid causing any harm to the tablet.
Q: What should I do if the back cover of my Samsung Galaxy A tablet is difficult to remove?
A: If you’re having trouble removing the back cover of your Samsung Galaxy A tablet, double-check to ensure that you’re applying gentle and even pressure. If the cover still won’t budge, consider seeking assistance from a professional or referring to the device’s user manual for specific instructions.
Q: Are there any precautions I should take before attempting to open the back of my Samsung Galaxy A tablet?
A: Before opening the back of your Samsung Galaxy A tablet, it’s important to power off the device to prevent any potential damage. Additionally, ensure that your hands are clean and dry to avoid transferring any dirt or moisture to the internal components of the tablet.
Q: Can opening the back of my Samsung Galaxy A tablet void the warranty?
A: Opening the back of your Samsung Galaxy A tablet may void the warranty, so it’s advisable to review the warranty terms and conditions provided by the manufacturer before attempting any DIY repairs or maintenance on the device.