
The Moto G 3 is a popular smartphone known for its impressive performance and affordability. However, storage space can sometimes be a limitation, especially if you love downloading a multitude of apps. Thankfully, there’s a solution – you can move apps to an SD card to free up space on your device.
In this article, we will guide you on how to efficiently move apps to an SD card on your Moto G 3. By doing so, you can optimize your smartphone’s storage and enjoy a seamless user experience without worrying about running out of space. Whether you’re a gaming enthusiast or a productivity aficionado, this article will provide you with the step-by-step instructions needed to make the most out of your Moto G 3’s storage capabilities.
Inside This Article
- Overview
- Step 1: Check your device compatibility
- Step 2: Format the SD card
- Step 3: Set the SD card as internal storage
- Step 4: Move apps to the SD card
- Additional tips and considerations
- Conclusion
- FAQs
Overview
In today’s digital age, our smartphones have become an integral part of our lives. From communication to entertainment, we rely on these devices for various tasks. However, with the increasing number of apps being installed, our phone’s internal storage can quickly fill up, leaving us with limited space to store new apps and files.
Thankfully, there’s a solution! If you own a Moto G 3 smartphone, you have the option to move your apps to the SD card, thereby freeing up precious internal storage. This means you can easily expand your storage capacity and have more space for new apps, photos, videos, and other files.
In this article, we will guide you through the step-by-step process of moving apps to the SD card on your Moto G 3. Whether you’re a newbie to smartphones or a tech-savvy individual, this guide will help you make the most of your device’s storage capacity and enhance your overall smartphone experience.
Step 1: Check your device compatibility
Before you can move apps to your SD card on your Moto G 3, it’s important to check if your device is compatible with this feature. Not all smartphones have the ability to move apps to an external storage such as an SD card, so it’s essential to verify if your Moto G 3 supports this function.
To check your device’s compatibility, follow these simple steps:
- Go to the Settings menu on your Moto G 3.
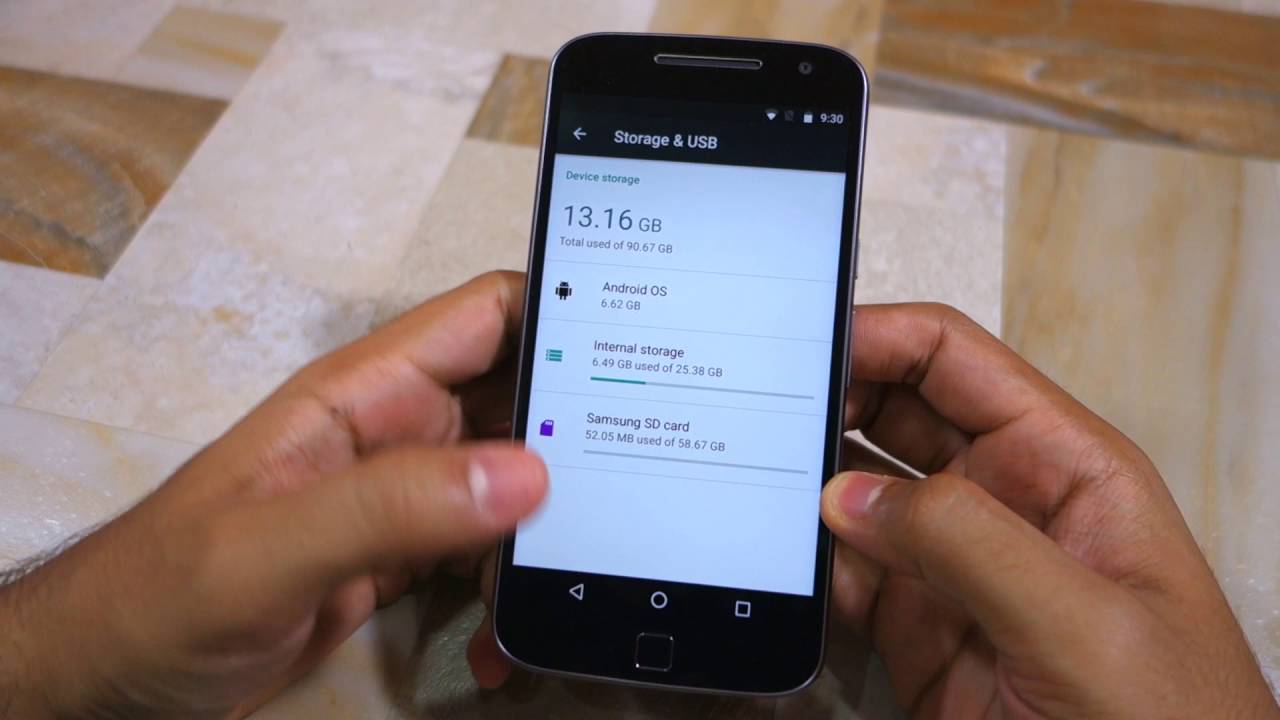
- Scroll down and tap on the ‘Storage & USB’ option.
- Look for the ‘Internal storage’ section and check if it displays an option like ‘SD card’ or ‘Format as internal’.
- If you see these options, it means your device supports moving apps to the SD card. If not, unfortunately, your device does not have this capability.
It’s important to note that some smartphones may have a ‘portable storage’ option instead of ‘format as internal’ for the SD card. In this case, you can still use the SD card to store media files such as photos, videos, and music but may not be able to move apps.
If you’re unsure about your device’s compatibility or have any questions regarding this feature, consult the user manual or contact Motorola customer support for further assistance.
Step 2: Format the SD card
Formatting the SD card is an essential step before using it as internal storage for your Moto G3. This process ensures that the card is properly prepared and compatible with your device. Follow these simple steps to format your SD card:
1. Insert the SD card into your Moto G3’s SD card slot. Make sure the device is powered off before doing so.
2. Once the SD card is inserted, power on your Moto G3 and wait for it to fully boot up.
3. Go to the “Settings” menu on your Moto G3. You can find it by swiping down from the top of the screen and tapping the gear icon in the upper-right corner.
4. In the “Settings” menu, scroll down and tap on “Storage & USB.”
5. Under the “Portable Storage” section, you will see the SD card listed. Tap on it to access the SD card settings.
6. In the SD card settings, you will find various options. Look for the option that says “Format” or “Format as internal.” Tap on it to proceed with formatting.
7. A warning message will appear, informing you that formatting the SD card will erase all data on it. Ensure that you have backed up any important data before proceeding. If you are ready to continue, tap on “Format” or “Erase & format.”
8. The Moto G3 will begin formatting the SD card. The process may take a few minutes, depending on the size of the SD card.
9. Once the formatting is complete, you will receive a notification indicating that the SD card is ready to use. Tap on “Done” or “OK” to exit the formatting settings.
Now that your SD card is formatted, you can proceed to the next step of setting it as internal storage on your Moto G3. This will enable you to move apps and data to the SD card, freeing up internal storage space and improving overall device performance.
Step 3: Set the SD card as internal storage
Setting the SD card as internal storage on your Moto G 3 can be a great way to free up space on your device and accommodate more apps and data. By doing so, you will effectively expand the available storage capacity of your smartphone. Here’s how you can set the SD card as internal storage:
1. Insert the SD card into your Moto G 3. Make sure it is properly inserted and recognized by your device.
2. Go to the “Settings” menu on your Moto G 3 by swiping down from the top of the screen and tapping the gear icon.
3. Scroll down and tap on “Storage & USB” or “Storage,” depending on the Android version of your device.
4. Under the “Portable storage” section, select the SD card that you want to set as internal storage.
5. Tap on the three-dot menu icon at the top right corner of the screen, then choose “Settings” from the dropdown menu.
6. In the “SD card settings” menu, select “Format as internal” or “Use as internal storage.”
7. You will see a warning message informing you that the SD card will be erased and formatted for internal use. Make sure you have backed up any important data on the SD card before proceeding.
8. Tap on “Erase & format” to confirm the process. Your Moto G 3 will then format the SD card and prepare it for use as internal storage.
9. Once the formatting process is complete, you will be prompted to move certain apps and data to the SD card. Follow the on-screen instructions to move apps or data to the newly set internal storage.
10. Congratulations! You have successfully set the SD card as internal storage on your Moto G 3. Now you can enjoy the increased storage capacity and smoothly run more apps on your device.
It’s important to note that once you set the SD card as internal storage, it becomes encrypted and tied to your Moto G 3. This means that if you remove the SD card from your device and try to use it on another device, it will require reformatting, which will erase all the data stored on it.
In addition, keep in mind that not all apps can be moved to the SD card, as some system and pre-installed apps may be restricted from being moved. However, moving compatible apps and data to the SD card can significantly improve the performance and usability of your Moto G 3.
Step 4: Move apps to the SD card
Now that you have formatted the SD card and set it as internal storage, it’s time to move your apps to the SD card. This will help you free up space on your device’s internal storage and ensure a smoother performance.
Here’s how you can move apps to the SD card on your Moto G 3:
- Go to the Settings menu on your device.
- Scroll down and select “Apps.”
- You will see a list of all the apps installed on your device. Tap on the app you want to move to the SD card.
- On the app’s page, you will find the “Storage” option. Tap on it.
- You will see two options: “Internal storage” and “SD card.” Tap on “Change.”
- A pop-up window will appear, giving you the option to move the app to the SD card. Tap on “Move to SD card.”
Once you tap on “Move to SD card,” the app will be transferred from your device’s internal storage to the SD card. It may take a few moments, depending on the size of the app and the speed of your SD card.
It’s important to note that not all apps can be moved to the SD card. Some apps, such as system apps or apps that are essential for the device’s functioning, cannot be transferred. However, you can move most third-party apps to the SD card, freeing up precious internal storage space.
You can repeat the above steps for each app you want to move to the SD card. Additionally, you can always check the storage section of each app to see if it is currently stored on the SD card or the device’s internal storage.
By moving apps to the SD card, you can optimize your Moto G 3’s storage and ensure that you have enough space for new applications, photos, videos, and other files.
Remember, it’s always a good idea to periodically check your device’s storage and move apps to the SD card whenever necessary. This will help you maintain a well-organized and efficient device.
Additional tips and considerations
When it comes to moving apps to the SD card on your Moto G 3, there are a few additional tips and considerations to keep in mind. These will help ensure a smooth and successful process without any issues. Take note of the following:
1. Check app compatibility: While most apps can be moved to the SD card, there are certain apps that may not have this functionality. Before attempting to move an app, check if it supports being moved to external storage. You can do this by going to the app’s settings or consulting the app developer’s documentation.
2. Keep essential apps on internal storage: Although you can move many apps to the SD card, it’s advisable to keep essential system apps, such as messaging, phone, or camera apps on the internal storage. This ensures their smooth functioning and avoids any potential complications that might arise from moving them.
3. Be mindful of app performance: Moving apps to the SD card may result in slightly slower performance, especially if the SD card has a lower read/write speed. Take this into account when deciding which apps to move and prioritize those that have no significant impact on performance.
4. Regularly check the SD card: It’s important to regularly check the condition of your SD card. Ensure it is properly inserted and functioning correctly. If any issues arise, such as corruption or errors, it might impact the apps stored on it. Regularly backing up the contents of your SD card is also recommended.
5. Manage available space: Moving apps to the SD card is a great way to free up internal storage. However, keep an eye on the available space on both the internal storage and the SD card. If either storage becomes too full, it can impact the device’s performance and cause issues with installed apps.
6. Unmount the SD card before removing: Before removing the SD card from your Moto G 3, make sure to unmount it properly. This ensures that any ongoing data transfer or app usage is completed and avoids any potential data corruption. To unmount the SD card, go to Settings > Storage & USB and tap on the “Unmount” option.
By following these additional tips and considerations, you can make the most out of moving apps to the SD card on your Moto G 3. It will help you optimize your storage space and enhance the overall performance of your device.
Conclusion
As we reach the end of this article, it is evident that knowing how to move apps to an SD card can greatly enhance the usability of your Moto G 3. By freeing up internal storage space, you can download and use more apps, take more photos and videos, and enjoy a smoother overall experience with your device.
While the Moto G 3 does not have native support for moving apps to an SD card, using a third-party app like AppMgr III can provide a viable solution. It allows you to easily transfer selected apps to your SD card, without compromising their functionality.
Remember, before moving apps, consider the size and importance of each one. Some apps may not be suitable for moving to an SD card, as they may require access to the internal storage for optimal performance.
By following the steps outlined in this article, you can make the most of your Moto G 3’s storage capabilities and ensure a smoother and more efficient smartphone experience.
FAQs
Q: Can I move apps to SD on Moto G 3?
A: Yes, you can move compatible apps to the SD card on the Moto G 3. This allows you to free up internal storage space on your device.
Q: How do I move apps to the SD card on Moto G 3?
A: To move apps to the SD card on your Moto G 3, follow these steps:
- Go to Settings on your device.
- Select Apps & notifications.
- Tap on the app you want to move.
- Scroll down and tap on ‘Storage’.
- Tap on ‘Change’ under ‘Storage used’.
- Select ‘SD card’ and tap on ‘Move’.
- The app will now be moved to the SD card.
Q: Are all apps compatible with moving to the SD card?
A: Not all apps can be moved to the SD card. Some apps have restrictions set by their developers that prevent them from being moved. In such cases, the ‘Change’ option under ‘Storage used’ will be greyed out.
Q: What happens to the app when it is moved to the SD card?
A: When an app is moved to the SD card, its data and cache are stored on the card, while a small portion still remains on the internal storage. The app will still be accessible and usable, but it may experience slightly slower performance compared to when it is stored in the internal storage.
Q: Can I move apps back to the internal storage from the SD card?
A: Yes, you can move apps back to the internal storage if needed. Simply follow the same steps mentioned earlier, but instead of selecting ‘SD card’ under ‘Change’, choose ‘Internal storage’. The app will then be moved back to the internal storage.