
Are you tired of constantly finding scratches and smudges on your mobile phone screen? Look no further than the Pela Screen Protector. With its advanced technology and easy application process, this screen protector is the perfect solution to keep your phone’s screen looking flawless and crystal clear. In this article, we will guide you through the step-by-step process of how to apply the Pela Screen Protector to ensure a seamless and bubble-free installation. Whether you’re a tech-savvy enthusiast or a beginner, you’ll find our instructions easy to follow and execute. Say goodbye to those pesky scratches and hello to a pristine phone screen with the Pela Screen Protector!
Inside This Article
- Proper Cleaning of your Device:
- Aligning the Pela Screen Protector
- Applying the Pela Screen Protector
- Removing Air Bubbles from the Screen
- Conclusion
- FAQs
Proper Cleaning of your Device:
Before applying a Pela Screen Protector to your device, it is crucial to clean the screen thoroughly. A clean screen ensures proper adhesion and prevents any debris or dust particles from causing air bubbles or uneven application. Here are the steps to properly clean your device:
- Start by turning off your device and unplugging any power sources. This will prevent accidental damage or electrical shock.
- Use a soft, lint-free microfiber cloth to gently wipe the surface of your screen. This will remove any fingerprints, smudges, or dust that may have accumulated.
- If there are stubborn stains or oily residue, dampen the cloth with a small amount of distilled water or screen cleaning solution specifically designed for electronic devices. Avoid using harsh chemicals or abrasive cleaners as they can damage the screen.
- Gently wipe the screen in a circular motion, taking care not to apply too much pressure. Allow the screen to air dry or use a clean, dry cloth to remove any excess moisture.
- Inspect the screen for any remaining dirt or debris. If necessary, repeat the cleaning process until the screen is completely clean.
It is important to note that cleaning your device’s screen regularly not only ensures a smooth application of the Pela Screen Protector but also helps maintain the clarity and functionality of your device.
Aligning the Pela Screen Protector
Once you have properly cleaned your device, it is time to align the Pela screen protector. Proper alignment is crucial to ensure that the protector fits perfectly on your device’s screen, providing maximum coverage and protection. Follow these steps for a seamless alignment process:
- Start by carefully removing the backing film from the Pela screen protector. Be sure to hold it by the edges to avoid fingerprints or smudges on the adhesive side.
- Hold the screen protector by the edges and align it with the top or bottom of your device’s screen, depending on your preference. You can use the front-facing camera or home button as reference points to align the protector accurately.
- Slowly lower the screen protector onto the screen, while simultaneously applying gentle pressure to help it adhere. Take your time during this step, ensuring that the protector remains aligned with the edges of the screen as you lay it down.
- Once the protector is in position, start from the center and use your fingertips or a microfiber cloth to gently press outwards towards the edges. This process helps to remove any air bubbles or creases that may have formed during the application.
- If you notice any misalignment or air bubbles, lift the screen protector slightly using a piece of tape, and carefully reposition it. Smooth out any bubbles using a clean cloth or your fingertips.
- Continue pressing outwards from the center towards the edges until you are satisfied with the adhesion and alignment of the screen protector.
Remember to work slowly and carefully during the alignment process to achieve the best results. Taking your time and being patient will ensure that the Pela screen protector fits perfectly on your device, providing the ultimate protection for your screen.
Applying the Pela Screen Protector
Now that you have properly aligned the Pela Screen Protector on your device, it’s time to apply it. Follow these steps to ensure a smooth and bubble-free installation:
- Start by peeling off the backing film from the adhesive side of the screen protector. Be careful not to touch the adhesive with your fingers.
- Hold the screen protector by the edges, align it with the device’s screen, and gently place it down, starting from one end.
- As you lay down the screen protector, use a microfiber cloth or a squeegee to push out any air bubbles and ensure proper adhesion. Start from the center and work your way outwards.
- Continue smoothing out the screen protector, applying even pressure to remove any remaining air bubbles or wrinkles.
- If you notice any stubborn bubbles, you can gently lift the screen protector and reapply it. Just be careful not to touch the adhesive side or introduce any dust or lint.
- Once the screen protector is evenly applied and all bubbles are removed, give it a final wipe-down with a microfiber cloth to ensure a clear and smudge-free surface.
It’s important to note that some screen protectors may come with additional tools or accessories, such as a dust remover or an applicator card. Follow the instructions provided by the manufacturer if such items are included in the packaging.
After applying the Pela Screen Protector, take a moment to admire the improved clarity and protection it provides for your device’s screen. Not only will it guard against scratches and smudges, but it will also help maintain the resale value of your device in the long run.
Remember, proper application is key to getting the most out of your screen protector. Take your time, follow the instructions, and you’ll have a pristine and bubble-free screen in no time!
Removing Air Bubbles from the Screen
After applying the Pela screen protector, you may notice a few air bubbles trapped beneath the surface. Don’t worry! It’s a common occurrence, and there are simple steps you can take to remove them and achieve a flawless finish. Here’s what you need to do:
- Give it some time: Sometimes, air bubbles may disappear on their own over a few hours or days. This is because the screen protector gradually adheres to the surface of your device. So, before trying the following methods, it’s worth waiting for a little while to see if the bubbles naturally disappear.
- Pressing the bubbles out: Start by gently pressing on the center of the bubble with a microfiber cloth or a soft cloth. With a slow, sweeping motion, press towards the edges of the screen. This will help in pushing out the air bubble towards the sides.
- Using a credit card: If pressing the bubble out with your fingers doesn’t work, you can gently use a credit card or a similar flat object. Place the edge of the card on the bubble and slowly push it towards the edge of the screen. Be careful not to apply too much pressure to avoid damaging the screen or the screen protector.
- Peel and reapply: In some cases, if the bubble persists, it may be necessary to remove the screen protector and reapply it. Carefully lift the edge of the protector using a fingernail or a small tool. Once it’s lifted, peel the protector off slowly. Clean the screen again, making sure there are no dust particles or debris. Then, align the protector carefully and apply it again, paying close attention to avoid any air bubbles.
Remember, it’s essential to be patient and take your time when trying to remove air bubbles. Rushing the process may cause the screen protector to lose its adhesive properties or create new bubbles. If you find it challenging to remove the air bubbles yourself, don’t hesitate to seek professional help or consult the manufacturer’s instructions for additional guidance.
By following these steps, you should be able to remove the air bubbles and enjoy a smooth and crystal-clear display on your device. It’s worth the effort to ensure optimal visibility and longevity of your screen protector.
Conclusion
In conclusion, applying a Pela screen protector to your cell phone is a simple and effective way to protect your device from scratches, smudges, and cracks. This eco-friendly accessory offers not only durable protection but also the peace of mind that comes from knowing you are making a sustainable choice.
By following the step-by-step instructions provided by Pela, you can easily apply the screen protector without any hassle. The high-quality materials used in Pela screen protectors ensure a bubble-free application and a crystal-clear display.
With the increasing use of smartphones and the inevitable wear and tear they undergo, investing in a Pela screen protector is a wise decision. It offers an added layer of defense against the everyday hazards your device may face.
So, give your cell phone the protection it deserves and choose a Pela screen protector – a reliable, durable, and sustainable accessory that will keep your device looking and functioning at its best for years to come.
FAQs
1. Why should I use a screen protector for my mobile phone?
Using a screen protector adds an extra layer of protection to your mobile phone’s display. It helps to prevent scratches, smudges, and fingerprints, ensuring that your screen stays in pristine condition. A screen protector can also reduce glare and provide a more comfortable viewing experience.
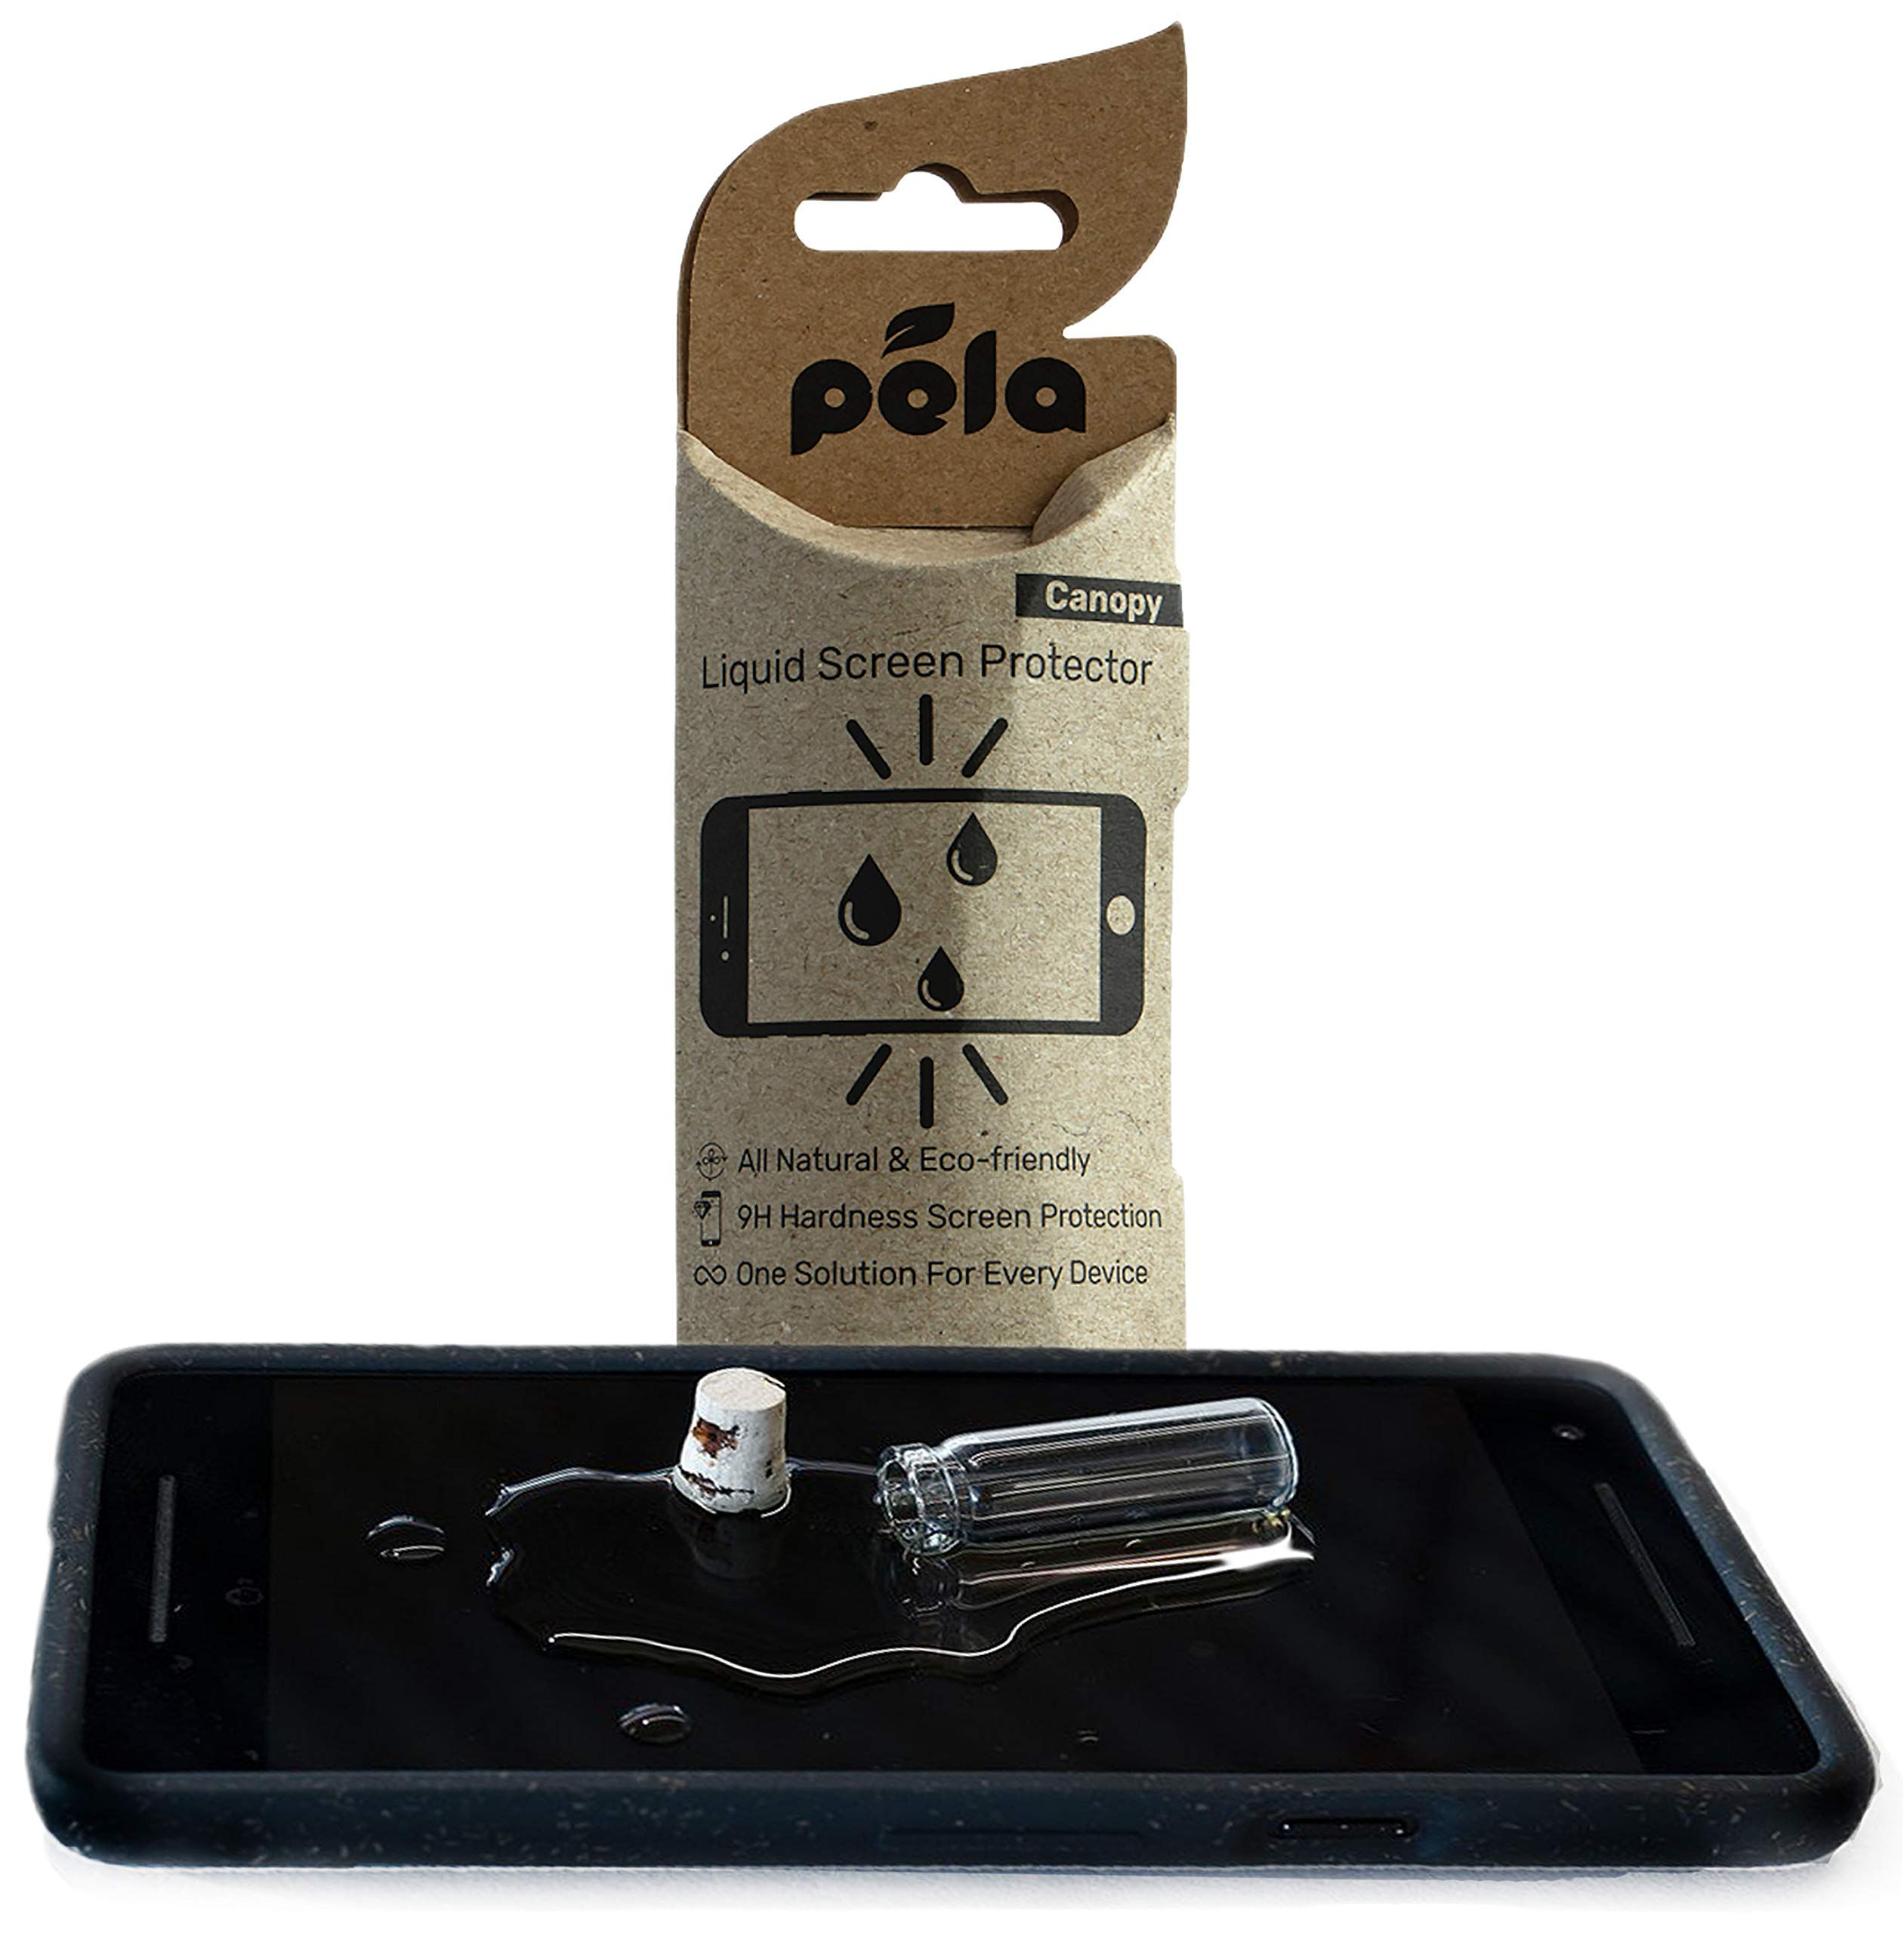
2. What is a Pela screen protector?
A Pela screen protector is a high-quality, durable screen protector made from eco-friendly materials. It is designed to provide excellent protection for your mobile phone’s screen while being kind to the environment. Pela screen protectors are known for their clarity, scratch resistance, and easy application.
3. How do I apply a Pela screen protector?
Applying a Pela screen protector is a simple and straightforward process. Here are the steps:
- Clean your mobile phone’s screen using a microfiber cloth to remove any dust or fingerprints.
- Peel off the protective film from the back of the screen protector.
- Align the screen protector with your phone’s screen, making sure the edges match correctly.
- Gently press down in the center of the screen protector and allow it to adhere to the screen.
- Use a card or your finger to remove any air bubbles by pushing them towards the edge of the screen.
- Finally, give it a final press to ensure a secure fit.
4. Are Pela screen protectors compatible with all mobile phone models?
Pela screen protectors are available in various sizes to fit different mobile phone models. Before purchasing, make sure to check the compatibility of the screen protector with your specific phone model.
5. How long do Pela screen protectors last?
The lifespan of a Pela screen protector can vary depending on the usage and level of protection required. On average, a Pela screen protector can last up to 6 months to a year. However, it is recommended to replace the screen protector if it starts to show signs of wear and tear or becomes damaged.