
In this digital era, touchscreens have become an integral part of our daily lives. Whether it’s navigating through a smartphone or using a tablet for work, we rely heavily on these devices for various tasks. However, sometimes the touch interface may not offer the precision and control that we desire. This is where a stylus comes into play, and Dell Active Stylus is definitely an accessory worth considering. If you’re wondering how to connect a Dell Active Stylus to your device, you’ve come to the right place. In this article, we will guide you through the step-by-step process, highlighting the necessary settings and ensuring a seamless connection. So grab your stylus, and let’s get started!
Inside This Article
- How to Connect a Dell Active Stylus?
- Step 1: Check Compatibility
- Step 2: Insert Batteries
- Step 3: Enable Bluetooth
- Step 4: Pair the Stylus with Your Device
- Step 5: Calibrate the Stylus (Optional)
- Troubleshooting Tips
- Conclusion
- FAQs
How to Connect a Dell Active Stylus?
If you’re the proud owner of a Dell Active Stylus, you may be wondering how to connect it to your device. The Dell Active Stylus is a powerful tool that allows you to easily navigate, draw, and take notes on your touchscreen device. Whether you’re using a Dell laptop, tablet, or 2-in-1 device, connecting the stylus is a straightforward process. In this guide, we’ll walk you through the steps to connect your Dell Active Stylus and start unleashing its full potential.
Before you get started, it’s essential to ensure that your device is compatible with the Dell Active Stylus. Not all Dell laptops, tablets, or 2-in-1s support stylus input, so it’s crucial to verify compatibility. You can check the documentation or specification sheet of your device or reach out to Dell’s customer support for confirmation.
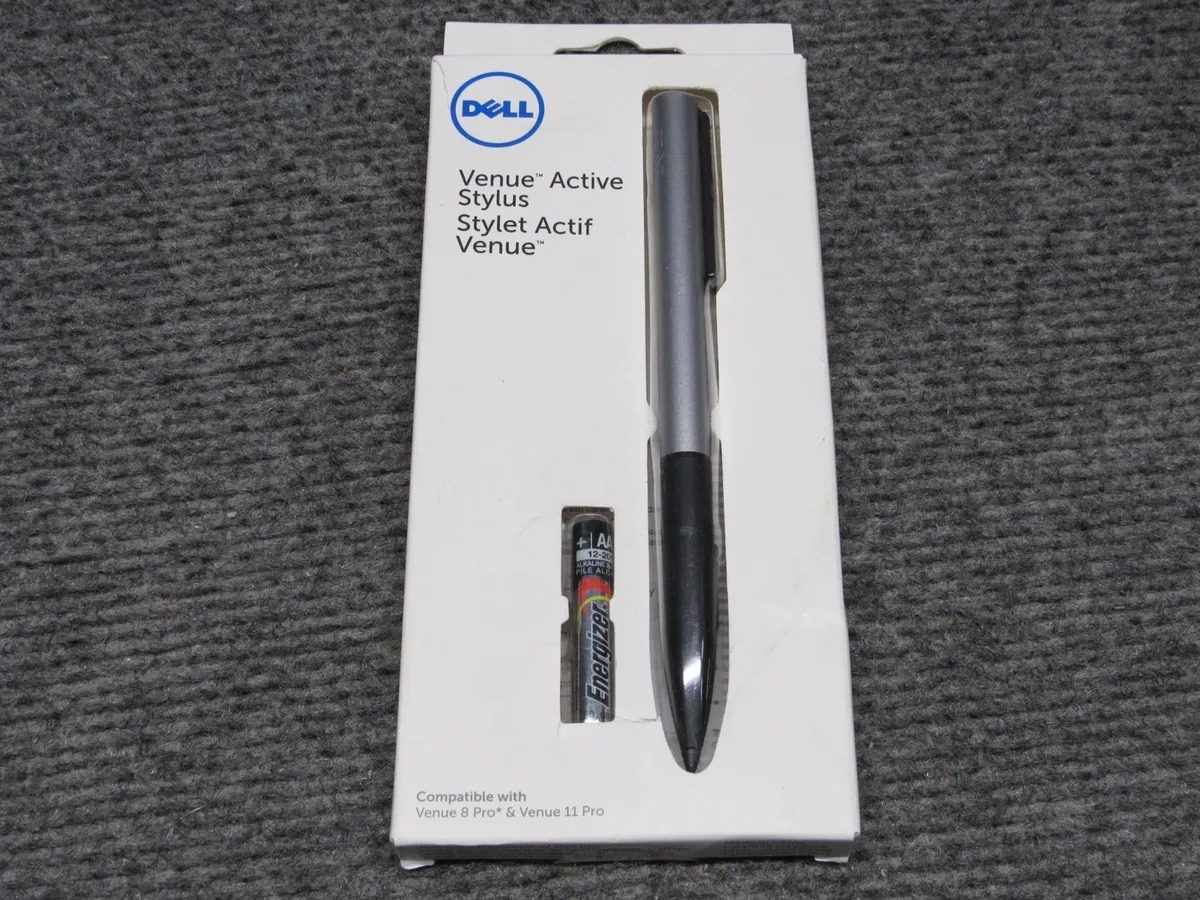
Once you’ve confirmed compatibility, the next step is to insert the batteries into the Dell Active Stylus. Most Dell Active Stylus models use AAAA batteries, so make sure you have those available. Open the stylus by twisting the top or bottom cap, depending on the model, and insert the batteries as indicated. Replace the cap and ensure it is securely in place.
Now that your stylus has power, you’ll need to enable Bluetooth on your device. The Dell Active Stylus uses Bluetooth technology to establish a connection. To enable Bluetooth, go to your device’s settings and find the Bluetooth menu. Toggle the Bluetooth switch to the “On” position. This will allow your device to detect and connect to the Dell Active Stylus.
After enabling Bluetooth, it’s time to pair the Dell Active Stylus with your device. On your device, navigate to the Bluetooth settings menu and search for available devices. Look for the Dell Active Stylus in the list of available devices and select it to start the pairing process. Follow any on-screen prompts to complete the pairing.
Once the pairing is successful, you should see a notification or indication that the Dell Active Stylus is connected to your device. At this point, you can start using the stylus to interact with your touchscreen. If you’re using a drawing or note-taking app, make sure to select the stylus as the input device within the app’s settings.
Some Dell devices may offer an optional calibration process for the stylus. Calibration helps ensure the accuracy of the stylus tip on the screen. If you prefer precise input, it is recommended to calibrate the stylus. Check your device’s settings or the stylus documentation for instructions on how to perform the calibration process.
In the event that you encounter any issues during the connection process, there are a few troubleshooting tips you can try. Make sure the batteries are inserted correctly and have sufficient charge. Restart your device and try the pairing process again. If the issue persists, consult the user manual or Dell’s support resources for further assistance.
Step 1: Check Compatibility
Before you connect your Dell Active Stylus to your device, it is important to ensure compatibility. Not all devices support the use of an active stylus, so it’s essential to verify that your device is compatible before proceeding with the connection process.
To check compatibility, start by referring to the user manual or specification sheet of your device. Look for any mention of active stylus support or compatibility with Dell Active Stylus. You can also visit the manufacturer’s website or contact their customer support for more information.
Additionally, you can check the packaging or product description of your Dell Active Stylus. It usually provides a list of supported devices, operating systems, and specific models that are compatible with the stylus.
If you are unable to find any information regarding compatibility, try searching online forums or community groups where users discuss their experiences with the Dell Active Stylus. Other users may have already tested the stylus on similar devices and can provide valuable insights.
Understanding the compatibility of your device with the Dell Active Stylus is crucial to ensure a smooth and successful connection. Taking the time to check compatibility will save you from potential frustrations or compatibility issues down the line.
Step 2: Insert Batteries
Once you have checked the compatibility of your Dell Active Stylus with your device, the next step is to insert the batteries. The Dell Active Stylus requires batteries for it to function properly. Follow these simple steps to insert the batteries:
- Locate the battery compartment on the Dell Active Stylus. It is usually located towards the top end of the stylus.
- Using your fingers or a small tool, gently slide open the battery compartment cover. Be careful not to apply too much force to avoid damaging the cover or the stylus.
- Inside the battery compartment, you will find a space for the batteries. Typically, the Dell Active Stylus requires AAAA batteries. Take out the required number of AAAA batteries and insert them into the compartment according to the polarity markings indicated.
- Once the batteries are properly inserted, close the battery compartment cover by sliding it back into place until it clicks or snaps shut. Make sure that the cover is securely closed to prevent the batteries from falling out during use.
It is important to note that while inserting the batteries, you should pay attention to the polarity markings to ensure proper alignment. This will prevent any issues with the stylus not functioning or experiencing intermittent connectivity.
With the batteries successfully inserted, your Dell Active Stylus is now ready to be paired with your device and used for a seamless and smooth digital writing and drawing experience.
Step 3: Enable Bluetooth
Enabling Bluetooth on your device is an essential step in connecting your Dell Active Stylus. By turning on Bluetooth, you allow your device to discover and connect to the stylus effortlessly. Here’s how you can enable Bluetooth:
1. Open the settings menu on your device. This can usually be accessed through the main menu or by swiping down from the top of the screen and tapping the settings icon.
2. Look for the “Bluetooth” option in the settings menu and tap on it to enter the Bluetooth settings.
3. You will see a toggle switch next to the Bluetooth option. Tap the toggle switch to enable Bluetooth. The switch should turn green or indicate that Bluetooth is now on.
4. Once you have enabled Bluetooth, your device will start searching for nearby devices to connect to, including the Dell Active Stylus.
Note: If you are connecting the stylus to a Dell laptop or computer, the steps may vary slightly depending on the system configuration. It’s recommended to refer to the device’s user manual for specific instructions on enabling Bluetooth.
Enabling Bluetooth is a crucial step in establishing a connection between your device and the Dell Active Stylus. It allows for seamless communication and ensures that the stylus functions properly with all its features. Make sure to keep Bluetooth enabled whenever you want to use the stylus for a smooth and hassle-free experience.
Step 4: Pair the Stylus with Your Device
After inserting the batteries and enabling Bluetooth, the next step is to pair your Dell Active Stylus with your device. The pairing process may slightly vary depending on the operating system of your device, but the general steps outlined below should guide you through the process:
1. Open the Bluetooth settings on your device: Go to the Settings menu and look for the Bluetooth option. Tap on it to open the Bluetooth settings screen.
2. Turn on the stylus: Make sure the Dell Active Stylus is turned on. You can do this by pressing the power button located on the stylus. Some stylus models may have an LED indicator that will light up when the device is powered on.
3. Search for available devices: On the Bluetooth settings screen, your device will search for nearby Bluetooth devices. Wait for a few seconds until your Dell Active Stylus appears in the list of available devices.
4. Select the stylus: Tap on the name or icon that corresponds to your Dell Active Stylus in the list of available devices. This will initiate the pairing process.
5. Confirm the pairing: Once you select the stylus, your device will attempt to pair with it. You may be prompted to confirm the pairing by entering a passcode or accepting a pairing request. Follow the on-screen instructions to complete the pairing process.
6. Test the connection: After the pairing is successful, test the connection between your device and the Dell Active Stylus. You can do this by using the stylus to draw or write on a suitable app or program that supports stylus input.
Remember to keep your Dell Active Stylus in close proximity to your device during the pairing process to ensure a stable and reliable connection. If the pairing process fails, make sure that Bluetooth is enabled on both the stylus and your device, and repeat the steps mentioned above.
Step 5: Calibrate the Stylus (Optional)
Calibrating your Dell Active Stylus can optimize its performance and accuracy, ensuring a seamless writing and drawing experience. Here are the steps to calibrate your stylus:
-
Open the settings menu on your device and navigate to the “Pen & Windows Ink” or “Pen & Touch” settings.
-
Look for an option related to stylus calibration. It may be labeled as “Calibrate” or “Digitizer Calibration.”
-
Follow the on-screen instructions to complete the calibration process. Typically, this involves tapping the stylus on specific points or drawing lines on the screen.
-
Once the calibration is complete, the device will save the settings and apply them to the stylus.
Calibrating the stylus helps your device accurately interpret the pressure and tilt sensitivity, ensuring smoother and more precise strokes. It is especially useful for tasks that require fine detail, such as digital art or handwriting.
Please note that calibrating the stylus is optional, and in most cases, the default settings should work well for general usage. However, if you find that your stylus is not responding as expected, calibrating it can often resolve the issue.
Troubleshooting Tips
While connecting your Dell Active Stylus to your device is usually a straightforward process, there may be instances when you encounter some difficulties. Don’t worry; we’ve got you covered. Here are some troubleshooting tips to help you resolve common issues:
1. Ensure compatibility: Before troubleshooting, make sure that your Dell Active Stylus is compatible with your device. Check the manufacturer’s specifications or documentation for compatibility information.
2. Check battery levels: If your stylus isn’t working, the batteries may be low or dead. Replace the batteries with new ones and try again. Make sure to insert them correctly, following the polarity indicated in the stylus.
3. Enable Bluetooth: If your stylus connects via Bluetooth, ensure that Bluetooth is turned on and functioning correctly on your device. Check your device settings and enable Bluetooth if it’s disabled.
4. Reset stylus: If you’re experiencing persistent issues with your Dell Active Stylus, try resetting it. Look for a small reset button or pinhole on the stylus and press it using a paperclip or a similar object. This will reset the stylus to its default settings.
5. Re-pair the stylus: If your stylus was previously connected but is no longer working, try removing the stylus from the list of paired devices on your device settings. Then, follow the pairing instructions again to establish a new connection.
6. Calibrate the stylus: If you’re having accuracy issues or the stylus is not responding as expected, you can calibrate it. Look for the calibration option in the stylus settings on your device and follow the on-screen instructions to align the stylus with your screen.
7. Update firmware and drivers: Check the manufacturer’s website for any firmware or driver updates for your stylus and device. Keeping the software up to date can often resolve compatibility issues and improve performance.
8. Try on a different device: If you have access to another compatible device, try connecting the stylus to that device to determine if the issue is with the stylus or the original device. This can help identify the source of the problem.
9. Contact customer support: If all else fails, reach out to Dell’s customer support or consult the user manual for further assistance. They will be able to provide specific troubleshooting steps or offer a solution to your problem.
By following these troubleshooting tips, you should be able to overcome most common issues when connecting your Dell Active Stylus. Remember, patience and persistence can go a long way in resolving technical glitches, so don’t be discouraged. Soon enough, you’ll be enjoying the full functionality of your stylus and unleashing your creativity.
After exploring the process of connecting a Dell Active Stylus, we can conclude that it is a straightforward and user-friendly procedure. By following these simple steps, you can unlock the full potential of your stylus and enjoy a more precise and convenient touch experience on your Dell device.
Remember to ensure your device is compatible with the Dell Active Stylus and that you have fully charged the stylus before attempting to connect it. Additionally, check for any software updates or driver installations that may be required for optimal functionality.
By leveraging the power of your Dell Active Stylus, you can take your creativity, productivity, and efficiency to new heights. Whether you’re an artist, a note-taker, or someone who simply enjoys the versatility of using a stylus, the Dell Active Stylus is a valuable accessory that enhances your overall mobile experience.
So, what are you waiting for? Give it a try and experience the seamless integration of technology and creativity with the Dell Active Stylus.
FAQs
1. How do I connect a Dell Active Stylus to my device?
To connect a Dell Active Stylus to your device, follow these steps:
– Ensure your device is compatible with the Dell Active Stylus.
– Insert the battery into the stylus if needed.
– Enable Bluetooth on your device.
– Press and hold the button on the stylus until the LED light starts blinking.
– On your device, go to the Bluetooth settings and search for available devices.
– Select the Dell Active Stylus from the list of devices to pair it.
– Once connected, you can start using the stylus for drawing, writing, and other tasks.
2. Can I use a Dell Active Stylus with any device?
No, Dell Active Stylus is designed specifically for compatible Dell devices. It may not work properly or be compatible with other brands or models of devices. It is always recommended to check the compatibility of the stylus with your device before purchasing.
3. How do I know if my device is compatible with a Dell Active Stylus?
Dell provides a list of compatible devices on their website. You can refer to this list to check if your device is supported. Additionally, you can check your device’s specifications or contact Dell customer support for confirmation.
4. Is the Dell Active Stylus rechargeable?
Yes, most models of the Dell Active Stylus are rechargeable. They usually come with a built-in battery that can be charged using a USB cable or a charging dock. The stylus may provide usage time ranging from a few hours to several days, depending on the model and usage patterns.
5. Can I use the Dell Active Stylus for handwriting recognition on my device?
Yes, the Dell Active Stylus can be used for handwriting recognition on supported devices. It allows you to write naturally on the screen and converts your handwriting into digital text. However, the availability and functionality of handwriting recognition may vary depending on the device and software applications used.