
Connecting an OTG (On-The-Go) cable to an Android phone opens up a whole new world of possibilities. With an OTG cable, you can connect various devices such as USB flash drives, external hard drives, mouse, keyboard, game controllers, and more directly to your Android phone. This ability to connect external devices to your smartphone can greatly enhance its functionality and convenience. Whether you want to transfer files, use a keyboard for typing, or play games with a controller, an OTG cable can make it all possible. In this article, we will guide you on how to properly connect an OTG cable to your Android phone and explore the endless possibilities that come with it. So, get ready to unlock the full potential of your Android device with an OTG cable!
Inside This Article
- Overview
- Step 1: Check compatibility
- Step 2: Connect the OTG cable to the Android phone
- Step 3: Verify the connection
- Step 4: Using OTG functionality on your Android phone
- Conclusion
- FAQs
Overview
Connecting an OTG (On-The-Go) cable to an Android phone opens up a world of possibilities. With an OTG cable, you can connect various external devices to your Android phone, such as USB drives, keyboards, mice, game controllers, and more. This enables you to expand the functionality of your phone and enhance your productivity or entertainment experience. In this article, we will guide you through the process of connecting an OTG cable to an Android phone.
Before diving into the steps, it’s important to note that not all Android phones support OTG functionality. Some older or budget models may not have the necessary hardware or software capabilities to support external device connections. Therefore, the first step is to check the compatibility of your Android phone with OTG.
If your Android phone supports OTG, the next step is to physically connect the OTG cable to your phone. The OTG cable has a micro USB or USB Type-C connector on one end, which you plug into your phone’s charging port. The other end of the cable has a USB Type-A port, which you can use to connect external devices.
After connecting the OTG cable to your Android phone, you need to verify that the connection is successful. Depending on the Android version and device model, you may receive a notification or see a pop-up window indicating that an external device is connected. Additionally, you can go to the Settings menu and check the “Connected Devices” or “OTG” section to confirm the connection.
Once the OTG cable is successfully connected, you can start utilizing its functionality on your Android phone. For example, you can connect a USB drive to your phone and access the files stored on it using a file manager app. You can also connect a keyboard or mouse to improve your typing and navigation experience.
It’s worth mentioning that not all external devices may be compatible with your Android phone. Some devices may require specific drivers or software to work properly. Therefore, it’s recommended to research the compatibility and functionality of the devices you intend to connect before making a purchase.
Step 1: Check compatibility
Before connecting an OTG cable to your Android phone, it is important to first check its compatibility. Not all Android devices support OTG functionality, so it’s crucial to ensure that your phone is capable of connecting to external devices through an OTG cable.
To check if your Android phone is OTG compatible, you can follow these simple steps:
- Make sure your Android phone is running on Android OS version 4.0 or later. Older versions may not have native support for OTG.
- Search for your phone’s specifications online or refer to the user manual to see if it specifically mentions OTG compatibility.
- If you don’t have access to the specifications or manual, you can use a third-party app from the Google Play Store, such as “USB OTG Checker,” to determine if your phone supports OTG functionality.
Once you have confirmed that your Android phone is OTG compatible, you can proceed to the next step of connecting the OTG cable to your device.
Step 2: Connect the OTG cable to the Android phone
Once you have confirmed the compatibility of your Android phone with an OTG cable, it’s time to connect the cable to your device. Follow these steps to establish the connection:
1. Start by identifying the micro USB port on your Android phone. This is the small rectangular port usually located at the bottom or side of the phone. Some newer Android phones may have a USB-C port instead.
2. Take one end of the OTG cable, which is the micro USB or USB-C end, and insert it into the corresponding port on your phone. Make sure to align the connector properly and apply gentle pressure to ensure a secure connection.
3. Once the cable is securely connected to your Android phone, take the other end of the cable, which is the female USB port, and plug in the USB device you want to use. This could be a USB flash drive, a keyboard, a mouse, or any other USB peripheral that is compatible with your phone.
4. After connecting the USB device to the OTG cable, your Android phone should recognize it automatically. A notification may appear on your phone’s screen, indicating that a USB device has been connected. You may need to unlock your phone and swipe down the notification panel to view the notification.
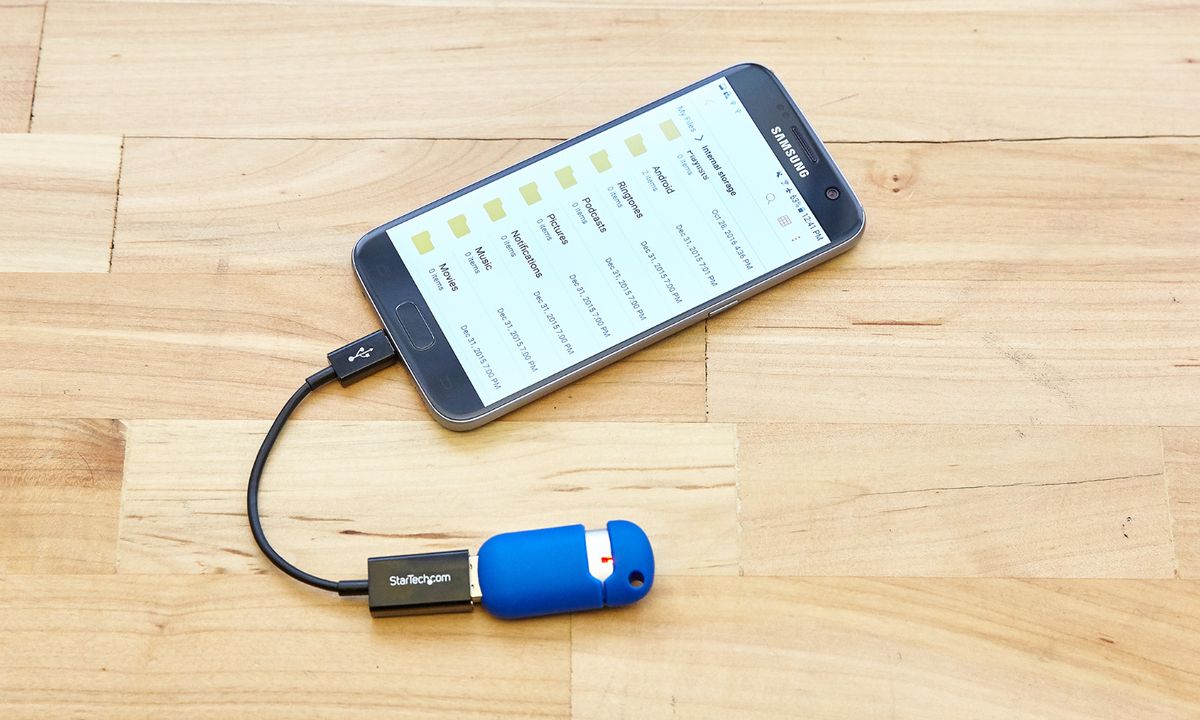
5. Now that the OTG cable is successfully connected to your Android phone and the USB device is recognized, you can start using the connected device. For example, if you connected a USB flash drive, you can access its files and transfer data between your phone and the flash drive.
6. When you are done using the USB device, safely disconnect it from your Android phone. To do this, go to the settings of your phone and find the option to eject or unmount the USB device. Follow the on-screen instructions to safely remove the device before physically disconnecting it from the OTG cable.
That’s it! You have now successfully connected an OTG cable to your Android phone. Enjoy the expanded functionality and convenience that comes with connecting various USB devices to your device.
Step 3: Verify the connection
Once you have connected the OTG cable to your Android phone, it is crucial to verify if the connection is successful. This will ensure that you can proceed with using the OTG functionality and accessing external devices.
The first thing you can do to verify the connection is to check if your Android phone recognizes the connected OTG cable. To do this, go to your device’s settings and navigate to the “Storage” or “Storage & USB” section. Look for a notification or indication that shows the OTG connection. It could be labeled as “USB OTG” or “USB storage.” If you see this indication, it means that your phone has successfully detected the OTG cable.
Another way to verify the connection is to connect a compatible USB device, such as a USB flash drive or a keyboard, to the OTG cable. Once the device is connected, your Android phone should recognize it and display a notification or pop-up asking you to open the connected device. This is an excellent confirmation that the OTG connection is working correctly.
If you are unsure whether the connected device is recognized or not, you can check the storage settings again. Look for the connected device’s name to appear in the list of available storage options. You can also try accessing the external device’s files or functions through apps such as file managers or keyboard apps to ensure that the OTG connection is functioning as expected.
It is important to note that some Android phones may not support certain USB devices or have limitations in terms of compatible file systems. If the connected device is not recognized or unable to access properly, it is recommended to double-check your phone’s compatibility with the specific USB device or consult your phone’s user manual or manufacturer’s website for more information.
Verifying the connection is an essential step to ensure that your Android phone can successfully utilize the OTG functionality and interact with external devices. By following the steps mentioned above and confirming the recognition of the connected OTG cable and USB devices, you can take full advantage of the capabilities offered by OTG technology.
Step 4: Using OTG functionality on your Android phone
Now that you have successfully connected the OTG cable to your Android phone, it’s time to explore the various functionalities it offers. Here are some of the ways you can make the most out of the OTG functionality on your device:
1. USB On-The-Go Storage: One of the most common uses of an OTG cable is to connect USB storage devices to your Android phone. You can easily transfer files, documents, photos, and videos between your phone and the connected USB device. It’s like having extra storage space that you can always carry with you.
2. External Keyboard or Mouse: If you find it inconvenient to type on your phone’s touchscreen, you can connect an external keyboard using the OTG cable. This will provide you with a more comfortable and efficient typing experience. Similarly, you can also connect a mouse for easier navigation and precise control on your Android phone.
3. Game Controllers: Are you an avid mobile gamer? With the help of an OTG cable, you can connect gaming controllers to your Android phone and enjoy a console-like gaming experience. Whether it’s a gamepad or a joystick, you can easily connect it to your phone and play your favorite games with better control and responsiveness.
4. MIDI Devices: If you have a passion for music production or enjoy playing musical instruments, you can connect MIDI devices to your Android phone via an OTG cable. This allows you to use MIDI keyboards, controllers, or other MIDI-compatible devices to create music, record tracks, and unleash your creativity on the go.
5. Printers and Scanners: Need to print or scan a document urgently? No problem! Just connect your printer or scanner to your Android phone using an OTG cable, and you can easily print or scan documents directly from your phone. This is especially useful when you’re away from a computer or a traditional printer/scanner setup.
6. USB-powered Devices: Another advantage of using an OTG cable is that you can connect USB-powered devices to your Android phone. Whether it’s a mini fan, LED light, or any other compatible USB-powered device, you can conveniently use it with your phone without the need for a separate power source.
These are just some of the many ways you can utilize the OTG functionality on your Android phone. The possibilities are endless, and it all depends on your needs and creativity.
Remember to disconnect the OTG cable from your Android phone when you’re done using it to prevent any potential damage or power drain on your device.
Conclusion
In conclusion, connecting an OTG cable to an Android phone opens up a world of possibilities for users. It allows for the seamless connection of various external devices and accessories, providing enhanced functionality and convenience. Whether it’s transferring files, connecting USB peripherals like keyboards or mice, or even using a game controller for gaming, the OTG cable enables users to expand the capabilities of their Android devices.
By following the simple steps outlined in this article, users can easily connect their OTG cable to their Android phone and start enjoying the benefits it offers. From increasing productivity to enabling new experiences, the versatility of an OTG cable makes it a must-have accessory for any Android user.
So, don’t hesitate to grab an OTG cable and explore the endless possibilities that it brings to your Android phone. Discover the convenience and power of connecting external devices and accessories, and enhance your overall mobile experience with this simple yet effective solution.
FAQs
1. How do I connect an OTG cable to my Android phone?
To connect an OTG (On-The-Go) cable to your Android phone, follow these steps:
- Ensure that your Android phone supports OTG functionality. Most modern Android phones have this feature.
- Get an OTG cable. This cable has a micro USB port on one end and a standard USB port on the other.
- Take the micro USB end of the OTG cable and plug it into the micro USB port on your Android phone.
- Take the standard USB end of the OTG cable and connect your desired accessory or device to it, such as a USB flash drive, keyboard, or mouse.
- Your Android phone will detect the connected accessory or device and enable its functionality.
2. What can I do with an OTG cable on my Android phone?
An OTG cable allows you to connect various USB accessories and devices to your Android phone. Some common uses of an OTG cable include:
- Connecting a USB flash drive to transfer files between your Android phone and the flash drive.
- Using a USB keyboard or mouse for typing or navigation.
- Connecting a game controller for gaming on your Android phone.
- Attaching a USB microphone for audio recording or voice calls.
- Connecting a USB hub to expand the number of USB ports on your Android phone.
3. Does my Android phone need any special settings to use an OTG cable?
In most cases, you don’t need to make any special settings on your Android phone to use an OTG cable. Once you connect the OTG cable and the accessory or device, your phone should automatically detect the connection and enable its functionality. However, some Android devices may require you to enable OTG support in the settings menu. Consult your phone’s user manual or the manufacturer’s website for specific instructions on enabling OTG support.
4. Can I charge my Android phone while using an OTG cable?
Most Android phones do not support simultaneous charging and data transfer when using an OTG cable. However, there are some exceptions. Some higher-end Android phones have a special feature called “OTG charging” that allows you to charge your phone while using an OTG cable. Check your phone’s specifications or consult the manufacturer for more information on whether your device supports this feature.
5. Are all OTG cables the same?
In general, most OTG cables function in the same way, allowing you to connect USB accessories and devices to your Android phone. However, there can be variations in terms of build quality, cable length, and connector types. It is important to choose an OTG cable that is compatible with your Android phone’s micro USB or USB-C port. Additionally, if you need to connect specific accessories or devices that require a specific USB connector type (such as USB-A or USB-B), make sure the OTG cable has the appropriate connectors.