
Are you wondering how to set up your headset mic on Windows 10? Whether you’re a gamer, a content creator, or someone who attends online meetings frequently, having a properly functioning headset mic is essential. With Windows 10, setting up your headset mic is a straightforward process that can be done in just a few minutes. In this article, we will guide you through the step-by-step process of setting up your headset mic on Windows 10, ensuring that you can start using it right away. We will cover everything from checking the hardware connections to adjusting the microphone settings in Windows 10. So, if you’re ready to get your headset mic up and running, let’s dive in!
Inside This Article
- Overview
- Step 1: Check Hardware Compatibility
- Step 2: Connect the Headset to Your Computer
- Step 3: Configure Audio Settings
- Step 4: Test the Microphone
- Troubleshooting Tips
- Conclusion
- FAQs
Overview
Setting up a headset mic in Windows 10 is essential for clear and convenient communication, whether it’s for gaming, video conferencing, or recording audio. With Windows 10, it’s simple to configure your headset microphone and ensure it works properly. In this guide, we’ll walk you through the necessary steps to set up your headset mic in Windows 10.
Before diving into the setup process, it’s important to check if your headset is compatible with Windows 10. Most modern headsets are plug-and-play, meaning they should be recognized by your computer without any additional software installations. However, some older or specialized headsets may require driver installations for full functionality.
To check for compatibility, start by connecting your headset to your computer’s audio/microphone ports. If Windows 10 recognizes your headset and installs the necessary drivers automatically, you’re good to go. If not, visit the manufacturer’s website to download and install the appropriate drivers before proceeding.
Next, you’ll need to adjust the microphone privacy settings in Windows 10. By default, Windows 10 may have microphone access disabled for certain applications, so it’s essential to enable it for your headset mic to function correctly. To do this, follow these steps:
- Open the Start menu and click on “Settings”.
- Select the “Privacy” option.
- In the left sidebar, click on “Microphone”.
- Ensure that the “Allow apps to access your microphone” option is turned on.
- Scroll down and make sure that the applications you want to use with the headset mic have microphone access enabled.
Once you’ve adjusted the privacy settings, it’s time to configure the microphone settings in Windows 10. Here’s how:
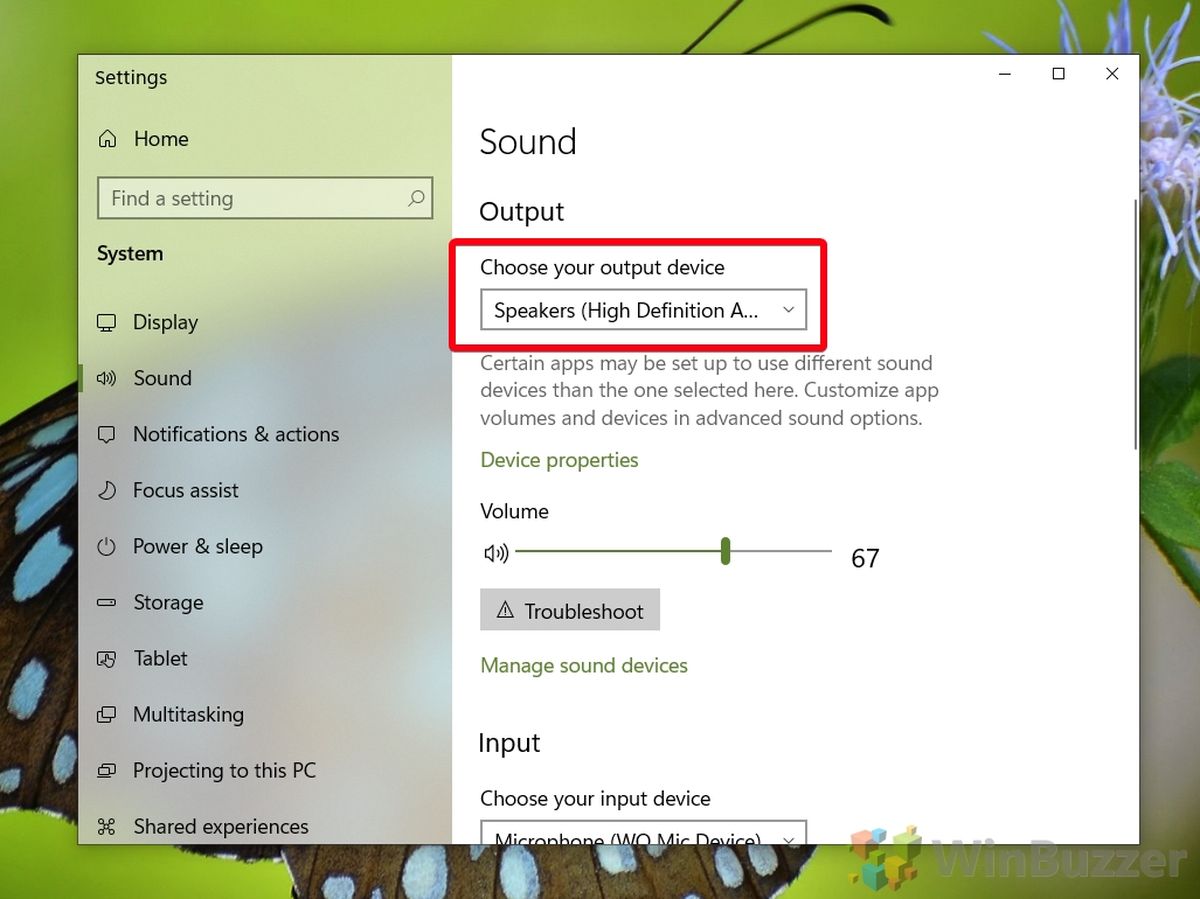
- Right-click on the Volume icon on the taskbar and select Open Sound settings.
- In the Sound settings window, scroll down to the “Input” section.
- Select your headset microphone from the list of available input devices.
- Adjust the microphone volume as needed using the slider.
After completing these steps, it’s crucial to test the headset microphone to ensure it’s working correctly. Here’s how:
- Open the Start menu and click on “Settings”.
- Select the “System” option.
- In the left sidebar, click on “Sound”.
- Scroll down to the “Input” section and make sure your headset microphone is selected.
- Speak into the microphone and observe the input level indicator. It should react to your voice.
By following these steps, you’ll be able to set up your headset microphone in Windows 10 and ensure it’s functioning properly. Remember to periodically check for driver updates from the manufacturer to maintain optimal performance.
Step 1: Check Hardware Compatibility
When setting up a headset microphone in Windows 10, the first step is to ensure that your hardware is compatible. Not all headsets are designed to work with all devices, so it’s important to verify compatibility before proceeding further.
Start by checking the specifications of your headset to ensure that it is compatible with Windows 10. Look for information regarding operating system compatibility or any specific software requirements. This will help you determine if the headset is designed to work with your version of Windows.
In addition to checking the specifications, it is also important to inspect the physical connectors on your headset. Most headsets utilize a 3.5mm audio jack or a USB connector. Make sure that your computer has the corresponding port for your headset. If your computer does not have the necessary ports, you may need to purchase an adapter to connect your headset.
Once you have verified the compatibility of your headset, you can proceed to the next step of setting up the microphone in Windows 10.
Step 2: Connect the Headset to Your Computer
Once you have determined the compatibility of your headset with Windows 10, it’s time to connect it to your computer. Follow these simple steps to ensure a proper connection:
1. Identify the headset ports: Most headsets come with two connectors – one for audio and one for the microphone. Look for the corresponding ports on your computer. Typically, the audio port is color-coded green, while the microphone port is pink.
2. Insert the audio connector: Take the audio connector of your headset, which is usually marked with an icon of headphones, and plug it into the audio port on your computer. Make sure it is inserted all the way in to establish a secure connection.
3. Connect the microphone: Take the microphone connector of your headset, which is usually marked with an icon of a microphone, and plug it into the microphone port on your computer. Like the audio connector, ensure that it is fully inserted to maintain a stable connection.
4. Check the connections: Once both connectors are inserted properly, give them a gentle tug to confirm that they are securely attached. A loose connection can result in audio issues or a malfunctioning microphone.
5. Adjust the headset: Put on the headset and adjust it to fit comfortably on your head. Ensure that the microphone is positioned correctly, usually near your mouth, for optimal performance.
6. Test the audio and microphone: Now that your headset is connected, it’s important to test both the audio output and microphone functionality. You can do this by playing a song or video to check the audio and using the Windows sound recorder or a communication app to test the microphone.
By following these steps, you should now have your headset successfully connected to your Windows 10 computer. Keep in mind that some headsets may have additional features or settings that need to be adjusted to optimize their performance. Refer to the manufacturer’s instructions or visit their website for more specific guidance.
Step 3: Configure Audio Settings
After checking for headset compatibility and adjusting the microphone privacy settings, it’s time to configure the audio settings on your Windows 10 system. Follow the steps below to ensure optimal performance of your headset microphone:
1. Open the Windows 10 Sound settings by either right-clicking on the speaker icon in the taskbar and selecting “Sounds” or by searching for “Sound” in the Start menu.
2. In the Sound settings window, navigate to the “Recording” tab. Here, you’ll see a list of available recording devices.
3. Locate your headset microphone from the list of recording devices. It may be listed as the name of your headset model or as a generic “Microphone” option. Right-click on your headset microphone and select “Properties” from the context menu.
4. In the Properties window, go to the “Levels” tab. Here, you can adjust the microphone volume by moving the slider. Start at a moderate level and test your microphone to ensure the volume is appropriate for your needs.
5. Next, navigate to the “Enhancements” tab. Here, you’ll find various audio enhancements that can improve the quality of your microphone recording. Experiment with different enhancements to find the ones that work best for you. If you prefer the original audio quality, you can leave this tab unchanged.
6. Finally, click on the “Advanced” tab. In this tab, you’ll find more advanced settings for your microphone. It’s recommended to leave most of these settings at their default values, but you can explore them further if you’re an advanced user and want to fine-tune your microphone settings.
7. Once you’ve configured the audio settings to your satisfaction, click “OK” to save the changes.
By following these steps, you can ensure that your headset microphone is properly configured in Windows 10. Remember to periodically check your audio settings to make any necessary adjustments for the best performance.
Step 4: Test the Microphone
After setting up your headset microphone in Windows 10, it is crucial to test its functionality to ensure that it is working properly. Follow the steps below to test your microphone:
1. Open the “Sound” settings by right-clicking on the speaker icon in the taskbar and selecting “Sounds” from the context menu.
2. In the “Sound” window, navigate to the “Recording” tab, which displays all the available recording devices on your computer.
3. Locate your headset microphone in the list of recording devices. It should be displayed with its respective name.
4. Once you have identified your headset microphone, speak into it or make a sound to check if the microphone is picking up the audio input. You should see the green levels next to the microphone icon move as you speak or make sounds.
5. If the microphone levels are not moving or the microphone is not picking up any sound, ensure that the headset is properly connected to the computer. Try reconnecting the headset or using a different USB or audio port.
6. You can also adjust the microphone volume by right-clicking on the microphone icon and selecting “Properties.” In the “Levels” tab, you can increase the microphone volume if it is too low or decrease it if it is too loud.
7. Once you have confirmed that the microphone is picking up sound and the levels are moving, click “Apply” and then “OK” to save the changes.
8. To further test the microphone, you can use the built-in voice recorder or any application that requires microphone input, such as video calling software or audio recording programs.
By following these steps, you can ensure that your headset microphone is set up correctly and is functioning as expected. Testing the microphone not only allows you to verify its functionality but also gives you the opportunity to make any necessary adjustments to optimize the audio input.
Troubleshooting Tips
If you’re facing issues with setting up your headset microphone in Windows 10, don’t worry – we’ve got you covered. Here are some troubleshooting tips to help you get your headset mic working properly.
1. Check the headset compatibility: Ensure that your headset is compatible with Windows 10. Check the manufacturer’s website or product documentation to confirm compatibility.
2. Adjust microphone privacy settings: In Windows 10, there are privacy settings that control access to your microphone. Go to “Settings” and select “Privacy.” Under the “Microphone” section, ensure that the “Allow apps to access your microphone” option is turned on.
3. Configure microphone settings in Windows 10: Open the “Sound” settings by right-clicking on the speaker icon in the taskbar and selecting “Sounds.” Go to the “Recording” tab and select your headset microphone. Click on “Properties” and navigate to the “Levels” tab. Ensure that the microphone volume is set to an appropriate level and that it is not muted.
4. Test the headset microphone: To check if your headset microphone is working properly, you can use the built-in Windows 10 voice recorder or any other application that utilizes the microphone. Record a short audio clip and play it back to test the recording quality. If the audio sounds clear and the microphone picks up your voice correctly, then it is functioning as expected.
5. Update audio drivers: Outdated or incompatible audio drivers can cause issues with your headset microphone. Visit the manufacturer’s website or use Windows Update to check for and install the latest drivers for your audio device.
6. Check physical connections: Ensure that your headset is properly connected to your computer. If you’re using a wired headset, check that the audio and microphone plugs are securely plugged into the appropriate ports. For wireless headsets, ensure that the wireless receiver is connected correctly and that the headset is within range of the receiver.
7. Try a different USB port or audio jack: If you’re using a USB headset, try connecting it to a different USB port on your computer. For wired headsets, try plugging them into different audio jacks to rule out any hardware issues with the port or jack you were previously using.
8. Restart your computer: Sometimes, a simple restart can resolve minor software glitches that may be causing issues with your headset microphone. Restart your computer and try setting up the headset microphone again.
By following these troubleshooting tips, you should be able to resolve most common issues with setting up your headset microphone in Windows 10. If the problem persists, you may need to contact the manufacturer’s support for further assistance.
Conclusion
Setting up a headset microphone on Windows 10 is a fairly simple process that can greatly enhance your audio experience. By following the steps outlined in this guide, you should now have a clear understanding of how to configure your headset mic and troubleshoot any issues that may arise.
Remember to check your audio settings, select the correct input device, and adjust the microphone levels to ensure optimal performance. Whether you’re using your headset for gaming, online meetings, or recording purposes, having a properly set up mic can make a world of difference in terms of sound quality and clarity.
With a functioning headset microphone, you’ll be able to communicate clearly with others, enjoy immersive gaming experiences, and create high-quality audio content. So, go ahead and give your headset mic the configuration it deserves, and get ready to make the most out of your audio adventures!
FAQs
Q: Can I use any headset with Windows 10?
A: Yes, you can use most headsets with Windows 10 as long as they are compatible with your PC’s audio port or USB port.
Q: How do I set up a headset microphone on Windows 10?
A: To set up a headset microphone on Windows 10, first, plug your headset into the appropriate audio port on your PC. Then, right-click on the volume icon in the taskbar, select “Sounds,” go to the “Recording” tab, and set the headset microphone as the default recording device.
Q: Why is my headset microphone not working on Windows 10?
A: There could be several reasons why your headset microphone is not working on Windows 10. It could be due to a hardware issue, incorrect audio settings, or driver problems. Try troubleshooting steps such as checking the connections, updating your audio drivers, and adjusting the sound settings to address the issue.
Q: How can I test if my headset microphone is working on Windows 10?
A: To test if your headset microphone is working on Windows 10, you can use the built-in Voice Recorder app. Simply open the app, hit the “Record” button, and speak into the headset microphone. After recording, play back the audio to check if the microphone is capturing sound properly.
Q: Can I use a headset with a single audio jack on a Windows 10 PC?
A: Yes, if your Windows 10 PC has a combo audio jack that supports both audio output and microphone input, you can use a headset with a single audio jack. However, you will need to use a headset splitter adapter to separate the audio and microphone signals and connect them to the appropriate ports on your PC.