
Are you tired of seeing your beautiful photos online without any credit or recognition? Watermarking your photos can be a great way to protect your work and ensure that you get the credit you deserve. If you own an iPhone, you’ll be happy to know that there are plenty of apps available that allow you to easily add watermarks to your photos right from your device. In this article, we will explore how to watermark photos on iPhone using some of the best apps available. Whether you’re a professional photographer or just someone who loves taking pictures, adding a watermark can help safeguard your images and showcase your talent. So, let’s dive in and discover how to add a personal touch to your photos with watermarks on your iPhone.
Inside This Article
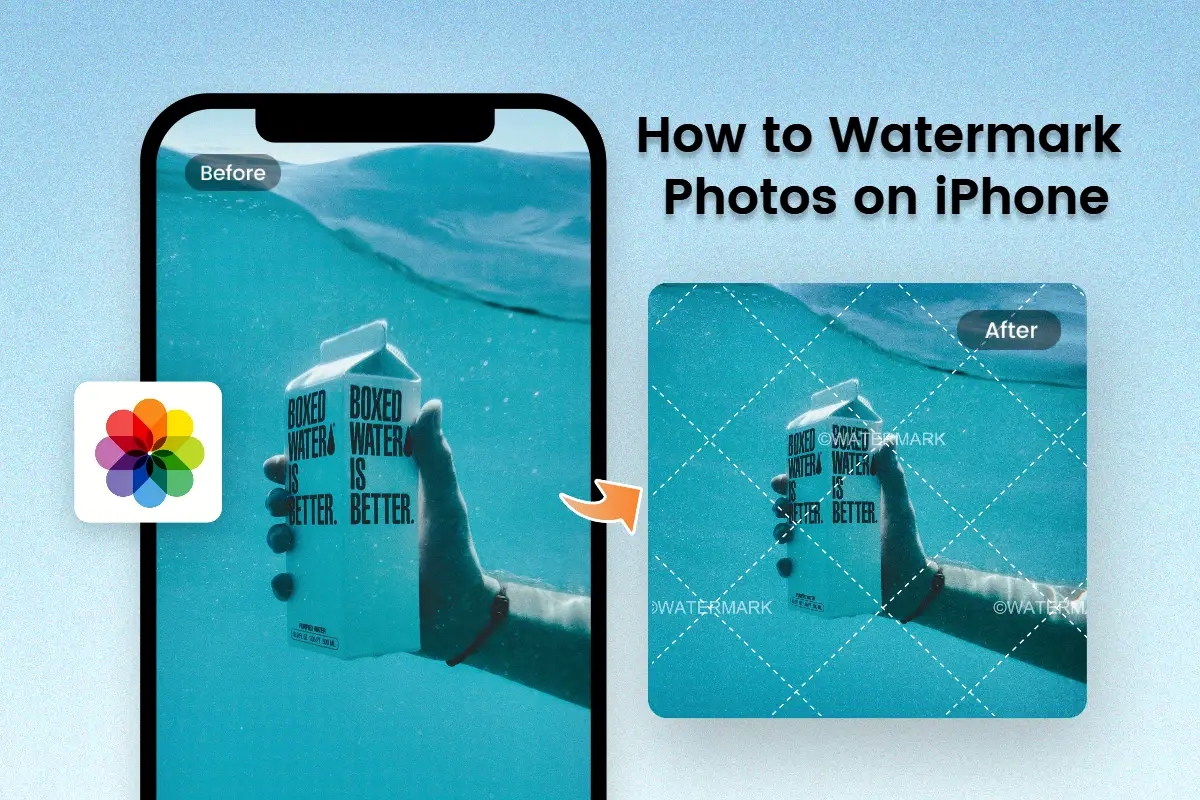
Overview
Watermarking photos on your iPhone is a simple yet effective way to protect your images from unauthorized use and ensure proper attribution. Whether you’re a professional photographer or just someone who values their visual creations, adding a watermark adds a layer of security and ownership to your photos.
There are several methods available for watermarking photos on your iPhone. In this article, we will explore two popular options: using the Markup tool and utilizing a dedicated watermark app. Both methods have their own advantages and can be easily implemented, even by those without advanced technical knowledge.
The Markup tool is a built-in feature of the iPhone’s Photos app, allowing you to draw, highlight, and add text to your photos. It provides a quick and convenient way to customize your watermark and apply it to your images without the need for any additional software. On the other hand, dedicated watermark apps offer more advanced features and flexibility in terms of customizing your watermark design and positioning.
Whether you choose to use the Markup tool or a watermark app, the process typically involves selecting the photo you want to watermark, customizing the watermark settings, and applying the watermark to the image. By following a few simple steps, you can significantly enhance the security and recognition of your photos.
Now that we’ve covered the basics, let’s move on to the specific methods of adding a watermark to your photos on an iPhone. The following sections will guide you through the steps for using the Markup tool and a watermark app, as well as customizing the watermark settings to suit your preferences.
Using the Markup Tool
Did you know that you can easily watermark your photos directly on your iPhone using the Markup tool? This built-in feature allows you to add personalized watermarks to your photos without the need for any third-party applications. Whether you want to protect your images or add a professional touch to your work, the Markup tool has got you covered.
To use the Markup tool for watermarking, simply follow these steps:
- Open the Photos app on your iPhone and select the photo you want to watermark.
- Tap the Edit button at the top-right corner of the screen.
- In the editing options, tap the three-dot icon and select Markup from the dropdown menu.
- The Markup editor will appear with a variety of tools at the bottom.
- Tap the + icon at the bottom-right corner and select Text in the popup menu.
- A text box will appear on your photo, allowing you to enter your desired watermark text.
- Customize the text by tapping the text box and using the controls that appear.
- Drag and position the text box to the desired location on the photo.
- Tap Done when you’re finished with the watermarking process.
- Tap the Save button to save the edited photo with the watermark.
The Markup tool also provides additional functionalities to enhance your photos. You can change the font, size, and color of the text, as well as add shapes, arrows, and even your signature. These features come in handy when you want to create custom watermarks that truly represent your personal or professional brand.
Keep in mind that while the Markup tool is a convenient option for adding watermarks, it may have limitations compared to dedicated watermarking apps. If you require more advanced features such as batch processing or automation, you may want to consider exploring third-party apps specifically designed for watermarking purposes.
With the Markup tool’s ease of use and seamless integration with the Photos app, watermarking your photos on iPhone has never been simpler. Give it a try and protect your image content or add that professional touch to your photographic masterpieces.
Using a Watermark App
If you’re looking for a more convenient and efficient way to watermark photos on your iPhone, using a watermark app is a great option. There are several apps available on the App Store that offer powerful features to help you add watermarks to your photos with ease.
One popular app is “Watermark Photo+”. This user-friendly app allows you to add custom watermarks to your photos in just a few simple steps. Here’s how you can use it:
- First, download and install the “Watermark Photo+” app from the App Store.
- Open the app and tap on the “Photo” button to select the photo you want to watermark from your iPhone’s photo library.
- Once you’ve chosen the photo, tap on the “Edit” button to access the editing tools.
- From the editing tools, tap on the “Watermark” option.
- Here, you can choose to add either a text watermark or an image watermark.
- If you choose to add a text watermark, you can customize the text, font, size, color, opacity, and position of the watermark on the photo.
- If you prefer to add an image watermark, you can select the image from your photo library and adjust its size and position on the photo.
- Once you’re satisfied with the watermark settings, tap on the “Apply” button to save the changes to your photo.
- Finally, you can save the watermarked photo to your iPhone’s photo library or share it directly on social media platforms.
Using a watermark app like “Watermark Photo+” offers you a range of customization options to add unique watermarks to your photos. It allows you to protect your images from unauthorized use and also adds a professional touch to your photography.
Remember to choose a watermark that is subtle yet visible, so it doesn’t distract from the main subject of your photo. Experiment with different positions and opacity levels to find the perfect placement for your watermark.
With the help of a dedicated watermark app, you can easily add watermarks to your photos on your iPhone, saving you time and effort in the process. Give it a try and protect your photos with personalized watermarks!
Customizing Watermark Settings
When it comes to watermarking photos on your iPhone, it’s essential to have control over the appearance and positioning of the watermark. Customizing watermark settings allows you to add a personal touch and ensure that your photos are protected. Here are some tips to help you customize your watermark settings:
1. Choose the Right Watermark: Select a watermark that represents your brand or style. It can be your logo, a signature, or even a copyright symbol. Make sure it is clearly visible and doesn’t overpower the image.
2. Adjust the Opacity: Depending on the look you want to achieve, adjust the opacity of the watermark. This can be done by making it semi-transparent, blending it seamlessly with the image while still being noticeable.
3. Positioning: Place the watermark strategically to avoid obstructing important elements in the photo. Most watermarking tools allow you to position the watermark in different corners or align it horizontally or vertically across the image.
4. Resize the Watermark: Resize the watermark to ensure it’s proportionate to your photo. It should be large enough to be visible but not so big that it distracts from the main subject of the image.
5. Font and Text Options: Customize the font type, size, and color of the text used in the watermark. Experiment with different fonts and colors to find the one that best complements your brand or personal style.
6. Batch Watermarking: If you have a large number of photos to watermark, look for an app or tool that offers batch processing. This feature will save you time by applying the same watermark settings to multiple photos in one go.
7. Preview and Adjust: Before finalizing the watermark settings, preview the watermark on a sample image. Make any necessary adjustments to ensure it appears exactly as you want it to.
By customizing your watermark settings, you can protect your photos while also adding a professional touch to them. Explore the various options provided by watermarking apps to find the perfect settings that align with your branding and aesthetic preferences.
Conclusion
Watermarking photos on your iPhone is a simple and effective way to protect your images and maintain ownership. By adding a personalized watermark, you can ensure that your photos are always attributed to you, even when shared online. With the help of various mobile apps, such as Watermark Photo Editor or iWatermark, the process becomes quick and hassle-free.
Not only do these apps make it easy to customize your watermark with text, logo, or signature, but they also provide options for adjusting its size, opacity, and positioning to suit your preferences. Whether you are a professional photographer or just someone who wants to protect their personal photos, watermarking is an essential step in safeguarding your creative work.
So, next time you want to add a watermark to your iPhone photos, download one of these reliable apps, unleash your creativity, and take control of the ownership of your images.
FAQs
Here are some commonly asked questions regarding how to watermark photos on iPhone:
1. Can I watermark my photos directly on my iPhone?
Yes, you can! There are several photo editing apps available on the App Store that allow you to easily add watermarks to your photos directly on your iPhone.
2. What are some popular apps for watermarking photos on iPhone?
Some popular apps for watermarking photos on iPhone include “iWatermark,” “eZy Watermark,” “Watermark X,” and “Marksta.”
3. How do I add a watermark to my photos using these apps?
The process may vary slightly depending on the app, but generally, you will need to select the photo you want to watermark, choose the type of watermark you want to add (text, logo, or combination), customize the watermark’s appearance (size, opacity, position), and then save the watermarked photo to your camera roll.
4. Can I customize the appearance of my watermark?
Absolutely! Most watermarking apps offer a range of customization options, allowing you to choose the font, color, size, opacity, and position of your watermark. Some apps even provide additional features like adding a shadow or adjusting the watermark’s rotation.
5. Are there any tips for creating an effective watermark?
Certainly! When creating a watermark, it’s important to strike a balance between visibility and subtlety. You want your watermark to be noticeable enough to discourage unauthorized use but not overly intrusive to distract from the main content of your photo. Additionally, consider using a transparent background for your watermark and positioning it strategically in a way that will be difficult to remove or crop out.