
In today’s fast-paced world, Android tablets have become an essential part of our lives. Whether for work or play, these devices offer a portable and versatile experience that keeps us connected and entertained. However, there may come a time when you encounter issues with your Android tablet that requires a reset. Maybe it’s frozen or unresponsive, or perhaps you want to erase all your personal data before selling or giving it away.
In this comprehensive guide, we will explore the different methods to reset your Android tablet, giving it a fresh start and resolving any software glitches that may be hindering its performance. From the standard factory reset to more advanced options, we’ll take you step by step through the process, ensuring that you can regain control over your tablet and get it back to its optimal functioning state.
Inside This Article
- Step 1: Power off your Android tablet
- Step 2: Press and hold the specific key combination
- Step 3: Use Volume keys to navigate and Power key to select
- Step 4: Confirm the reset
- Step 5: Wait for the tablet to reset
- Step 6: Set up your Android tablet
- Conclusion
- FAQs
Step 1: Power off your Android tablet
Before you begin the reset process for your Android tablet, the first step is to power off the device. This is essential to ensure that the reset process happens smoothly and without any interruptions.
To power off your Android tablet, locate the power button on the device. This button is usually found on the side or top of the tablet, depending on the make and model. Press and hold the power button until you see the power options menu appear on the screen.
Once the power options menu is displayed, tap on the “Power off” option. This will initiate the shutdown process for your Android tablet. Wait for a few seconds until the screen goes completely dark, indicating that the tablet has been powered off.
It is important to note that different Android tablets may have slightly different power-off procedures. If you are unsure about the exact steps for your tablet, you can refer to the user manual or the manufacturer’s website for specific instructions.
By powering off your Android tablet, you are now ready to proceed to the next step of the reset process. Make sure to follow the remaining steps carefully to ensure a successful reset and a fresh start for your tablet.
Step 2: Press and hold the specific key combination
Once you have powered off your Android tablet, it’s time to move on to the next step: pressing and holding the specific key combination that will initiate the reset process. Different tablet models may require different key combinations, but most Android tablets follow a similar pattern.
To begin, locate the combination of keys you need to press and hold. This is usually a combination of the volume up, volume down, and power buttons. The exact combination may vary depending on your tablet’s make and model, so it’s important to consult the user manual or search online for the specific key combination for your device.
Once you have identified the correct key combination, take a moment to ensure that your fingers are positioned properly on the buttons. Make sure you have a good grip on the tablet and are ready to press and hold the keys for the required amount of time.
Now, press and hold the specific key combination simultaneously. It’s important to hold all the buttons down at the same time and not release them until prompted to do so. This step is crucial, as pressing the wrong buttons or releasing them too soon can disrupt the reset process and potentially cause issues with your tablet.
Keep in mind that the timing of the key combination may also be crucial. Some tablets may require you to press and hold the buttons as you power on the device, while others may require you to press and hold them after the tablet has been powered on. Make sure you are following the correct procedure for your specific tablet model to ensure a successful reset.
As you press and hold the key combination, you may feel a slight vibration or see the screen light up. This is an indication that the tablet has entered the reset mode. Continue to hold the buttons until you see the recovery menu or the Android logo appear on the screen.
Once you have successfully entered the reset mode, you can proceed to the next step of the reset process. This typically involves navigating through the menu options using the volume keys and selecting the appropriate option using the power button. The exact steps may vary depending on your tablet’s software version, so make sure to follow the on-screen instructions to proceed with the reset.
Remember, performing a factory reset will erase all data on your tablet and restore it to its original settings. It is crucial to back up any important files or data before proceeding with the reset. Once you have completed the reset process, you can restore your backed-up data or set up your tablet as a fresh device.
Step 3: Use Volume keys to navigate and Power key to select
Once you have successfully entered the recovery mode on your Android tablet, you will need to navigate through the menu options using the volume keys and select the desired option using the power key. This step is crucial in order to initiate the reset process and restore your tablet to its factory settings.
The volume keys on your Android tablet are typically located on the side of the device. These keys allow you to adjust the volume of your tablet when you’re using it normally. However, in the recovery mode, they serve a different purpose.
Using the volume up and volume down keys, you can scroll through the various options displayed on the screen. By pressing the volume up key, you can move the selection up, while pressing the volume down key will move the selection down. This allows you to navigate through the recovery menu and select the desired option.
Once you have highlighted the desired option using the volume keys, you will need to use the power key to confirm your selection. The power key is typically located on the top or side of your tablet, and it acts as the “enter” or “select” button in the recovery mode.
Pressing the power key will initiate the chosen action, such as confirming a factory reset or wiping the cache partition. It is important to be cautious when using the power key in the recovery mode, as selecting the wrong option can result in data loss or other unintended consequences.
Make sure to read the instructions carefully on the screen and double-check your selection before pressing the power key to avoid any unnecessary complications. Once you are confident in your selection, press the power key to proceed with the reset process.
Using the volume keys to navigate and the power key to select is a standard procedure across most Android tablets. However, there may be slight variations depending on the manufacturer or the specific model of your tablet. It is always recommended to refer to the user manual or the manufacturer’s website for precise instructions tailored to your device.
Step 4: Confirm the reset
Once you have navigated to the “Reset” or “Factory Reset” option using the volume keys and selected it with the power key, you will be presented with a confirmation screen. This screen will typically display a warning message informing you that all data on your Android tablet will be erased and cannot be recovered.
It is essential to take a moment to ensure that you have backed up all important files and data because confirming the reset will initiate the process of wiping your device clean. This includes your apps, settings, media files, and personal information.
Read the confirmation message carefully to make sure you understand the consequences of proceeding with the reset. If you are certain that you want to proceed, navigate to the “Yes” or “Confirm” option using the volume keys and select it with the power key.
Keep in mind that confirming the reset is a final step, and you will be unable to recover any data that has been erased. Once the reset process begins, your Android tablet will begin to delete all the data and restore it to its original factory settings.
After confirming the reset, it is essential to be patient as the tablet may take a few moments to begin the reset process. The length of time it takes will depend on the device’s make and model.
During the reset process, the tablet may display messages or progress status on the screen. Avoid interrupting the reset by powering off the device or removing the battery, as this could potentially cause harm to the operating system and result in an incomplete reset.
Once the reset is complete, the tablet will typically restart automatically and display the initial setup screen. At this point, you have successfully reset your Android tablet and can proceed to set it up again with your preferred language, Wi-Fi network, and other settings.
Remember to reinstall any apps and restore your backed-up data to ensure your tablet is fully equipped with your preferred settings and content.
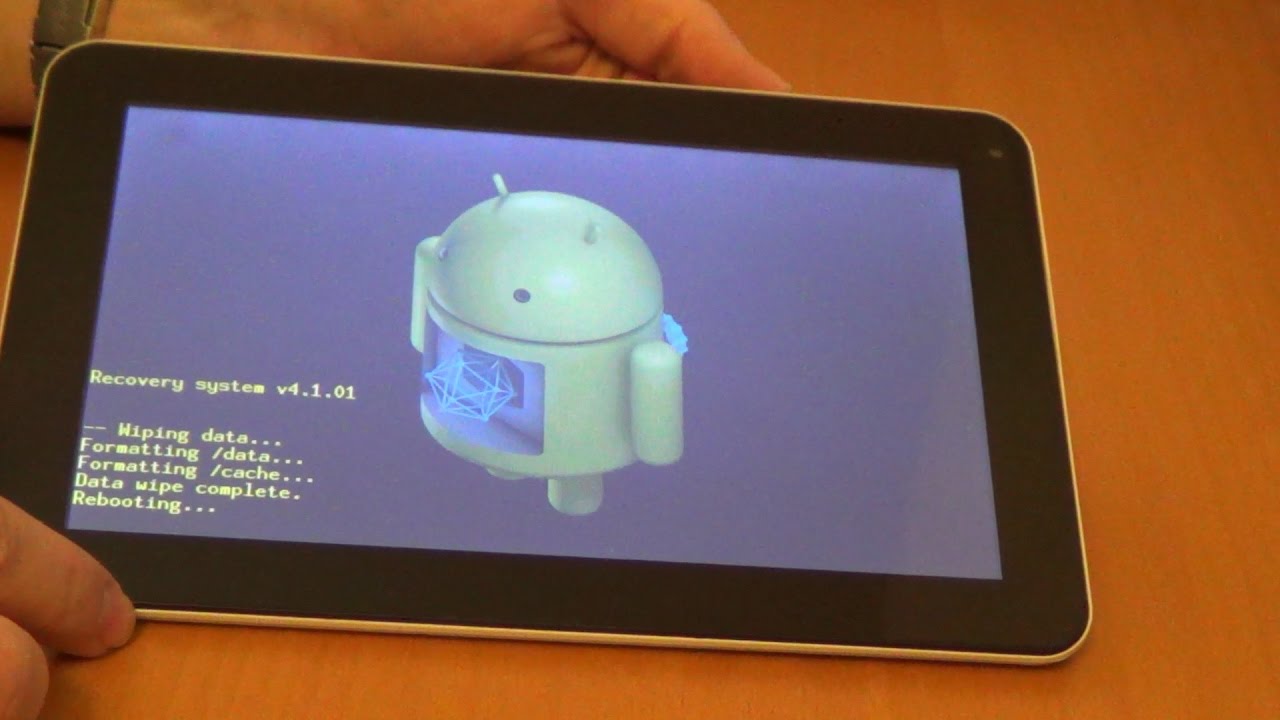
Step 5: Wait for the tablet to reset
After you have confirmed the reset on your Android tablet, the device will begin the reset process. This step requires patience as it may take some time for the tablet to complete the reset.
During this process, the tablet will go through several stages. It will first erase all the data and settings, reverting back to its factory default state. This means that any apps, personal files, and customizations you made will be deleted.
Additionally, the tablet will then reinstall the operating system to bring it back to its original state. This ensures that the tablet is fully reset and ready for you to set it up as if it were brand new.
While the tablet is resetting, it is important to avoid interrupting the process. Do not power off the device or try to restart it during this time, as it may cause issues and hinder the reset process.
The duration of the reset process can vary depending on the tablet’s model and specifications. It is not uncommon for the process to take several minutes, so it’s important to remain patient and let the tablet complete the reset on its own.
In some cases, the tablet may display a progress bar or a loading screen during the reset process. This can give you an indication of how much time is remaining or how far along the reset is. However, keep in mind that these indicators are estimates and may not be entirely accurate.
Once the tablet has finished resetting, it will automatically reboot and present you with the initial setup screen. This signifies that the reset process is complete, and you can proceed to set up your Android tablet as you prefer.
During the initial setup, you will be prompted to choose your preferred language, connect to a Wi-Fi network, sign in with your Google account, and personalize various settings. Follow the on-screen instructions to complete the setup and make the necessary configurations for your tablet.
Remember to take note of any important information, such as passwords or backup codes, that you may need to recover or reconfigure your accounts and services.
By following these steps and patiently waiting for your tablet to reset, you can ensure that your Android device is restored to its factory settings, providing you with a fresh start and the opportunity to set it up according to your preferences.
If you encounter any issues during the reset process, consult the manufacturer’s support documentation or reach out to their customer support for further assistance.
Step 6: Set up your Android tablet
After completing the reset process, you will need to set up your Android tablet from scratch. Follow these steps to get your device up and running again:
1. Language Selection: The first screen will prompt you to choose a language. Select your preferred language by tapping on it.
2. Wi-Fi Connection: On the next screen, you will be asked to connect to a Wi-Fi network. Find your network from the list of available options and enter the password if required.
3. Google Account Sign-in: To access the full functionality of your Android tablet, you will need to sign in with a Google account. If you already have an account, enter your email address and password. If not, tap on “Create account” to set up a new Google account.
4. Set up as a New Device: Once you have signed in or created a Google account, you will have the option to restore your apps and settings from a previous device or set up your tablet as a new device. Select “Set up as a new device” to start fresh.
5. Terms and Conditions: Next, you will need to review and accept the terms and conditions for using your Android tablet. Read through the terms and tap on “Accept” to proceed.
6. Google Services: You will then be prompted to choose which Google services you want to enable on your tablet. Select the services you want and tap on “Next” to continue.
7. Device Name: Give your tablet a unique name that will help you identify it among other devices connected to your Google account. Enter a name and tap on “Next”.
8. Backup & Restore: If you chose to restore your apps and settings in step 4, this screen will give you the option to restore from a previous backup. Select the backup option you prefer, or choose “Skip” to proceed without restoring.
9. Additional Settings: Depending on your device and Android version, you may be prompted to customize additional settings such as screen lock, fingerprint or face ID, and more. Follow the on-screen instructions to complete these settings.
10. Ready to Use: Once you have completed all the setup steps, you will see a “Congratulations” or similar message indicating that your Android tablet is ready to use. Tap on “Finish” to finalize the setup process.
Now you can start exploring your newly reset Android tablet and customize it to your liking. Install your favorite apps, add widgets to the home screen, and personalize your settings to ensure a seamless and personalized user experience.
Conclusion
Resetting your Android tablet can be a great solution for various issues or when you want to start fresh. Whether you’re experiencing performance problems, software glitches, or just want to wipe all your personal data, resetting the tablet can help. The process may vary slightly depending on the make and model of your device, but generally, it involves going into the settings menu and navigating to the reset options.
Remember, before resetting your tablet, it’s essential to back up all important data and files to prevent any loss. Once you’ve completed the reset process, you can set up your tablet as new and enjoy a smooth, optimized performance. Don’t hesitate to consult the user manual or seek assistance from the manufacturer’s support if you encounter any difficulties during the process.
By following the steps mentioned in this guide, you can easily reset your Android tablet, resolve various issues, and ensure that your device functions optimally. Enjoy your refreshed tablet experience!
FAQs
Here are some frequently asked questions about resetting an Android tablet:
1. Can I reset my Android tablet without losing data?
Yes, it is possible to reset your Android tablet without losing data. You can perform a “soft reset” or a “factory reset.” A soft reset will restart your tablet without erasing any data, while a factory reset will wipe all data and restore the tablet to its original settings. It’s important to back up your data before performing a factory reset.
2. How do I perform a soft reset on my Android tablet?
To perform a soft reset on your Android tablet, simply press and hold the power button until the device restarts. This will help resolve minor software issues without affecting your data.
3. How do I perform a factory reset on my Android tablet?
To perform a factory reset on your Android tablet, follow these steps:
- Go to the “Settings” menu on your tablet.
- Scroll down and tap on “System” or “System settings”.
- Look for the “Reset” or “Backup & reset” option.
- Tap on “Factory data reset” or “Reset tablet”.
- Read the warning message, then confirm your decision by tapping on “Reset” or “Erase all data.”
Keep in mind that a factory reset will erase all data on your tablet, so be sure to back up any important files before proceeding.
4. What should I do if my Android tablet is frozen or unresponsive?
If your Android tablet is frozen or unresponsive, you can try performing a “hard reset” by following these steps:
- Locate the small reset hole on your tablet (usually next to the power button).
- Use a small pin or similar tool to press and hold the reset button for a few seconds.
- Your tablet should vibrate or show a reboot message on the screen.
- Release the reset button and allow your tablet to restart.
If a hard reset doesn’t work, you may need to contact the manufacturer or seek professional assistance.
5. How do I reset a locked Android tablet?
If you have forgotten the passcode or pattern to unlock your Android tablet, you can still perform a factory reset in recovery mode. Here’s how:
- Power off your tablet.
- Press and hold the volume up and power buttons simultaneously until the tablet turns on.
- Use the volume buttons to navigate to the “Recovery” or “Factory Reset” option.
- Press the power button to select the option.
- Follow the on-screen instructions to reset your tablet.
Please note that this process may vary slightly depending on the make and model of your Android tablet.