
Are you looking to add another user to your Apple HomePod? Well, you’ve come to the right place! Adding another user to your HomePod not only allows them to enjoy the benefits of your smart speaker, but also gives them access to their own personalized music, messages, and preferences. Whether you want to include a family member, roommate, or friend, the process is quick and easy. In this article, we’ll guide you through the steps to add another user to your Apple HomePod, ensuring that everyone in your household can enjoy a personalized experience with this innovative smart device. So, let’s dive in and get started!
Inside This Article
- How to Add Another User to Your Apple HomePod
- Make sure you and the other user meet the requirements
- Invite the other user to your HomePod
- Accept the invitation on the other user’s device
- Set up individual user preferences (optional)
- Conclusion
- FAQs
How to Add Another User to Your Apple HomePod
Adding another user to your Apple HomePod is a quick and simple process. With multiple users, everyone in your household can enjoy personalized access to their own Apple Music, Messages, and more. In this article, we will guide you through the steps to add another user to your Apple HomePod.
Step 1: Setting Up Multiple Users
The first step is to ensure that you have set up multiple users on your HomePod. To do this, make sure that all the devices that you want to link with the HomePod are updated to the latest version of iOS or iPadOS. This will enable the HomePod to recognize and connect with multiple users.
Step 2: Inviting a User to HomePod
To add another user to your Apple HomePod, open the Home app on your iPhone or iPad. Tap on the home icon in the top left corner of the screen to access the home settings. Scroll down to find the HomePod that you want to add a user to.
Tap on the HomePod, and then tap on the “Details” button. Under the “People” section, you will see the current users associated with the HomePod. Tap on the “Invite” button to invite another user.
Enter the person’s Apple ID or select them from your contacts. You can also choose to send an invitation via Messages or email. Once the invitation is sent, the user will receive a notification on their device.
Step 3: Managing User Access and Permissions
After the user accepts the invitation, they will be able to access the HomePod and use their personalized features. As the owner of the HomePod, you have the ability to manage user access and permissions.
To manage user access, go to the HomePod settings in the Home app. Under the “People” section, you can see a list of users associated with the HomePod. You can tap on a user’s name to view and adjust their permissions.
You can enable or disable features such as Messages, HomeKit accessories, and personalized Siri requests for each user. This allows you to customize the HomePod experience for each user based on their preferences.
Step 4: Removing a User from HomePod
If you need to remove a user from your Apple HomePod, you can easily do so in the Home app. Go to the HomePod settings and under the “People” section, swipe left on the user you want to remove.
Tap on the “Remove” button, and the user will no longer have access to your HomePod. Please note that removing a user will also remove their personalized settings and preferences from the HomePod.
Adding another user to your Apple HomePod allows everyone in your household to enjoy a personalized and seamless experience. By following these simple steps, you can easily add, manage, and remove users from your HomePod, ensuring that each person gets the most out of their Apple devices.
Make sure you and the other user meet the requirements
Before adding another user to your Apple HomePod, it is important to ensure that both you and the other user meet the necessary requirements. This will ensure a smooth and seamless experience when it comes to sharing access and controlling the HomePod.
Here are two key requirements that you and the other user need to meet:
- Both users need to have an iCloud account: In order to share access to the Apple HomePod, both you and the other user must have an active iCloud account. This is essential as the iCloud account serves as the basis for user identification and authentication on Apple devices.
- Users must have their devices updated to the latest iOS version: It is crucial that both parties have their respective devices updated to the latest version of iOS. This ensures compatibility and functionality when it comes to managing user access and permissions on the HomePod.
By meeting these requirements, you can proceed with adding another user to your Apple HomePod and enjoy the benefits of shared access and personalized experiences.
Invite the other user to your HomePod
Adding another user to your Apple HomePod allows them to access and control the device’s features and settings. To invite a user, follow these steps:
- Open the Home app on your iOS device.
- Tap on the Home icon in the top-left corner to access your home settings.
- Scroll down and tap on “Home Settings.”
- Under the People section, tap on “Invite.”
- Enter the Apple ID or contact information of the person you want to invite.
- Tap on “Invite <user>,” replacing <user> with the name of the person you are inviting.
- The invited user will receive a notification to join your HomePod.
Once the invited user accepts the invitation, they will be able to use their Apple device to control the HomePod and access its features.
Accept the invitation on the other user’s device
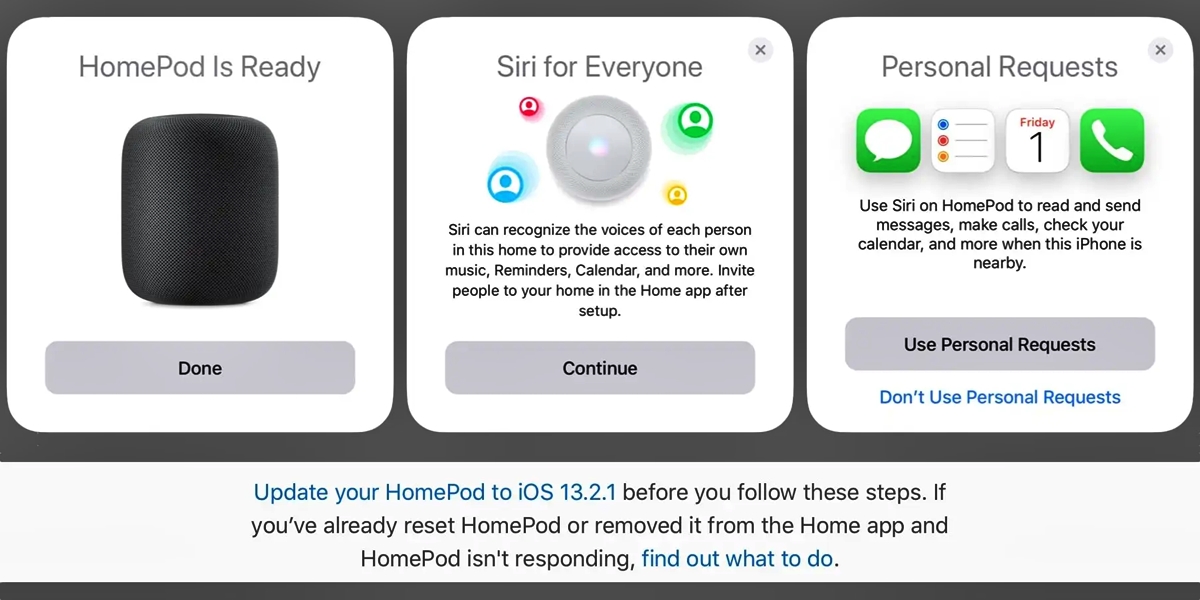
The invited user needs to check their devices for the invitation notification. They should open the Home app on their iOS device and tap on “Home” at the bottom of the screen. Then, they need to scroll down to “People” and tap on “Pending” invites. In the list of pending invites, they should look for the invitation related to the Apple HomePod.
Once they have found the invitation, they can tap on it to open the details. By tapping on the “Accept” button, the user will officially accept the invitation and be added as a user to the Apple HomePod.
After accepting the invitation, the user will be able to access all the features and controls of the Apple HomePod. They can use Siri to interact with the device, play music, control smart home devices, and more. They will have their personalized settings and preferences saved, allowing for a customized experience.
It’s important to note that the user who accepted the invitation will need to have their own Apple ID and be signed in with it on their iOS device in order to fully utilize the features of the HomePod as an individual user.
Set up individual user preferences (optional)
To make the experience on your Apple HomePod even more personalized, you have the option to set up individual user preferences for each user. This allows you to customize settings such as personalized Siri requests and notifications. Follow these simple steps to set up individual user preferences:
- Open the Home app on your iOS device.
- Tap on the Home icon located in the top-left corner.
- Scroll down and tap on “Home Settings”.
- Under the “People” section, locate and tap on the name of the user you wish to customize.
- Within the user’s settings, you can now set individual preferences such as personalized Siri requests and notifications.
- Once the preferences are set, the user can now enjoy a fully personalized experience on your Apple HomePod.
By customizing these preferences, each user can receive personalized notifications and have their requests heard by Siri with specific voice recognition. This ensures that each member of your household can enjoy their own unique experience with the Apple HomePod.
Setting up individual user preferences not only enhances the personalization of your HomePod but also ensures that everyone in your household can make the most out of this smart device. Whether it’s customizing Siri requests or receiving personalized notifications, the Apple HomePod will adapt to the needs and preferences of each user.
So, take a few moments to set up individual user preferences on your Apple HomePod and let everyone in your home enjoy a fully personalized and optimized experience.
Adding another user to your Apple HomePod is a simple and seamless process. With just a few steps, you can grant access to your music, messages, and personalized settings to friends or family members. By doing so, everyone in your household can enjoy the convenience and functionality of this smart speaker.
Whether you want to share your favorite playlist with your partner or allow your kids to control the HomePod using their own preferences, adding another user is a great way to personalize the experience.
Remember, the HomePod is designed to cater to multiple users, so don’t hesitate to invite others to join in on the fun. With the ability to add multiple users to your HomePod, you can ensure that everyone’s needs and preferences are met. So, go ahead and expand the access to your Apple HomePod today!
FAQs
1. Can I add another user to my Apple HomePod?
Yes, you can add another user to your Apple HomePod. Adding multiple users allows each person to have a personalized experience with their own Apple Music account, preferences, and personalized recommendations. This ensures that everyone in your household can enjoy their favorite content on the HomePod.
2. How do I add another user to my Apple HomePod?
To add another user to your Apple HomePod, follow these steps:
– Open the Home app on your iPhone or iPad.
– Tap on the Home icon in the top left corner.
– Scroll down and tap on the “Home Settings” option.
– Under People, tap on “Invite” and enter the email address of the person you want to invite.
– The person will receive an invitation to join your home. Once they accept, they will have access to the HomePod and its personalized features.
3. Can I restrict certain features or content for the other user on my Apple HomePod?
Yes, you can restrict certain features or content for the other user on your Apple HomePod. You can create user profiles with restrictions using the Screen Time feature on your iPhone or iPad. This allows you to set limits on music with explicit content, restrict access to certain apps or features, and more.
4. Can multiple users use their own Apple Music accounts on the same Apple HomePod?
Yes, multiple users can use their own Apple Music accounts on the same Apple HomePod. Each user can link their Apple Music account to their profile on the HomePod, allowing them to access their own music library, playlists, and recommendations.
5. Is there a limit to the number of users I can add to my Apple HomePod?
There is no specific limit to the number of users you can add to your Apple HomePod. You can add multiple users based on the number of people in your household. Each user will have their own profile and personalized experience on the HomePod.