
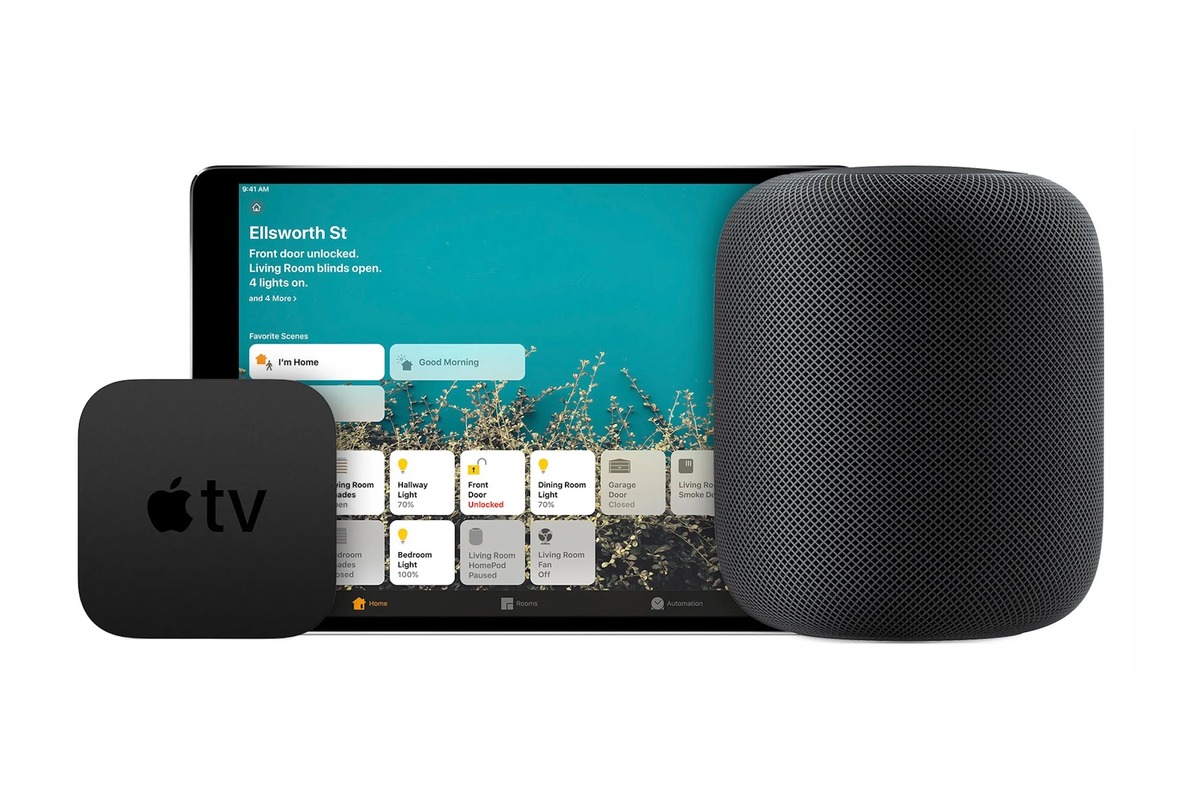
Are you looking to turn your Apple TV, HomePod, or iPad into a HomeKit Hub? You’ve come to the right place! HomeKit is Apple’s smart home platform that allows you to control your compatible devices with ease. By setting up a HomeKit Hub, you can conveniently manage your smart home gadgets remotely and even automate their functionality.
Whether you want to adjust the lights, temperature, or security system, having a HomeKit Hub ensures that you have full control of your smart home even when you’re away. In this comprehensive guide, we will walk you through the steps to transform your Apple TV, HomePod, or iPad into a powerful HomeKit Hub. With our expert tips and insights, you’ll be enjoying a seamless smart home experience in no time!
Inside This Article
- Set Up your Apple TV as a HomeKit Hub
- Use your HomePod as a HomeKit Hub
- Make your iPad a HomeKit Hub
- Benefits of using an Apple TV, HomePod, or iPad as a HomeKit Hub
- Conclusion
- FAQs
Set Up your Apple TV as a HomeKit Hub
Apple TV can serve as a central hub for your HomeKit devices, allowing you to control them remotely and automate your smart home. To set up your Apple TV as a HomeKit hub, follow these steps:
1. Update your Apple TV: Ensure that your Apple TV is updated to the latest version of tvOS. You can do this by going to Settings > System > Software Updates and selecting “Update Software.”
2. Sign in with your Apple ID: Make sure you are signed in to your Apple TV with your iCloud account. This is essential for HomeKit functionality.
3. Enable iCloud Keychain: Go to Settings > Users and Accounts > iCloud and turn on iCloud Keychain. This will securely store your HomeKit data and allow it to sync across all your devices.
4. Set up Two-Factor Authentication: If you haven’t done so already, enable Two-Factor Authentication for your Apple ID. This provides an extra layer of security for accessing your HomeKit devices remotely.
5. Enable HomeKit: Navigate to Settings > AirPlay and HomeKit > HomeKit and make sure it is turned on. You may be prompted to enter a HomeKit setup code that came with your accessory. Follow the on-screen instructions to complete the setup.
6. Configure HomeKit accessories: Once HomeKit is enabled, you can add and configure your HomeKit-compatible devices. To do this, open the Home app on your iPhone or iPad, tap on the “+” symbol, and follow the instructions to add your devices to your HomeKit network.
7. Access your devices remotely: After setting up your Apple TV as a HomeKit hub, you can access and control your devices remotely. This includes turning on/off lights, adjusting the thermostat, and viewing security camera feeds from anywhere in the world.
By setting up your Apple TV as a HomeKit hub, you can enjoy the convenience and flexibility of controlling your smart home devices from anywhere, even when you are not at home.
Use your HomePod as a HomeKit Hub
If you are a proud owner of a HomePod, you have the opportunity to use it as a HomeKit Hub. The HomeKit Hub is an essential component of Apple’s smart home ecosystem, as it enables remote access and control of your HomeKit devices when you’re away from home.
Setting up your HomePod as a HomeKit Hub is a straightforward process. To begin, you need to make sure that your HomePod is updated to the latest version of the operating system. You can do this by going into the Home app on your connected iOS device and checking for any available updates.
Once your HomePod is up to date, you can activate it as a HomeKit Hub by following these steps:
- Open the Home app on your iOS device.
- Tap the “Rooms” tab at the bottom of the screen.
- Tap and hold on the HomePod that you want to use as a HomeKit Hub.
- A menu will appear; tap “Details”.
- Scroll down and under “Status and Notifications”, toggle on “Use this as a Home Hub”.
Once you have completed these steps, your HomePod will be set up as a HomeKit Hub. This means that you can control your HomeKit devices remotely using the Home app or Siri even when you’re not at home.
The HomeKit Hub functionality of the HomePod provides several benefits. Firstly, it allows you to automate your smart home devices based on time, location, or specific triggers. For example, you can set your lights to turn on automatically when you arrive home or adjust your thermostat based on a schedule.
Secondly, it enables remote access to your HomeKit devices. If you’re away from home, you can use the Home app or Siri to control and monitor your smart devices. This can be particularly convenient if you want to check if you left the lights on or adjust the temperature before returning home.
Lastly, the HomePod as a HomeKit Hub ensures enhanced security and privacy. Your HomeKit devices communicate directly with your HomePod, and all data is encrypted. This means that your personal information and control commands remain secure, providing you with peace of mind.
Overall, transforming your HomePod into a HomeKit Hub is a simple yet powerful way to expand the capabilities of your Apple smart home. With remote access, automation, and enhanced security, you can enjoy the convenience and peace of mind that comes with a seamlessly connected smart home ecosystem.
Make your iPad a HomeKit Hub
If you have an iPad, you can easily turn it into a HomeKit Hub to control your smart home devices remotely. Here’s how you can do it:
1. Update your iPad: Ensure that your iPad is running the latest version of iOS to have access to the Home app and the HomeKit Hub feature.
2. Open the Settings app: Launch the Settings app on your iPad and tap on your Apple ID at the top of the screen.
3. Select iCloud: Scroll down and select iCloud from the list of options.
4. Enable iCloud Keychain: If iCloud Keychain is not already enabled, turn it on. This will allow your iPad to securely store and sync your HomeKit data.
5. Open the Home app: Go back to the Home screen and open the Home app.
6. Set up your HomeKit home: If you haven’t already set up a HomeKit home, follow the prompts to create one. This will allow you to control your smart home devices using the Home app.
7. Set up your iPad as a HomeKit Hub: Tap on the arrow icon in the top-left corner of the Home app. Then, tap on “Home Settings” and select “Home Hubs”.
8. Enable iPad as a HomeKit Hub: Toggle the switch next to your iPad’s name to enable it as a HomeKit Hub.
9. Remote access to your devices: Once your iPad is set up as a HomeKit Hub, you’ll have the ability to control your smart home devices remotely. This means you can manage your home automation even when you’re away from home.
10. Enjoy the convenience: With your iPad as a HomeKit Hub, you can use Siri voice commands or the Home app to control your lights, thermostat, security cameras, and other smart devices. It’s a convenient way to stay connected to your home even when you’re not there.
Remember, your iPad must be turned on and connected to Wi-Fi for it to act as a HomeKit Hub. Additionally, make sure that all of your smart home devices are compatible with HomeKit to enjoy seamless control and automation.
With just a few simple steps, you can transform your iPad into a HomeKit Hub and enjoy the convenience of controlling your smart home devices from anywhere.
Benefits of using an Apple TV, HomePod, or iPad as a HomeKit Hub
Using an Apple TV, HomePod, or iPad as a HomeKit hub offers several benefits for users looking to enhance their smart home experience. Let’s explore the advantages of each device:
1. Seamless Control
By setting up an Apple TV, HomePod, or iPad as a HomeKit hub, you can control your smart home accessories effortlessly. With a simple voice command to Siri or using the Home app on your device, you can control lights, thermostats, locks, and more, even when you are away from home.
2. Remote Access
One of the key benefits of using an Apple TV, HomePod, or iPad as a HomeKit hub is the ability to access and control your smart home devices remotely. Whether you are at work or on vacation, you can monitor and adjust your home’s settings, ensuring peace of mind and convenience.
3. Automation and Scenes
With a HomeKit hub, you can create automated routines and scenes to simplify your daily activities. For example, you can set up a “Good Morning” scene that automatically turns on lights, opens blinds, and starts your coffee maker, all by a single command. This level of automation adds convenience and efficiency to your smart home experience.
4. Enhanced Device Compatibility
An Apple TV, HomePod, or iPad as a HomeKit hub increases device compatibility within the Apple ecosystem. It allows you to connect and control a wide range of HomeKit-enabled devices from different manufacturers, ensuring seamless integration and a unified smart home experience.
5. Enhanced Security
Using an Apple TV, HomePod, or iPad as a HomeKit hub can enhance the security of your smart home. With end-to-end encryption, your data and home automation commands are securely transmitted and stored, protecting your privacy and minimizing the risk of unauthorized access.
6. Multiple User Access
If you have multiple family members or roommates, using a HomeKit hub allows everyone to access and control smart home devices. Each user can have their individual settings, preferences, and access levels, creating a personalized and user-friendly experience for all.
Conclusion
Having your Apple TV, HomePod, or iPad serve as a HomeKit hub opens up a world of possibilities for controlling and automating your smart home devices. By setting up a hub, you can enjoy seamless connectivity, enhanced security, and convenient remote access to your devices even when you’re away. Whether you’re looking to control your lights, adjust the thermostat, or monitor your home security system, having a HomeKit hub in place simplifies and streamlines the process.
With the step-by-step guide we’ve provided, you can easily turn your Apple TV, HomePod, or iPad into a HomeKit hub and take full advantage of the features and benefits it offers. Whether you’re a tech-savvy enthusiast or a casual user, incorporating a hub into your smart home ecosystem ensures a more advanced and enjoyable experience. So, go ahead and set up your HomeKit hub today, and enjoy the seamless integration and greater control over your connected devices.
FAQs
1. What are the benefits of using an Apple TV, HomePod, or iPad as a HomeKit hub?
Using an Apple TV, HomePod, or iPad as a HomeKit hub offers several benefits. Firstly, it allows you to control your HomeKit-enabled devices remotely, even when you are away from home. Secondly, it enables automations and scenes to run smoothly and reliably, ensuring that your smart home devices work seamlessly together. Lastly, it provides an extra layer of security by allowing end-to-end encryption for your smart home commands and data.
2. Can I use multiple HomeKit hubs in my home?
Yes, you can use multiple HomeKit hubs in your home. In fact, having multiple hubs can improve the reliability and range of your HomeKit network. You can set up an Apple TV, HomePod, or iPad as a primary hub and then configure additional devices as secondary hubs. This allows for better coverage throughout your home and ensures that your smart home devices are always connected.
3. How do I set up my Apple TV, HomePod, or iPad as a HomeKit hub?
To set up your Apple TV, HomePod, or iPad as a HomeKit hub, follow these steps:
- Ensure that your device is updated to the latest iOS or tvOS version.
- Sign in to iCloud using the same Apple ID on all your devices.
- On your device, go to Settings.
- Select your Apple ID and then tap on iCloud.
- Scroll down and enable the Home option.
- Once enabled, your device will function as a HomeKit hub.
4. Can I use a HomeKit hub without an internet connection?
While a HomeKit hub does require an internet connection for remote access and certain functionalities, it can still function within your home network without internet access. This means that you can continue to control your HomeKit devices using the Home app on your iPhone or iPad, as long as you are connected to the same Wi-Fi network as your hub.
5. What happens if my HomeKit hub is disconnected or goes offline?
If your HomeKit hub gets disconnected or goes offline temporarily, your HomeKit devices will continue to function locally within your home network. However, you will lose remote access and certain advanced automation features until the hub is back online. It is recommended to troubleshoot the connection issue or restart the hub to restore its functionality.