
Introduction
Are you looking for a fun and creative school project that will showcase your artistic skills? Look no further than making a hanging mobile! A hanging mobile is a versatile and eye-catching decoration that can be made using various materials and designs to suit your personal style.
In this article, we will guide you through the process of creating a hanging mobile for your school project. From choosing the right materials to assembling and hanging your mobile, we will provide step-by-step instructions that will help you create an impressive and aesthetically pleasing final product.
Whether you are a beginner or have experience in crafts, making a hanging mobile is an accessible and enjoyable project that will allow you to explore your creativity and express yourself. So, get ready to let your imagination soar and create a stunning hanging mobile that will make your school project stand out!
Inside This Article
- Supplies Needed
- Step 1: Prepare the Base- Cut a piece of wire or wooden dowel to your desired length for the mobile’s base.- Bend the wire into a loop or shape the dowel into a curved or straight line.
- Step 2: Create Hanging Points- Cut several pieces of string or fishing line into equal lengths.- Tie one end of each piece securely to the base, evenly spaced apart.
- Step 3: Decorate the Mobile
- Step 4: Balance the Mobile – Hang the decorated objects from the hanging points on the base, adjusting their placement until the mobile is balanced – Trim any excess string or fishing line
- Step 5: Optional – Paint or Decorate the Base
- Step 6: Hang and Display- Find a suitable location to hang your mobile, ensuring it is secure and easily visible.- Hang the mobile from a hook or ceiling fixture, making sure it is level and balanced.
- Conclusion
- FAQs
Supplies Needed
When it comes to making a hanging mobile for a school project, there are a few essential supplies you’ll need to gather. These supplies will help you create a sturdy base and add decorative elements to bring your mobile to life. Here’s a list of what you’ll need:
- Wire or wooden dowel: This will serve as the foundation for your mobile, providing a structure to hang your decorative objects from. You can choose between using a flexible wire or a wooden dowel depending on your preference.
- String or fishing line: You’ll need some string or fishing line to create hanging points for your mobile. This will allow you to suspend your decorative objects from the base.
- Scissors: A pair of scissors is essential for cutting the wire, string, and any other materials you’ll be working with.
- Assorted lightweight objects: Get creative with your choice of lightweight objects to hang from your mobile. Consider using paper shapes, feathers, beads, or any other small and lightweight items that can be easily attached.
- Paints or markers (optional): If you want to add a personal touch to your mobile, you can use paints or markers to decorate the base or the objects before assembling them. This step is optional but can be a fun way to personalize your project.
Ensure that you have all of these supplies on hand before starting your hanging mobile project. Having everything ready will make the process smoother and more enjoyable.
Step 1: Prepare the Base- Cut a piece of wire or wooden dowel to your desired length for the mobile’s base.- Bend the wire into a loop or shape the dowel into a curved or straight line.
When making a hanging mobile for a school project, the first step is to prepare the base. To do this, you will need to cut a piece of wire or wooden dowel to your desired length. Consider the size and weight of the objects you plan to hang from the mobile when determining the length.
Once you have the wire or dowel, it’s time to shape it into the base of your mobile. If you’re using wire, bend it into a loop shape. This loop will serve as the top part of your mobile, allowing you to hang it from a hook or ceiling fixture. If you’re using a wooden dowel, you can shape it into a curved or straight line, depending on your desired design.
Take your time to ensure that the wire or dowel is shaped properly. It should be sturdy and able to support the weight of the hanging objects without bending or breaking. If necessary, use pliers or other tools to help you shape the wire or dowel accurately.
Once you’re satisfied with the shape of the base, you’re ready to move on to the next step of creating your hanging mobile for the school project.
Step 2: Create Hanging Points- Cut several pieces of string or fishing line into equal lengths.- Tie one end of each piece securely to the base, evenly spaced apart.
To create the hanging points for your mobile, you will need to cut several pieces of string or fishing line into equal lengths. This will ensure that your mobile hangs evenly and looks balanced. Using a pair of scissors, carefully cut the string or fishing line into the desired lengths for your mobile.
Once you have cut the pieces of string or fishing line, it’s time to secure them to the base of your mobile. Start by tying one end of each piece securely to the base. You can use a basic knot or a double knot to make sure the string or fishing line stays in place. It’s important to tie the knots tightly to prevent the objects on your mobile from sliding down.
As you tie the pieces of string or fishing line to the base, make sure to space them evenly apart. This will help maintain the balance and symmetry of your mobile. You can use a ruler or measuring tape to ensure that the distances between each hanging point are consistent. Taking the time to measure and space the hanging points evenly will result in a visually pleasing mobile.
By creating these evenly spaced hanging points, you are laying the foundation for the objects that will hang from your mobile. This step is crucial in ensuring that your mobile hangs harmoniously and doesn’t tilt to one side. So take your time to cut the string or fishing line to equal lengths and tie them securely to the base, evenly spaced apart.
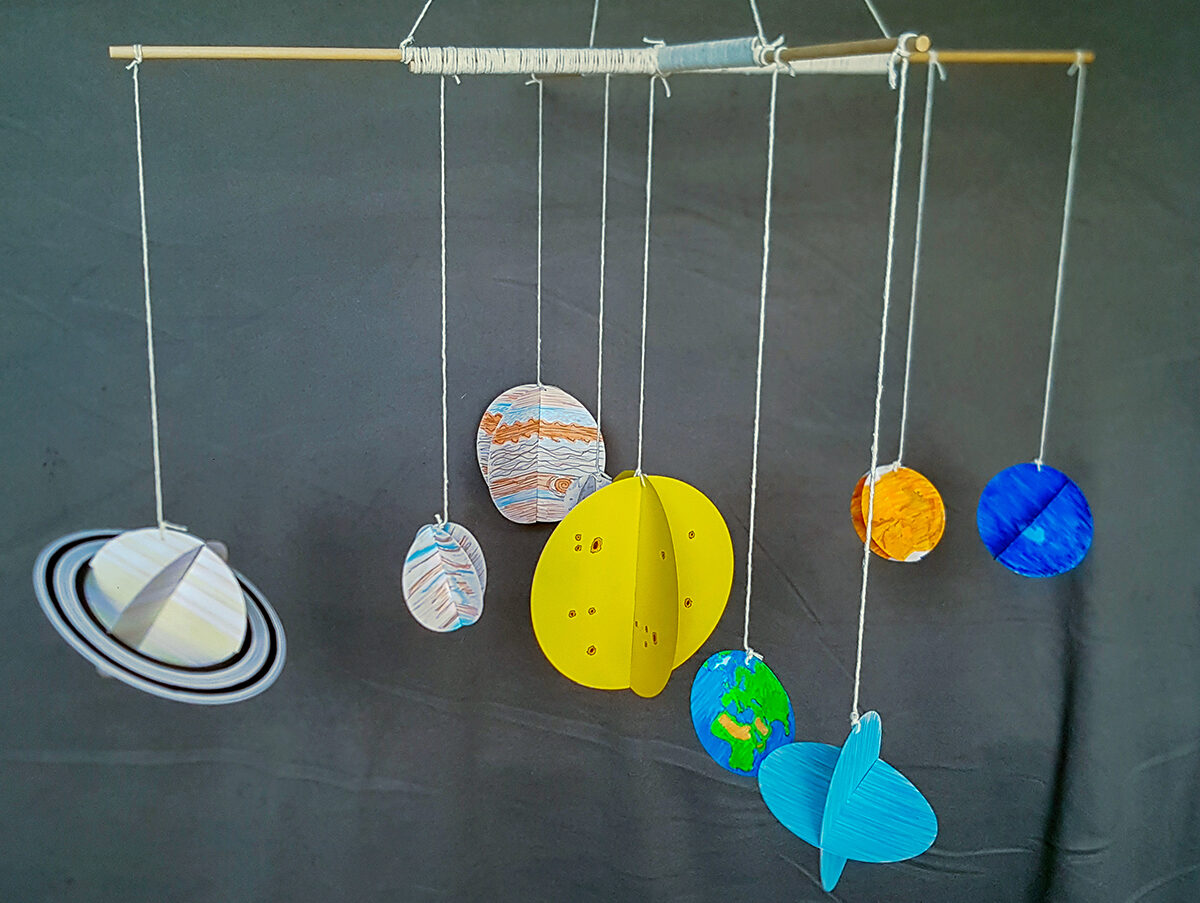
Step 3: Decorate the Mobile
Use scissors or a craft knife to make different shapes out of lightweight materials like colored paper, foam, or cardboard. You can explore your creativity and cut out shapes like stars, flowers, animals, or any other design you like. Make sure the shapes are lightweight so that they can hang easily from the mobile.
Once you have cut out the shapes, take a piece of string or fishing line and thread it through the hole or at the top of each shape. You can use a needle to make this process easier. Make sure to tie a secure knot at the end of each string to prevent the shape from falling off.
As you thread each shape onto the string, leave a long tail at the end of the string. This tail will be used to hang the shape from the mobile. Adjust the length of each string depending on how low or high you want each shape to hang. Play around with different lengths to create an interesting visual effect.
Continue threading different shapes onto separate strings until you have decorated all the shapes you want to include in your mobile. You can experiment with different colors, patterns, and textures to make the mobile visually appealing.
Make sure to tie a loop or knot at the top of each string, so they can be securely attached to the hanging points on the mobile’s base. Test the security of each knot to avoid any mishaps or shapes falling off the mobile.
Once all the shapes are attached to their respective strings, give the mobile a gentle shake to ensure that everything is securely in place. Adjust any shapes or strings as needed to achieve the desired balance.
Remember, the key to a visually striking mobile is the arrangement and balance of the shapes. You can experiment with different heights, spacing, and patterns to create a unique and eye-catching design.
Now that your mobile is beautifully decorated, you are ready to move on to the next step – balancing the mobile and preparing it for display.
Step 4: Balance the Mobile – Hang the decorated objects from the hanging points on the base, adjusting their placement until the mobile is balanced – Trim any excess string or fishing line
Once you have completed decorating the objects for your mobile, it’s time to hang them and achieve a perfect balance. This step is crucial to ensure that your mobile hangs evenly and moves gracefully in the air.
Start by hanging the decorated objects from the hanging points on the base. Attach each object securely to the strings or fishing lines, making sure they are evenly spaced apart. You can use knots or small loops to hold the objects firmly in place.
As you hang each object, take a step back and observe how the mobile looks and moves. Adjust the placement of the objects if needed to achieve a balanced composition. Some objects might be heavier than others, which can cause the mobile to tilt to one side. Use your judgment to rearrange the objects and distribute their weight evenly.
While adjusting the placement, consider the visual aspect of your mobile. Pay attention to the shapes, colors, and sizes of the objects. Experiment with different arrangements to create an aesthetically pleasing design.
Once you are satisfied with the placement and balance of the objects, it’s time to trim any excess string or fishing line. Use scissors to carefully cut off any extra length, making sure to leave enough length for hanging. Trim the strings as close to the knots or loops as possible to maintain a clean and neat appearance.
Trimming the excess string or fishing line not only improves the visual appeal of the mobile but also prevents it from getting tangled or catching on nearby objects. Be careful while cutting to avoid accidentally damaging the objects or the base.
After trimming the excess string, take a final look at your mobile. Make any final adjustments if necessary. Ensure that the objects are secure and won’t come loose easily. Once you are confident that your mobile is balanced and visually pleasing, it’s time to move on to the last step – hanging and displaying your creation.
Step 5: Optional – Paint or Decorate the Base
If you want to add a personal touch to your hanging mobile, you can choose to paint or decorate the wire or dowel base before assembling the rest of the mobile. This step allows you to customize the look and feel of your project, making it unique and eye-catching.
Before you begin, gather your paints or markers, and any other decorative materials you may want to use. The type of paint or decoration you choose will depend on your personal preference and the overall theme of your mobile.
Start by preparing the base for painting or decorating. If you are using wire, you may want to clean the surface to remove any dirt or oils that could affect the adhesion of paint. If you are using a wooden dowel, lightly sand the surface to create a smooth and even finish.
Once your base is ready, it’s time to unleash your creativity. Use brushes or markers to apply paint or draw designs directly onto the wire or dowel. You can opt for bold and vibrant colors, subtle and soothing shades, or any other combination that suits your vision.
If painting is not your forte, consider using other decorative materials to enhance the appearance of the base. Wrap the wire or dowel with colorful ribbons, twine, or fabric. Adhere stickers, gems, or sequins to create a sparkling effect. The options are endless, so let your imagination run wild!
Once you have finished painting or decorating the base, allow it to dry completely before continuing. This is important to ensure that the paint or decorations don’t smudge or transfer onto other parts of the mobile. Patience is key, as rushing this step could compromise the overall look of your project.
Remember, this step is entirely optional. If you prefer a more minimalist or natural look, you can skip painting or decorating the base altogether and proceed directly to assembling the rest of the mobile.
Now that your base is beautifully painted or decorated, it’s time to move on to the final steps of assembling and hanging your hanging mobile. The finished result will be a stunning piece of art that showcases your creativity and adds a touch of charm to any space.
Step 6: Hang and Display- Find a suitable location to hang your mobile, ensuring it is secure and easily visible.- Hang the mobile from a hook or ceiling fixture, making sure it is level and balanced.
After completing the previous steps and creating your beautiful hanging mobile, it’s time to find the perfect spot to display it. Finding a suitable location is crucial to ensure that your mobile is secure, easily visible, and able to be enjoyed by all.
Firstly, look for a spot that provides enough space for the mobile to hang freely without any obstructions. It should have enough clearance for the objects to move and sway gracefully, allowing the mobile to showcase its captivating motion.
Consider the overall aesthetics of the room or area where you intend to hang the mobile. You want to choose a location that complements the style and decor of the space, enhancing its visual appeal. Think about the color scheme, theme, and ambiance of the room, and choose a spot that harmonizes with these elements.
It is important to ensure that the location you select is secure enough to hold the weight of the mobile. Evaluate different options such as hooks or ceiling fixtures that can provide sufficient support. Make sure the chosen hanging mechanism is strong and durable, as you don’t want your mobile to come crashing down unexpectedly.
When hanging the mobile, pay attention to its balance. The objects should hang evenly and at the same height, creating a harmonious and visually pleasing display. Use a leveled or a spirit level to ensure that the mobile is perfectly horizontal or balanced, giving it a polished and professional appearance.
Take some time to observe how the mobile interacts with the surrounding environment. Make sure that it doesn’t interfere with any other objects or people passing by. Consider the movement of air in the room, as gentle breezes can add to the mesmerizing effect of the mobile. However, avoid placing the mobile in a spot with strong drafts that may cause it to swing excessively or become unstable.
Once you have found the ideal location, carefully hang the mobile from the chosen hook or ceiling fixture. Ensure that the mobile is properly secured and attached to prevent it from falling or moving out of position. Double-check the stability of the hanging mechanism and adjust if necessary.
Finally, step back and admire your hanging mobile in all its glory. Take joy in how it adds a touch of creativity and beauty to your chosen space. Whether it’s in a child’s bedroom, a living room, or a classroom, your hanging mobile is sure to capture attention and inspire wonder.
Conclusion
Creating a hanging mobile for a school project is a fantastic way to showcase creativity and learn about balance, symmetry, and design. By following the steps outlined in this guide, you can construct a unique and visually stunning mobile that will impress your teachers and classmates.
Remember to choose a theme or subject that you are passionate about, as this will make the project more enjoyable and meaningful. Experiment with different materials, colors, and shapes to add depth and interest to your mobile. Don’t be afraid to think outside the box and incorporate unconventional elements into your design.
With proper planning, careful assembly, and attention to detail, your hanging mobile will not only serve as an impressive school project but also a beautiful piece of art that you can proudly display. So gather your materials and get started on creating a captivating hanging mobile that will amaze everyone who sees it!
FAQs
1. Can I use any materials to make a hanging mobile for a school project?
Yes, you can use a variety of materials to create a hanging mobile for your school project. Common materials include cardboard, paper, wire, string, and lightweight objects such as feathers, beads, or small crafts. Be creative and choose materials that best represent your project theme or concept.
2. Do I need any special tools or skills to make a hanging mobile?
No, you do not need any specialized tools or skills to make a hanging mobile. Basic craft supplies like scissors, glue, tape, and a hole puncher will be sufficient. However, having some basic knowledge of balancing weights and shapes can be helpful in creating a visually pleasing and stable mobile.
3. How do I create a balanced hanging mobile?
To create a balanced hanging mobile, it’s important to distribute the weight evenly and strategically. Start by creating a central point of balance by attaching a string or wire to the top and suspending it from a hook or another stable base. Then, attach your chosen objects at different lengths and angles, making sure to adjust their positions until the mobile hangs evenly and does not tilt to one side.
4. Can I incorporate electronics or lights into a hanging mobile?
Yes, you can definitely incorporate electronics or lights into your hanging mobile. LED lights or battery-operated fairy lights can add a magical or whimsical touch to your project. Just make sure to consider the weight and electrical requirements when attaching these elements to your mobile, and always prioritize safety by using proper insulation and securing any loose wires.
5. How do I display my hanging mobile for my school project?
There are various ways to display your hanging mobile for your school project. You can hang it from the ceiling using hooks or suspend it between two poles or dowels. Another option is to create a stand or base for your mobile so that it can be placed on a table or shelf. Consider the size and weight of your mobile when deciding on the display method, and make sure it is secure and stable to prevent accidents.