
In today’s digital age, personalization has become a top priority for many individuals. From customizing our social media profiles to tailoring our wardrobes, we crave uniqueness in every aspect of our lives. And what better way to express our individuality than through the devices we use every day, like our mobile phones? Phone cases have long been a popular accessory, offering both protection and style. But what if you could take it a step further and print your own phone cases? With the advancements in technology, it’s now possible to add a personal touch to your phone with custom designs, photos, or artwork. In this article, we will explore how to print phone cases, giving you the freedom to showcase your creativity and make a statement with a one-of-a-kind phone case.
Inside This Article
- Materials Required
- Step 1: Selecting the Design
- Step 2: Preparing the File
- Step 3: Printing the Design
- Step 4: Applying the Design to the Phone Case
- Step 5: Finishing Touches
- Tips and Tricks for Printing Phone Cases
- Conclusion
- FAQs
Materials Required
To print phone cases, you will need the following materials:
- Blank phone cases: Depending on your preference, you can choose from a variety of blank phone cases made of different materials, such as plastic or silicone. Make sure to select a case that is compatible with your specific phone model.
- Printing equipment: You will need a reliable printer that is capable of producing high-quality prints. Inkjet printers are commonly used for this purpose. Additionally, purchase sublimation or heat transfer paper specially designed for phone case printing.
- Design software: To create or customize the design for your phone case, you will require design software. Popular options include Adobe Photoshop, Illustrator, or even online design tools like Canva.
- Computer or laptop: A computer or laptop with the design software installed is essential for creating and editing your phone case designs.
- Heat press machine or sublimation heat press: Depending on the type of printing method you choose, you will need either a heat press machine or a sublimation heat press. These machines apply heat and pressure to transfer the design onto the phone case.
- Protective gloves and apron: It is important to protect yourself from any potential hazards during the printing process. Use heat-resistant gloves and an apron to protect your skin and clothing.
- Cleaning supplies: Keep some cleaning supplies handy to remove any smudges or dirt from the phone cases before printing.
- Optional embellishments: If you want to add some extra flair to your phone cases, consider using embellishments such as rhinestones, stickers, or metallic foils.
- Paper trimmer or scissors: Use a paper trimmer or a pair of scissors to cut the printed design to the appropriate size for your phone case.
Having these materials ready before you start the printing process will ensure a smooth and successful printing experience.
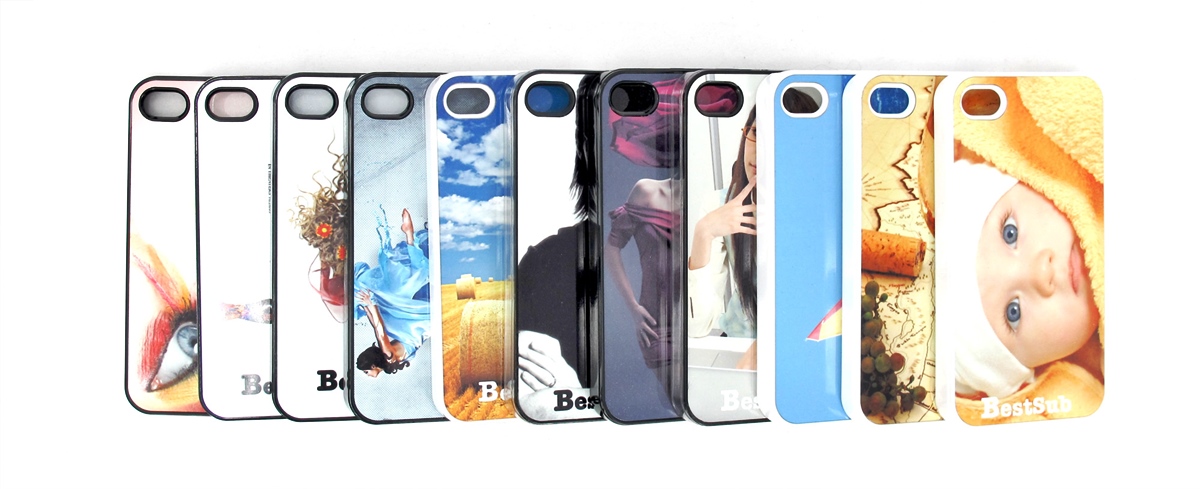
Step 1: Selecting the Design
When it comes to printing phone cases, the first step is to select a design that suits your taste and style. There are numerous sources to explore for inspiration, including online platforms, design marketplaces, or creating your own custom design.
If you’re looking for ready-made designs, you can browse through websites that offer a wide selection of phone case designs. These platforms often categorize designs based on different themes, such as nature, abstract, patterns, or pop culture. Take your time to explore different designs and choose one that resonates with your personal preferences.
Another option is to visit design marketplaces where artists and designers from around the world offer their unique creations. These marketplaces often have a variety of design styles and techniques, allowing you to find something truly original.
If you have a creative streak and prefer a one-of-a-kind design, you can try creating your own. There are numerous software applications and online tools available that allow you to design your phone case. You can unleash your creativity, experiment with different colors, images, and typography to create something truly unique and personalized.
Remember, the design you choose should reflect your personality and interests. Whether it’s a minimalist pattern, a vibrant floral design, or a custom image, selecting a design that resonates with you will make your printed phone case truly special.
Step 2: Preparing the File
Before you can start printing your desired design onto a phone case, you need to ensure that the file is properly prepared. Follow these steps to get your file ready:
1. Choose the right file format: When preparing your design, it’s essential to use the correct file format. Most printers accept files in JPEG or PNG format. These formats provide a good balance between image quality and file size. Make sure to save your design in one of these formats before moving forward.
2. Check the image resolution: The quality of the printed design greatly depends on its resolution. Higher resolutions generally result in sharper and more detailed prints. It’s recommended to have a resolution of at least 300 DPI (dots per inch) for optimal results. If your image has a lower resolution, consider resizing or finding a higher-quality version of it.
3. Adjust the dimensions: Different phone cases have various sizes and dimensions. Ensure that your design is correctly sized to fit the phone case you’re planning to print on. Take measurements of the case, and adjust the dimensions of your design accordingly. Pay attention to any specific guidelines provided by the manufacturer or printing service as well.
4. Remove background or unwanted elements: If your design has a background or any unwanted elements, it’s best to remove them to achieve a cleaner and more focused look. Use photo-editing software like Adobe Photoshop or online platforms like Canva to edit your design and eliminate any unnecessary elements or distractions.
5. Consider adding bleed: Bleed is the extended area beyond the actual print boundaries. Adding bleed ensures that no white edges appear on the printed phone case due to slight variations during the cutting process. Consult the printing guidelines or the printing service you’re using to find out the optimal bleed size to add to your design.
6. Save and export the file: Once you have made all the necessary adjustments and edits to your design, save the file and export it in the preferred file format. Double-check that everything looks as intended, including the correct dimensions, resolution, and any added bleed. It’s always a good idea to keep a backup of your original design file, in case you need to make further modifications in the future.
By following these steps and properly preparing your design file, you’ll be one step closer to printing your chosen design onto your phone case. Once the file is ready, you can move on to the next stage of the printing process.
Step 3: Printing the Design
After selecting and preparing the design, the next step is to print it onto the phone case. This process may vary depending on the type of printer you have and the materials you are working with. Here are a few steps to guide you through the printing process:
1. Set up your printer: Ensure that your printer is properly set up and connected to your computer. Make sure you have the correct printer settings, such as paper size and quality, selected for the type of phone case material you are using.
2. Load the printable material: If you are using printable phone case sheets, follow the manufacturer’s instructions on how to load them into your printer. Make sure the material is properly aligned to avoid any printing errors.
3. Preview and adjust the design: Before printing the final design, it is a good idea to preview it on your computer screen. Check for any scaling or alignment issues and make any necessary adjustments using graphic design software.
4. Print the design: Click the print button and wait for the printer to complete the job. Ensure that you have enough ink or toner in your printer cartridge to avoid any interruptions during the printing process.
5. Let the print dry: Once the design is printed, allow it to dry completely before proceeding to the next step. This will prevent smudges or smears when applying the design to the phone case.
6. Check for any imperfections: After the print has dried, examine the design for any imperfections, such as color bleed or distortions. In case of any issues, repeat the printing process until you achieve the desired result.
7. Optional: Apply any protective coating: If you want to add an extra layer of protection to the design, consider applying a clear coat of sealant or spray-on varnish. This can help prevent the print from fading or scratching over time.
Printing the design onto a phone case is a crucial step in the customization process. Make sure to follow these steps carefully to achieve the best results and create a truly personalized phone case.
Step 4: Applying the Design to the Phone Case
Once you have printed your desired design onto the transfer paper, it’s time to apply it to the phone case. Follow these simple steps to ensure a successful and professional-looking application:
1. Prepare the phone case: Before applying the transfer, make sure the phone case is clean and free from any dust or debris. Use a gentle cleanser or wipe to remove any fingerprints or smudges.
2. Trim the transfer paper: Carefully trim the excess paper around the design, leaving a small border. This will make it easier to align the design on the phone case and give it a clean, finished appearance.
3. Position the design: Place the trimmed transfer paper onto the desired spot on the phone case, aligning it accurately. Take your time to ensure the design is centered and straight. You can lightly tape the edges of the paper to hold it in place temporarily.
4. Apply heat and pressure: Using a heat press or an iron set to the appropriate temperature, apply heat and pressure to the transfer paper. Follow the manufacturer’s instructions for time and temperature settings.
5. Peel off the backing: Carefully peel off the backing paper while the transfer is still warm. Start from one corner and slowly peel it off, making sure the design adheres to the phone case. If you notice any parts of the design not sticking, place the backing paper back down and apply more heat and pressure.
6. Allow it to cool: Once the transfer paper is removed, allow the phone case to cool completely before handling it. This will ensure that the design sets properly and remains intact.
7. Optional: Apply a clear coat: For added durability and protection, you can apply a clear coat over the design. This will help to prevent scratching and fading over time. Make sure to use a clear coat that is compatible with the type of transfer you used.
With these steps, you can easily apply your printed design onto a phone case and create a customized and personalized accessory. Experiment with different designs and colors to make your phone case truly unique.
Step 5: Finishing Touches
After you have printed and applied the design to your phone case, it’s time to add those final finishing touches. These small details can make a big difference in the overall appearance and durability of your printed phone case. Here are a few tips to help you achieve a professional and polished look:
1. Seal the Design: To protect your printed design from scratches and fading, it’s a good idea to seal it with a protective coating. There are various options available, such as clear lacquer or a clear phone case spray. Apply the sealant evenly and let it dry thoroughly before handling the phone case.
2. Clean and Buff: Before you start using your newly printed phone case, give it a good cleaning. Use a mild soap and water solution to gently remove any dust or smudges. Once it’s clean, use a microfiber cloth or a lint-free cloth to buff the surface of the phone case, bringing out its shine.
3. Test for Compatibility: If you have added any additional accessories to your phone case, such as a phone grip or a cardholder, make sure to test their compatibility. Ensure that your phone case still fits properly and functions as intended with these added elements.
4. Personalize Further: If you want to add an extra touch of personalization to your phone case, consider additional customization options. This could include adding stickers, decals, or even using a heat press to apply vinyl designs. Get creative and make it uniquely yours!
5. Evaluate and Adjust: Once you’ve completed the finishing touches, take a step back and evaluate the overall look and feel of your printed phone case. Pay attention to any areas that may need adjustment or improvement, and make necessary changes. Remember, practice and experimentation are key to achieving the perfect finished product.
By paying attention to these finishing touches, you can enhance the longevity and visual appeal of your printed phone case. Whether you’re creating a custom case for yourself or as a gift, these final steps will ensure that your design stands out and remains protected.
Tips and Tricks for Printing Phone Cases
Printing phone cases can be a fun and creative way to personalize your mobile device. Whether you’re looking to showcase your favorite design, create a custom case for a special occasion, or even start a small business, it’s important to keep a few tips and tricks in mind to ensure a successful printing experience. Here are some valuable insights to help you get the best results:
- Choose the Right Printer: A high-quality printer is essential for producing crisp and vibrant prints. Look for a printer that offers high resolution and is compatible with the materials you plan to use for your phone cases.
- Select the Right Materials: Speaking of materials, it’s crucial to choose the appropriate ones for your phone case printing. Opt for durable and scratch-resistant materials that will withstand everyday use and protect your device.
- Use High-Quality Images: The resolution and quality of the images you use will greatly impact the final result. Ensure you have high-resolution images to guarantee the clarity and sharpness of the design when printed on the phone case.
- Adjust Color Profiles: Colors can appear differently on screens versus printed materials. To ensure accurate color representation, consider calibrating your monitor and adjusting color profiles before printing your designs.
- Test Print: Before diving into large-scale production, it’s wise to do some test prints first. Printing a sample of your design on a spare or inexpensive case allows you to assess the colors, sharpness, and overall quality of the print.
- Properly Align the Design: Aligning the design correctly on the phone case is crucial for an aesthetically pleasing result. Measure and mark the center of the case and use guides or templates to ensure accurate placement of the design.
- Consider Different Printing Techniques: There are various printing techniques available, such as sublimation, direct-to-garment, or UV printing. Research and experiment with different methods to determine which one works best for your desired outcome.
- Protect the Print: To ensure the longevity of the printed design, consider applying a protective coating or using a clear phone case that provides additional protection against scratches and fading.
- Experiment with Textures and Finishes: Don’t be afraid to explore different textures and finishes for your phone case designs. Embossing, glossy or matte finishes, and even 3D effects can add a unique touch to your creations.
- Consider Market Trends: If you plan to sell your printed phone cases, staying updated with the latest trends can help you create designs that appeal to a wider audience. Research popular themes, styles, and patterns to stay ahead of the competition.
By keeping these tips and tricks in mind, you can ensure a successful and enjoyable experience when printing phone cases. Whether you’re printing for yourself or for potential customers, the key is to focus on quality, attention to detail, and finding your own unique style. So, get creative, have fun, and let your phone case designs stand out from the crowd!
In conclusion, learning how to print phone cases opens up a world of possibilities for customization and personalization. With the right tools and techniques, you can transform a plain and generic phone case into a unique and eye-catching accessory. Whether you want to showcase your favorite designs, personalize a case with your own photos, or even start a business selling custom phone cases, printing your own cases gives you the freedom and creativity to do so. So, why settle for boring and ordinary phone cases when you can unleash your creativity and create something truly one-of-a-kind? Take the leap and start printing your own phone cases today!
FAQs
1. Can I print my own design on a phone case?
Yes, you can definitely print your own design on a phone case. There are various online services and printing shops that offer customizable phone cases. You can upload your design or choose from a range of templates to create a unique phone case.
2. What materials are used for printing phone cases?
Phone cases can be made from a variety of materials, including silicone, TPU (thermoplastic polyurethane), polycarbonate, and leather. The choice of material for printing usually depends on personal preference and the intended level of protection. The printing process may vary depending on the material used.
3. How durable is the printed design on a phone case?
The durability of the printed design on a phone case can depend on factors such as the printing method used, the quality of the print, and the material of the case. Generally, high-quality prints and cases with protective coatings tend to be more durable and resistant to fading, scratching, and peeling.
4. Can I print a phone case for any phone model?
While there is a wide range of phone cases available for popular phone models, it may not always be possible to find a specific design or fit for less common or older phone models. However, many printing services offer customizable options where you can upload your own design to fit your specific phone model.
5. How long does it take to print a phone case?
The printing time for a phone case can vary depending on several factors, such as the printing method, the complexity of the design, and the number of cases being printed. In general, the printing process usually takes a few minutes to a few hours. However, it’s always best to check with the printing service or shop for the estimated time frame.