
Are you having issues with your iPhone 14 and need to reset it to factory settings? Resetting your iPhone can be a helpful troubleshooting step to fix software glitches or prepare your device for resale. In this article, we will guide you through the process of resetting your iPhone 14 to factory settings. Whether you need to erase all of your personal data, or simply want to start fresh, we’ve got you covered. By following our step-by-step instructions, you’ll be able to restore your iPhone 14 to its original settings in no time. So, let’s get started and learn how to reset your iPhone 14 to factory settings.
Inside This Article
- How to Reset iPhone 14 to Factory Settings
- Step 1: Backup your Data
- Step 2: Sign out of iCloud and other Accounts
- Step 3: Erase All Content and Settings
- Step 4: Set up your iPhone as New or Restore from Backup
- Conclusion
- FAQs
How to Reset iPhone 14 to Factory Settings
If you’re looking to give your iPhone 14 a fresh start, resetting it to factory settings is the way to go. This process erases all the data and settings on your device, returning it to its original state when you first purchased it. Whether you’re selling your iPhone, experiencing software issues, or simply want to start with a clean slate, this guide will walk you through the steps to reset your iPhone 14 to factory settings.
Before diving into the resetting process, it’s crucial to back up your data. This will ensure that you don’t lose any important files, photos, or messages. You can create a backup either through iCloud or by connecting your iPhone to a computer and using iTunes. Make sure you have enough storage space available to store your backup.
Once your data is safely backed up, the next step is to sign out of iCloud and any other accounts linked to your iPhone 14. This includes your Apple ID, iMessage, FaceTime, iCloud Photos, and any other apps or services you may be signed into. By signing out of these accounts, you’ll prevent any potential issues when resetting your device.
Now comes the actual reset process. On your iPhone 14, navigate to the “Settings” app and tap on “General.” Scroll down and find the “Reset” option. Tap on it, and you’ll see different reset options available, including “Erase All Content and Settings.” Select this option to proceed with the factory reset.
Keep in mind that this process will wipe all your data, settings, and apps from your iPhone 14. It’s important to be certain about your decision before proceeding. Once you’ve confirmed the reset, your device will begin the reset process, erasing all content and settings. This may take a few minutes to complete.
Once the reset is complete, your iPhone 14 will restart and display the initial setup screen. At this point, you can choose to set up your device as new or restore it from your previously created backup. If you want to start fresh, select the “Setup as New iPhone” option and follow the on-screen prompts to configure your device.
If you prefer to restore your iPhone 14 from a backup, choose the “Restore from iCloud Backup” or “Restore from iTunes Backup” option, depending on where you created the backup. Follow the instructions provided and select the most recent backup to restore your data and settings onto your device.
Step 1: Backup your Data
Before you reset your iPhone 14 to factory settings, it’s crucial to back up all your important data to ensure nothing is lost during the process. Here’s how you can back up your data:
1. Connect your iPhone 14 to a stable Wi-Fi network.
2. Open the “Settings” app on your iPhone.
3. Scroll down and tap on “iCloud.”
4. If you haven’t already, sign in to your iCloud account using your Apple ID and password.
5. In the iCloud settings, you will see a list of apps that can be backed up. Toggle on the switch for each app that contains important data you want to save.
6. Scroll down and tap on “iCloud Backup.”
7. Toggle on the switch for “iCloud Backup.” This will enable automatic backups of your iPhone to iCloud.
8. Tap on “Back Up Now” to initiate an immediate backup of your iPhone. Keep in mind that the duration of the backup process may vary depending on the amount of data on your device and the speed of your internet connection.
9. Once the backup is complete, you can verify it by going to “Settings” > “iCloud” > “iCloud Storage” > “Manage Storage.” You should see your recent backup listed here.
It’s always a good practice to regularly back up your iPhone to ensure all your important data, such as photos, contacts, messages, and app data, is safely stored. By following this first step, you can proceed with confidence to reset your iPhone 14 to factory settings, knowing that your data is securely backed up.
Step 2: Sign out of iCloud and other Accounts
Before resetting your iPhone 14 to factory settings, it is crucial to sign out of your iCloud account and any other accounts linked to your device. This step ensures that your personal information, data, and settings are not accessible by anyone else.
To sign out of iCloud, follow these simple steps:
- Open the “Settings” app on your iPhone 14.
- Tap on your name at the top of the screen. This will take you to your Apple ID settings.
- Scroll down and tap on “Sign Out” at the bottom of the page.
- Enter your Apple ID password if prompted.
- You will be asked whether you want to keep a copy of your iCloud data on your iPhone. If you plan to set up your iPhone as new, choose the option to “Delete from My iPhone.” If you want to restore your iPhone from a backup later, you can choose to “Keep on My iPhone.”
- Tap on “Sign Out” to confirm and sign out of your iCloud account.
In addition to signing out of iCloud, make sure to log out of any other accounts linked to apps and services on your iPhone 14. This may include accounts for email, social media, messaging apps, and more.
By signing out of all accounts, you ensure that your personal data, such as emails, messages, and social media activity, remains private and secure.
Remember to keep track of any account credentials or login information you may need to re-enter after resetting your iPhone 14 to factory settings.
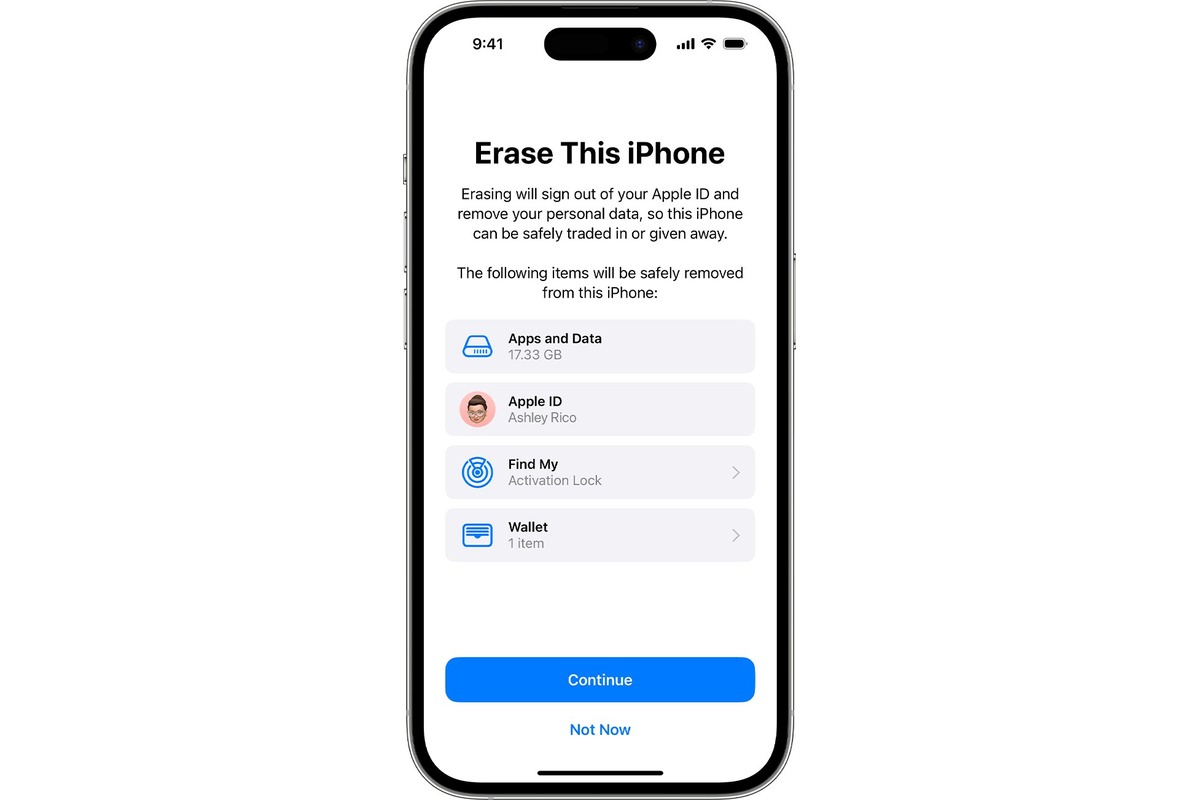
Step 3: Erase All Content and Settings
Once you have backed up your data and signed out of your iCloud and other accounts, you are ready to move on to the next step: erasing all content and settings on your iPhone 14. This step will restore your device to its original factory settings, wiping out all data and personalization.
To proceed with the erase process, follow these simple steps:
- Go to the “Settings” app on your iPhone 14. It is represented by a gear icon and can usually be found on your home screen.
- Scroll down and tap on the “General” option.
- Next, scroll down and select “Reset”.
- In the reset menu, tap on the “Erase All Content and Settings” option.
- You may be asked to enter your passcode to continue. Enter the passcode for your iPhone 14 when prompted.
- A warning message will appear, reminding you that this action will erase all data, including photos, videos, apps, and settings. If you are sure you want to proceed, tap on “Erase Now”.
- The erasing process will begin, and you will see a progress bar indicating the status. This may take several minutes to complete, depending on the amount of data on your device.
- Once the erasing process is finished, your iPhone 14 will reboot, and you will be presented with the setup screen, as if you just turned on the device for the first time.
It is important to note that erasing all content and settings is irreversible, so make sure you have backed up any important data before proceeding with this step. Additionally, ensure that your iPhone 14 is connected to a stable Wi-Fi network and has enough battery power to complete the process.
By performing a factory reset, you can address various issues with your iPhone 14, such as freezing, crashes, or excessive lag. It is also useful if you plan to sell or give away your device, as it ensures that your personal information and data are completely wiped out.
Now that you have successfully erased all content and settings on your iPhone 14, you can proceed to the next step of setting up your device as new or restoring from a backup, depending on your preference.
Step 4: Set up your iPhone as New or Restore from Backup
Once you have completed the previous steps of backing up your data, signing out of iCloud and other accounts, and erasing all content and settings, you are now ready to set up your iPhone 14. There are two options available: setting up your iPhone as new or restoring it from a backup.
If you choose to set up your iPhone as new, you will start with a clean slate. This means that all your previous data, settings, and apps will be wiped out and you will have to reinstall and reconfigure everything from scratch. While this may take some time and effort, it can be beneficial if you want a fresh start or if you were experiencing issues with your device.
On the other hand, if you opt to restore your iPhone from a backup, you will be able to transfer all your data, settings, and apps from a previous backup. This is particularly useful if you want to retain your previous settings, app layout, and personalization without having to manually reinstall everything.
To restore from a backup, follow these steps:
- Connect your iPhone 14 to a Wi-Fi network.
- On the “Apps & Data” screen during the setup process, select “Restore from iCloud Backup” if you have an iCloud backup, or “Restore from Mac or PC” if you have a backup stored on your computer.
- If you are restoring from an iCloud backup, sign in to your iCloud account using your Apple ID and password. Select the backup you want to restore from the list of available backups.
- If you are restoring from a backup on your computer, open iTunes or Finder on your Mac or PC and connect your iPhone 14 using the USB cable. Select your iPhone when it appears in iTunes or Finder, and choose the backup you want to restore.
- Wait for the restore process to complete. This may take some time depending on the size of your backup and the speed of your internet connection.
- Once the restore is finished, your iPhone 14 will restart and you can proceed with the setup process. Follow the on-screen instructions to set up your device.
It’s important to note that restoring from a backup will bring back all your data, including apps, photos, contacts, messages, and settings. However, it may also bring back any issues or glitches that were present in the backup. If you were experiencing problems with your previous setup, it may be worth considering setting up your iPhone as new instead of restoring from a backup.
Ultimately, the choice between setting up your iPhone as new or restoring from a backup depends on your personal preference and the condition of your previous setup. If you are starting fresh or troubleshooting issues, setting up as new may be the way to go. However, if you want to retain your previous data and settings, restoring from a backup is the ideal option.
Whichever option you choose, make sure to carefully follow the setup process and take note of any prompts or instructions to ensure a smooth and successful setup of your iPhone 14.
Conclusion
In conclusion, resetting your iPhone 14 to factory settings can be a powerful troubleshooting tool to resolve various software issues and improve overall performance. Whether you need to fix a persistent bug, clear up storage space, or prepare your device for resale, the process is simple and effective.
By backing up your data, signing out of iCloud, and following the step-by-step instructions provided, you can confidently perform a factory reset on your iPhone 14. Just remember to take note of any important information before proceeding, as a factory reset erases all data and settings on your device.
Once the factory reset is complete, you can set up your iPhone 14 as a new device or restore from a backup to quickly resume using your preferred apps, settings, and personal data.
Now that you have a clear understanding of how to reset your iPhone 14 to factory settings, you can confidently troubleshoot any issues that arise and enjoy a smoother, more efficient user experience.
FAQs
Q: How do I reset an iPhone 14 to factory settings?
A: Resetting your iPhone 14 to factory settings is a straightforward process. Go to the Settings app on your iPhone, tap on General, then scroll down and tap on Reset. From there, select the option “Erase All Content and Settings” and confirm your choice. Your iPhone 14 will then begin the reset process, restoring it to its original factory settings.
Q: Will resetting my iPhone 14 delete all my data?
A: Yes, when you reset your iPhone 14 to factory settings, it will delete all your data, including your contacts, photos, videos, apps, and any other personal information. It is essential to backup your data before performing a reset.
Q: Can I reset my iPhone 14 without using the Settings app?
A: Yes, you can reset your iPhone 14 without using the Settings app. If your iPhone is unresponsive or you are unable to access the Settings app, you can perform a hard reset by holding down the power button and the volume down button simultaneously until the Apple logo appears on the screen. This will force restart your iPhone 14 and may resolve any software-related issues.
Q: Will resetting my iPhone 14 remove the latest iOS update?
A: No, resetting your iPhone 14 to factory settings will not remove the latest iOS update. It will only restore the device to its original factory settings while keeping the current version of iOS intact. If you wish to downgrade to a previous iOS version, you need to perform a separate restore using a backup with the desired iOS version.
Q: Can I undo a factory reset on my iPhone 14?
A: Unfortunately, once you have performed a factory reset on your iPhone 14, the process cannot be undone. All your data and settings will be permanently erased, and there is no way to recover them unless you have a backup. It is crucial to double-check and ensure you have backed up any important data before proceeding with the reset.