
Are you excited to get your hands on a brand new Samsung phone? Setting up a new phone can be an exhilarating experience, but it can also seem overwhelming, especially if you’re transitioning from your old device. But worry not, because in this article, we will guide you through the process of setting up your new Samsung phone from your old one. Whether you’re moving from an iPhone or another Android device, we’ve got you covered. From transferring your contacts, apps, and data to customizing your settings, we’ll provide you with all the tips and tricks you need to make the transition seamless and hassle-free. So let’s dive in and learn how to set up your new Samsung phone like a pro!
Inside This Article
- Step 1: Backing Up Your Old Samsung Phone
- Step 2: Preparing Your New Samsung Phone
- Step 3: Transferring Data and Settings via Smart Switch
- Step 4: Setting Up Your Accounts and Personalization
- Conclusion
- FAQs
Step 1: Backing Up Your Old Samsung Phone
Before setting up your new Samsung phone, it is essential to back up your old device to ensure that none of your important data is lost in the process. Here are a few simple steps to help you securely back up your old Samsung phone:
1. Make sure your old Samsung phone is connected to the internet: Before you begin the backup process, ensure that your old phone is connected to a stable and secure Wi-Fi network. This is crucial as it will allow you to transfer your data efficiently and without any interruptions.
2. Open the settings on your old Samsung phone: Go to the settings menu on your old device and find the “Backup and Restore” or “Cloud and Accounts” option. Different Samsung models may have slightly different paths to reach this section, so make sure to locate the appropriate menu.
3. Choose the backup option: Once you’re in the “Backup and Restore” or “Cloud and Accounts” section, look for the backup option. This might be labeled as “Backup my data” or something similar. Tap on it to start the backup process.
4. Select the data you want to back up: In the backup options, you’ll find a list of different types of data that can be backed up, such as contacts, messages, photos, and more. Select the types of data that you want to include in your backup. It’s advisable to back up all the available data to ensure a complete transfer to your new device.
5. Initiate the backup: Once you have selected the data you wish to back up, tap on the “Backup” or “Start Backup” option to initiate the process. The time it takes to complete the backup will depend on the amount of data you have, so be patient and allow the process to finish.
6. Verify the backup: After the backup process is complete, make sure to verify that the backup was successful. You can do this by going back to the backup options and confirming that the data you selected is backed up and ready to be transferred.
By following these steps, you can easily back up your old Samsung phone and ensure that all your important data is safely preserved. Now that your data is backed up, you’re ready to move on to the next step – setting up your new Samsung phone!
Step 2: Preparing Your New Samsung Phone
After unpacking your new Samsung phone, it’s time to get it ready for use. Follow these steps to ensure a smooth setup process:
1. Power on your new phone by pressing and holding the power button located either on the side or top of the device. Once the Samsung logo appears on the screen, release the button.
2. Select your preferred language and region from the on-screen prompts. This will set the default language and regional settings for your device.
3. Connect to a Wi-Fi network. Swipe down from the top of the screen to open the notification panel, then tap the Wi-Fi icon. Choose your Wi-Fi network from the available options and enter the password if required. Once connected, your phone can download necessary updates and apps.
4. Sign in to your Google account. If you already have a Google account, enter your email address and password to sign in. If not, tap “Create account” to set up a new one. Signing in to your Google account will give you access to various Google services and allow you to restore your data from a previous device.
5. Set up the Samsung account. A Samsung account allows you to enjoy exclusive services and sync your data across multiple devices. If you already have a Samsung account, sign in with your credentials. Otherwise, tap “Create account” to make a new one.
6. Customize your preferences. Take a few moments to personalize your new Samsung phone. Set a screen lock method, choose your theme and wallpaper, and adjust any other settings according to your preferences.
7. Enable Smart Switch. Samsung Smart Switch is a convenient tool that allows you to transfer data from your old device to your new Samsung phone. To enable Smart Switch, go to the Settings app, select “Accounts and backup,” and then tap “Smart Switch.” Follow the on-screen instructions to transfer your data quickly and effortlessly.
By following these steps, you will successfully prepare your new Samsung phone for use. Whether you’re setting up a brand new device or replacing an old one, these steps will ensure a seamless transition to your new Samsung experience.
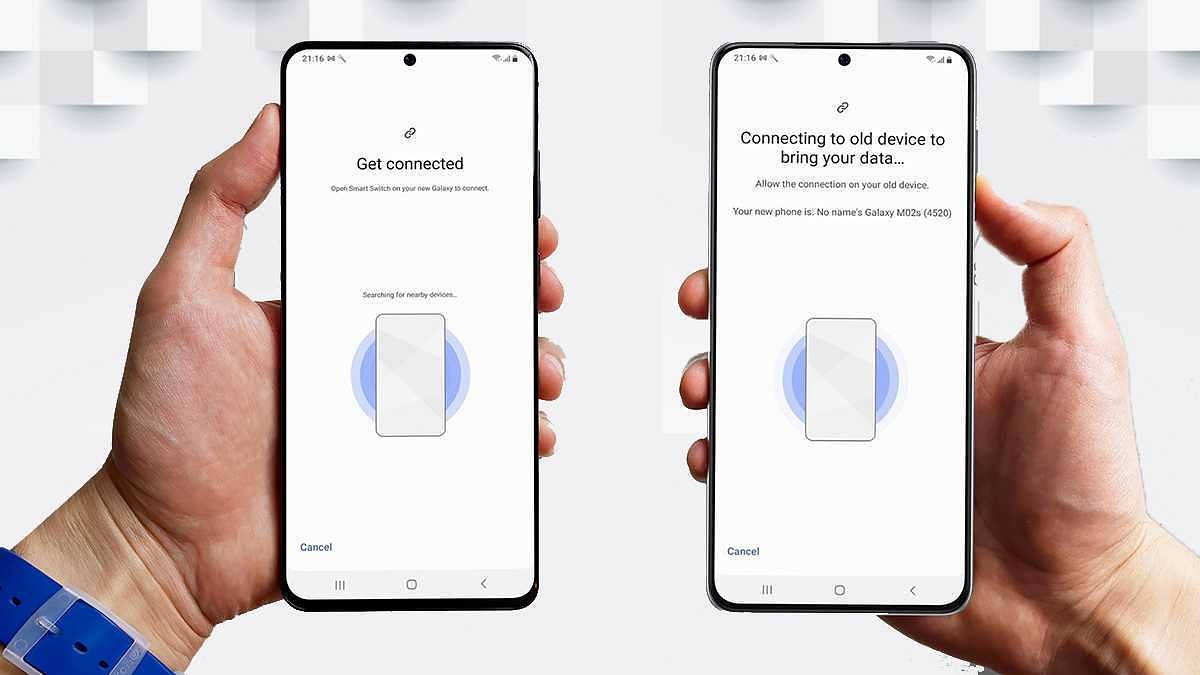
Step 3: Transferring Data and Settings via Smart Switch
If you are switching to a new Samsung phone, you’ll be happy to know that Samsung has a dedicated application called Smart Switch that allows you to seamlessly transfer your data and settings from your old phone to the new one. Smart Switch is a powerful tool that makes the transition to a new device a breeze.
With Smart Switch, you can transfer various types of data including contacts, messages, photos, videos, music, and even apps from your old Samsung phone to your new one. Whether you’re upgrading to a newer model or simply replacing a broken phone, Smart Switch ensures that your important data and settings are transferred safely and efficiently.
Before you begin the transfer process, make sure that both your old and new Samsung phones are charged and have a stable internet connection. You’ll also need to install Smart Switch on both devices, which can be downloaded for free from the Google Play Store.
Once Smart Switch is installed on both devices, follow these simple steps to transfer your data and settings:
- Open Smart Switch on both devices.
- On the old phone, tap on “Send data”. On the new phone, tap on “Receive data”.
- Choose the connection method: wireless or USB cable.
- If you choose the wireless method, make sure both devices are connected to the same Wi-Fi network.
- If you choose the USB cable method, connect the old phone to the new phone using a USB cable.
- On the old phone, select the data and settings you want to transfer.
- Tap on “Transfer” to start the transfer process.
- Wait for the transfer to complete. The time it takes depends on the amount of data being transferred.
- Once the transfer is complete, you’ll be prompted to disconnect the devices and set up your new phone.
It’s important to note that Smart Switch can only transfer data and settings from Samsung devices running Android 4.3 or later. If you’re switching from a non-Samsung Android device or an iPhone, you’ll need to use a different method to transfer your data, such as Google Account or Samsung Cloud.
Transferring your data and settings via Smart Switch is a hassle-free way to upgrade your Samsung phone without losing any important information. So, if you’re planning to get a new Samsung device, make sure to take advantage of this handy tool and enjoy a seamless transition.
Step 4: Setting Up Your Accounts and Personalization
Now that you have successfully transferred your data to your new Samsung phone, it’s time to set up your accounts and personalize your device. This step is essential as it allows you to access your email, social media accounts, and customize your phone to suit your preferences.
The first thing you’ll want to do is set up your email accounts. Whether you use Gmail, Outlook, or any other email provider, setting up your email on your Samsung phone is a breeze. Simply open the email app, enter your login credentials, and you’ll be ready to send and receive emails in no time. Make sure to adjust the settings according to your preferences, such as email notifications and synchronization intervals.
Next, it’s time to log in to your social media accounts. Whether you’re a fan of Facebook, Instagram, Twitter, or any other platform, having access to your social media networks on your phone is essential. Install the respective apps from the Google Play Store, or use the pre-installed apps on your Samsung phone, and log in with your account details. This way, you can stay connected with your friends and family and easily share updates or photos on the go.
In addition to email and social media accounts, you may also have other online accounts that you use on a regular basis, such as banking, shopping, or streaming services. Install the corresponding apps or access the websites on your new Samsung phone and log in with your account credentials. Make sure to enable any additional security measures, such as two-factor authentication, for added protection.
Now that your accounts are set up, it’s time to personalize your Samsung phone to make it feel like your own. Start by customizing your home screen and app layout. You can rearrange the icons, create folders, and choose a wallpaper that suits your style. Samsung phones also offer various themes and customization options, allowing you to change the overall look and feel of your device.
Don’t forget to set up additional features and settings that are important to you. This could include enabling biometric security options like fingerprint or facial recognition, adjusting notification settings to prevent distractions, and configuring your preferred language and keyboard settings. Take the time to explore the settings menu and tailor your Samsung phone to meet your specific needs and preferences.
Setting up your accounts and personalizing your Samsung phone are crucial steps in making your new device truly yours. By following these steps, you can ensure that you have seamless access to your email, social media accounts, and other online platforms while enjoying a customized and personalized experience with your new Samsung phone.
Conclusion
Setting up a new Samsung phone from an old device doesn’t have to be a daunting task. With the right steps and guidance, you can effortlessly transfer your data and settings to ensure a smooth transition. Whether you’re upgrading to a newer Samsung model or switching devices, following the above methods will help you get up and running in no time.
Remember to back up your data, sign in to your Samsung account, and use the Smart Switch app to transfer your apps, photos, contacts, and more. Additionally, take advantage of the Samsung Cloud service to safeguard your data and keep it accessible across devices.
As technology advances, setting up a new phone becomes simpler and more convenient. Samsung devices, in particular, offer a user-friendly experience that prioritizes seamless transitions and data preservation. So, don’t worry about the hassle of setting up your new Samsung phone – with these steps, you’ll be ready to enjoy your new device in no time!
FAQs
1. How do I transfer my data from my old phone to a new Samsung phone?
Transferring your data from your old phone to a new Samsung phone is a simple process. You can use Samsung’s Smart Switch app, which allows you to transfer your contacts, photos, messages, and other important data wirelessly. Simply install the Smart Switch app on both devices, follow the on-screen instructions, and select the data you want to transfer. Alternatively, you can also use methods like backing up your data to the cloud or transferring it via a computer using a USB cable.
2. How long does it take to set up a new Samsung phone?
The time it takes to set up a new Samsung phone can vary depending on various factors, such as the amount of data you need to transfer and the apps you need to install. On average, the initial setup process, including transferring data and installing apps, can take anywhere from 15 minutes to an hour. However, this may be longer if you have a large amount of data or if your internet connection is slow.
3. Can I set up a new Samsung phone without a SIM card?
Yes, you can set up a new Samsung phone without a SIM card. When setting up your new Samsung phone, you will be prompted to connect to a Wi-Fi network. You can skip the SIM card activation step and proceed with the setup process. However, note that without a SIM card, you will not be able to make calls or send text messages until you insert a valid SIM card into your device.
4. How do I transfer my apps and settings to my new Samsung phone?
To transfer your apps and settings to your new Samsung phone, you can utilize the Samsung Smart Switch app or the Google Play Store’s built-in restore feature. With Smart Switch, you can transfer your apps, app data, and settings from your old phone to your new Samsung phone. Alternatively, if you have been using the same Google account on both devices, you can restore your apps and settings by signing in to your Google account on your new Samsung phone and allowing the system to sync and install your previously downloaded apps.
5. Can I transfer data from an iPhone to a new Samsung phone?
Yes, you can transfer data from an iPhone to a new Samsung phone. Samsung’s Smart Switch app supports data transfer from iPhone to Samsung devices. Simply install the Smart Switch app on both devices, follow the prompts, and select the data you want to transfer. The app will guide you through the process of transferring your contacts, photos, messages, and more from your iPhone to your new Samsung phone.