
The iPhone 13 is the latest model in Apple’s iconic line of smartphones. Packed with impressive features and cutting-edge technology, the iPhone 13 offers users a seamless and enhanced mobile experience. One of the essential functionalities that iPhone users frequently utilize is taking screenshots. Whether you want to capture a memorable moment in a game, save an important conversation, or share information with others, knowing how to take a screenshot on your iPhone 13 is crucial.
In this article, we will guide you through the step-by-step process of taking screenshots on the iPhone 13. From the traditional button combination to the new gesture-based methods, we will provide you with all the information you need to capture screenshots effortlessly. So, let’s dive in and discover the various ways to capture those precious moments on your iPhone 13!
Inside This Article
- How to Take Screenshot on iPhone 13
- Enable Screenshot Shortcut
- Use Physical Buttons to Take a Screenshot
- Use Assistive Touch to Capture a Screenshot
- Capture a Screenshot with Siri
- Conclusion
- FAQs
How to Take Screenshot on iPhone 13
Are you excited about your new iPhone 13 and want to capture important moments on your device? Well, taking screenshots is a handy feature that allows you to save and share what’s on your screen. Whether you want to capture a funny text message, save a captivating social media post, or record an important moment in a game, taking a screenshot on your iPhone 13 is quick and easy. In this article, we will guide you through the different methods to take a screenshot on your iPhone 13.
To take a screenshot on your iPhone 13, there are two primary methods you can use:
- Using Physical Buttons: This is the traditional method of taking a screenshot on an iPhone.
- Using AssistiveTouch: If you prefer a more convenient way, you can enable AssistiveTouch and use it to take screenshots.
Using Physical Buttons
The physical buttons on your iPhone 13 make it easy to capture a screenshot. Here’s a step-by-step guide:
- Open the app or screen that you want to capture.
- Simultaneously press and quickly release the Side button (previously known as the Sleep/Wake button) located on the right side of your iPhone, and the Volume Up button located on the left side. You should hear a camera shutter sound, indicating that the screenshot has been taken.
- You can view the screenshot immediately by swiping left on the thumbnail that appears at the bottom left corner of the screen. The screenshot will be saved in your Photos app.
Using AssistiveTouch
If you find it inconvenient to press physical buttons, you can enable AssistiveTouch and use it to take screenshots. Here’s how:
- Go to Settings on your iPhone 13.
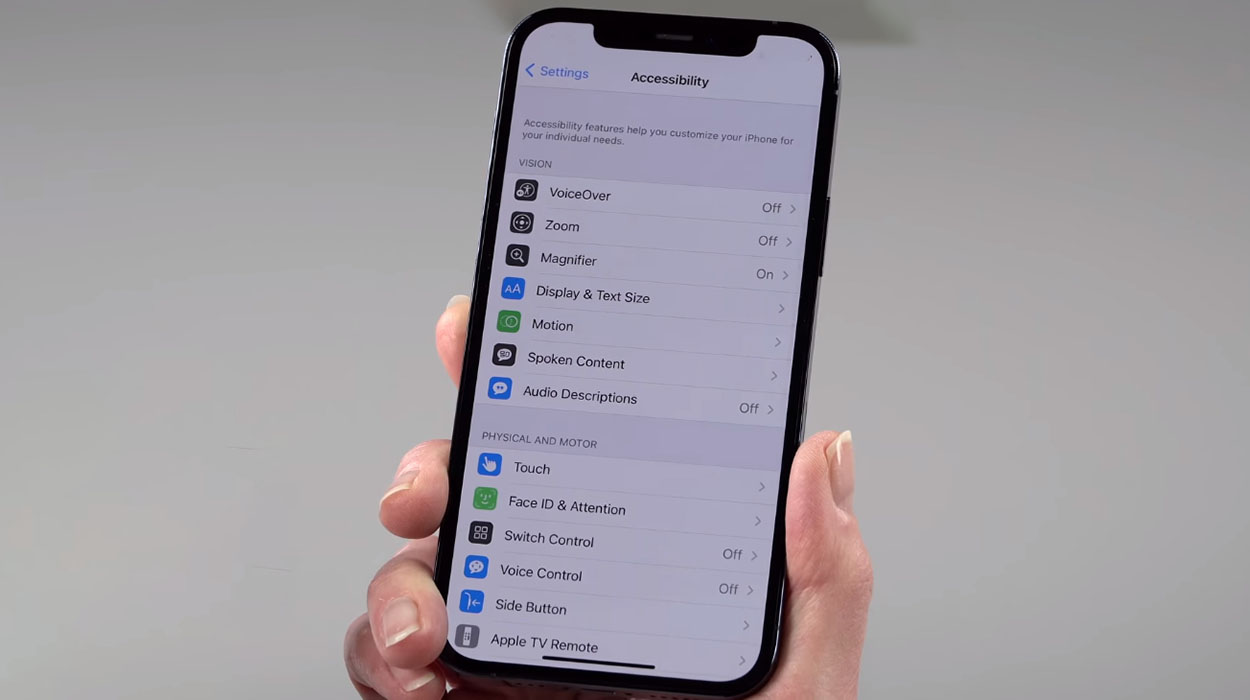
- Tap on Accessibility.
- Scroll down and select Touch.
- Tap on AssistiveTouch and toggle the switch to enable it.
- Tap on Customize Top Level Menu and then on the plus (+) button to add a new icon.
- Select Screenshot from the list of options and tap Done.
- You will now see the AssistiveTouch icon on your screen. Tap on it and then tap on the Screenshot icon to capture a screenshot.
Customizing Screenshot Settings
On your iPhone 13, you can also customize the screenshot settings according to your preferences. Here’s how:
- Go to Settings on your iPhone 13.
- Tap on Camera.
- Under Screenshot, you can choose to enable or disable features such as showing the thumbnail preview, saving screenshots to Photos, or turning off the flash when taking screenshots in low light.
By customizing these settings, you can ensure that taking screenshots on your iPhone 13 is tailored to your specific needs.
Now that you know how to take a screenshot on your iPhone 13, you can capture and preserve important moments with ease. Whether it’s a funny meme, an interesting article, or a memorable chat, you can save and share them with just a few taps. So go ahead, explore the screenshot feature on your iPhone 13, and make those unforgettable moments last!
Enable Screenshot Shortcut
One of the most useful features of the iPhone 13 is the ability to take screenshots with just a few simple steps. By enabling the screenshot shortcut, you can easily capture and save anything on your screen, from important information to memorable moments. Here’s how you can enable the screenshot shortcut on your iPhone 13:
- Open the “Settings” app on your iPhone 13.
- Scroll down and tap on “Control Center.”
- Under the “More Controls” section, you’ll find “Screenshot.” Tap the green plus (+) button next to it to add it to your Control Center.
Once you have enabled the screenshot shortcut, you can easily access it by swiping down from the top right corner of your screen to open the Control Center. You’ll see the screenshot button, which looks like a small camera icon. Simply tap on it to capture a screenshot instantly.
With the screenshot shortcut enabled, you no longer have to fumble with physical buttons or go through multiple steps to take a screenshot on your iPhone 13. It’s a convenient and time-saving feature that enhances your overall user experience.
So, go ahead and enable the screenshot shortcut on your iPhone 13 to make capturing and sharing information easier than ever before.
Use Physical Buttons to Take a Screenshot
If you prefer a more traditional method, you can also use the physical buttons on your iPhone 13 to take a screenshot. Here’s how:
- Step 1: Navigate to the screen that you want to capture.
- Step 2: Locate the Side button (previously known as the Sleep/Wake button) on the right side of your iPhone 13.
- Step 3: Simultaneously press and release the Side button along with the Volume Up button on the left side.
- Step 4: You will see a brief flash on the screen, indicating that the screenshot has been successfully taken.
- Step 5: Access your screenshot by tapping on the thumbnail that appears in the bottom left corner of the screen. From there, you can edit, annotate, or share it as desired.
This method allows for a quick and convenient way to capture your screen without relying on any additional features or settings. It’s especially useful when you need to capture a moment or save important information on your iPhone 13.
However, keep in mind that the placement of the Side button and Volume Up button may vary depending on the iPhone model. If you are using an older iPhone without a Side button, you can use the Sleep/Wake button (located on the top or side of the device) along with the Home button to take a screenshot.
Using the physical buttons to take a screenshot is a reliable method that has been a staple feature on iPhones for years. It offers a straightforward and familiar approach, making it easy for anyone to capture their screen with just a few simple button presses.
Use Assistive Touch to Capture a Screenshot
Assistive Touch is a convenient feature on iPhone 13 that allows you to perform various actions using virtual buttons on your screen. This feature also enables you to capture screenshots without having to use the physical buttons on your device.
To enable Assistive Touch, follow these steps:
- Go to the “Settings” app on your iPhone 13.
- Scroll down and select “Accessibility”.
- Tap on “Touch”, then choose “Assistive Touch”.
- Toggle the switch to turn on Assistive Touch.
Once you have enabled Assistive Touch, here’s how you can use it to capture a screenshot:
- Open the screen or app that you want to capture.
- Tap on the Assistive Touch button that appears on your screen.
- A menu will pop up with various options. Tap on “Device”.
- In the Device menu, select “More”.
- Tap on “Screenshot” to capture a screenshot of the current screen.
- The screenshot will be saved to your Photos app.
By using Assistive Touch, you can easily capture screenshots on your iPhone 13 with just a few taps. This feature is particularly useful for those who may have difficulty pressing the physical buttons or prefer the convenience of virtual buttons.
Remember to disable Assistive Touch once you have finished taking screenshots if you don’t use it for any other purpose. This will prevent any accidental usage or interference with your regular device interactions.
Using Assistive Touch to capture screenshots offers an alternative method that can be especially helpful in certain situations. Whether you have a physical limitation or simply prefer using virtual buttons, this feature makes it easy to take screenshots on your iPhone 13.
Capture a Screenshot with Siri
Siri, Apple’s virtual assistant, can also help you capture a screenshot on your iPhone 13. This method is especially useful if you prefer a hands-free approach or have difficulty using the physical buttons or AssistiveTouch.
To take a screenshot with Siri, follow these steps:
- Activate Siri by saying “Hey Siri” or pressing and holding the Side button on your iPhone 13.
- Once Siri is activated, simply say “Take a screenshot” or “Screenshot.”
- Siri will instantly capture a screenshot of your current screen.
- The screenshot will be automatically saved to your Photos app, where you can find it in the “Screenshots” album.
Using Siri to capture a screenshot is convenient and can be especially useful in certain situations, such as when you’re driving or cooking and don’t have your hands free to press the physical buttons.
It’s important to note that Siri should be properly enabled and configured on your iPhone 13 for this feature to work. If you’re having trouble using Siri to capture a screenshot, make sure Siri is enabled by going to Settings > Siri & Search and toggling on the “Listen for ‘Hey Siri'” option. Also, ensure that the voice activation feature is working correctly by verifying your microphone settings.
Capturing a screenshot with Siri is a quick and effortless way to capture and save what’s on your iPhone 13 screen.
Note: Depending on your device’s settings, Siri’s voice activation may work differently, so make sure to check your specific iPhone 13 model’s documentation for the most accurate instructions.
Conclusion
Taking screenshots on the iPhone 13 is a simple and straightforward process that allows you to capture and share important moments with ease. Whether you want to save a funny meme, capture a message, or document an important piece of information, the screenshot feature on the iPhone 13 ensures that you can do so effortlessly.
The combination of the side button and the volume up button has made taking screenshots more convenient than ever before. Additionally, the ability to preview and easily edit the screenshots before saving them provides users with more control and flexibility. With these features, you can crop, annotate, and share your screenshots directly from your device.
Whether you’re a social media enthusiast, a student taking notes, or a professional sharing information, being able to take screenshots on your iPhone 13 is an essential skill. It allows you to capture and express yourself in a visually engaging way. So, next time you come across something worth sharing, don’t forget to utilize the screenshot feature on your iPhone 13!
FAQs
1. How do I take a screenshot on iPhone 13?
To take a screenshot on iPhone 13, simply press the side button (located on the right side of the device) and the volume up button at the same time. The screen will flash white, indicating that the screenshot has been taken. You can find the screenshot in the Photos app or in the Screenshots album in the Photos app.
2. Can I edit my screenshots on iPhone 13?
Yes, you can edit your screenshots on iPhone 13. After taking a screenshot, a thumbnail will appear in the bottom left corner of the screen. Tap on the thumbnail to open the editing tools. You can crop, annotate, add text, or use various other editing options to customize your screenshot before saving or sharing it.
3. How can I share a screenshot on iPhone 13?
Sharing a screenshot on iPhone 13 is easy. After taking a screenshot, tap on the thumbnail that appears in the bottom left corner of the screen. From there, you can tap the Share button to share the screenshot via various methods, such as email, messaging apps, social media, or save it to your iCloud Drive or other file-sharing services.
4. Is it possible to capture a scrolling screenshot on iPhone 13?
Unfortunately, as of now, iPhone 13 does not have a built-in feature to capture scrolling screenshots. However, you can use third-party apps from the App Store that offer this functionality. These apps allow you to capture long screenshots of webpages, conversations, or any other content that extends beyond the visible screen.
5. Can I take a screenshot of a specific portion of the screen on iPhone 13?
Yes, you can take a screenshot of a specific portion of the screen on iPhone 13. After pressing the side button and the volume up button simultaneously, a thumbnail of the screenshot will appear in the bottom left corner of the screen. Tap on the thumbnail and then tap on “Full Page” or “Screen” to choose whether to capture the entire screen or just a specific portion.