
So, you’ve got your hands on the shiny new iPhone 13 Pro, and you’re eager to explore all its amazing features. One of the most useful and frequently used features on any smartphone is the ability to take screenshots. Whether you want to capture a funny meme, save an important message, or show off your high score in a game, knowing how to take a screenshot on your iPhone 13 Pro is essential. In this article, we’ll guide you through the step-by-step process of taking a screenshot on your new iPhone, along with some handy tips and tricks to make the most out of this feature. Let’s dive in and learn how to capture and share your screen in a matter of seconds!
Inside This Article
- How to Take Screenshot on iPhone 13 Pro
- Using the Side Button and Volume Up Button
- Utilizing Assistive Touch
- Capturing a Screenshot with Siri
- Saving a Screenshot on iPhone 13 Pro
- Conclusion
- FAQs
How to Take Screenshot on iPhone 13 Pro
If you’re the proud owner of an iPhone 13 Pro, you may be wondering how to capture the screen and save it as a screenshot. Well, you’re in luck! Taking a screenshot on the iPhone 13 Pro is super easy and can be done in just a few simple steps. In this article, we’ll walk you through three different methods to capture screenshots on your iPhone 13 Pro. Let’s get started!
Using the Side Button and Volume Up Button
The most common way to take a screenshot on the iPhone 13 Pro is by using the physical buttons on the device. First, navigate to the screen you want to capture. Once you’re ready, simultaneously press and release the Side button (located on the right side of the device) and the Volume Up button (located on the left side of the device). You’ll hear a satisfying click noise, and the screen will briefly flash, indicating that the screenshot has been successfully captured.
Utilizing Assistive Touch
If you find it challenging to press the physical buttons at the same time, or if you prefer a more accessible method, you can use the Assistive Touch feature on your iPhone 13 Pro. To enable Assistive Touch, go to Settings > Accessibility > Touch > Assistive Touch, and toggle the switch to turn it on. Once enabled, a small floating button will appear on your screen. Tap on the Assistive Touch button, then select Device > More > Screenshot. The screen will flash, indicating that the screenshot has been taken.
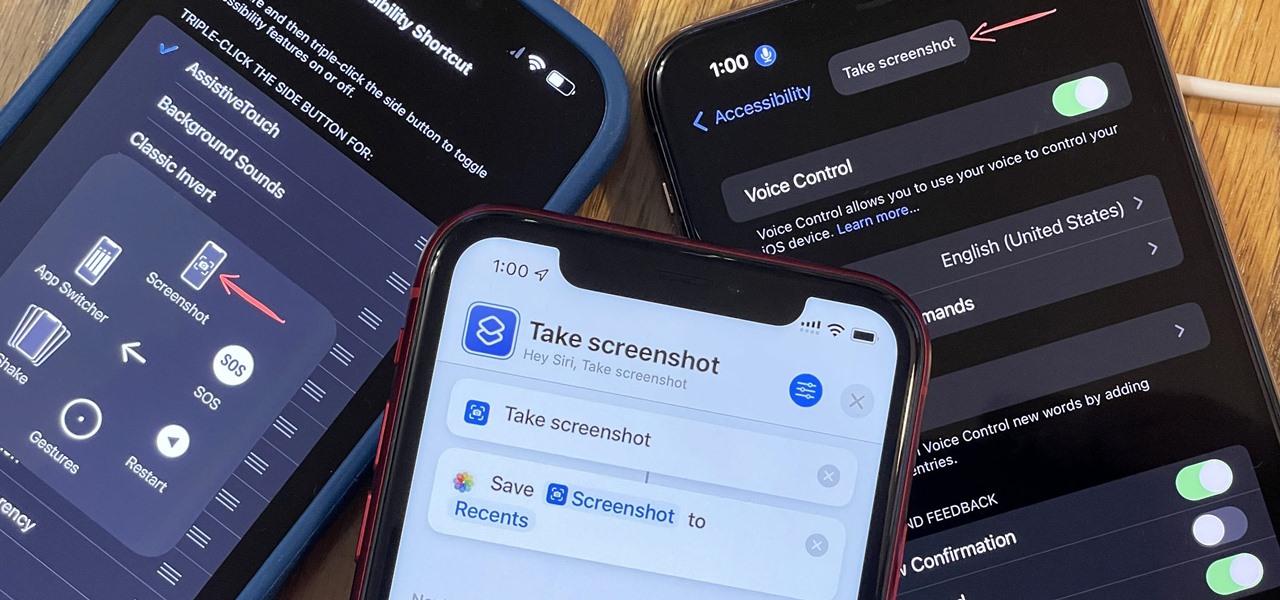
Capturing a Screenshot with Siri
If you’re a fan of hands-free commands, you can also use Siri to capture a screenshot on your iPhone 13 Pro. Simply activate Siri by saying “Hey Siri” or long-pressing the Side button, then give the command “Take a screenshot.” Siri will instantly capture the screen and save it as a screenshot in your Photos app. It’s a convenient option if you need to capture a screenshot quickly without physically interacting with your device.
Saving a Screenshot on iPhone 13 Pro
Once you’ve taken a screenshot on your iPhone 13 Pro, you’ll have the option to preview and edit it before saving. The screenshot preview will appear as a thumbnail in the bottom left corner of your screen. Tap on the thumbnail to open it and make any necessary edits. You can crop, annotate, or add text to the screenshot if desired. When you’re satisfied with the changes, tap on the “Done” button. You can then choose to save the screenshot to your Photos app or share it with others via various platforms like messaging apps, social media, or email.
And there you have it! Three simple ways to take a screenshot on your iPhone 13 Pro. Whether you prefer using the physical buttons, Assistive Touch, or Siri, capturing and saving screenshots has never been easier. Now you can easily document important moments, share interesting conversations, or keep a record of important information with just a few taps. Happy screenshotting!
Using the Side Button and Volume Up Button
One of the easiest and most commonly used methods to take a screenshot on the iPhone 13 Pro is by using the physical buttons on the device. By simultaneously pressing the Side button and Volume Up button, you can capture a screenshot of whatever is currently displayed on your screen.
To do this, locate the Side button on the right side of your iPhone 13 Pro. It is the button used to power on or off your device. The Volume Up button can be found on the left side of the device, just above the Volume Down button.
Once you have identified the buttons, follow these steps to capture a screenshot:
-
Select the desired screen that you want to capture.
-
Press and hold the Side button on the right side of your iPhone.
-
While still holding the Side button, press the Volume Up button on the left side of your iPhone.
-
Release both buttons simultaneously.
Your iPhone screen will flash momentarily, indicating that the screenshot has been successfully captured. You can find the screenshot in the Photos app or in the “Screenshots” album, depending on your device settings.
This method is not only quick and convenient, but it also ensures that you can capture a screenshot easily without needing to navigate through any menus or settings. It is especially useful when you want to capture a specific moment or save important information displayed on your screen.
Utilizing Assistive Touch
If you’re looking for an alternative method to take screenshots on your iPhone 13 Pro, Assistive Touch is a great option. Assistive Touch is a feature designed to assist users with physical or motor disabilities, but it can also be used by anyone as a convenient way to access certain functions, including taking screenshots.
To enable Assistive Touch, follow these steps:
- Go to the “Settings” app on your iPhone 13 Pro.
- Scroll down and tap on “Accessibility.”
- Select “Touch.”
- Tap on “Assistive Touch.”
- Toggle the switch to turn on Assistive Touch.
Once Assistive Touch is enabled, a floating button will appear on your iPhone’s screen. You can move this button to a convenient location by dragging it with your finger.
Now, to capture a screenshot using Assistive Touch:
- Tap the Assistive Touch floating button on the screen to open the Assistive Touch menu.
- In the menu, tap on “Device.”
- Tap on “More.”
- Finally, tap on “Screenshot.”
By following these steps, your iPhone 13 Pro will capture a screenshot, just like it would with the traditional method.
Additionally, you can also customize the Assistive Touch menu by going back to the “Assistive Touch” settings and tapping on “Customize Top Level Menu.” This allows you to add or remove various functions from the menu, making it even more tailored to your needs.
Utilizing Assistive Touch to take screenshots on your iPhone 13 Pro provides a convenient alternative, especially if you find it challenging to press physical buttons simultaneously. It’s a practical feature that can enhance your overall user experience.
Capturing a Screenshot with Siri
If you own an iPhone 13 Pro, you’re in luck! Apple’s virtual assistant, Siri, can help you capture a screenshot effortlessly. With a simple voice command, Siri can initiate the screenshot process, allowing you to quickly capture and save important information or share it with others.
To capture a screenshot with Siri on your iPhone 13 Pro, follow these steps:
- First, activate Siri by pressing and holding the side button or saying, “Hey Siri.”
- Once Siri is active, say, “Take a screenshot.”
- Siri will instantly capture the contents of your screen and provide you with a preview in the lower-left corner.
- You can tap on the preview to make edits, add annotations, or simply choose to save the screenshot by tapping on the share button.
- If you choose to save it, the screenshot will be stored in your Photos app, where you can easily access and share it as needed.
It’s important to note that when using Siri to capture a screenshot, you need to clearly enunciate the voice command to ensure accuracy. Make sure to speak the command in a clear and focused manner to avoid any misunderstandings.
This method is particularly useful if you have your hands occupied or prefer a hands-free approach to taking screenshots on your iPhone 13 Pro. Siri’s quick response time and convenience make it a great option for capturing screenshots on the go.
However, keep in mind that Siri’s ability to capture screenshots may vary depending on your device model and iOS version. It’s always a good idea to check the compatibility and functionality of Siri’s screenshot feature with your specific device.
So, next time you need to capture an important moment or share something interesting on your iPhone 13 Pro, let Siri lend a helping hand with a simple voice command to capture the perfect screenshot.
Saving a Screenshot on iPhone 13 Pro
Once you’ve successfully taken a screenshot on your iPhone 13 Pro, the next step is to save it for future use or share it with your friends and family. Saving a screenshot on the iPhone 13 Pro is incredibly easy and can be done in just a few simple steps.
After you have captured the desired screenshot by either using the side button and volume up button or through Assistive Touch, a preview of the screenshot will appear in the bottom left corner of your screen. You can tap on the preview to instantly access editing options like cropping or adding annotations. This gives you the flexibility to personalize your screenshot before saving it.
To save the screenshot, simply tap on the “Done” button located in the top left corner of the screen. This will take you to the sharing options menu, where you can choose to either save the screenshot to your Photos app or share it with others through various platforms like Messages, Mail, or social media apps.
If you wish to save the screenshot without making any edits or changes, you can simply swipe the preview to the right and the screenshot will be automatically saved to your Photos app. From there, you can access your saved screenshots by opening the Photos app and navigating to the “Screenshots” album located in the “Albums” tab.
Additionally, you can also save screenshots directly to your iCloud Drive or other cloud storage services if you have them set up on your iPhone 13 Pro. This allows you to access your screenshots across multiple devices or easily share them with others.
It’s worth noting that there is no limit to the number of screenshots you can save on your iPhone 13 Pro. You can capture and save as many screenshots as your device’s storage allows. However, it is always a good practice to periodically organize and delete unnecessary screenshots to free up space and ensure optimal device performance.
Whether you want to capture important information, save memorable conversations, or showcase stunning images on your iPhone 13 Pro, saving screenshots is a crucial feature that allows you to preserve and share significant moments at your fingertips.
In conclusion, taking a screenshot on your iPhone 13 Pro is a straightforward and convenient process. Whether you want to capture a hilarious meme, save an important conversation, or showcase an impressive achievement in a game, the screenshot feature on your iPhone 13 Pro has got you covered.
By following the simple steps outlined in this article, you can easily capture and save anything you see on your iPhone 13 Pro screen. Remember to utilize the different screenshot options available, such as capturing the entire screen or selecting a specific portion, to fit your needs.
With the ability to quickly and effortlessly take screenshots, you can capture and share moments from your iPhone 13 Pro with friends, family, or on social media platforms. So go ahead, explore the world of screenshots, and let your creativity shine!
FAQs
1. How do I take a screenshot on iPhone 13 Pro?
To take a screenshot on your iPhone 13 Pro, simply follow these steps:
1. Locate the power button, which is located on the right side of your device.
2. Simultaneously press the power button and the volume up button.
3. Release both buttons quickly.
4. You will see a thumbnail of the screenshot in the bottom left corner of your screen. You can tap on it to edit or share the screenshot.
2. Where are the screenshots saved on iPhone 13 Pro?
By default, screenshots taken on your iPhone 13 Pro are saved in the Photos app. You can access them by opening the Photos app and navigating to the “Screenshots” album.
3. Can I edit my screenshots on iPhone 13 Pro?
Yes, you can edit your screenshots on iPhone 13 Pro. After taking a screenshot, tap on the thumbnail that appears in the bottom left corner of your screen. This will open the screenshot in the built-in Markup editor. From there, you can crop, annotate, draw, add text, and make various adjustments to your screenshot before saving or sharing it.
4. How can I share my screenshots on iPhone 13 Pro?
To share your screenshots on iPhone 13 Pro, follow these steps:
1. Take the screenshot using the method described earlier.
2. Tap on the screenshot thumbnail that appears in the bottom left corner of the screen.
3. In the Markup editor, tap on the Share button (represented by a square with an arrow pointing upwards).
4. Select the desired sharing option, such as AirDrop, Messages, Mail, or social media platforms.
5. Can I take a screenshot of a specific portion of my screen on iPhone 13 Pro?
Yes, you can capture a specific portion of your screen on iPhone 13 Pro. After pressing the power button and volume up button together to take a screenshot, a thumbnail will appear in the bottom left corner of your screen. Tap on the thumbnail, and it will open in the Markup editor. From there, you can use the selection tool to crop the screenshot and capture only the portion you want.