
When it comes to capturing those perfect moments on your iPhone, it’s crucial to have control over the exposure settings. Whether you’re taking photos in bright sunlight or dimly lit environments, adjusting the exposure can make all the difference in creating stunning images. But what if you find that your iPhone’s exposure is consistently too high, causing overexposed photos? Don’t worry – we’re here to help. In this article, we’ll guide you through the steps on how to turn exposure down on your iPhone. From adjusting exposure in the Camera app to using third-party apps for finer control, we’ll explore various methods to achieve the perfect exposure for your photos. So, let’s dive in and take your iPhone photography skills to the next level!
Inside This Article
- Understanding Exposure on iPhone
- Methods to Turn Exposure Down on iPhone
- Adjusting Exposure with the Camera app
- Using Manual Controls in Third-Party Camera Apps
- Utilizing the Exposure Compensation feature
- Conclusion
- FAQs
Understanding Exposure on iPhone
Understanding how exposure works on an iPhone is essential to capturing high-quality photos. Exposure refers to the brightness or darkness of an image and is determined by the amount of light that enters the camera. It plays a crucial role in photography as it affects the overall look and feel of the image.
On an iPhone, exposure is primarily controlled through the camera app. When you open the camera app and frame your shot, the iPhone automatically adjusts the exposure based on the lighting conditions. However, there may be times when you want to have more control over the exposure settings to achieve a specific creative effect or to compensate for challenging lighting situations.
To understand exposure better, it is helpful to know the two key components: shutter speed and ISO. Shutter speed refers to the length of time that the camera’s shutter remains open to capture light. A fast shutter speed freezes motion, while a slow shutter speed can create motion blur. ISO, on the other hand, determines the sensitivity of the camera sensor to light. A lower ISO value is ideal for well-lit scenes, while a higher ISO is suitable for darker environments.
When the iPhone automatically adjusts exposure, it takes into account the available light and the object or scene you are photographing. However, in certain situations, the iPhone’s automatic exposure may not produce the desired results. This is where manually adjusting the exposure on your iPhone becomes handy.
By learning how to control the exposure settings on your iPhone, you can achieve better results in various scenarios. Whether you are photographing a sunset, a brightly lit landscape, or a low-light environment, being able to adjust exposure allows you to capture the mood and atmosphere accurately.
Now that you are familiar with the basics of exposure on an iPhone, let’s move on to the various methods you can use to turn the exposure down on your device.
Methods to Turn Exposure Down on iPhone
Exposure refers to the brightness of an image captured by the iPhone camera. Sometimes, due to strong lighting conditions or other factors, the exposure level can be too high, resulting in overexposed photos. In such cases, it becomes necessary to turn the exposure down to achieve a well-balanced and visually pleasing image.
Fortunately, the iPhone offers several methods to adjust and control exposure. Whether you want to capture a stunning landscape or a beautifully lit portrait, here are some ways to turn down the exposure on your iPhone:
- Adjusting Exposure with the Camera app: The native Camera app on your iPhone provides a simple and intuitive way to adjust exposure. After launching the Camera app, tap on the area of the screen that you want to adjust the exposure for. The exposure slider will appear, allowing you to drag it up or down to increase or decrease the exposure level respectively.
- Using Manual Controls in Third-Party Camera Apps: If you want more control over your exposure settings, you can consider using third-party camera apps that offer manual controls. These apps allow you to adjust various parameters such as ISO, shutter speed, and exposure compensation to fine-tune the exposure level and achieve the desired effect.
- Utilizing the Exposure Compensation feature: The iPhone also has a built-in Exposure Compensation feature, which is accessible from the Camera app. To use it, simply tap on the screen to focus, and then swipe up or down to adjust the exposure compensation. Swiping up increases the exposure, while swiping down decreases it. This feature is particularly helpful when you want to quickly adjust the exposure without diving into manual controls.
By utilizing these methods, you can easily turn down the exposure on your iPhone and capture stunning images in various lighting conditions. Experiment with each technique to find the one that best suits your needs and desired aesthetic.
Adjusting Exposure with the Camera app
The Camera app on your iPhone allows you to take stunning photos in various lighting conditions. One important aspect of capturing the perfect shot is getting the exposure right. Exposure refers to the amount of light that enters the camera sensor, and it can greatly impact the overall brightness and quality of your photos.
Fortunately, adjusting the exposure with the Camera app is quick and easy. Here’s how you can do it:
1. Open the Camera app on your iPhone.
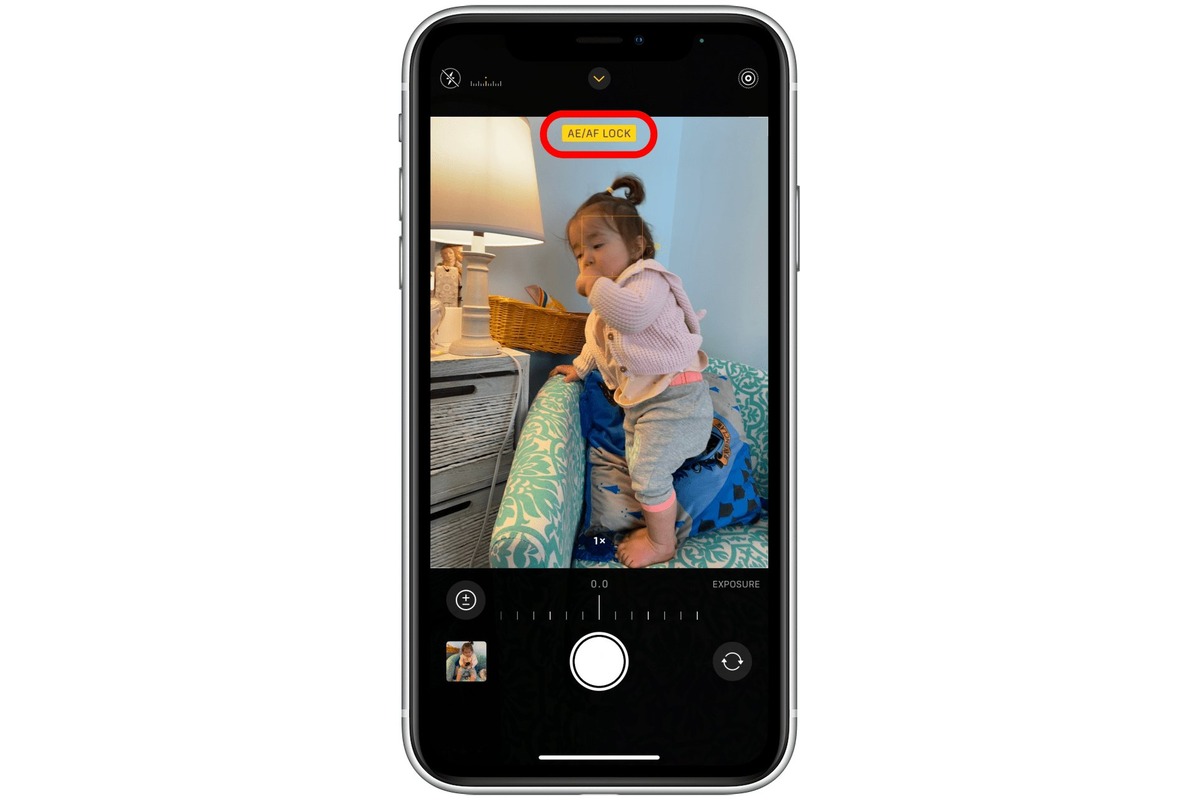
2. Frame your shot and tap on the area of the screen where you want to set the focus and exposure.
3. A yellow square or box will appear to indicate the focus and exposure point. You can drag the yellow box up or down to adjust the exposure level manually.
4. As you drag the yellow box upwards, the exposure will decrease, making the image darker. Dragging it downwards will increase the exposure, making the image brighter.
5. Take a test shot and review the exposure level. If needed, repeat steps 3 and 4 until you achieve the desired exposure for your photo.
It’s important to note that adjusting the exposure in the Camera app is a manual process. This gives you greater control over the final outcome of your photo, allowing you to capture the perfect balance of light and shadow. Experimenting with different exposure levels can also help you add artistic flair to your images.
Remember, the Camera app on your iPhone is equipped with advanced algorithms that automatically adjust the exposure based on the scene and lighting conditions. However, manually adjusting the exposure can often yield better results, especially in challenging lighting situations.
So, the next time you’re out capturing photos with your iPhone, don’t hesitate to experiment with exposure adjustments. You’ll be amazed at the creative possibilities that open up when you take control of the exposure levels yourself.
Using Manual Controls in Third-Party Camera Apps
When it comes to capturing the perfect shot on your iPhone, sometimes the camera’s default settings may not provide the desired exposure. In such instances, utilizing manual controls in third-party camera apps can give you more control over the exposure settings.
Manual camera apps, such as ProCamera, Camera+, or Manual, offer users the ability to adjust essential settings like shutter speed, ISO, and white balance. These apps provide a more advanced interface and options compared to the native Camera app, allowing you to fine-tune the exposure to your liking.
To use manual controls in third-party camera apps, follow these steps:
- First, visit the App Store and choose a camera app that offers manual controls. Some popular options include ProCamera, Camera+, and Manual.
- Install the chosen app on your iPhone and launch it.
- Once the app is open, you will notice various manual control options displayed on the screen. These might include sliders or numerical input fields for settings like ISO, shutter speed, and white balance.
- Experiment with adjusting these settings to achieve the desired exposure. For example, you can decrease the ISO to reduce brightness or increase the shutter speed to darken the image.
- Take test shots and preview the results on the app’s interface. This will allow you to make further adjustments if needed.
- Once you are satisfied with the exposure settings, capture the final image by tapping the shutter button.
Using manual controls in third-party camera apps gives you more flexibility to capture stunning photos in challenging lighting scenarios. Whether you’re shooting in low light conditions or trying to achieve a specific artistic effect, manual control allows you to tailor the exposure settings to your vision.
Remember, each camera app may have a slightly different user interface and control layout. Take some time to familiarize yourself with the features and controls of the app you choose to ensure you make the most of its manual capabilities.
So, the next time you find yourself wanting more control over the exposure settings on your iPhone, consider using a third-party camera app with manual controls. It opens up a world of possibilities and allows you to take your photography skills to the next level.
Utilizing the Exposure Compensation feature
If you’re looking to have more control over the exposure of your photos on an iPhone, you’ll be pleased to know that the Exposure Compensation feature is here to help. This tool allows you to manually adjust the exposure settings in your camera app, enabling you to create well-balanced and professionally-looking shots. Whether you’re dealing with a bright outdoor scene or a dimly lit indoor environment, the Exposure Compensation feature can make all the difference.
To access the Exposure Compensation feature on your iPhone, open the Camera app and tap on the screen to focus. Then, you’ll notice a small sun or brightness icon next to the focus point. To adjust the exposure, simply swipe up or down on the screen. Swiping up will increase the exposure, making the image brighter, while swiping down will decrease the exposure, resulting in a darker image.
The great thing about utilizing the Exposure Compensation feature is that it allows you to fine-tune the exposure settings based on the specific lighting conditions you’re facing. This means that you can capture the true essence of a breathtaking sunset by dialing down the exposure to create rich and vibrant hues. Similarly, you can preserve the details in a high-contrast situation by increasing the exposure to prevent the shadows from losing their depth.
Another advantage of using the Exposure Compensation feature is its ability to override the automatic exposure settings of your iPhone. While the camera app does a great job of determining the optimal exposure in most situations, there might be instances where the automatic settings fall short. In such cases, you can take matters into your own hands by adjusting the exposure manually and achieving the desired results.
Keep in mind that the Exposure Compensation feature is available on most recent iPhone models. However, if you own an older device, it’s worth checking if this feature is supported. To do so, go to the settings of your Camera app and look for the exposure compensation option. If it’s available, make sure to enable it, allowing you to take full advantage of this powerful tool.
Conclusion
In conclusion, being able to turn exposure down on your iPhone is a valuable skill that can greatly improve the quality of your photos. By adjusting the exposure, you can capture more detail in both bright and dark areas, resulting in perfectly balanced and visually engaging images. Whether you’re an amateur photographer or a professional, the ability to control exposure is essential for creating stunning visuals.
Remember, you can adjust exposure directly in the iPhone’s Camera app by tapping on the screen and using the slider that appears. Additionally, you can make further adjustments using third-party photo editing apps like Snapseed or VSCO. Experiment with different exposure settings and techniques to discover your preferred style and bring your photos to life.
With these tips and tricks, you’ll be able to master exposure control on your iPhone and take your mobile photography to the next level. So get out there, explore the world around you, and capture breathtaking moments with unparalleled precision and clarity. Happy shooting!
FAQs
1. Can I turn down the exposure on my iPhone?
Yes, you can easily adjust the exposure on your iPhone. By using the built-in camera app, you can tap on the screen to set the focus point and then swipe up or down to adjust the exposure. This allows you to darken or lighten the overall image to your liking.
2. Why would I want to turn down the exposure on my iPhone?
There are several reasons why you might want to turn down the exposure on your iPhone. One common scenario is when you are taking photos in bright sunlight or other high-contrast situations. By reducing the exposure, you can avoid overexposed areas and bring out more detail in the shadows. Additionally, lowering the exposure can help create a more moody or dramatic effect in your photos.
3. Are there any third-party camera apps that offer more control over exposure?
Yes, there are many third-party camera apps available on the App Store that offer advanced features and greater control over exposure settings. Apps like ProCamera, Camera+, and Halide are popular choices among photographers who want more flexibility in adjusting exposure, ISO, shutter speed, and other settings. These apps often provide a more professional-level experience and allow for even finer adjustments to capture the perfect shot.
4. Will turning down the exposure affect the quality of my photos?
Lowering the exposure on your iPhone can affect the overall brightness and contrast of your photos. However, if done properly, it should not significantly impact the quality of the image. It’s important to find the right balance and avoid underexposing the image, which can result in loss of detail in the shadows. Experiment with different exposure settings to achieve the desired look while maintaining photo quality.
5. Can I edit the exposure of my photos after taking them?
Yes, you can edit the exposure of your photos after taking them using various photo editing apps available on the App Store. Apps like Adobe Lightroom, Snapseed, and VSCO offer powerful editing tools that allow you to adjust exposure, brightness, contrast, and other settings to enhance your photos. This gives you the flexibility to fine-tune the exposure to your liking even after capturing the image.