
Are you looking to transfer all your important files and data from your iPhone to your computer? Whether you are upgrading to a new iPhone, need to free up space on your device, or want to make sure your data is safely backed up, transferring files from your iPhone to your computer is a crucial task.
Transferring files such as photos, videos, documents, and even messages can be a daunting process, but with the right tools and techniques, it can be a seamless and efficient experience. In this article, we will explore different methods and options to help you transfer all your files and data from your iPhone to your computer in 2023.
Inside This Article
- Point 1: Choosing the Best Transfer Method
- Point 2: Using iTunes to Transfer Files
- Point 3: Using iCloud to Transfer Files
- Point 4: Using Third-Party Software to Transfer Files
- Conclusion
- FAQs
Point 1: Choosing the Best Transfer Method
When it comes to transferring files from your iPhone to your computer, it’s important to choose the method that suits your needs and preferences. There are three main options to consider: using iTunes, using iCloud, or opting for third-party software. Each method has its own advantages and considerations, so let’s delve into each of them.
1. Using iTunes: iTunes is Apple’s default software for managing media and files on your iOS devices. It provides a straightforward way to transfer files to your computer. To get started, connect your iPhone to your computer using a USB cable. Launch iTunes, and your device should appear in the iTunes interface. From there, you can choose to sync specific files or entire folders, including photos, videos, music, and more. However, keep in mind that iTunes has limitations when it comes to transferring non-media files or large files.
2. Using iCloud: iCloud is Apple’s cloud storage and synchronization service, which offers a convenient way to transfer files wirelessly. To use iCloud, make sure you have a stable internet connection and enough iCloud storage space. On your iPhone, go to Settings > [Your Name] > iCloud > iCloud Drive, and enable it. Turn on the iCloud Drive on your computer and sign in with the same Apple ID. Now, you can access your files from both your iPhone and computer seamlessly. iCloud is particularly useful for syncing documents, presentations, and other file types across multiple devices.
3. Using Third-Party Software: If you’re looking for more flexibility and control over your file transfers, third-party software can be a great choice. There are various options available, such as iMobie AnyTrans, Syncios, and iMazing, which provide comprehensive features for managing files between your iPhone and computer. These software often have user-friendly interfaces, allowing you to transfer not only media files but also contacts, messages, apps, and more. Additionally, they may offer advanced features like selective transfer, file conversion, and backup/restore capabilities.
Ultimately, the best transfer method depends on your specific needs. If you prefer a simple and straightforward process, iTunes or iCloud may be the right choice for you. On the other hand, if you require more control and versatility, third-party software might be the way to go. Consider the types of files you want to transfer, the size of the files, and your comfort level with the software interface. By evaluating these factors, you can choose the method that aligns best with your preferences and ensures a smooth transfer of files from your iPhone to your computer.
Point 2: Using iTunes to Transfer Files
If you’re looking to transfer files from your iPhone to your computer, one of the most popular methods you can rely on is using iTunes. iTunes is a software developed by Apple that allows you to manage and synchronize your media files, including music, videos, photos, and more.
Using iTunes to transfer files from your iPhone to your computer is a straightforward process. Here’s a step-by-step guide on how to do it:
- Start by connecting your iPhone to your computer using a USB cable. Make sure to have the latest version of iTunes installed on your computer.
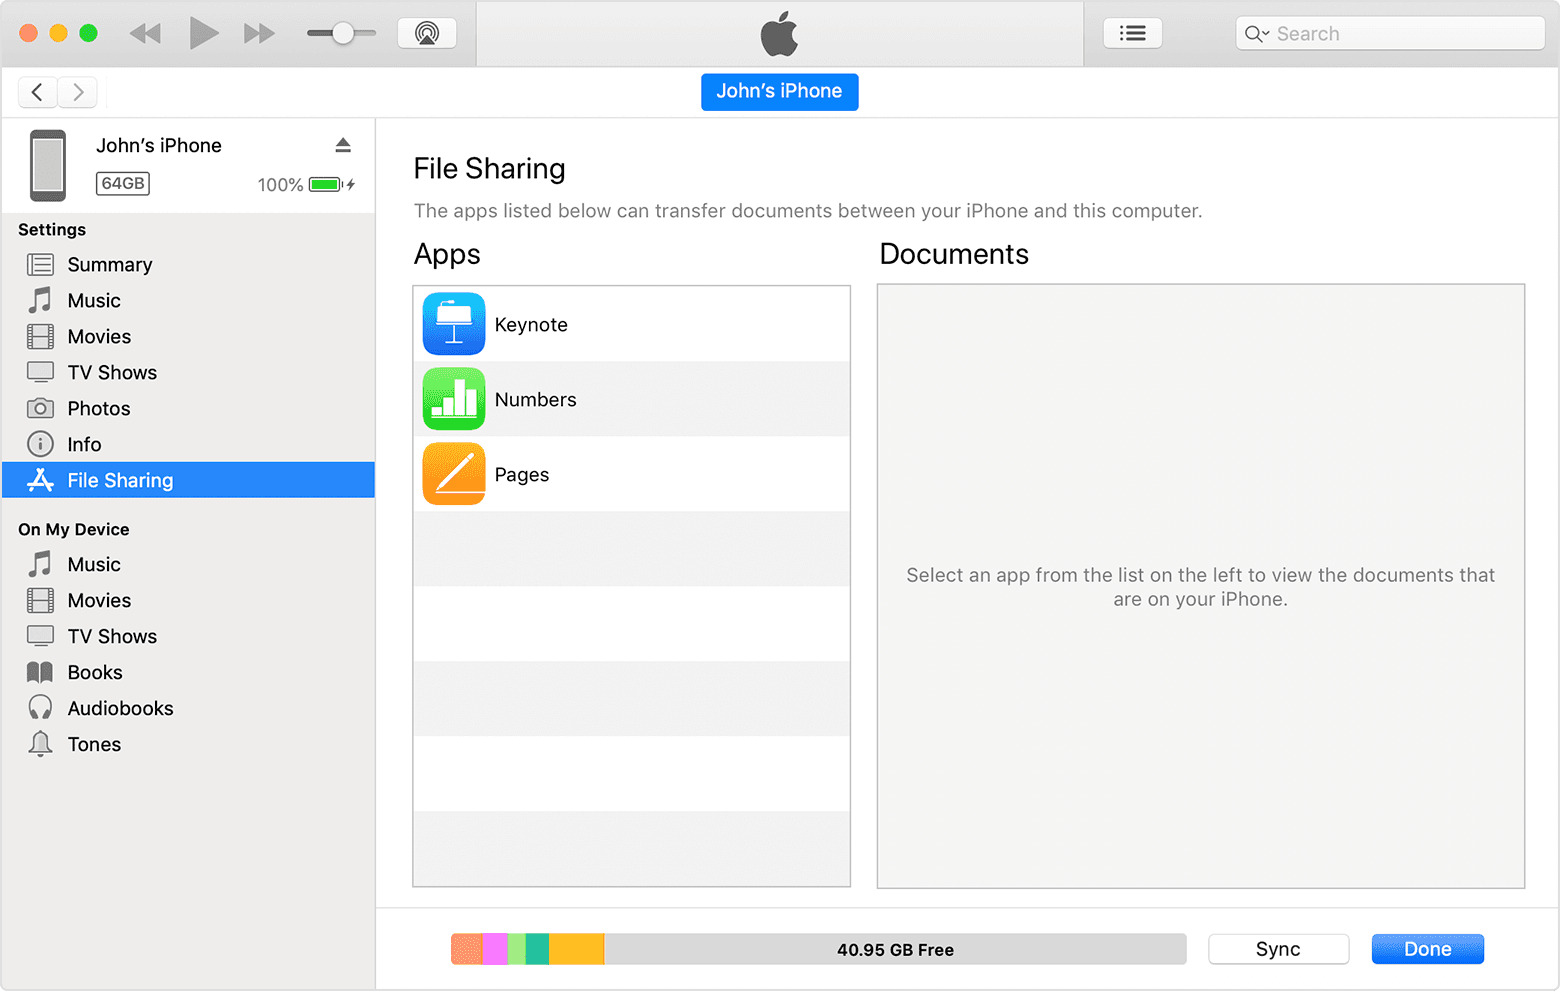
- Once your iPhone is connected, launch the iTunes application. It should automatically detect your device and display its icon on the top left corner of the iTunes window.
- Click on the iPhone icon to access the device’s Summary page.
- In the Summary tab, you’ll find various options and settings related to your iPhone. Look for the “Backups” section and choose the option that suits your needs.
- If you want to transfer all of your files, including photos, videos, music, apps, and settings, select the “This Computer” option under the “Automatically Back Up” section.
- Click on the “Apply” button to initiate the backup process. This might take a few minutes depending on the size of your files.
- Once the backup is complete, you can now transfer specific files to your computer. To do this, select the file category from the sidebar on the left.
- Within each category, you can choose specific files or select all of them. To select multiple files, you can use the CTRL (or CMD on Mac) key and click on each file.
- After selecting the files, right-click and choose the “Export” or “Transfer” option, depending on the version of iTunes you’re using.
- Select the destination folder on your computer where you want to save the transferred files and click the “OK” or “Save” button.
- iTunes will then proceed to transfer the selected files from your iPhone to your computer. The transfer speed may vary depending on the file size and your computer’s performance.
Using iTunes to transfer files from your iPhone to your computer offers a reliable and convenient method, especially if you want to back up your entire device or transfer multiple file types. However, keep in mind that iTunes has limitations, such as the inability to transfer non-media files, like messages, contacts, and notes.
If you require more flexibility and want to transfer a wider range of files, including non-media files, you can consider exploring other methods like using iCloud or third-party software. These alternatives provide additional features and options for transferring files from your iPhone to your computer easily.
Point 3: Using iCloud to Transfer Files
Another popular method for transferring files from your iPhone to your computer is by using iCloud. iCloud is a cloud-based storage service provided by Apple, which allows you to store and access your data across multiple devices. With iCloud, you can easily sync and transfer files from your iPhone to your computer with just a few simple steps.
To transfer files using iCloud, you first need to ensure that you have enough storage space available in your iCloud account. You can check your available storage by going to Settings on your iPhone, tapping on your Apple ID/iCloud, and selecting iCloud. From there, you can see how much storage is being used and how much is available.
Once you have confirmed that you have enough storage space, follow these steps:
- On your iPhone, go to Settings, tap on your Apple ID/iCloud, and select iCloud.
- Make sure that the types of files you want to transfer, such as photos or documents, are enabled for iCloud backup. You can toggle the switches on or off to include or exclude specific file types.
- Now, on your computer, open a web browser and go to iCloud.com.
- Sign in to iCloud using your Apple ID and password.
- Once you are logged in, you will see the iCloud web interface. Click on the applicable app, such as Photos or iCloud Drive.
- Find the files you want to transfer and select them by clicking on them or using the Ctrl/Cmd key and mouse click for multiple selections.
- Next, click on the download button or the “Download” option in the context menu to start the transfer process.
- The files will be downloaded to your computer, and you can choose the location where you want to save them.
Using iCloud to transfer your files provides a convenient way to access and manage your data across different devices. However, it is worth noting that the transfer speed may vary depending on your internet connection and the size of the files you are transferring. Additionally, iCloud offers a limited amount of free storage, and you may need to purchase additional storage if you exceed the provided quota.
By utilizing iCloud’s file-syncing capabilities, you can effortlessly transfer files from your iPhone to your computer and ensure that your important data is easily accessible and backed up.
Point 4: Using Third-Party Software to Transfer Files
While iTunes and iCloud are the go-to options for transferring files between an iPhone and a computer, there are also third-party software solutions available that provide additional features and flexibility. These tools often offer an intuitive interface and a seamless transfer process, making it easier than ever to manage your files.
One popular third-party software is iMobie AnyTrans. It allows you to transfer a wide range of files, including photos, videos, contacts, messages, and more, from your iPhone to your computer. With just a few clicks, you can quickly and securely transfer your data without any hassle.
Another noteworthy option is iExplorer. This software enables you to access and transfer files from your iPhone to your computer, providing you with complete control over your data. Not only can you transfer files, but you can also browse through your iPhone’s file system, manage backups, and even export data to other formats.
If you’re looking for a cross-platform solution, Syncios is worth considering. It supports not only iPhone to computer transfers but also allows you to transfer files between iOS and Android devices. This software provides a user-friendly interface and offers a variety of features, such as transferring music, videos, photos, contacts, messages, and more.
For those who value speed and efficiency, Dr.Fone – Phone Transfer is an excellent choice. This software offers a straightforward and quick way to transfer files from an iPhone to a computer. It supports a wide range of file types, including contacts, messages, photos, videos, music, and more, ensuring that you can transfer all your important data seamlessly.
Before using any third-party software, it’s essential to do some research and ensure that the software you choose is reputable and safe to use. Be sure to read reviews, check the software’s compatibility with your iPhone model and computer operating system, and follow any instructions provided by the software developer.
Conclusion
Transferring files and data from an iPhone to a computer is an essential task for many users. Whether you want to create a backup of your precious photos and videos, transfer important documents, or simply free up space on your device, having a reliable method to transfer data is crucial.
In this article, we have explored different ways to transfer files and data from an iPhone to a computer. We discussed utilizing iTunes, which offers a comprehensive solution for managing and transferring all types of content. We also explored using third-party software like iMobie AnyTrans, which provides a user-friendly and efficient way to transfer files between devices.
Regardless of the method you choose, it is important to regularly back up your iPhone to ensure the safety and security of your data. By following the steps and recommendations outlined in this article, you can confidently transfer all your important files and data from your iPhone to your computer.
So, whether you are looking to create a backup, share files with your computer, or simply organize your data, now you have the knowledge and tools to accomplish it. Don’t let your files gather dust on your phone – transfer them to your computer and have peace of mind.
FAQs
1. How do I transfer files and data from my iPhone to my computer?
To transfer files and data from your iPhone to your computer, you can use several methods. One of the easiest ways is to connect your iPhone to your computer using a USB cable. Once connected, your computer should recognize your iPhone as a storage device. You can then access the files and data on your iPhone and copy them to your computer’s hard drive. Alternatively, you can use cloud storage services, such as iCloud or Google Drive, to sync and access your iPhone’s files and data on your computer.
2. Can I transfer files and data from my iPhone to a Windows computer?
Yes, you can transfer files and data from your iPhone to a Windows computer. You can connect your iPhone to your Windows computer using a USB cable, and then access your iPhone’s files and data through File Explorer. Alternatively, you can use iCloud for Windows software to sync and access your iPhone’s files and data on your Windows computer.
3. Are there any specific software or apps I need to transfer files from my iPhone to my computer?
In most cases, you don’t need any specific software or apps to transfer files from your iPhone to your computer. The built-in functionality of your computer’s operating system, like iTunes on Windows or Finder on Mac, is usually sufficient to access and transfer files from your iPhone. However, if you want more advanced features or additional control over the transfer process, there are third-party software and apps available that you can explore.
4. Can I transfer all types of files from my iPhone to my computer?
Yes, you can transfer various types of files from your iPhone to your computer. This includes photos, videos, music, documents, contacts, messages, and more. The process may vary slightly depending on the file type and the method you choose to transfer the files. For example, transferring photos and videos can be as simple as copying and pasting the files, while transferring contacts and messages may require using specialized software or apps.
5. Will transferring files from my iPhone to my computer delete them from my iPhone?
No, transferring files from your iPhone to your computer will not delete them from your iPhone. The process of transferring files is usually a copy-and-paste operation, which leaves the original files intact on your iPhone while creating a duplicate on your computer. However, it is always recommended to create backups of your important files before performing any file transfer operations, as unforeseen issues can occur.