
Excel is a powerful tool that allows you to organize, analyze, and manipulate data efficiently. One of the key features in Excel is the ability to auto-populate data, saving you time and effort. Auto-population is the process of automatically filling in cells with pre-defined data or formulas based on a specified pattern or criteria. This feature comes in handy when you have to input repetitive or sequential information in your spreadsheet.
Whether you need to generate a series of numbers, dates, or repetitive text, Excel’s auto-population feature can streamline your data entry process. By understanding how to use this feature effectively, you can save valuable time and reduce the chances of errors. In this article, we will explore different methods to auto-populate data in Excel, from simple manual techniques to more advanced formulas and functions. So, let’s dive in and discover how to make Excel work for you!
Inside This Article
- Method 1: Using Formulas to Auto Populate Data in Excel
- Method 2: Using VBA Macros to Auto Populate Data in Excel
- Method 3: Using Data Validation to Auto Populate Data in Excel
- Method 4: Using Power Query to Auto Populate Data in Excel
- Conclusion
- FAQs
Method 1: Using Formulas to Auto Populate Data in Excel
One of the most common and versatile ways to auto populate data in Excel is by using formulas. Excel provides various built-in formulas that can help populate data automatically based on specific conditions or calculations. Here are a few commonly used formulas:
- VLOOKUP: This formula allows you to search for a value in a column and retrieve a corresponding value from another column in the same row. It’s useful for populating data based on matching criteria.
- IF: The IF formula allows you to specify a condition and provide a value if the condition is true, and a different value if the condition is false. It helps in auto-populating data based on logical tests.
- INDEX and MATCH: These formulas work together to retrieve a value from a specific column and row intersection. The INDEX formula identifies the value based on the row and column numbers provided by the MATCH formula.
- COUNTIF: This formula counts the number of cells in a range that meet specific criteria. It can be used to auto-populate data based on counting occurrences of certain values.
- SUMIF: The SUMIF formula allows you to sum the values in a range that meet specific criteria. It’s helpful for auto-populating data based on summing values that satisfy certain conditions.
By combining these formulas with logical operators, cell references, and other functions, you can create complex calculations to automatically populate data in Excel. For example, if you have a spreadsheet with sales data and you want to calculate the total revenue for each product, you can use the SUMIF formula to sum the sales values for each product category.
To use these formulas, simply enter them into the desired cell and adjust the cell references and criteria as needed. As you update the data, the formulas will recalculate and auto-populate the results accordingly.
Formulas provide a powerful and flexible way to automate data population in Excel. However, they may require some knowledge of Excel functions and syntax. It’s always a good idea to explore the various formulas available and experiment with them to find the best solution for your specific data population needs.
Method 2: Using VBA Macros to Auto Populate Data in Excel
If you want to take your data auto-population in Excel to the next level, VBA macros are a powerful tool that can automate the process. VBA (Visual Basic for Applications) is a programming language that is built into Excel, allowing you to write custom code to perform specific tasks.
Here’s how you can use VBA macros to automatically populate data in Excel:
- Enable the Developer tab: Before you can start using VBA macros, you need to enable the Developer tab in Excel. To do this, go to the File tab, choose Options, and select Customize Ribbon. Check the box for Developer and click OK.
- Open the Visual Basic Editor: Once you have enabled the Developer tab, click on it and then click on the Visual Basic button. This will open the Visual Basic for Applications Editor, where you can write and edit your VBA code.
- Write your VBA code: In the Visual Basic Editor, you can start writing your VBA code to automate the data population. This code will typically consist of a subroutine or function that performs the desired actions, such as copying data from one range to another or generating data based on certain conditions.
- Link your VBA code to a trigger: To make your VBA code run automatically, you need to link it to a trigger event in Excel. This could be a button click, a specific cell value change, or even a worksheet or workbook event. You can use the Workbook_Open event to make the code run when the workbook is opened.
- Run your VBA code: Once you have written your VBA code and linked it to a trigger, you can save your workbook and exit the Visual Basic Editor. When the specified trigger event occurs, your VBA code will run automatically, populating the desired data in Excel.
VBA macros offer a high level of customization and flexibility, allowing you to automate complex data population tasks in Excel. However, it is important to remember that VBA coding requires some programming knowledge. If you are not familiar with VBA, you may need to invest some time in learning the basics or seek assistance from a more experienced VBA programmer.
With VBA macros, you can unleash the full power of Excel and automate the data population process, saving you time and effort in the long run.
Method 3: Using Data Validation to Auto Populate Data in Excel
Data validation is a powerful tool in Excel that allows you to set up rules and restrictions on the data entered into a cell. It can also be used to automate the process of populating data in Excel. By applying data validation to specific cells, you can create drop-down lists or input restrictions that will automatically populate the corresponding cells with pre-defined values.
Here’s how you can use data validation to auto populate data in Excel:
- Select the range of cells where you want to apply the data validation.
- Go to the “Data” tab in the Excel ribbon and click on the “Data Validation” button.
- In the data validation dialog box, choose the type of validation you want to apply. For example, if you want to create a drop-down list, select the “List” option.
- In the “Source” field, enter the values you want to appear in the drop-down list, separated by commas.
- Click on “OK” to apply the data validation to the selected cells.
Once the data validation is set up, you will see a drop-down arrow in the cells where you applied the validation. When you click on the arrow, you will see the list of pre-defined values you entered in the data validation settings. Selecting a value from the list will automatically populate the cell with that value.
Using data validation to auto populate data in Excel not only saves time but also helps maintain consistency and accuracy in your spreadsheets. You can easily update the pre-defined values in the data validation settings and all the corresponding cells will be updated accordingly.
Additionally, you can also apply data validation rules to restrict the type of data that can be entered into a cell. For example, you can set up a validation rule to only accept numerical values or to restrict input to a specific range of numbers.
By utilizing the power of data validation, you can automate the process of populating data in Excel and ensure data integrity in your spreadsheets.
Method 4: Using Power Query to Auto Populate Data in Excel
If you’re looking for a powerful and efficient way to auto populate data in Excel, look no further than Power Query. Power Query is a data analysis and transformation tool that allows you to import, transform, and load data from various sources into Excel. With its advanced features and functionalities, Power Query can quickly and effortlessly populate data in your Excel worksheets.
Here’s how you can use Power Query to auto populate data in Excel:
- Step 1: Open Excel and go to the Data tab in the ribbon. Click on the Get Data button and select the data source you want to import into Excel.
- Step 2: Power Query will open a new window where you can perform various transformations on the data. Use the intuitive interface to filter, sort, and manipulate the data as needed.
- Step 3: Once you’re satisfied with the data transformations, click on the Load button to load the data into Excel. Power Query will generate a query that automatically updates the data whenever changes are made to the source.
- Step 4: To auto populate the data, simply refresh the query whenever you want to update the data in Excel. This can be done by going to the Data tab, clicking on the Refresh All button, or right-clicking on the query and selecting Refresh.
With Power Query’s ability to connect to various data sources, combine and transform data, and automatically update the data in Excel, you can save time and effort in manually populating your worksheets. Whether you’re working with large datasets or regularly importing data from external sources, Power Query can be a game-changer in automating the data population process.
So, if you want a seamless and efficient way to auto populate data in Excel, give Power Query a try. It’s a powerful tool that can streamline your data analysis workflow and help you work smarter, not harder.
Conclusion
In conclusion, auto populating data in Excel can greatly improve efficiency and accuracy when working with large datasets. Whether you need to fill in a series of values, extract information from a database, or automate data entry, there are several methods and techniques available to easily accomplish this task. By utilizing formulas, functions, macros, or even third-party tools, you can save time and reduce the risk of errors in your Excel worksheets.
Remember, Excel offers a wide range of features that make it a powerful tool for data manipulation and analysis. Experiment with different techniques and explore the possibilities that auto population has to offer. With practice and familiarity, you’ll be able to effortlessly populate data in Excel and unleash the full potential of this versatile spreadsheet program.
FAQs
1. Can I auto populate data in Excel?
Yes, you can auto populate data in Excel using various methods such as formulas, functions, macros, and data validation rules. Depending on your specific needs and the complexity of the data that needs to be auto populated, you can choose the most suitable method.
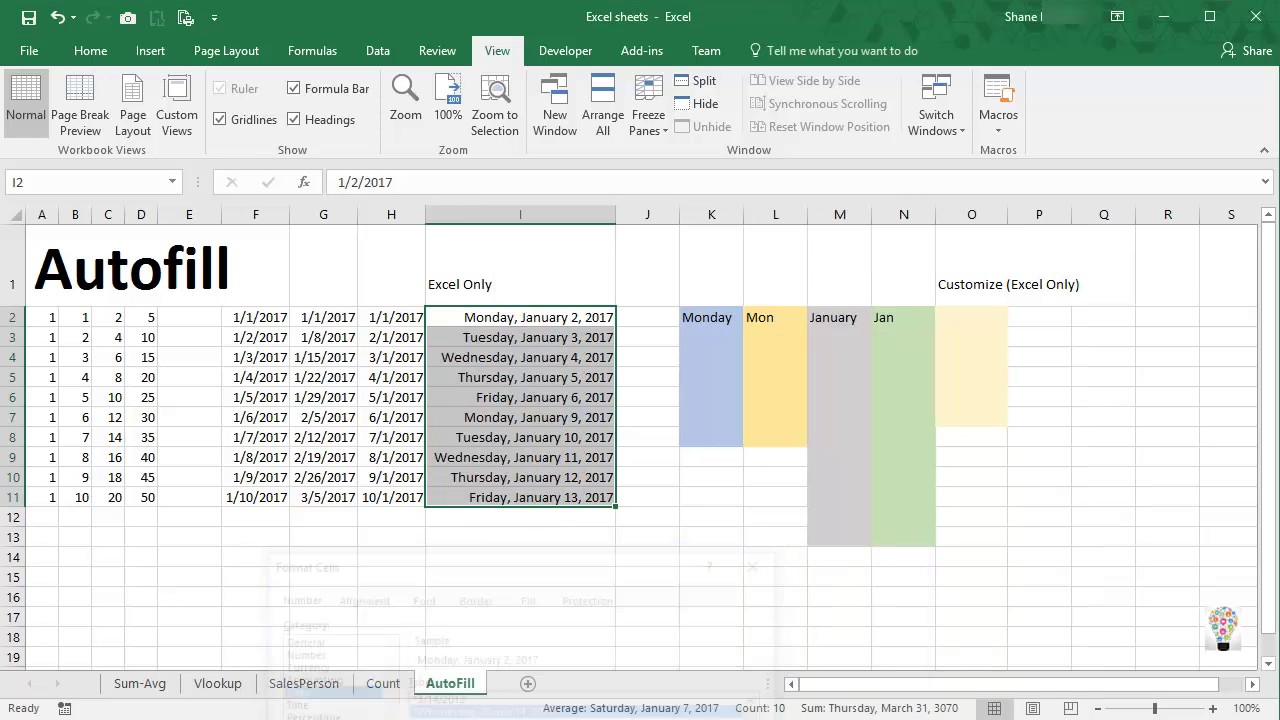
2. How do I auto populate a series in Excel?
To auto populate a series in Excel, you can use the Fill Handle feature. Simply enter the desired value in the first cell of the series, select that cell, and then drag the Fill Handle across the range where you want the series to be auto populated. Excel will automatically continue the series based on the pattern established in the initial cell.
3. Is it possible to auto populate data from one worksheet to another in Excel?
Yes, you can auto populate data from one worksheet to another in Excel using formulas or linking cells. For example, you can use the VLOOKUP function to retrieve data from a different worksheet based on a common value. Alternatively, you can link cells by simply referencing the desired cell from another worksheet using the “=SheetName!CellReference” format.
4. How can I auto populate data based on conditions in Excel?
To auto populate data based on conditions in Excel, you can use the IF function along with other logical functions such as AND, OR, and IFERROR. By specifying the condition and the corresponding action to take, you can automatically populate data based on the specified criteria.
5. Can I auto populate data in Excel using macros?
Yes, you can use macros to auto populate data in Excel. Macros allow you to automate repetitive tasks by recording a sequence of actions and then playing back the recorded macro whenever needed. You can write custom VBA (Visual Basic for Applications) code to handle more complex auto population requirements.