
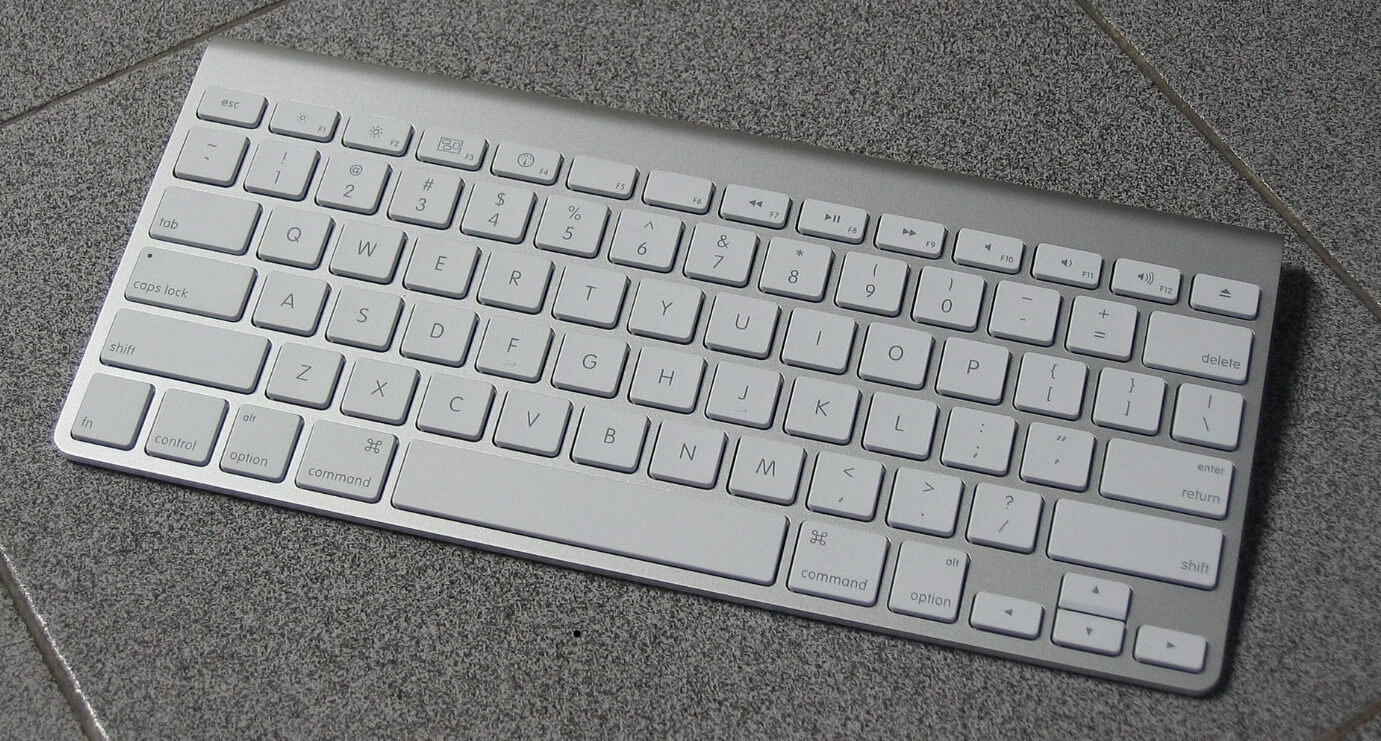
The Apple wireless keyboard is a popular accessory for many Mac users. With its sleek design and wireless convenience, it offers a great typing experience for those who prefer working without cables. However, like any device powered by batteries, the time will come when the batteries need to be replaced.
In this article, we will guide you through the process of changing the batteries on your Apple wireless keyboard. Whether you’re a tech-savvy user or a beginner, we’ve got you covered. You’ll learn everything you need to know, from the type of batteries to use to the step-by-step instructions for replacing them. So let’s dive in and ensure your keyboard is always ready for typing!
Inside This Article
- Overview
- Tools and Materials Needed
- Step 1: Prepare the Keyboard
- Step 2: Remove the Old Batteries
- Step 3: Insert the New Batteries
- Step 4: Test and Confirm
- Troubleshooting Tips
- Conclusion
- FAQs
Overview
Apple wireless keyboards offer a convenient and clutter-free experience, thanks to their sleek design and Bluetooth connectivity. However, like any other wireless device, they require periodic battery changes to ensure optimal performance. If you’re unsure about how to change the batteries on your Apple wireless keyboard, fret not! In this article, we will guide you through the process step by step, ensuring a seamless transition and uninterrupted productivity.
To change the batteries on your Apple wireless keyboard, you will need a few tools and materials. We have listed them below, so make sure to gather everything before you get started:
- 1. Apple wireless keyboard
- 2. New batteries (typically AA or AAA)
- 3. Small screwdriver (if your keyboard has a battery compartment cover)
Now that you have all the necessary items, let’s proceed to the next section to prepare your keyboard for battery replacement.
Tools and Materials Needed
Before you begin changing the batteries on your Apple wireless keyboard, make sure you have the following tools and materials ready:
1. Replacement Batteries: Ensure you have a fresh pair of AAA batteries to replace the old ones. It is recommended to use alkaline batteries for longer battery life.
2. Screwdriver: Depending on the model of your Apple wireless keyboard, you may need a screwdriver to remove any screws that secure the battery compartment. Check the underside of the keyboard to determine if a screwdriver is necessary.
3. Soft Cloth: Having a soft cloth nearby will help you clean any dust or debris that may have accumulated on the keyboard during the battery replacement process.
4. Damp Cloth or Wipes: It’s always a good idea to have a damp cloth or cleaning wipes on hand to wipe down the keyboard and keep it free from fingerprints or stains.
5. Optional: User Manual: If you are unsure of the specific steps to change the batteries on your Apple wireless keyboard, consult the user manual that came with the device. It may contain helpful diagrams or instructions.
With these tools and materials at your disposal, you are well-prepared to proceed with changing the batteries on your Apple wireless keyboard. Now let’s move on to the step-by-step process.
Step 1: Prepare the Keyboard
Before you start changing the batteries on your Apple wireless keyboard, it’s important to prepare the keyboard to ensure a smooth and successful battery replacement. Follow these steps:
1. Clear the surface: Begin by finding a clean and clutter-free surface to work on. This will prevent any accidental damage to the keyboard or its components during the battery replacement process.
2. Turn off the keyboard: Locate the power switch on the back of the keyboard. Turn it off by sliding the switch to the “Off” position. This will prevent any interference while changing the batteries.
3. Gather the necessary tools: Ensure you have all the tools and materials you’ll need for the battery replacement. These may include a small screwdriver or coin for opening the battery compartment, and fresh batteries that are compatible with your Apple wireless keyboard.
4. Check for any debris: Inspect the keyboard for any dust, crumbs, or debris that may have accumulated. Use a soft brush or compressed air to gently clean the surface and between the keys. This will help maintain the longevity of your keyboard.
5. Get comfortable: Find a comfortable seating position with good lighting to work in. This will make it easier to see and manipulate the keyboard during the battery replacement process.
By preparing your Apple wireless keyboard properly, you can ensure a hassle-free battery replacement experience. Once you have completed these steps, you’re ready to move on to the next phase of the process: removing the old batteries.
Step 2: Remove the Old Batteries
Once you have prepared your Apple wireless keyboard, it’s time to remove the old batteries. Follow these simple steps to get the job done:
1. Turn your keyboard over and locate the battery compartment. It is usually positioned on the underside of the keyboard.
2. Look for the battery cover, a small panel that holds the batteries in place. It may have a locking mechanism or a simple slide-off design.
3. If there is a locking mechanism, carefully unlock or release it using your fingers or a small tool, like a coin or a flathead screwdriver. Be gentle to avoid damaging the casing.
4. Once the locking mechanism is released, slide or lift the battery cover to expose the old batteries. You may need to apply a bit of pressure and maneuver the cover to remove it completely.
5. Take note of the battery orientation before removing them. There should be markings or indicators indicating which way the batteries should be inserted.
6. Using your fingers, gently remove the old batteries from the compartment. Dispose of them responsibly according to your local regulations for battery disposal.
7. It’s a good practice to clean the battery compartment with a dry, soft cloth to remove any accumulated dust or debris. This will ensure proper contact with the new batteries.
Once you have successfully removed the old batteries and cleaned the compartment, you are now ready to insert the new batteries. Move on to the next step to continue the process.
Step 3: Insert the New Batteries
After removing the old batteries from your Apple wireless keyboard, it’s time to insert the new ones. Here’s a step-by-step guide to help you through the process:
1. Check the Battery Orientation: Take a quick look at the new batteries and check for the positive (+) and negative (-) signs on them. It’s crucial to ensure they are inserted correctly into the keyboard.
2. Open the Battery Compartment: Locate the battery compartment on the underside of the keyboard. Depending on the model, you may need to slide a latch or use a small tool to open it.
3. Insert the Batteries: Carefully place the new batteries into the compartment, making sure to match the positive and negative signs with the corresponding markings inside the compartment. Press the batteries down gently to ensure they are securely in place.
4. Close the Battery Compartment: Once the batteries are inserted properly, close the battery compartment securely. Ensure that it clicks or latches into place to prevent the batteries from falling out during use.
5. Test the Keyboard: Turn on your Apple wireless keyboard and check if it’s working correctly. Press a few keys to verify that the keyboard is responding as expected. If not, double-check the battery orientation and repeat the previous steps if necessary.
6. Dispose of Old Batteries Responsibly: Remember to dispose of the old batteries properly. You can check with your local recycling center or electronic waste collection facility to ensure they are recycled or treated in an environmentally friendly way.
By following these steps, you should be able to easily insert the new batteries into your Apple wireless keyboard and continue using it without any interruptions.
Step 4: Test and Confirm
Once you’ve inserted the new batteries into your Apple wireless keyboard, it’s time to test and confirm if it’s working properly. Follow these simple steps to ensure everything is functioning as it should:
1. Check for Power: First, make sure the keyboard is turned on. Look for the power switch on the back or side of the keyboard and toggle it to the “on” position. This will activate the keyboard and allow it to connect to your Mac or other compatible device.
2. Establish Connection: Next, check if the keyboard is successfully connected to your device. If it’s a Bluetooth keyboard, go to your device’s settings and select the keyboard from the available devices list. If it’s a wireless keyboard, you may need to use a USB receiver to establish the connection. Ensure that the connection is stable and the keyboard is recognized by your device.
3. Test Typing: Open a document, text editor, or any application that requires keyboard input. Begin typing to check if all the keys on your wireless keyboard are working properly. Pay attention to any keys that may feel unresponsive or have strange behavior. Test both the alphanumeric keys as well as the function keys, special keys, and shortcuts to ensure they perform as expected.
4. Check for LED Indicators: Some Apple wireless keyboards have LED indicators to indicate various states or functions. Verify that the LED indicators are working correctly by checking if they illuminate or blink when certain functions are activated. For example, the Caps Lock indicator should toggle on and off when you press the Caps Lock key.
5. Adjust Keyboard Settings: If you notice any issues with the keyboard’s behavior or responsiveness, you may need to adjust the keyboard settings on your device. Explore the keyboard settings menu and make any necessary modifications to optimize your typing experience.
6. Final Confirmation: After performing the above steps, you should have a good idea of whether the new batteries have resolved any previous issues with your Apple wireless keyboard. If all keys are functioning correctly and the keyboard is connecting and responding as expected, then congratulations! You have successfully tested and confirmed the functionality of your Apple wireless keyboard with the new batteries.
By following these steps, you can ensure that your Apple wireless keyboard is operating smoothly and efficiently. Remember to periodically check the battery life and replace the batteries when necessary to avoid any unexpected disruptions in your typing experience.
Troubleshooting Tips
Despite following the steps outlined above, you may still encounter some issues when changing the batteries on your Apple wireless keyboard. Don’t worry! Here are some troubleshooting tips to help you out:
1. Check the battery placement: Ensure that the batteries are inserted correctly, following the indicated “+” and “-” symbols. Sometimes, it’s easy to accidentally put them in the wrong way and experience connectivity problems as a result.
2. Clean the battery contacts: Over time, the battery contacts inside the keyboard can accumulate dirt or debris, which can interfere with the connection. Use a soft, lint-free cloth or cotton swab to gently clean the contact points before inserting the new batteries.
3. Restart your computer: If you’re still facing issues after changing the batteries, try restarting your computer. This can help reset the keyboard’s connection and resolve any software-related glitches that may be causing the problem.
4. Reset the keyboard: If the keyboard is still unresponsive, you can try resetting it. Turn off the keyboard by pressing the power button (if applicable) and then turn it back on again. This can often reestablish the connection and resolve any temporary connectivity issues.
5. Pair the keyboard again: In some cases, you may need to re-pair the keyboard with your computer or device. Refer to the manufacturer’s instructions or Apple’s support website for detailed steps on how to do this for your specific model of keyboard.
6. Update drivers and software: Make sure that your computer has the latest drivers and software updates installed. Sometimes outdated software can cause compatibility issues with the keyboard, so keeping everything up to date can often resolve these problems.
7. Replace the batteries: If you’ve tried all the troubleshooting tips above and are still experiencing issues, consider replacing the batteries once again. Sometimes, even new batteries can be faulty or have a low charge, so trying a different set may solve the problem.
8. Contact Apple Support: If all else fails, and you’re still unable to resolve the issue, it may be best to seek assistance from Apple Support or visit an Apple Store. They can provide further guidance and potentially offer a solution to the problem.
Remember, troubleshooting tips may vary depending on the specific model of your Apple wireless keyboard. Refer to the user manual or Apple’s support resources for model-specific troubleshooting advice.
Conclusion
In conclusion, changing the batteries on your Apple wireless keyboard is a simple and straightforward process that can be done in just a few minutes. By following the steps outlined in this article, you can ensure that your keyboard continues to function at its best and provide you with a seamless typing experience.
Remember to have a fresh set of batteries on hand, remove the old ones carefully, and insert the new ones properly, paying attention to the correct polarity. If you’re experiencing any issues with the battery life of your keyboard, it’s worth considering using rechargeable batteries as a more cost-effective and environmentally friendly solution.
With proper battery maintenance, your Apple wireless keyboard will continue to serve you well for hours of typing pleasure. So, don’t let a drained battery slow you down—get those batteries changed and get back to being productive in no time!
FAQs
Q: Can I change the batteries on my Apple Wireless Keyboard?
A: Yes, you can change the batteries on your Apple Wireless Keyboard. It is a straightforward process that only requires a few simple steps.
Q: What type of batteries does the Apple Wireless Keyboard use?
A: The Apple Wireless Keyboard uses two AA batteries. It is recommended to use alkaline batteries for optimal performance.
Q: How do I change the batteries on my Apple Wireless Keyboard?
A: To change the batteries on your Apple Wireless Keyboard, follow these steps:
- Flip the keyboard over to access the battery compartment.
- Open the battery compartment by sliding the switch labeled “Open” or “Unlock.”
- Remove the old batteries and dispose of them properly.
- Insert the new AA batteries into the battery compartment, making sure to align the positive (+) and negative (-) ends correctly.
- Close the battery compartment by sliding the switch back to the “Lock” or “Close” position.
- Turn on your Apple Wireless Keyboard and ensure it is paired with your device.
Q: How long do the batteries last in the Apple Wireless Keyboard?
A: The battery life of the Apple Wireless Keyboard can vary depending on usage. However, with regular use, the batteries can last for several months before needing replacement.
Q: Will changing the batteries on my Apple Wireless Keyboard affect its performance?
A: No, changing the batteries on your Apple Wireless Keyboard should not have any negative impact on its performance. As long as you use quality batteries and properly insert them, your keyboard should continue to function effectively.