
Are you struggling to connect your Canon wireless printer? Don’t worry, we’re here to help! Connecting a wireless printer can be a bit tricky, but with the right guidance, you’ll have it up and running in no time. Canon wireless printers offer the convenience of printing from anywhere in your home or office without the hassle of tangled cords. In this article, we will walk you through the step-by-step process of connecting your Canon wireless printer to your computer or mobile device. Whether you’re a tech novice or a seasoned pro, our comprehensive guide will ensure a seamless printing experience. So, let’s dive in and get your Canon wireless printer connected!
Inside This Article
- Step 1: Check the printer’s compatibility
- Step 2: Connect the printer to a power source
- Step 3: Install the printer cartridges
- Step 4: Connect the printer to your Wi-Fi network
- Conclusion
- FAQs
Step 1: Check the printer’s compatibility
Before connecting your Canon wireless printer, it’s crucial to ensure that it is compatible with your computer and operating system. This step is essential to avoid any compatibility issues and ensure a smooth installation process.
Start by checking the system requirements provided by Canon for your specific printer model. This information can usually be found in the printer’s user manual or on the manufacturer’s website. Take note of the minimum operating system version, required software, and any other specifications mentioned.
Once you have gathered the necessary information, compare it to your computer’s specifications. Check if your computer meets the minimum requirements specified by Canon. Look for compatibility with your operating system, available storage space, and the necessary ports or connections.
If your computer meets the compatibility requirements, you can proceed with the installation process. However, if there are any discrepancies or your computer does not meet the minimum specifications, you may need to consider upgrading your system or choose a different printer model that is compatible with your equipment.
Ensuring compatibility between your Canon wireless printer and your computer is vital to ensure that both devices can communicate effectively and perform their intended functions. By following this step, you can avoid any potential issues and ensure a successful installation and printing experience.
Step 2: Connect the printer to a power source
Once you have unpacked your Canon wireless printer, the next step is to connect it to a power source. Follow these simple steps to ensure a smooth setup process:
- Locate the power cable: The power cable is typically included in the printer package. It has a three-pronged plug on one end and connects to the back of the printer on the other end.
- Find a suitable power outlet: Look for a nearby power outlet to plug in the printer. Make sure the outlet is easily accessible and within reach of the printer’s power cable.
- Plug in the power cable: Insert the three-pronged plug of the power cable into the power outlet. Ensure that the cable is securely connected, and there are no loose connections.
- Connect the power cable to the printer: Now, locate the power port on the back of the printer. Insert the other end of the power cable into this port until it is firmly in place.
- Power on the printer: Once the power cable is securely connected, press the power button located on the printer. The printer will start initializing and ready itself for the next steps.
Connecting the printer to a power source is a crucial step in the setup process. It provides the necessary electricity to the printer, enabling it to function properly. Make sure to follow the steps carefully, ensuring a secure connection and proper power supply.
Step 3: Install the printer cartridges
Installing the printer cartridges is an essential step in setting up your Canon wireless printer. The cartridges contain ink that will be used to print your documents and images. Follow the steps below to ensure a smooth and successful cartridge installation process.
1. Start by opening the printer’s cartridge access door. This can usually be found on the front or top of the printer. Check the printer’s manual if you’re unsure about the exact location.
2. Once the cartridge access door is open, wait for the printer carriage to stop moving and remain idle. The carriage is the part of the printer that holds the cartridges.
3. Identify the color-coded slots inside the printer where the cartridges will be inserted. These slots are usually marked with letters or symbols indicating the corresponding cartridge color.
4. Take out the new ink cartridges from their packaging. Be careful not to touch the gold electrical contacts or the nozzles on the cartridges, as this can cause damage to the cartridges or affect print quality.
5. Insert the cartridges one by one into their respective color-coded slots. Make sure they are firmly seated and properly aligned with the slots. You should hear a clicking sound when the cartridges are correctly inserted.
6. Close the cartridge access door carefully. Ensure that it is securely closed to avoid any errors or issues during the printing process.
7. Wait for the printer to initialize and calibrate the newly installed cartridges. This process may take a few minutes, during which the printer may make noise or display status messages.
8. Once the calibration is complete, your Canon wireless printer is now ready to use. You can proceed to perform a test print to ensure that everything is working correctly.
It’s important to note that the specific steps for installing cartridges may vary depending on the Canon printer model you have. Always consult the printer’s manual or online documentation for detailed instructions tailored to your specific printer model.
Remember to only use genuine Canon ink cartridges for the best results and to prolong the lifespan of your printer. Using third-party or counterfeit cartridges may lead to print quality issues or even damage the printer.
By following these steps, you can confidently install the printer cartridges and ensure that your Canon wireless printer is ready to deliver crisp, high-quality prints for all your printing needs.
Step 4: Connect the printer to your Wi-Fi network
Connecting your Canon wireless printer to your Wi-Fi network is a crucial step in ensuring seamless printing from your device. Follow the steps below to establish a stable connection:
1. Access the printer’s setup menu: Start by pressing the Menu button on your printer’s control panel. Navigate to the network settings and select Wi-Fi setup options.
2. Choose the Wi-Fi network: Your printer will display a list of available Wi-Fi networks. Select your network from the options provided. If your network doesn’t appear, try refreshing the list or manually enter the network name (SSID).
3. Enter the network password: If your Wi-Fi network is password protected, the printer will prompt you to enter the password. Use the printer’s on-screen keyboard to input the password and proceed.
4. Confirm network settings: Once you’ve entered the password, the printer will display the network settings. Verify the information provided and make any necessary adjustments.
5. Complete the setup: After confirming the network settings, the printer will attempt to establish a connection to your Wi-Fi network. It may take a few moments to establish a stable connection. Once connected, the printer will display a success message.
6. Test the connection: To ensure that the printer is successfully connected to your Wi-Fi network, try printing a test page or document from your computer or mobile device.
7. Troubleshooting: In case you encounter any difficulties while connecting your printer to the Wi-Fi network, refer to the user manual or visit the Canon support website for troubleshooting tips and assistance.
By following these steps, you can easily connect your Canon wireless printer to your Wi-Fi network, allowing for convenient and efficient printing from any device connected to the same network. Enjoy the freedom of wireless printing with your Canon printer!
Conclusion
Connecting a Canon wireless printer is a simple and convenient process that allows you to print wirelessly from your computer, smartphone, or tablet. By following the step-by-step instructions provided by Canon, you can easily set up your printer and start enjoying the benefits of wireless printing.
With a wireless printer, you can say goodbye to tangled cables and enjoy the freedom to print from anywhere in your home or office. Whether you need to print important documents, family photos, or school assignments, a Canon wireless printer offers the flexibility and convenience to meet all your printing needs.
Now that you know how to connect a Canon wireless printer, take advantage of this technology to simplify your printing tasks and enhance your productivity. Get ready to experience the seamless and hassle-free printing that wireless connectivity brings!
FAQs
1. How do I connect my Canon wireless printer to my computer?
To connect your Canon wireless printer to your computer, follow these steps:
– Make sure your printer is turned on and connected to a power source
– Press the Wi-Fi button on your printer until the light starts flashing
– On your computer, go to the Wi-Fi settings and select your printer from the list of available networks
– Enter the password for your wireless network if prompted
– Wait for your computer to establish a connection with the printer
– Once connected, you can start printing wirelessly from your computer
2. What if my computer doesn’t detect the Canon wireless printer?
If your computer is not detecting the Canon wireless printer, try these troubleshooting steps:
– Make sure the printer is within range of your computer and there are no obstacles affecting the wireless signal
– Check that the printer is turned on and connected to a power source
– Restart your printer and computer
– Disable any firewall or antivirus software that may be blocking the connection
– Uninstall and reinstall the printer drivers on your computer
– If all else fails, consult the user manual or contact Canon support for further assistance
3. Can I connect my Canon wireless printer to multiple devices?
Yes, you can connect your Canon wireless printer to multiple devices. Once the printer is connected to your wireless network, any device connected to the same network will be able to send print jobs to the printer. Simply select the Canon printer from the available printers list on each device.
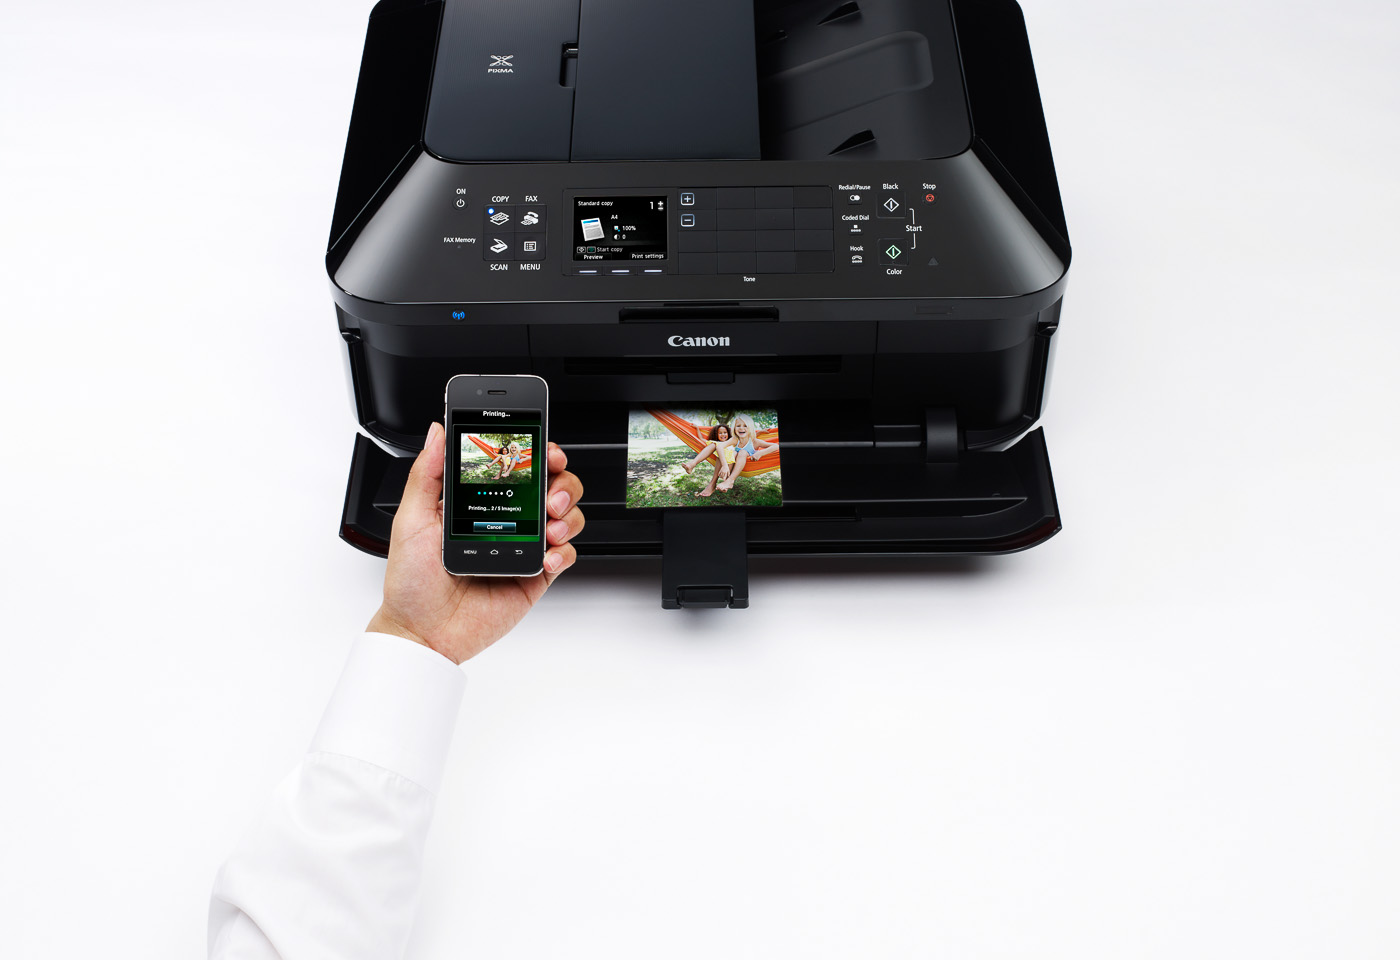
4. How do I print from my mobile device to my Canon wireless printer?
To print from a mobile device to your Canon wireless printer, you will need to download and install the Canon PRINT Inkjet/SELPHY app on your Android or iOS device. Once installed, follow these steps:
– Ensure that your printer is connected to the same Wi-Fi network as your mobile device
– Open the Canon PRINT Inkjet/SELPHY app
– Select the type of document you want to print (photo, document, etc.)
– Choose the specific file or photo you wish to print
– Adjust any print settings if required
– Tap the Print button to send the print job to your Canon wireless printer
5. Can I connect my Canon wireless printer to a wired network?
Yes, it is possible to connect your Canon wireless printer to a wired network. Most Canon wireless printers have an Ethernet port that allows you to connect the printer directly to your router using an Ethernet cable. This can provide a more stable and reliable connection compared to Wi-Fi. Simply connect one end of the Ethernet cable to the printer and the other end to an available LAN port on your router. Once connected, you can set up the printer using the appropriate network settings on your computer or through the printer’s control panel.