
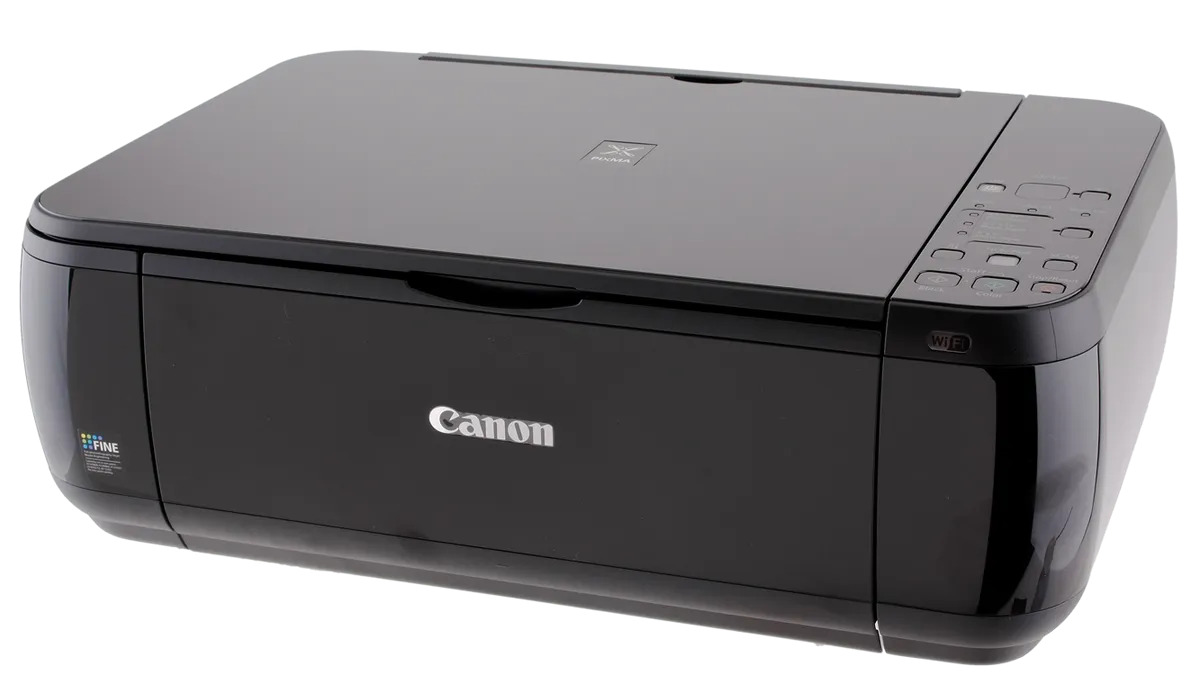
The Canon Pixma MP495 wireless printer is a versatile and user-friendly device that allows you to print, scan, and copy documents effortlessly. With its wireless capabilities, you can easily connect it to your home network and print from anywhere in your house, eliminating the need for messy cables and cords. Setting up the Canon Pixma MP495 wireless printer might seem intimidating at first, but with the right guidance, it can be a breeze. In this article, we will guide you through the step-by-step process of setting up your Canon Pixma MP495 wireless printer, ensuring that you can start using it in no time. Whether you’re a tech-savvy individual or a beginner, our comprehensive instructions will help you get your printer up and running smoothly.
Inside This Article
- Overview
- Step 1: Check System Requirements
- Step 2: Gather Necessary Materials
- Step 3: Connect the Printer to Power
- Step 4: Install Ink Cartridges
- Step 5: Load Paper into the Printer
- Step 6: Connect the Printer to Wi-Fi
- Step 7: Install Printer Software
- Step 8: Test the Printer Connection
- Conclusion
- FAQs
Overview
Setting up a Canon Pixma Mp495 wireless printer is a convenient way to print documents and photos wirelessly from your devices. Whether you’re using a laptop, smartphone, or tablet, a wireless printer allows you to print without the hassle of connecting cables.
The Canon Pixma Mp495 is a versatile printer that offers high-quality printing, scanning, and copying capabilities. It offers wireless connectivity, making it easy to print from multiple devices without the need for a direct connection to your computer or mobile device.
By following a few simple steps, you can quickly set up your Canon Pixma Mp495 wireless printer and start printing wirelessly. In this article, we will guide you through the process step by step, ensuring a smooth and hassle-free setup experience.
From checking system requirements to connecting the printer to your Wi-Fi network and installing the necessary software, we’ll cover all the essential steps to get your Canon Pixma Mp495 up and running wirelessly.
So, let’s dive in and get your Canon Pixma Mp495 wireless printer set up!
Step 1: Check System Requirements
Before setting up your Canon Pixma MP495 wireless printer, the first step is to ensure that your system meets the necessary requirements. This will ensure a smooth and hassle-free installation process. Here are the system requirements you need to check:
1. Compatible Operating System: Make sure that your computer or device is running an operating system that is compatible with the Canon Pixma MP495. The printer is compatible with Windows, Mac, and Linux operating systems. Check the Canon website or the printer’s manual for the specific versions supported.
2. Available USB Port: While setting up the wireless connection, you may need to temporarily connect the printer to your computer using a USB cable. Ensure that your computer has an available USB port to establish this initial connection.
3. Internet Connectivity: Since you will be setting up the wireless feature of the printer, you need to have a stable internet connection. Make sure that your Wi-Fi is working properly and that you have the necessary Wi-Fi credentials (SSID and password) to connect the printer to your network.
4. Sufficient Disk Space: Check if your computer has enough disk space to install the printer software. The software installation may require a certain amount of free space on your hard drive.
5. Minimum System Requirements: Verify the minimum system requirements for the printer software. Typically, this includes minimum RAM, processor speed, and other hardware specifications. Ensure that your computer meets or exceeds these requirements to ensure optimal performance.
6. Device Compatibility: If you plan to print wirelessly from your mobile device, such as a smartphone or tablet, make sure that it is compatible with the Canon Pixma MP495. Some models may require specific apps or drivers to enable wireless printing.
By checking these system requirements in advance, you can ensure that your computer and printer are compatible and ready for the setup process. This will help you avoid any compatibility issues or software installation errors, making the overall setup process more efficient and successful.
Step 2: Gather Necessary Materials
Before setting up your Canon Pixma MP495 wireless printer, it’s important to gather all the necessary materials. Having everything in one place will make the setup process smoother and more efficient. Here are the materials you will need:
1. Canon Pixma MP495 Printer: Make sure you have the printer itself. It should come with all the required cables and accessories.
2. Power Cable: This cable is used to connect the printer to a power source. Ensure that you have the correct power cable for your region.
3. USB Cable: Although the setup is focused on the wireless connection, you may need a USB cable to establish an initial connection between the printer and your computer during the setup process.
4. Ink Cartridges: The Canon Pixma MP495 requires ink cartridges for printing. Check if your printer came with compatible ink cartridges, or purchase them separately if needed. Make sure you have the correct ink cartridges for your printer model.
5. Paper: Load the printer with the appropriate paper type for your needs. Ensure that the paper size matches the printer’s specifications.
6. Wi-Fi Network Information: If you already have a Wi-Fi network set up at your location, gather the necessary information, including the network name (SSID) and password.
7. Computer or Mobile Device: To set up the Canon Pixma MP495 wireless printer, you’ll need a computer or mobile device with internet access. Ensure that it meets the system requirements for the printer software.
By gathering these materials beforehand, you can save time and avoid interruptions during the setup process. Once you have everything you need, you can proceed to the next steps with confidence.
Step 3: Connect the Printer to Power
Before you can start using your Canon Pixma MP495 wireless printer, you need to connect it to a power source. Here are the steps to follow:
1. Locate the power cable that came with your printer. It should have a plug on one end and a connector on the other end that fits into the printer’s power port.
2. Make sure the printer is placed near an electric outlet. This will make it easier to connect the power cable.
3. Insert the plug of the power cable into the electric outlet.
4. Take the connector end of the power cable and insert it into the power port on the back of the printer. The power port is usually labeled with the power symbol.
5. Once the power cable is securely connected to both the printer and the power source, switch on the printer by pressing the power button. The power button is typically located on the top or front of the printer.
6. You should see the printer’s display screen light up, indicating that it is receiving power.
7. If your printer has a Wi-Fi button, press it to activate the wireless connectivity.
Now that your Canon Pixma MP495 printer is connected to power, you can proceed with the next steps to set up your wireless connection and install the necessary software.
Step 4: Install Ink Cartridges
Installing ink cartridges is an essential step in setting up your Canon Pixma MP495 wireless printer. The ink cartridges are responsible for delivering the ink necessary to print your documents and photos. Follow these simple instructions to install the ink cartridges correctly:
-
Open the printer cover by lifting the scanning unit. The ink cartridge holder will move to the center of the printer.
-
Remove the protective tape from the new ink cartridges. Be careful not to touch the gold-colored contacts or the print head nozzles.
-
Insert the ink cartridges into their respective slots. Match the cartridges with the color-coded labels and push them firmly until they click into place.
-
Close the printer cover by lowering the scanning unit. Ensure that it is securely closed.
Once you have installed the ink cartridges, your Canon Pixma MP495 printer is now ready to print. However, it is important to note that the printer may go through an initialization process which could take a few minutes. During this time, avoid printing or performing any other actions with the printer.
It is recommended to use genuine Canon ink cartridges to ensure the best print quality and avoid potential compatibility issues. Genuine cartridges are designed specifically for your printer model and are known to deliver exceptional results.
If you need to replace the ink cartridges in the future, simply follow the same steps mentioned above. Remember to recycle the used cartridges responsibly to minimize the environmental impact.
By following these instructions, you can easily install the ink cartridges for your Canon Pixma MP495 wireless printer and start enjoying high-quality prints.
Step 5: Load Paper into the Printer
Once you have successfully completed the previous steps of setting up your Canon Pixma MP495 wireless printer, it’s time to load it with paper. Follow these simple instructions to do so:
- Ensure that the power is turned on and the printer is in standby mode.
- Locate the paper input tray, usually located at the top or front of the printer.
- Take a stack of plain, unused paper and fan it to prevent any pages from sticking together.
- Adjust the paper guides to match the width of the paper. Most printers have adjustable paper guides to accommodate different paper sizes.
- Hold the stack of paper by its edges and insert it into the paper input tray. Make sure the stack is aligned neatly against the guides.
- Push the paper gently until it is firmly in place. Avoid forcing the paper, as it may cause paper jams.
- Double-check that the paper guides are holding the paper securely in place.
- With the paper now loaded, you are ready to proceed to the next step of connecting the printer to Wi-Fi.
By following these steps, you will ensure that the Canon Pixma MP495 wireless printer is loaded with paper correctly. This will enable you to print documents and photos effortlessly. Remember to always check the printer’s user manual for any specific instructions or guidelines related to paper loading.
Step 6: Connect the Printer to Wi-Fi
Connecting your Canon Pixma Mp495 wireless printer to Wi-Fi is essential for seamless printing from any device in your home or office. Follow these steps to establish a wireless connection:
1. Start by ensuring that your printer is turned on and connected to a power source. Locate the power button and switch it on if necessary.
2. Next, access the printer’s settings menu by pressing the Menu or Setup button on the printer’s control panel. Use the arrow keys or scroll wheel to navigate to the Wi-Fi or Wireless LAN option.
3. In the Wi-Fi settings menu, select Wireless LAN Setup and press the OK button. This will initiate the setup process.
4. Your printer will now search for available Wi-Fi networks. Wait for the printer to display a list of networks on the printer’s LCD screen.
5. Use the arrow keys or scroll wheel to select your desired network from the list. Press the OK button to proceed.
6. If your Wi-Fi network is secured, you will be prompted to enter the network password. Use the alphanumeric keys on the printer’s control panel to enter the password and confirm by pressing the OK button.
7. Once you have entered the correct network password, the printer will attempt to establish a connection to the selected Wi-Fi network. This may take a few moments, so be patient.
8. When the connection is successful, the printer’s LCD screen will display a confirmation message. This indicates that your Canon Pixma Mp495 wireless printer is now connected to Wi-Fi.
By completing this step, you have successfully connected your Canon Pixma Mp495 wireless printer to your Wi-Fi network. Now you can enjoy convenient printing from any device on the same network, without the hassle of using cables or transferring files.
Step 7: Install Printer Software
Installing the printer software is an essential step in setting up your Canon Pixma MP495 wireless printer. The software enables you to communicate with the printer and perform various functions such as printing, scanning, and copying. To install the printer software, follow the steps below:
- Ensure that your computer is connected to the internet. Having an active internet connection is crucial as it allows you to download the latest version of the Canon Pixma MP495 printer software.
- Visit the Canon official website or use the installation CD that came with the printer. If you choose to download the software from the website, search for the MP495 printer model, locate the dedicated driver/software section, and select the appropriate software based on your operating system.
- Click on the download link and wait for the software to be downloaded to your computer. The file size may vary depending on the software version and features.
- Once the download is complete, locate the downloaded file on your computer and double-click to launch the installation process. Follow the on-screen instructions to proceed with the installation.
- During the installation process, you may be prompted to connect your printer to your computer using a USB cable. Connect one end of the USB cable to the USB port on your printer and the other end to an available USB port on your computer.
- Continue following the on-screen instructions to complete the installation. The software will automatically detect your printer and configure the necessary settings for wireless printing.
- Once the installation is complete, restart your computer to ensure that all the changes take effect.
- After restarting your computer, disconnect the USB cable from both the printer and the computer. Your Canon Pixma MP495 printer is now ready to use wirelessly.
Installing the printer software is a straightforward process that ensures proper communication between your computer and the Canon Pixma MP495 wireless printer. By following these steps, you will be able to utilize all the features and functions provided by your printer for seamless printing, scanning, and copying.
Step 8: Test the Printer Connection
After successfully installing the printer software on your computer, it’s time to test the printer connection to ensure everything is set up correctly. Here are the steps to follow:
1. Open a document or image you want to print on your computer.
2. Go to the “File” menu and select the “Print” option. Alternatively, you can use the keyboard shortcut Ctrl + P (Windows) or Command + P (Mac) to bring up the print dialog.
3. In the print dialog, make sure that the Canon PIXMA MP495 printer is selected as the default printer. You should see the printer name in the list of available printers.
4. Adjust the print settings according to your preferences. This includes choosing the paper size, print quality, and number of copies.
5. Click on the “Print” button to start the printing process.
6. Monitor the printer to ensure that it is receiving the print job and that the paper is feeding correctly. You should hear the printer working and see the paper being pulled in for printing.
7. Wait for the printout to complete. Depending on the size and complexity of the document or image, it may take a few moments for the printer to finish the job.
8. Once the printout is finished, examine the print quality to ensure that it meets your expectations. Look for any smudges, streaks, or color variations that may indicate a problem with the printer or the ink cartridges.
9. If you’re satisfied with the printout, congratulations! Your Canon PIXMA MP495 wireless printer is now successfully connected and ready for use.
10. If you encounter any issues during the testing process, refer back to the previous steps to ensure that everything is properly connected and set up. You can also consult the printer’s user manual or contact Canon customer support for further assistance.
By following these steps, you can quickly and easily test the printer connection of your Canon PIXMA MP495 wireless printer. Enjoy the convenience of wireless printing and effortlessly bring your documents and images to life.
Conclusion
Setting up your Canon Pixma MP495 wireless printer is a straightforward process that allows you to enjoy the convenience of wireless printing. By following the steps outlined in this article, you can establish a wireless connection between your printer and your devices in no time.
From downloading the necessary drivers and software to connecting to your Wi-Fi network, the setup process is designed to be user-friendly and intuitive. Once the setup is complete, you can easily print documents, photos, and more wirelessly from your computer, smartphone, or tablet.
With its compact design and high-quality printing capabilities, the Canon Pixma MP495 wireless printer is a reliable choice for home or small office use. Embrace the convenience of wireless printing and enjoy the freedom it offers. Say goodbye to tangled cables and experience seamless printing with the Canon Pixma MP495.
FAQs
- What is the Canon Pixma MP495 Wireless Printer?
- How do I set up the Canon Pixma MP495 Wireless Printer?
- Ensure that the printer is turned on and in a ready state.
- On your computer or device, go to the network settings and connect to the wireless network associated with the printer.
- Download and install the printer driver software from the official Canon website.
- During the installation process, select the wireless connection option and follow the prompts.
- Once the installation is complete, your device should be able to detect the printer and establish a wireless connection.
- Can I print from my smartphone or tablet with the Canon Pixma MP495 Wireless Printer?
- What types of files can I print using the Canon Pixma MP495 Wireless Printer?
- Is the Canon Pixma MP495 Wireless Printer suitable for both personal and small office use?
The Canon Pixma MP495 is a compact all-in-one printer that offers wireless printing capabilities. It allows you to connect your computer, tablet, or smartphone to the printer wirelessly, making it convenient and flexible to print documents, photos, and other files.
To set up the Canon Pixma MP495 Wireless Printer, follow these steps:
Yes, you can print directly from your smartphone or tablet with the Canon Pixma MP495 Wireless Printer. With its wireless capabilities, you can connect your mobile device to the printer, download the Canon PRINT Inkjet/SELPHY app, and easily print your desired files. The app also offers additional features, such as scanning and cloud printing.
The Canon Pixma MP495 Wireless Printer supports a wide range of file formats for printing. You can print documents in formats such as PDF, Word, and Excel, as well as image files in JPEG, PNG, and GIF formats. Additionally, the printer allows you to print directly from memory cards or USB drives, expanding the versatility of the printer.
While the Canon Pixma MP495 Wireless Printer is primarily designed for personal use, its features and capabilities make it suitable for small office use as well. It can handle basic printing, scanning, and copying tasks, making it a versatile option for individuals or small teams with moderate printing needs.