
Are you wondering how to add a wireless network on Windows 8? Well, you’ve come to the right place! In this article, we will provide you with step-by-step instructions on how to connect to a wireless network on your Windows 8 device. With the increasing importance of wireless connectivity in our lives, it is essential to know how to set up a wireless network on your computer. Whether you’re connecting at home, at work, or in a public area, having a wireless connection can provide you with the flexibility and convenience of accessing the internet without the need for wired connections. So, let’s get started and learn how to add a wireless network on Windows 8!
Inside This Article
- Connecting to a Wireless Network on Windows 8
- Step 1: Accessing the Network Settings
- Step 2: Scanning for Available Networks
- Step 3: Selecting the Desired Network
- Step 4: Entering the Network Password
- Step 5: Connecting to the Wireless Network
- Troubleshooting: Common Connection Issues
- Conclusion
- FAQs
Connecting to a Wireless Network on Windows 8
Connecting to a wireless network on Windows 8 is a straightforward process that allows you to enjoy the convenience of a wireless internet connection on your device. Whether you are setting up a new computer or replacing an existing network, Windows 8 provides a user-friendly interface to connect to a wireless network effortlessly.
Here are the steps to help you easily connect to a wireless network on Windows 8:
- Step 1: Accessing the Network Settings
- Step 2: Scanning for Available Networks
- Step 3: Selecting the Desired Network
- Step 4: Entering the Network Password
- Step 5: Connecting to the Wireless Network
- Troubleshooting: Common Connection Issues
To begin, open the Charms bar by moving the mouse cursor to the top or bottom right corner of the screen or by pressing the Windows key + C. Click on the “Settings” charm and then select the “Wireless” icon to access the network settings.
Once you are in the network settings, click on the “Available Networks” option. Windows 8 will scan for available networks in your vicinity. Wait for a few moments while the scan is completed.
After the scan, a list of available networks will be displayed. Look for the desired network name or SSID (Service Set Identifier) that you want to connect to. Click on the network to select it.
If the network you selected requires a password, a prompt will appear asking for the network security key. Enter the password correctly, taking care of uppercase and lowercase letters if necessary. Then click on the “Connect” button to proceed.
Windows 8 will now attempt to connect to the chosen wireless network. Once the connection is established, a notification will appear indicating that you are now connected. You can now start using the internet and enjoying the benefits of a wireless network connection on your Windows 8 device.
If you encounter any issues during the connection process, there are a few troubleshooting steps you can try. First, ensure that you have entered the correct network password. If the problem persists, you can try restarting your computer or resetting your network adapter. Additionally, make sure that your wireless router is functioning properly and that the signal strength is strong enough for a stable connection.
Step 1: Accessing the Network Settings
Before you can connect to a wireless network on your Windows 8 computer, you need to access the network settings. This allows you to view and manage the available network connections on your device. Accessing the network settings is a simple process that can be done in just a few steps.
To begin, go to the desktop by pressing the Windows key or clicking the “Desktop” tile on the Start screen. Once you’re on the desktop, move your cursor to the bottom right corner of the screen to bring up the Charms bar.
In the Charms bar, click on the “Settings” option, represented by a gear icon. This will open the Settings menu on the right-hand side of the screen. From the Settings menu, click on the “Network” icon to access the network settings.
Alternatively, you can access the network settings by pressing the Windows key + I to open the Settings menu directly. Then, click on the “Network” icon to proceed.
Once you have opened the network settings, you will see a list of available connection types on the left-hand side of the screen. These may include Wi-Fi, Ethernet, VPN, and Dial-up connections. Click on the “Wi-Fi” option to view and manage your wireless network connections.
By accessing the network settings, you are now ready to proceed with the next step of connecting to a wireless network on your Windows 8 computer.
Step 2: Scanning for Available Networks
After accessing the network settings in Windows 8, the next step in connecting to a wireless network is scanning for available networks. This process allows your device to detect and display all the wireless networks within range.
To begin scanning for networks, click on the “Network icon” located in the lower-right corner of the taskbar. The icon resembles a series of vertical bars that signal the presence of a network signal. Alternatively, you can swipe in from the right edge of the screen to access the Charms bar, click on the “Settings” option, and select the “Wireless” or “Wi-Fi” icon.
Once you have opened the network menu, you will see a list of available wireless networks. The list will typically display the network names or SSIDs (Service Set Identifiers) along with the signal strength of each network. The stronger the signal, the closer the network is to your device.
To update the list of available networks, click on the “Refresh” or “Scan” button, usually represented by a circular arrow icon. This action will prompt Windows 8 to search for any newly detected networks and update the list accordingly.
While scanning, it is important to note that some networks may be hidden or not broadcast their SSIDs. In such cases, they will not appear on the list of available networks. However, if you know the exact network name and password, you can manually connect to these hidden networks by selecting the “Connect to a hidden network” option.
Additionally, you may encounter a situation where your device is unable to detect any networks. This can be caused by several factors, such as a disabled wireless adapter, a malfunctioning router, or being outside the range of any wireless networks. In such cases, it is recommended to troubleshoot the issue by checking your device’s network settings and ensuring that the wireless adapter is enabled.
Once you have successfully scanned for available networks, you can proceed to the next step of selecting the desired network to connect to on your Windows 8 device.
Step 3: Selecting the Desired Network
Once you have accessed the network settings and scanned for available networks, it’s time to select the desired network on your Windows 8 device. This step is crucial as it determines the network you will connect to for internet access.
When you scan for available networks, Windows 8 will display a list of networks that are within range of your device. The list will usually include the names or SSIDs (Service Set Identifiers) of the networks along with their signal strengths and types of encryption.
Take a moment to review the list and look for the network you want to connect to. It may be helpful to know the name (SSID) of the network in advance, especially if you are connecting to a specific network in a public place like a coffee shop or library.
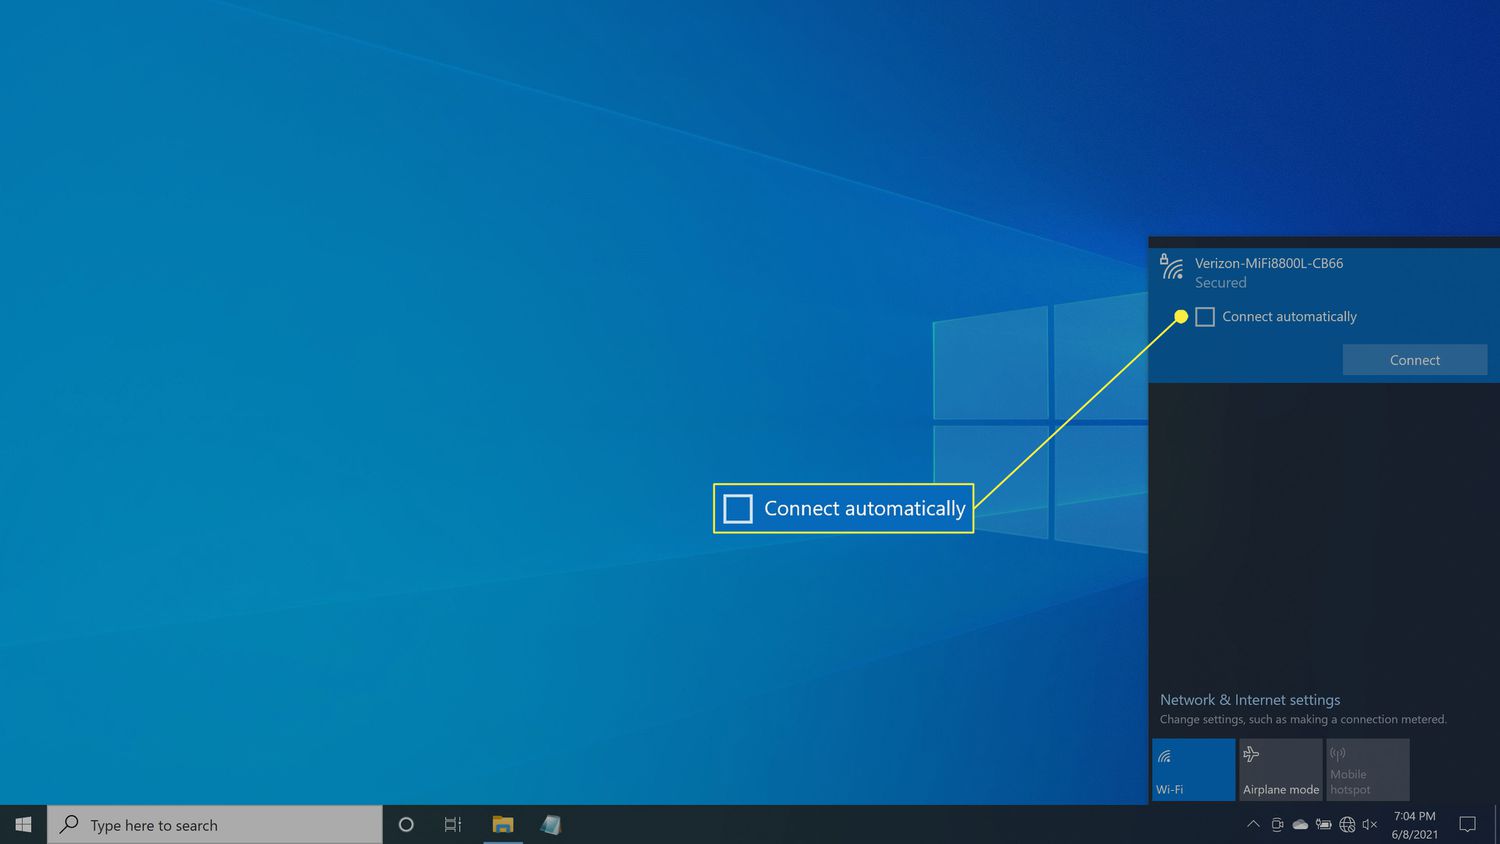
Once you have identified the desired network, click on it to select it. Windows 8 will highlight the selected network, and additional options will become available.
At this point, you may be prompted to enter a network password if the selected network is secured with WPA or WEP encryption. If the network is open or does not require a password, you can proceed to the next step.
If you need to enter a password, click on the “Connect” button or a similar option that appears on the screen. This will open a dialog box where you can enter the network password.
Make sure to enter the password correctly, paying attention to uppercase and lowercase letters, as passwords are case-sensitive. If you are unsure about the password, check with the network owner or administrator.
After entering the password, click on “Connect” or a similar button to finalize the connection process. Windows 8 will attempt to connect to the selected network using the provided password.
If the password is correct and the network is within range, your device will establish a connection with the wireless network. You should see a notification or icon indicating a successful connection.
However, if you are unable to connect or encounter any issues, please refer to the troubleshooting section or consult the network administrator for further assistance.
Step 4: Entering the Network Password
Once you have selected the wireless network you want to connect to, you will need to enter the network password to establish a secure connection. The network password, also known as the Wi-Fi password or security key, is a combination of letters, numbers, and symbols that ensures only authorized users can access the network.
Here’s how you can enter the network password on Windows 8:
- Click on the network name or SSID (Service Set Identifier) of the desired network in the list of available networks.
- A pop-up window will appear, prompting you to enter the network password.
- Type in the network password using the keyboard. Pay attention to uppercase and lowercase letters, as passwords are case-sensitive.
- Ensure that you accurately input the password to avoid any connectivity issues.
- If you are uncertain about the password, you can click the “Show characters” checkbox to reveal the characters you have entered.
- Double-check that the password is correct and matches the one provided by the network administrator or the password written on your Wi-Fi router or modem.
Once you have entered the correct password, click on the “Connect” or “OK” button to proceed. Windows 8 will attempt to connect to the network using the provided password. If the password is correct, you will successfully establish a connection to the wireless network.
It is important to note that the network password is different for each wireless network you connect to. This means that you will need to enter the password each time you want to connect to a different network or if you have changed the password for your home network.
Step 5: Connecting to the Wireless Network
After selecting the desired network and entering the correct password, it’s time to connect your Windows 8 device to the wireless network. Here’s how you can do it:
1. Once you have entered the network password, click on the “Connect” button. Windows 8 will then attempt to establish a connection with the selected wireless network.
2. During the connection process, you may see a message indicating that Windows is acquiring an IP address or applying network settings. This is completely normal and it may take a few moments for the connection to be established.
3. Once the connection is established, you will see an icon in the system tray indicating a successful connection to the wireless network. You can also verify the connection by opening a web browser and attempting to access a website.
4. It’s always a good idea to test your connection by browsing the internet or checking your email to ensure everything is working properly. If you encounter any issues, refer to the troubleshooting section for common connection problems.
5. Congratulations! You have successfully connected your Windows 8 device to the wireless network. Now you can enjoy the benefits of wireless connectivity, such as online gaming, streaming media, and browsing the web without the need for a wired connection.
Remember, once you have successfully connected to a wireless network, Windows 8 will automatically reconnect to it whenever it’s in range, making future connections quick and effortless.
Troubleshooting: Common Connection Issues
While adding a wireless network on Windows 8 is usually a straightforward process, there might be instances where you encounter connection issues. Understanding and troubleshooting these problems can help you get back online quickly. Here are some common connection issues and their solutions:
1. No available networks: If you are not seeing any available networks in the network settings, check if your wireless adapter is enabled. Go to the device manager and ensure that the adapter is not disabled or has any driver issues. If necessary, reinstall the driver or update it to the latest version.
2. Weak signal: If you are connected to a network but experiencing a weak signal, try moving closer to the router. Objects like walls and large furniture can obstruct the signal. You can also try changing the wireless channel on your router to minimize interference from other devices.
3. Authentication issues: If you are unable to connect to a network even after entering the correct password, double-check the password for any typographical errors. If the issue persists, try restarting your router and the device you are trying to connect from. Resetting the network settings on your Windows 8 device may also help resolve authentication issues.
4. Limited or no connectivity: If you are connected to a network but experiencing limited or no connectivity, try disconnecting and reconnecting. If that doesn’t work, restart your router and check if other devices are able to connect without any issues. If the problem persists, reset the TCP/IP stack on your Windows 8 device by following the command prompt instructions.
5. Interference from other devices: Sometimes, other devices like cordless phones, baby monitors, or microwave ovens can interfere with the wireless signal. Move these devices away from your router or use devices that operate on different frequency bands to minimize interference.
6. Driver compatibility issues: Sometimes, outdated or incompatible wireless drivers can cause connection problems. Ensure that you have the latest drivers installed for your wireless adapter. If the issue persists, try rolling back to a previous version of the driver or contact the manufacturer for further assistance.
7. Firewall or antivirus software: In some cases, your firewall or antivirus software may be blocking your Windows 8 device from connecting to a network. Temporarily disable these software and check if you can establish a connection. If that resolves the issue, configure your firewall or antivirus settings to allow network access.
By understanding and resolving these common connection issues, you can ensure a smooth and hassle-free wireless network experience on your Windows 8 device.
Adding a wireless network on Windows 8 is a simple and straightforward process that allows you to connect and enjoy the benefits of wireless connectivity. By following the steps outlined in this article, you can easily set up your wireless network and enjoy seamless internet access on your Windows 8 device. Whether you’re at home, at work, or on the go, having a wireless network can greatly enhance your productivity and make your online experience more convenient and enjoyable.
FAQs
1. How do I add a wireless network on Windows 8?
To add a wireless network on Windows 8, follow these steps:
- Click on the Wi-Fi icon located in the system tray on the bottom right corner of the screen.
- A list of available wireless networks will appear. Choose the network you want to connect to.
- If the network is password protected, enter the password in the provided field.
- Click on the “Connect” button and Windows will attempt to connect to the wireless network.
- Once connected, you will see a notification confirming the connection status.
2. Can I connect to a hidden network on Windows 8?
Yes, you can connect to a hidden network on Windows 8. To do so, follow these steps:
- Click on the Wi-Fi icon located in the system tray on the bottom right corner of the screen.
- At the bottom of the list of available networks, click on the “Hidden Network” option.
- Enter the network name (SSID) in the provided field.
- If the network is password protected, enter the password in the provided field.
- Click on the “Connect” button and Windows will attempt to connect to the hidden network.
- Once connected, you will see a notification confirming the connection status.
3. How do I forget a wireless network on Windows 8?
To forget a wireless network on Windows 8, follow these steps:
- Click on the Wi-Fi icon located in the system tray on the bottom right corner of the screen.
- A list of available wireless networks will appear.
- Right-click on the network you want to forget and select “Forget” from the menu.
- The network will be removed from your list of known networks.
4. Why is my wireless network not showing up on Windows 8?
There could be several reasons why your wireless network is not showing up on Windows 8. Here are a few troubleshooting steps you can try:
- Make sure that your wireless adapter is enabled. You can check this by going to the Network and Sharing Center in the Control Panel.
- Check if the wireless network is within range and that the router or access point is powered on.
- Restart your computer and try again.
- If the network is a hidden network, make sure you have entered the correct network name (SSID) and password.
- If none of the above solutions work, it is possible that there may be an issue with your wireless card or router. Consider contacting your internet service provider or a technical support professional for further assistance.
5. How do I troubleshoot Wi-Fi connection issues on Windows 8?
If you are experiencing Wi-Fi connection issues on Windows 8, here are a few troubleshooting steps you can try:
- Restart your computer and try connecting to the network again.
- Make sure that your Wi-Fi adapter is enabled. You can check this by going to the Network and Sharing Center in the Control Panel.
- Check if other devices are able to connect to the wireless network. If they are, the issue may be with your computer.
- Update your Wi-Fi driver by going to the manufacturer’s website and downloading the latest driver for your specific adapter model.
- Disable any VPN or proxy settings that may interfere with your Wi-Fi connection.
- If all else fails, consider resetting your network settings or contacting your internet service provider for further assistance.