
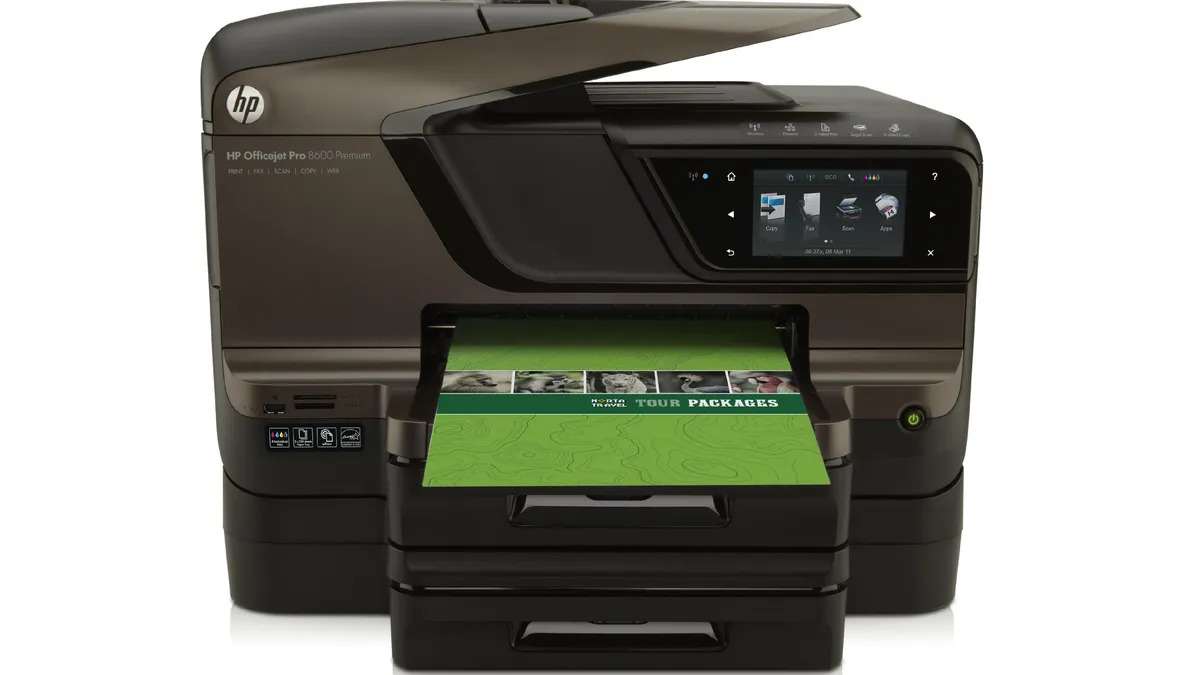
Are you struggling to set up your HP 8600 wireless printer? Look no further, because we’re here to guide you through the process step by step. The HP 8600 wireless printer offers a convenient and efficient way to print from any device in your home or office. Whether you’re printing documents, photos, or even wirelessly scanning, this versatile printer has got you covered. In this article, we’ll walk you through the setup process, from connecting your printer to your Wi-Fi network, installing the necessary drivers, to configuring the printer settings. By following our expert instructions, you’ll be up and running in no time, experiencing the freedom and convenience of wireless printing. Let’s get started!
Inside This Article
- Step 1: Unboxing and Setup
- Step 2: Connecting to Wi-Fi
- Step 3: Installing Printer Drivers
- Step 4: Printing a Test Page
- Step 5: Troubleshooting Common Issues
- Conclusion
- FAQs
Step 1: Unboxing and Setup
So, you’ve just received your brand-new HP 8600 Wireless Printer, now it’s time to get started with the unboxing and setup process. In this step-by-step guide, we’ll walk you through the process of setting up your printer right out of the box.
Before you begin, make sure you have a clear work area and all the necessary components that came with the printer, including the printer itself, power cord, ink cartridges, and any additional accessories.
1. Carefully remove all the protective packaging material from the printer, taking care not to touch any of the internal components.
2. Locate the power cord and connect one end to the back of the printer and the other end to a power outlet. Ensure the printer is receiving proper power supply.
3. Open the ink cartridge access door located at the front of the printer. Remove the ink cartridges from their packaging and gently insert them into their respective slots, making sure they are securely in place.
4. Close the ink cartridge access door firmly. The printer will then initialize the ink cartridges, and you may need to wait for a few minutes until the printer is ready.
5. Now, it’s time to load paper into the input tray. Open the input tray at the bottom of the printer and adjust the paper guides to fit the size of the paper you will be using. Place a stack of paper into the tray and slide it back into the printer.
6. Once the paper is properly loaded, the printer will perform a paper alignment process. Follow the on-screen instructions if prompted to complete this process.
7. Once you’ve completed the hardware setup, turn on the printer by pressing the power button. You will see the printer’s display screen come to life and display the main menu.
8. Take a moment to familiarize yourself with the printer’s control panel and menu options. This will help you navigate through the printer’s settings and functions later on.
That’s it! You have successfully unboxed and set up your HP 8600 Wireless Printer. Now you’re ready to move on to the next step, which is connecting the printer to a Wi-Fi network.
Step 2: Connecting to Wi-Fi
After unboxing your HP 8600 wireless printer and connecting the power cord (Step 1), the next crucial step is to connect it to your Wi-Fi network. This will allow you to print wirelessly from any device connected to the same network, whether it’s a laptop, smartphone, or tablet.
Here’s a step-by-step guide on how to connect your HP 8600 to Wi-Fi:
1. Start by turning on your printer. Make sure it is in a location with a good Wi-Fi signal strength.
2. On the printer’s control panel, navigate to the “Network” or “Wireless” menu. You may need to refer to the printer’s manual to find the exact location of these settings.
3. Select the “Wireless Setup Wizard” option. This will prompt your printer to search for available Wi-Fi networks.
4. Your printer will display a list of available Wi-Fi networks. Scroll through the list and select your network from the options. If your network is not visible, you may need to manually enter the network name (SSID).
5. If your network requires a password, enter it using the printer’s control panel. Make sure to enter the password correctly to avoid connection issues.
6. Once you’ve entered the password, the printer will attempt to connect to your Wi-Fi network. This may take a few moments, so be patient.
7. Once the connection is successful, your printer will display a message indicating that it is connected to the Wi-Fi network.
Your HP 8600 wireless printer is now connected to your Wi-Fi network. You can proceed to the next step of installing printer drivers and software (Step 7) to fully utilize all the features of your printer.
Please note that if you encounter any issues during the Wi-Fi setup process, consult the printer’s manual or visit the HP support website for troubleshooting assistance.
Step 3: Installing Printer Drivers
Installing printer drivers is an essential step in setting up your HP 8600 wireless printer. These drivers allow your computer to communicate with the printer, enabling you to print documents, photos, and more. Follow these simple steps to get your printer drivers installed:
1. Start by ensuring that your computer is connected to the internet. This is crucial as the installation process requires downloading the necessary software from the HP website. You can use either a wired or wireless connection.
2. Open your web browser and go to the official HP website. Navigate to the support page, where you can find drivers and software specific to the HP 8600 wireless printer model.
3. Enter the model number of your printer in the search bar, or you can select it from the provided list. This will take you to the product page, where you can find all available software and drivers.
4. On the product page, you should see a section dedicated to printer drivers. Locate the driver that is compatible with your operating system and click on the download button. The download process will begin, and you can track the progress on your browser.
5. Once the download is complete, locate the downloaded file on your computer and double-click on it to start the installation process. Follow the on-screen prompts to proceed with the installation. You may be asked to accept the terms and conditions before proceeding.
6. The installation process will take a few minutes. Once it’s complete, you will see a notification confirming the successful installation of the printer drivers.
7. Finally, restart your computer to ensure that the changes take effect. This step is important to ensure that your computer properly recognizes the installed printer drivers.
By following these steps, you can easily install the necessary printer drivers for your HP 8600 wireless printer. Once the drivers are installed, you will be able to print wirelessly from your computer and enjoy all the features and functionalities that the printer has to offer.
Step 4: Printing a Test Page
Now that you have successfully connected your HP 8600 wireless printer to your Wi-Fi network and installed the necessary drivers and software, it’s time to print a test page to ensure everything is working correctly. The test page will help you verify that the printer is communicating with your computer and that it can produce high-quality prints.
To print a test page, follow these simple steps:
- Open any document or image on your computer that you want to test print.
- Click on the “File” option in the top left corner of the application window.
- Select the “Print” option from the dropdown menu.
- Choose the HP 8600 wireless printer as your printing device.
- Click on the “Print” button to start the test print.
Make sure that the document or image is properly formatted and contains all the necessary details for the test.
A dropdown menu will appear with various options.
A print settings window will open, allowing you to configure the print options.
Make sure that the correct printer is selected from the available options.
The print command will be sent to the printer, and it will begin the printing process.
After clicking the “Print” button, you will hear the printer initializing and see the test page being printed out. The test page will typically consist of a combination of text, graphics, and alignment patterns.
Once the test page is printed, take a moment to examine the results. Check if the text is sharp and clear, if the colors are vibrant and accurate, and if the overall print quality meets your expectations. If you notice any issues, such as misaligned text or streaks in the prints, you may need to recalibrate or perform maintenance tasks on the printer.
Printing a test page is an essential step in the setup process as it allows you to identify any initial issues or misconfigurations before you start printing important documents. It also serves as a useful reference point for troubleshooting purposes in case you encounter any future problems.
Congratulations! You have now completed the setup of your HP 8600 wireless printer and successfully printed a test page. You can now start enjoying the convenience and efficiency of wireless printing.
Step 5: Troubleshooting Common Issues
Setting up a wireless printer like the HP 8600 can sometimes come with its fair share of challenges. If you encounter any issues during the setup process, don’t worry! We’ve compiled a list of common problems and their solutions to help you troubleshoot effectively:
- No Wi-Fi network found: If your printer is unable to detect any available Wi-Fi networks, ensure that your router is powered on, and the Wi-Fi signal is strong enough to reach the printer. You might also want to check if any wireless interference is affecting the signal.
- Incorrect Wi-Fi network credentials: One of the most common mistakes during setup is entering the wrong Wi-Fi network name (SSID) or password. Double-check the credentials and ensure they are correctly entered into the printer’s settings.
- Printer not connecting to Wi-Fi: If your printer seems to be unable to establish a connection to your Wi-Fi network, try restarting both your printer and router. Sometimes, a simple reboot can resolve connectivity issues.
- Outdated printer firmware: It’s essential to keep your printer’s firmware up to date to ensure optimal performance. If you’re encountering connectivity problems, visit the HP Support website and download the latest firmware for your HP 8600 printer model.
- Incompatible drivers or software: If your computer is unable to communicate with the printer, it may be due to incompatible drivers or software. Make sure you have the correct drivers installed for your printer model and update them if necessary.
- Printer offline: Sometimes, your printer may appear offline, even though it is connected to the Wi-Fi network. Check the printer status on your computer and make sure it is selected as the default printer. If it is still offline, try restarting the printer and checking the network connection.
Remember, troubleshooting is a systematic process of identifying and resolving problems. If you’re still facing issues despite following the steps above, consult the user manual or contact the HP customer support team for further assistance.
Conclusion
In conclusion, the HP 8600 wireless printer is a versatile and efficient device that offers seamless printing experiences. With its easy-to-use setup process, wireless connectivity, and advanced features, it is a popular choice for both personal and professional use.
Throughout this article, we have explored the step-by-step guide to setting up the HP 8600 wireless printer, covering important aspects such as connectivity options, driver installation, and troubleshooting tips. By following these instructions, you can have your printer up and running in no time.
Remember to refer to the user manual and online resources provided by HP for any detailed instructions or specific troubleshooting steps.
Investing in the HP 8600 wireless printer will not only streamline your printing tasks, but it will also offer you the convenience of wireless printing from any device. Whether you are printing documents, photos, or even envelopes, this printer will deliver high-quality results with ease.
So, why wait? Get your HP 8600 wireless printer and start enjoying the benefits of hassle-free printing today!
FAQs
1. How do I set up my HP 8600 wireless printer?
To set up your HP 8600 wireless printer, follow these steps:
- Make sure your printer is turned on and connected to a power source.
- On the printer’s control panel, navigate to the wireless settings or setup menu.
- Select the option to connect to a wireless network.
- Select your Wi-Fi network from the list of available networks.
- Enter your Wi-Fi network password when prompted.
- Wait for the printer to establish a connection with your Wi-Fi network.
- Once connected, you can install the necessary printer drivers on your computer or mobile device and start printing wirelessly.
2. Can I use my HP 8600 printer with multiple devices?
Yes, you can use your HP 8600 printer with multiple devices. Once the printer is connected to your Wi-Fi network, any device connected to that network will be able to access and print from the printer. This includes computers, smartphones, tablets, and other devices that support printing.
3. How do I find the IP address of my HP 8600 printer?
To find the IP address of your HP 8600 printer, follow these steps:
- On the printer’s control panel, navigate to the network settings or setup menu.
- Select the option to view network information or TCP/IP settings.
- Look for the IP address listed in the network information.
- Make a note of the IP address for future reference.
4. How do I troubleshoot common issues with my HP 8600 wireless printer?
If you’re experiencing issues with your HP 8600 wireless printer, try the following troubleshooting steps:
- Ensure that the printer is within range of your Wi-Fi network.
- Restart your printer and check for any error messages on the control panel.
- Ensure that your Wi-Fi network is functioning properly and that your device is connected to the correct network.
- Check for any firmware updates for your printer and install them if available.
- Restart your computer or device and try printing again.
- If the issue persists, consult the printer’s user manual or contact HP customer support for further assistance.
5. How do I change ink cartridges in the HP 8600 printer?
To change ink cartridges in the HP 8600 printer, follow these steps:
- Make sure the printer is turned on.
- Open the scanner lid to access the ink cartridge carriage.
- Wait for the carriage to move to the center of the printer.
- Press the tab or release latch on the front of the empty ink cartridge.
- Remove the empty ink cartridge from the carriage.
- Take the new ink cartridge out of its packaging and remove the protective tape.
- Insert the new ink cartridge into the empty slot in the carriage, making sure it clicks into place.
- Close the scanner lid.
- The printer will automatically align the ink cartridges.