
Tableau is a powerful data visualization tool that allows users to explore, analyze, and share insights from their data. However, in order to leverage Tableau’s capabilities, you need to be able to upload your data into the software. Uploading data to Tableau is a crucial step in the data analysis process, as it enables you to create interactive visualizations and derive meaningful insights.
In this article, we will guide you through the process of uploading data to Tableau, step by step. Whether you are a beginner or an experienced Tableau user, understanding how to upload data correctly is essential for unlocking the full potential of the software.
So, if you’re ready to dive into the fascinating world of data visualization with Tableau, let’s get started and learn how to upload your data seamlessly!
Inside This Article
- Overview
- Prerequisites
- Method 1: Uploading Data from a File
- Method 2: Connecting to a Database
- Method 3: Importing Data from an Excel File
- Method 4: Using Tableau Prep to Upload Data
- Troubleshooting Tips
- Conclusion
- FAQs
Overview
Uploading data to Tableau is a crucial step in the data analysis process. Whether you’re working with files, databases, or Excel spreadsheets, Tableau provides various methods to upload and access your data seamlessly. In this article, we’ll explore different ways to upload data to Tableau, including uploading from a file, connecting to a database, importing from an Excel file, and using Tableau Prep.
Before diving into the uploading methods, it’s essential to have a basic understanding of Tableau. Tableau is a powerful data visualization tool that allows users to connect, analyze, and visualize data quickly and efficiently. With its user-friendly interface and robust features, Tableau has become a go-to solution for professionals across industries, from data analysts to business leaders.
When it comes to uploading data, Tableau offers flexibility and versatility. You can upload various data formats, including CSV, Excel, text files, and even connect to databases like MySQL, Oracle, and SQL Server. The ability to directly upload and connect to data sources makes Tableau a convenient choice for data analysis and visualization.
In the following sections, we’ll explore four different methods to upload data to Tableau: uploading from a file, connecting to a database, importing from an Excel file, and using Tableau Prep. No matter which method you choose, the goal remains the same: to make your data accessible and ready for analysis within Tableau’s intuitive interface.
So, let’s dive into each method and discover how to seamlessly upload your data to Tableau for advanced analysis and visualization.
Prerequisites
In order to successfully upload data to Tableau, you’ll need a few things in place beforehand. Here are the essential prerequisites you should consider:
1. Tableau Software: You will obviously need Tableau software installed on your computer. Ensure that you have the latest version downloaded and ready to go.
2. Data Source: Before uploading data, you need to have the data source prepared. This can be in the form of a file (such as a CSV, Excel, or text file) or a database that Tableau can connect to. Make sure you have the necessary access permissions or credentials to access the data source.
3. Data Format: It’s important to have the data in a proper format that Tableau can understand. Ensure that the data is clean, structured, and organized. Remove any unnecessary columns or rows and make sure that the data types are correct.
4. Data Connectivity: If you are connecting to a database, make sure that you have the necessary drivers installed and configured on your computer. This will allow Tableau to establish a connection with the database and retrieve the data.
5. Basic Data Analysis Skills: While not necessarily a prerequisite, having a basic understanding of data analysis concepts and techniques will greatly enhance your ability to work with the uploaded data in Tableau. Familiarize yourself with concepts like dimensions, measures, and aggregates.
6. Familiarity with Tableau Interface: It’s beneficial to have a basic understanding of the Tableau interface and how it works. Familiarize yourself with the different components of the software, such as worksheets, dashboards, and data source connections.
By ensuring you have these prerequisites in place, you can confidently proceed with uploading your data to Tableau and start visualizing and analyzing it.
Method 1: Uploading Data from a File
If you have data saved in a file that you want to upload to Tableau, you’re in luck. Tableau offers a straightforward process for importing data from a variety of file formats, such as CSV, Excel spreadsheets, and text files. Here’s how you can do it:
Step 1: Launch Tableau and open a new or existing workbook.
Step 2: Go to the “Connect” pane on the left side of the Tableau interface and click on the “To a File” option.
Step 3: Browse for the file you want to upload by clicking on the “Browse” button or by dragging and dropping the file into the Tableau window.
Step 4: Once you’ve selected the file, Tableau will automatically detect the file type and display a preview of the data. Make sure the data looks correct and click on the “Open” button to proceed.
Step 5: Tableau will now load the data from the file into the “Data Source” pane. Here, you can see an overview of the fields and data types in your file.
Step 6: If needed, you can perform data cleaning and transformation tasks in Tableau’s “Data Source” pane. This includes renaming fields, changing data types, creating calculated fields, and more.
Step 7: Once you’re satisfied with the data, click on the “Sheet” tab at the bottom of the Tableau interface to start analyzing and visualizing your data.
That’s it! You’ve successfully uploaded data from a file to Tableau using Method 1. Now you can explore the various visualization options and uncover insights from your data.
Method 2: Connecting to a Database
Tableau offers seamless integration with various databases, allowing users to directly connect and retrieve data for visualization. Connecting to a database in Tableau is a straightforward process that involves a few simple steps. Follow the guide below to learn how to connect to a database in Tableau:
1. Open Tableau and navigate to the “Connect” pane. Here, you will find a list of data sources that Tableau supports.
2. From the list of data sources, select the type of database you want to connect to, such as MySQL, SQL Server, Oracle, or PostgreSQL.
3. Enter the necessary connection details, including the server name, port number, database name, and authentication credentials. Make sure to provide accurate information to establish a successful connection.
4. Once you have entered the required information, click on the “Connect” button to initiate the connection process.
5. Tableau will then establish a connection to the database based on the provided details. If the connection is successful, you will be directed to the data source tab where you can start working with your data.
6. In the data source tab, you can select specific tables or views from the connected database that you want to analyze. Tableau will automatically retrieve the data and provide a preview of the selected data.
7. Now that you have successfully connected to a database and selected the desired data, you can start creating visualizations and performing data analysis in Tableau.
8. Tableau also offers additional features to enhance your database connectivity. You can apply filters, joins, calculations, and create custom queries to refine your data analysis.
By connecting directly to a database in Tableau, you can tap into the power of your data and unleash its potential for visual exploration and insights. Whether you are working with large-scale enterprise databases or smaller datasets, Tableau’s database connectivity capabilities provide a seamless experience for data analysis and visualization.
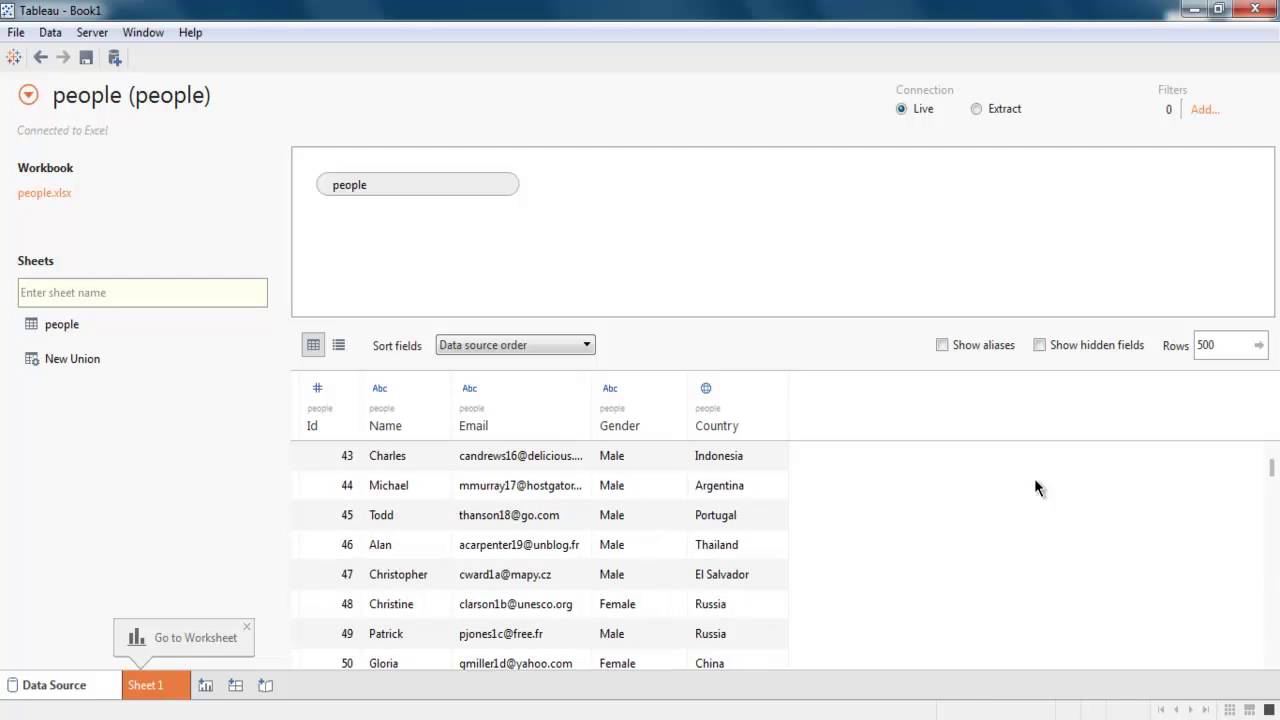
Method 3: Importing Data from an Excel File
If you have data stored in an Excel file and want to import it into Tableau, you’re in luck. Tableau offers a seamless process for importing data from Excel, allowing you to quickly and easily analyze your data within the Tableau platform.
The first step is to open Tableau and create a new workbook. Once you have your workbook ready, go to the “Data” tab at the top of the interface. From there, you’ll see a range of options for connecting to different data sources. Select the “Excel” option.
After selecting the Excel option, navigate to the location on your computer where your Excel file is stored. Choose the file and click “Open” to begin the import process.
Tableau will then present you with a preview of the data from your Excel file. This gives you the opportunity to review the data and make any necessary adjustments or transformations before importing it into your worksheet. You can specify the sheet and range of cells you want to import, rename fields, and perform other data cleanup tasks.
Once you are satisfied with the preview and any modifications you’ve made, click “Sheet” to import the data into your workbook. Tableau will create a new worksheet and populate it with the imported data.
From here, you can start analyzing your data in Tableau by dragging and dropping fields onto the rows, columns, and shelves. You can create visualizations, apply filters, and perform calculations to gain insights from your data.
It’s worth noting that Tableau provides various options for refreshing the imported data. You can choose to manually refresh the data whenever you want, or set up a scheduled refresh if your Excel file is dynamic and regularly updated.
Importing data from an Excel file is a convenient and efficient way to leverage the power of Tableau for analysis and visualization. Whether you’re working with sales figures, customer data, or any other form of information, Tableau’s Excel import feature allows you to effortlessly transform raw data into actionable insights.
Method 4: Using Tableau Prep to Upload Data
If you’re looking for a comprehensive and efficient way to upload your data to Tableau, look no further than Tableau Prep. This powerful tool allows you to prepare, cleanse, and transform your data before uploading it to Tableau Desktop or Tableau Online.
Tableau Prep offers a user-friendly interface that makes it easy for even non-technical users to manipulate data. Whether you need to merge multiple datasets, clean up messy data, or create calculated fields, Tableau Prep provides a visual and intuitive way to accomplish these tasks.
To upload data using Tableau Prep, follow these steps:
- Connect to your data sources: Tableau Prep allows you to connect to a wide range of data sources, including files, databases, and server connections. Simply select the appropriate data source type and provide the necessary credentials to establish the connection.
- Profile and clean your data: Once connected to your data sources, Tableau Prep automatically profiles your data, giving you insights into its structure and quality. You can easily identify and address any data quality issues, such as missing values or outliers.
- Transform and prepare your data: Tableau Prep offers a variety of tools for data transformation. You can perform tasks such as joining tables, pivoting data, filtering rows, and creating calculated fields. These transformations can be done visually, with a simple drag-and-drop interface.
- Preview and validate your data: Before uploading your data to Tableau Desktop or Tableau Online, Tableau Prep allows you to preview the final result. You can verify that your data has been transformed and prepared correctly, ensuring its accuracy and relevance.
- Upload your data to Tableau: Once you’re satisfied with the data preparation process, simply click on the “Output” step in Tableau Prep and select the destination where you want to upload your data. You can choose to publish to Tableau Desktop, Tableau Online, or save the data as a Tableau Data Extract (.tde) file.
Tableau Prep streamlines the data preparation process, saving you time and effort when uploading data to Tableau. By using this powerful tool, you can ensure that your data is clean, accurate, and ready for analysis in Tableau Desktop or Tableau Online.
So, if you’re looking for a seamless and efficient way to upload data to Tableau, give Tableau Prep a try. You’ll be amazed at how it simplifies and enhances your data preparation workflow.
Troubleshooting Tips
Tableau is a powerful data visualization tool that allows users to analyze and share data effortlessly. However, like any software, it may encounter occasional hiccups or errors. In this section, we will explore some common troubleshooting tips to help you overcome any issues that may arise while uploading data to Tableau.
1. Check your data source: Ensure that your data source is in a compatible format that Tableau can recognize. Tableau supports various file formats such as CSV, Excel, and databases like MySQL and SQL Server. Double-check the file extension and verify that the data file is not corrupt.
2. Verify data structure: It’s crucial to ensure that the structure of your data is correct. Check if the columns and fields are labeled correctly, and the data types match the actual values. Additionally, ensure that there are no missing values or formatting issues in your data.
3. Update Tableau to the latest version: Sometimes, issues may arise due to outdated software. To avoid compatibility issues and benefit from the latest bug fixes and enhancements, make sure you are using the most recent version of Tableau. You can check for updates within the Tableau application or on the Tableau website.
4. Review system requirements: Tableau has certain system requirements, including RAM, processor speed, operating system, and disk space. If your system does not meet the minimum requirements, it may lead to performance issues or errors. Ensure that your system meets or exceeds the specifications recommended by Tableau.
5. Restart Tableau and your computer: Sometimes, a simple restart can resolve temporary software glitches. Close Tableau and any other related applications, and then restart your computer. This action can reset any background processes and clear any cached data that might be causing issues.
6. Check internet connectivity: If you are using Tableau with an online data source or connecting to a database on a remote server, ensure that you have a stable internet connection. Unstable or slow internet can cause data upload failures or connection issues.
7. Review error messages: If you encounter an error message while uploading data to Tableau, read it carefully. The error message may provide specific information about the issue or suggest a possible solution. Use this information to troubleshoot and resolve the problem.
8. Consult Tableau resources: Tableau provides a wealth of online resources, including documentation, knowledge bases, forums, and customer support. If you are facing persistent issues, consult these resources for guidance. You may find answers to your specific problem, or you can reach out to the Tableau community for assistance.
By following these troubleshooting tips, you can overcome common data upload issues in Tableau and ensure a smooth and seamless experience with the software. Remember, persistence and patience are key when troubleshooting, and don’t hesitate to seek help if you need it. Happy data exploring!
Conclusion
In conclusion, uploading data to Tableau is a seamless process that allows users to visualize and analyze data in an interactive and meaningful way. Whether you are a beginner or an experienced user, Tableau provides a user-friendly interface and robust features to make the data uploading process efficient and effective.
By following the steps outlined in this article, you can easily connect to various data sources, import and cleanse your data, and create stunning visualizations and dashboards. Tableau’s flexibility and scalability make it a powerful tool for businesses and individuals alike, enabling them to gain valuable insights and make data-driven decisions.
So, whether you are a data analyst, a business professional, or just someone curious about exploring data, Tableau makes it simple to upload, manipulate, and present your data in a visually appealing and easy-to-understand way. Start leveraging the power of Tableau today to unlock the full potential of your data!
FAQs
1. What is Tableau?
Tableau is a powerful data visualization and business intelligence tool that helps users analyze and understand their data. It allows users to create interactive dashboards, reports, and visualizations to gain insights and make data-driven decisions.
2. How do I upload data to Tableau?
To upload data to Tableau, follow these steps:
- Launch Tableau and go to the start page.
- Click on “Connect to Data” and select the data source you want to upload (e.g. Excel, CSV, SQL database).
- Browse and locate the file or database you want to connect to.
- Configure the connection settings, such as specifying the file delimiter or entering the database credentials.
- Preview and verify the data in the connection window.
- Click on “Connect” to import the data into Tableau.
- Once loaded, you can start visualizing and analyzing the data using Tableau’s intuitive interface.
3. What file formats does Tableau support?
Tableau supports a wide range of file formats, including Excel (.xlsx, .xls), CSV, text files, Access databases, SQL databases (such as MySQL, Microsoft SQL Server, Oracle), and cloud-based data sources (such as Google Sheets and Tableau Server/Online).
4. Can I connect Tableau to live data sources?
Yes, Tableau allows you to connect to live data sources, such as databases, web services, and cloud-based platforms. By connecting to live data, you can access real-time information and perform up-to-the-minute analysis and visualizations.
5. Is Tableau accessible for both beginners and advanced users?
Yes, Tableau provides a user-friendly interface and a drag-and-drop functionality that makes it accessible for beginners. At the same time, it offers advanced features, scripting capabilities, and complex calculations that cater to the needs of experienced users and data professionals.