
Are you the proud owner of a brand new iPhone 13? Congratulations! Now, it’s time to activate your shiny new device and unlock all its amazing features. Activating a new iPhone is an essential step that ensures you can make calls, send messages, and access the internet. In this comprehensive guide, we will walk you through the step-by-step process of activating your new iPhone 13, whether you’re setting it up for the first time or switching from an existing device. From inserting the SIM card to navigating the setup wizard, we’ve got you covered. Get ready to unlock the full potential of your iPhone 13 and dive into the world of seamless connectivity and unparalleled performance.
Inside This Article
- Setting up your iPhone 13
- Connecting to Wi-Fi and cellular network
- Restoring from backup or setting up as new
- Activating your iPhone 13 with your carrier
- Conclusion
- FAQs
Setting up your iPhone 13
Congratulations on your new iPhone 13! Setting up a new device can be an exciting and exhilarating experience. To help you get started, we have outlined a simple step-by-step guide to set up your iPhone 13 seamlessly.
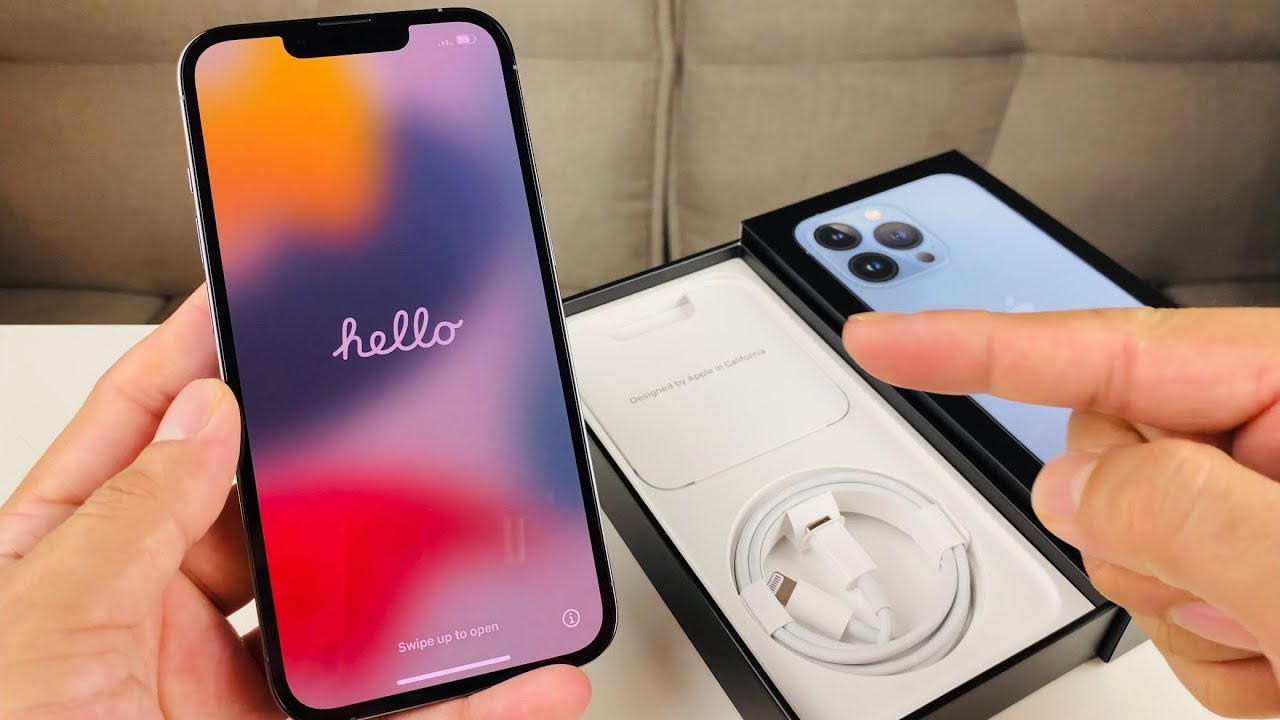
1. Turn on your iPhone 13 by pressing and holding the power button, typically located on the right side of the device. You will see the Apple logo appear, indicating that your device is booting up.
2. Follow the on-screen instructions to select your language and region. This step ensures that your iPhone 13 is personalized according to your preferences and location.
3. Connect to a Wi-Fi network. Tap on the “Wi-Fi” option in the setup process and select your network from the list. If you don’t have access to Wi-Fi at the moment, you can choose to use a cellular data connection instead.
4. Set up Face ID or Touch ID. The iPhone 13 offers advanced biometric security features, allowing you to unlock your device using your face or fingerprint. Follow the instructions to set up either Face ID or Touch ID, depending on your device model.
5. Sign in with your Apple ID. If you already have an Apple ID, sign in using your credentials. This will allow you to access your iCloud, App Store, and other Apple services seamlessly. If you don’t have an Apple ID, you can create one during the setup process.
6. Restore from backup or set up as new. If you have a previous iPhone or iCloud backup, you can choose to restore your data onto your new iPhone 13. Alternatively, you can set up your device as new, starting with a clean slate. Select the option that suits your needs.
7. Customize your settings. This step allows you to personalize your iPhone 13 even further. You can choose your preferred display and text size, enable or disable various features and settings, and set up Apple Pay and Siri, among other options.
8. Install your favorite apps. Now that your iPhone 13 is set up and ready to go, head over to the App Store to download and install your favorite apps. Whether you need productivity tools, social media apps, or entertainment platforms, the App Store has a wide selection to choose from.
With these simple steps, you can successfully set up your new iPhone 13 and begin exploring all the incredible features and capabilities it has to offer. Enjoy your new device!
Connecting to Wi-Fi and cellular network
One of the first things you’ll want to do after setting up your new iPhone 13 is to connect it to a Wi-Fi network. This will allow you to access the internet, download apps, and enjoy a faster browsing experience. Follow these steps to connect to Wi-Fi:
- Go to the Settings app on your iPhone 13.
- Tap on Wi-Fi.
- If Wi-Fi is turned off, toggle the switch to enable it.
- A list of available Wi-Fi networks will appear. Tap on the network you want to connect to.
- If the network is secured, you may need to enter a password. Type in the password and tap Join.
- Your iPhone 13 will now connect to the Wi-Fi network. Once connected, you will see a checkmark next to the network name.
In addition to Wi-Fi, your iPhone 13 also supports cellular networks. If you have a cellular data plan, you can connect to the internet even when Wi-Fi is not available. To connect to a cellular network:
- Ensure that your iPhone 13 has a SIM card inserted, and that cellular service is activated on your account.
- Go to Settings > Cellular.
- Toggle the Cellular Data switch to enable it. The switch will turn green when enabled.
- Below the Cellular Data switch, you will see a list of apps that are allowed to use cellular data. Toggle the switches next to the apps to enable or disable their cellular access.
Your iPhone 13 will now connect to the cellular network, allowing you to make calls, send texts, and use data using your cellular data plan.
It’s important to note that connecting to a Wi-Fi network is generally more preferable as it helps conserve your cellular data and provides faster internet speeds. However, having a cellular network as a backup option ensures that you stay connected even when Wi-Fi is not available.
Restoring from backup or setting up as new
When setting up your new iPhone 13, you have the option to either restore from a previous backup or start fresh and set it up as new. Both options have their advantages, so it’s important to understand the differences and choose the one that best suits your needs.
If you have used iCloud or iTunes to back up your previous iPhone, restoring from a backup can be a convenient option. This allows you to transfer your apps, settings, and data seamlessly to your new device, making the transition smooth and hassle-free. To restore from a backup, follow these steps:
- Turn on your new iPhone 13 and go through the initial setup process until you reach the “Apps & Data” screen.
- Select the “Restore from iCloud Backup” or “Restore from iTunes Backup” option, depending on where your backup is stored.
- Sign in to your iCloud account or connect your iPhone to your computer with iTunes and select the desired backup.
- Wait for the restore process to complete. This may take some time depending on the size of your backup.
- Once the restore is finished, follow the on-screen instructions to set up your Face ID or Touch ID, and complete the setup process.
Alternatively, you may choose to set up your iPhone 13 as new, especially if you want a fresh start or if you didn’t have a backup to restore from. Setting up as new allows you to start with a clean slate, free from any clutter or unnecessary data from your previous device. To set up as new, follow these steps:
- Proceed with the initial setup process on your new iPhone 13 until you reach the “Apps & Data” screen.
- Select the “Set Up as New iPhone” option.
- Follow the on-screen instructions to customize your settings, set up your Apple ID, and personalize your device.
- Download your favorite apps from the App Store, sync your contacts and calendars, and set up your email accounts.
Regardless of your choice, it’s important to note that setting up your new iPhone 13 may take some time, especially if you’re restoring from a backup or downloading apps and data. Ensure that you have a stable internet connection and sufficient battery life to complete the process smoothly.
Remember, you can always change your mind and switch between restoring from a backup or setting up as new even after you’ve completed the setup. Simply go to the Settings app on your iPhone 13, tap on “General,” then “Reset,” and choose the desired option.
Whether you decide to restore from a backup or set up as new, the goal is to ensure that your new iPhone 13 is personalized and ready for you to enjoy all its features and capabilities.
Activating your iPhone 13 with your carrier
Once you have your new iPhone 13 in hand, the next step is to activate it with your carrier. Activating your iPhone ensures that you can make calls, send texts, and access cellular data. In this section, we will guide you through the process of activating your iPhone 13 with your carrier.
Before you begin, make sure you have your carrier account information handy. This typically includes your account number, PIN or password, and any other details required by your carrier. Once you have this information, follow the steps below:
- Power on your iPhone 13 by pressing and holding the side button.
- Follow the on-screen prompts to select your language and country or region.
- Connect your iPhone 13 to a Wi-Fi network. If you don’t have access to Wi-Fi, you can activate your iPhone using a cellular data connection (if available).
- Select “Set Up Manually” when prompted to activate your iPhone.
- Choose your carrier from the list of available carriers or select “Don’t have a carrier?” if you’re using an unlocked device.
- If prompted, enter your carrier account information, such as your account number and PIN or password.
- Wait for the activation process to complete. This may take a few minutes.
- Once activated, follow the on-screen instructions to set up Face ID or Touch ID, create a passcode, and sign in with your Apple ID.
After successfully activating your iPhone 13 with your carrier, you should be able to make and receive calls, send text messages, and access cellular data. If you encounter any issues during the activation process, contact your carrier for further assistance.
Activating your iPhone 13 with your carrier is a crucial step in getting your new device up and running. By following the steps outlined above, you’ll be able to enjoy all the features and capabilities of your iPhone 13 without any interruptions.
In conclusion, activating a new iPhone 13 is a straightforward process that allows you to unlock the full potential of your device. By following the steps outlined in this article, you will be able to set up your new iPhone, transfer data, and enjoy all the exciting features and functionalities it has to offer. Remember to back up your old device, ensure a stable internet connection, and have your Apple ID and password ready. Whether you choose to activate your iPhone through a cellular network or Wi-Fi, the process is designed to be user-friendly and efficient. So, go ahead and start using your new iPhone 13 to explore the world of possibilities that await you!
Conclusion
FAQs
Q: How do I activate my new iPhone 13?
A: Activating your new iPhone 13 is a straightforward process. Simply follow these steps:
1. Power on your iPhone 13 by pressing and holding the side button until the Apple logo appears.
2. On the “Hello” screen, select your preferred language and region.
3. Connect your iPhone 13 to a Wi-Fi network. You can also activate it using a cellular data connection if available.
4. Set up Face ID or Touch ID for added security.
5. Sign in with your Apple ID or create a new one if you don’t have an Apple ID yet.
6. Follow the on-screen instructions to complete the setup process, including setting up Siri, choosing whether to enable location services, and restoring data from a backup if desired.
7. Once you’ve completed all the steps, your new iPhone 13 will be successfully activated and ready to use!
Q: Can I transfer data from my old iPhone to the new iPhone 13 during activation?
A: Yes, you can transfer data from your old iPhone to the new iPhone 13 during the activation process. When setting up your new iPhone 13, you’ll have the option to restore from an iCloud backup, an iTunes backup, or use the Quick Start feature to transfer data wirelessly from your previous iPhone. Simply follow the on-screen instructions to select the desired method and transfer your data seamlessly.
Q: What do I do if I’m unable to activate my new iPhone 13?
A: If you encounter issues while activating your new iPhone 13, here are a few troubleshooting steps you can try:
1. Ensure that you have a stable internet connection. Connect to Wi-Fi or a cellular network if available.
2. Restart your iPhone 13 by pressing and holding the side button until the power off slider appears, then slide to power off. After a few seconds, press and hold the side button again to turn it back on.
3. Verify that your SIM card is inserted correctly and securely in the SIM card slot.
4. Contact your cellular carrier to ensure that your account and SIM card are active and properly provisioned.
5. Update your iPhone 13 to the latest version of iOS by going to Settings > General > Software Update.
If the issue persists, it is recommended to reach out to Apple Support for further assistance.
Q: Do I need to activate my iPhone 13 with a SIM card?
A: Yes, you typically need to activate your iPhone 13 with a SIM card. The SIM card allows your phone to connect to your cellular network and unlock all the features and functionalities. Depending on your carrier, you may receive a new SIM card with your iPhone 13 or need to use the SIM card from your previous device. Follow the activation steps provided by your carrier to activate your iPhone 13 with the SIM card.
Q: Can I activate my new iPhone 13 without a computer?
A: Yes, you can activate your new iPhone 13 without a computer. The activation process can be completed directly on the device itself. All you need is a stable internet connection through Wi-Fi or cellular data. Simply follow the on-screen instructions during the setup process to activate your iPhone 13 without the need for a computer.