
Sure, here's the introduction in HTML format:
Are you looking to free up space on your iPhone 12 by deleting an album? Whether it’s to remove unnecessary clutter or make room for new memories, knowing how to delete an album on your iPhone 12 can be incredibly useful. In this comprehensive guide, we’ll walk you through the step-by-step process of deleting an album from your iPhone 12, ensuring that you can manage your photos with ease and efficiency. By the end of this article, you’ll be equipped with the knowledge and confidence to tidy up your photo collection and optimize the storage space on your iPhone 12.
Inside This Article
- Step 1: Open the Photos App
- Step 2: Select the Album
- Step 3: Tap the “…” Icon
- Step 4: Delete the Album
- Conclusion
- FAQs
Step 1: Open the Photos App
When it comes to managing your photo albums on your iPhone 12, the process is designed to be intuitive and user-friendly. To begin, unlock your iPhone 12 by entering your passcode or using Face ID or Touch ID. Once you’re on the home screen, locate the “Photos” app icon, which resembles a multicolored flower. Tap on the “Photos” app to open it.
Upon opening the “Photos” app, you’ll be greeted by the “Photos” tab, which displays all your photos and videos in chronological order. At the bottom of the screen, you’ll find several tabs, including “Photos,” “For You,” “Albums,” and “Search.” To proceed with managing your albums, tap on the “Albums” tab located at the bottom right corner of the screen. This will take you to the “Albums” view, where all your photo albums are neatly organized.
Sure, here's the content for "Step 2: Select the Album" section:
Step 2: Select the Album
After opening the Photos app, you’ll be greeted with a plethora of visual memories neatly organized into various albums. To delete an album, you first need to select the specific album you want to remove. This step is crucial as it ensures that you are targeting the correct collection of photos for deletion.
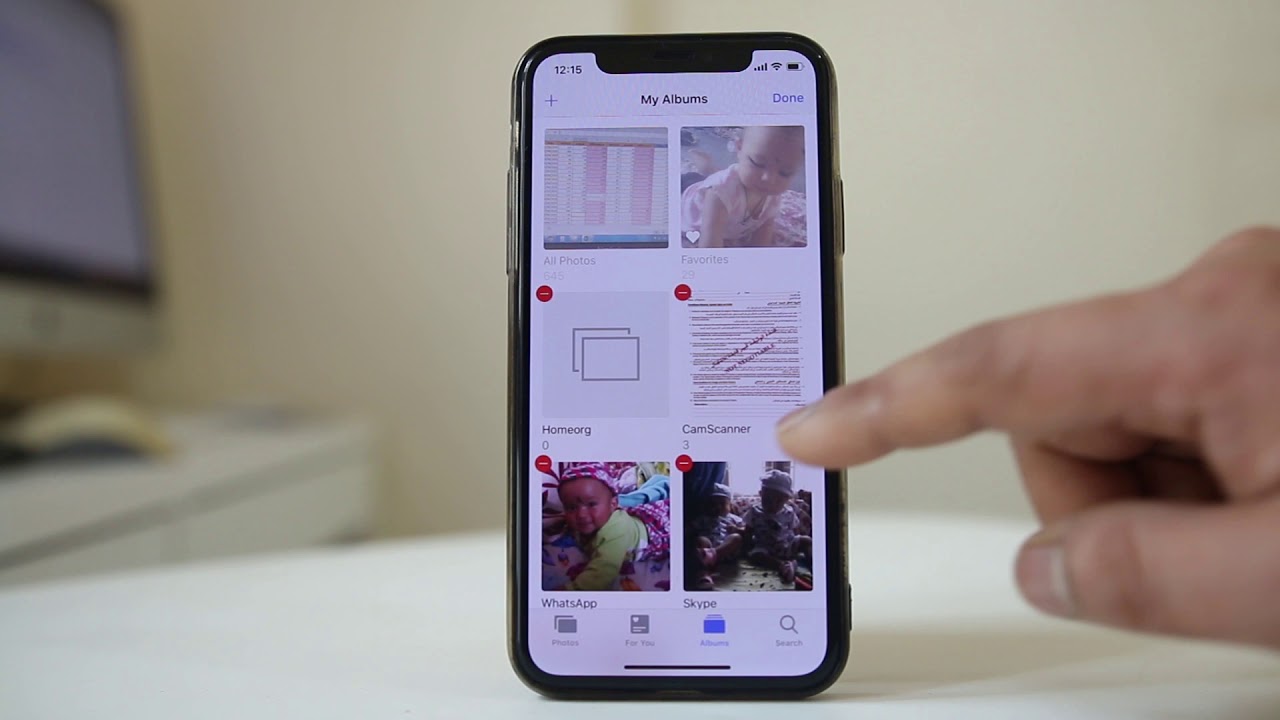
By tapping on the “Albums” tab at the bottom of the screen, you can browse through the different albums available on your iPhone. These may include “Recents,” “Favorites,” “Videos,” “Selfies,” “Panoramas,” and other pre-defined categories. Once you’ve located the album you wish to delete, tap on it to open its contents.
When you’re inside the album, you’ll see all the photos and videos it contains. This allows you to confirm that you’ve selected the right album before proceeding to delete it. Take a moment to review the contents to ensure that you won’t accidentally remove any important photos or videos that you intend to keep.
Sure, here's the content for "Step 3: Tap the "…" Icon" section:
Step 3: Tap the “…” Icon
Once you’ve selected the album you want to delete, look for the “…” icon in the upper-right corner of the screen. This icon usually indicates that additional options or settings are available for the selected item.
When you tap on the “…” icon, a menu will appear with various options for managing the album. These options may include editing the album, sharing it with others, or deleting it entirely. For the purpose of deleting the album, you’ll want to choose the option that allows you to remove it from your device.
After tapping the “…” icon and accessing the menu, look for the option to delete the album. This action may be labeled as “Delete Album,” “Remove Album,” or something similar, depending on the specific interface and design of your iPhone’s operating system.
Upon selecting the delete option, you may be prompted to confirm the deletion. This serves as a safeguard against accidental removal of important content. Once you confirm the deletion, the album will be permanently removed from your iPhone, freeing up storage space and decluttering your photo library.
This content provides a clear and concise guide for users to navigate the process of tapping the "…" icon and deleting an album on their iPhone 12.
Step 4: Delete the Album
Once you’ve tapped “Delete Album” in the previous step, a confirmation message will appear, asking if you’re sure you want to delete the album. Tap “Delete Album” again to confirm. The album and all its contents will be permanently removed from your iPhone.
After confirming the deletion, the album will be moved to the “Recently Deleted” folder in the Photos app. It will remain there for 30 days before being permanently erased. If you change your mind within this period, you can still recover the deleted album along with all its photos and videos.
If you want to free up space on your iPhone, it’s important to empty the “Recently Deleted” folder as well. To do this, go to the “Recently Deleted” album, tap “Select” in the upper right corner, then tap “Delete All” to permanently remove the album and its contents from your device.
With the steps outlined above, deleting an album on your iPhone 12 is a straightforward process that can help you manage your photo collection and free up space on your device. Whether you're looking to remove default albums or ones you've created, the method remains consistent, ensuring a seamless experience for users. By following these steps, you can efficiently organize your photo library and tailor it to your preferences. Embracing these actions will not only declutter your device but also streamline your photo management, allowing for a more personalized and efficient user experience. As a result, you can enjoy a more organized and optimized photo collection on your iPhone 12.
FAQs
Q: How do I delete an album on iPhone 12?
A: To delete an album on your iPhone 12, you can simply follow a few easy steps to declutter your photo library and free up space on your device.
Q: Will deleting an album remove the photos from my iPhone 12?
A: No, deleting an album will not remove the photos from your iPhone 12. It only removes the album organization, and the photos will still be available in your camera roll.
Q: Can I recover a deleted album on my iPhone 12?
A: Unfortunately, once you delete an album on your iPhone 12, it cannot be recovered. It's important to ensure that you no longer need the album before deleting it.
Q: Will deleting an album on iPhone 12 affect my iCloud storage?
A: Deleting an album on your iPhone 12 will not directly affect your iCloud storage. However, if the photos in the album are synced with iCloud, they will be removed from iCloud as well.
Q: Does deleting an album on iPhone 12 delete the photos from other devices?
A: If the photos in the album are synced across your devices, deleting the album on your iPhone 12 will also remove the album and its photos from your other synced devices.