
Welcome to our comprehensive guide on how to delete a photo album on the iPhone 13. As an iPhone user, you may have accumulated a significant number of photo albums over time, making it necessary to declutter and organize your device. Deleting unwanted photo albums not only helps free up storage space but also allows you to streamline the photo browsing experience. In this article, we will walk you through the step-by-step process of deleting photo albums on your iPhone 13, ensuring that you can easily manage your photo library. Whether it’s an album you created or one that came pre-installed on your device, we’ve got you covered with all the information you need to take control of your iPhone’s photo albums.
Inside This Article
- How to Delete a Photo Album on iPhone 13
- Accessing the Photos App
- Deleting a Photo Album
- 3. Confirming the Deletion
- Removing Photos from the Recently Deleted Album
- Conclusion
- FAQs
How to Delete a Photo Album on iPhone 13
Organizing your photo albums on your iPhone 13 can be a useful way to sort and categorize your memories. However, there may come a time when you want to delete a photo album that you no longer need. In this guide, we’ll walk you through the steps to delete a photo album on your iPhone 13.
Before we begin, it’s important to understand that deleting a photo album will not delete the actual photos contained within it. The photos will remain in your iPhone’s Camera Roll or other albums. Deleting a photo album will only remove the album itself.
Now, let’s get started with the steps to delete a photo album on your iPhone 13:
- Open the Photos app on your iPhone 13. This app has a multicolored flower icon and can usually be found on your home screen.
- Navigate to the “Albums” tab at the bottom of the screen. This will display all the photo albums on your iPhone 13.
- Scroll through the list of albums and locate the one you want to delete. Tap on the album to open it.
- Once you’re inside the album, tap on the “…” button in the top-right corner of the screen. This will open a dropdown menu with various options.
- From the dropdown menu, select “Delete Album.” A confirmation message will appear, asking if you want to delete the album.
- Confirm your decision by tapping on the “Delete Album” button. The photo album will be deleted from your iPhone 13.
And that’s it! You have successfully deleted a photo album on your iPhone 13. Remember, this action only removes the album itself, not the photos contained within it.
If you ever want to recover a deleted photo album, don’t worry. As long as you haven’t deleted the photos individually, you can easily restore the album. Simply go to the “Photos” tab, tap on “Albums,” and scroll down to the “Other Albums” section. There, you will find a “Recently Deleted” album. Tap on it, select the deleted album, and tap on “Recover” to restore it.
Deleting a photo album on your iPhone 13 is a straightforward process that can help you keep your device organized. By following the steps outlined in this guide, you can easily remove unwanted albums and free up space on your device, without losing any of your precious memories.
Accessing the Photos App
To delete a photo album on your iPhone 13, you’ll need to access the Photos app. The Photos app allows you to organize and manage your photos and albums easily. Here’s how you can access the Photos app on your device:
1. Go to the home screen – Press the home button or swipe up from the bottom of the screen to go to the home screen.
2. Find the Photos app icon – Look for the Photos app icon, which has a multicolored flower-like design. It is typically located on one of your home screens or in the dock at the bottom of the screen.
3. Tap on the Photos app icon – Once you’ve located the Photos app icon, tap on it to open the app.
Great! Now that you’ve accessed the Photos app, you can proceed with deleting the unwanted photo album from your iPhone 13.
Deleting a Photo Album
Deleting a photo album on your iPhone 13 is a straightforward process. Whether you want to get rid of a default album that you no longer need or remove a custom album you created, here are the steps to follow:
Step 1: Unlock your iPhone 13 and go to the Photos app on the home screen.
Step 2: Once you’re in the Photos app, tap on the “Albums” tab located at the bottom of the screen.
Step 3: You will see a list of all your photo albums. Locate the album that you want to delete.
Step 4: From the album’s thumbnail view, tap the “Edit” button in the top right corner of the screen.
Step 5: Now, you will see red minus signs (“-“) appearing on the top left corner of each album. Tap the minus sign next to the album you want to delete.
Step 6: A confirmation prompt will appear. Tap on the “Delete Album” option to confirm the deletion.
Step 7: Congratulations! You have successfully deleted the photo album from your iPhone 13.
It’s important to note that deleting a photo album will only remove the album itself, not the individual photos inside it. If you want to delete specific photos from an album, you can do so by following these steps:
Step 1: Open the album containing the photos you want to delete.
Step 2: Tap on the “Select” button in the top right corner of the screen.
Step 3: Tap on the photos you want to delete. Selected photos will have a blue checkmark on them.
Step 4: Once you’ve selected all the photos you want to delete, tap the trash can icon at the bottom right corner of the screen.
Step 5: Confirm the deletion by tapping on the “Delete” button.
If you accidentally deleted a photo album and want to recover it, don’t worry! Here’s how you can restore deleted photo albums on your iPhone 13:
Step 1: Open the Photos app and go to the “Albums” tab.
Step 2: Scroll down to the bottom and tap on the “Recently Deleted” album.
Step 3: Find the deleted photo album you want to restore and tap on it.
Step 4: Tap on the “Recover” button at the bottom right corner of the screen.
Step 5: The deleted photo album will be restored, and you’ll find it back in your Albums list.
By following these simple steps, you can easily delete unwanted photo albums from your iPhone 13 and even recover them if needed. Keep your photo collection organized and tidy with these handy features!
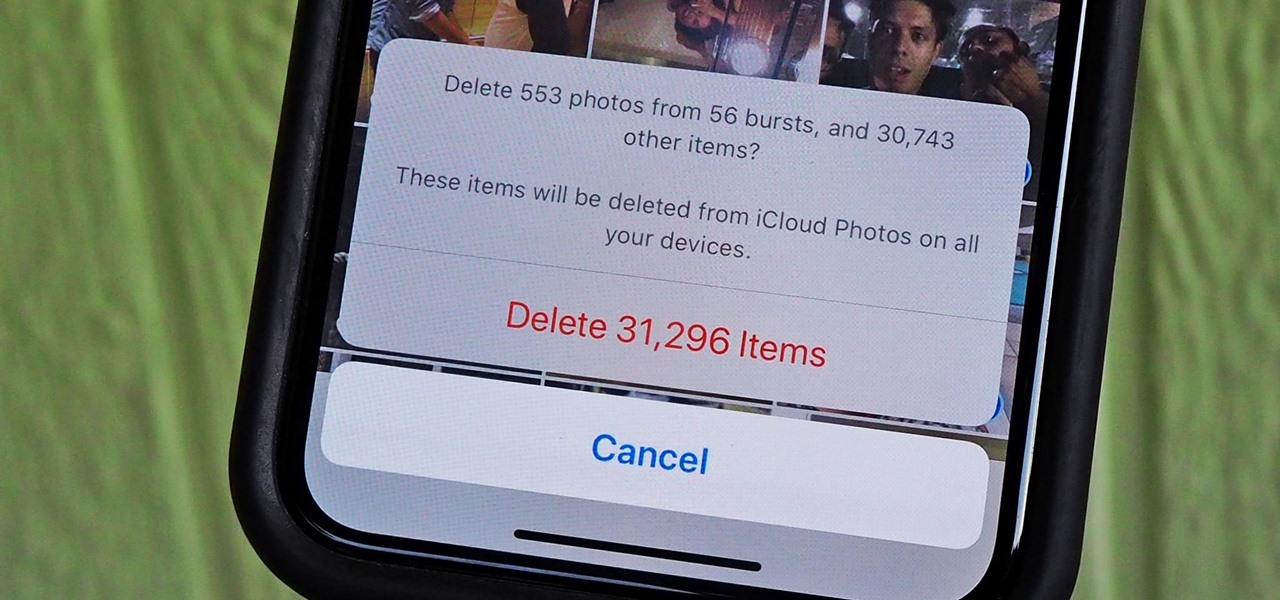
3. Confirming the Deletion
Once you have selected the “Delete Album” option, a confirmation prompt will appear on your iPhone 13 screen. This prompt serves as a final step to ensure that you indeed want to delete the photo album.
The confirmation prompt will typically display the name of the album you are about to delete, along with a message asking if you are sure you want to proceed with the deletion. It is important to carefully review the information displayed in the prompt to avoid accidental deletions.
If you are certain that you want to delete the album, you can proceed by tapping on the “Delete Album” button. This will permanently remove the album from your iPhone 13, along with all the photos and videos contained within it.
On the other hand, if you have changed your mind and decide not to delete the album, you can simply tap on the “Cancel” or “No” button. This will abort the deletion process, and the album will remain intact on your device.
Once you have confirmed the deletion and tapped on the “Delete Album” button, the album will be permanently removed from your iPhone 13 and will no longer be visible in the Photos app. However, it is important to note that the photos and videos within the deleted album may still exist in other albums or in your Camera Roll.
If you accidentally delete an album and realize that you still need the photos and videos within it, you can try recovering them by following the steps outlined in the next section.
Removing Photos from the Recently Deleted Album
The Recently Deleted album on your iPhone 13 is a temporary storage location for photos that you have recently deleted. These photos are kept in this album for a period of 30 days before they are permanently removed from your device. However, if you want to free up space and remove these photos immediately, you can follow these steps:
- Open the Photos app on your iPhone 13.
- Tap on the Albums tab at the bottom of the screen to access your photo albums.
- Scroll down and find the “Recently Deleted” album. It should be located under the “Other Albums” section.
- Tap on the Recently Deleted album to open it.
- You will see a list of photos that are scheduled to be permanently deleted. If you want to remove all the photos, tap the “Select” button at the top-right corner of the screen.
- To remove individual photos, tap on each photo that you want to delete.
- Once you have selected the photos you want to remove, tap the “Delete” button at the bottom-right corner of the screen.
- A confirmation message will appear asking if you want to delete the selected photos. Tap “Delete [number] Photos” to confirm.
After completing these steps, the selected photos will be permanently removed from your iPhone 13, freeing up additional storage space.
In conclusion, deleting a photo album on your iPhone 13 is a simple and straightforward process that can help you organize your photos and free up storage space. Whether you want to remove pre-existing albums or delete your own customized albums, the steps provided in this article will guide you through the process.
The Photos app on your iPhone 13 offers a convenient way to manage and delete photo albums, allowing you to keep your image library clutter-free and well-organized. By following the step-by-step instructions provided, you can easily delete unwanted albums and ensure that your precious memories are stored in a way that suits your preferences.
Remember, deleting an album does not delete the individual photos contained within it. Your photos will still be available in the “All Photos” album and any other albums they are saved in. So, feel free to delete albums that no longer serve a purpose and enjoy a more streamlined photo library on your iPhone 13.
FAQs
1. Can I delete a photo album on iPhone 13?
Yes, you can delete a photo album on your iPhone 13. Apple provides a simple and straightforward method to delete unwanted albums.
2. Will deleting a photo album also delete the photos inside?
No, deleting a photo album will not delete the photos inside. The photos will still remain in your Photos app, organized under the “All Photos” album.
3. How do I delete a photo album on iPhone 13?
To delete a photo album on your iPhone 13, open the Photos app and go to the “Albums” tab. Tap on the “Edit” button in the top-right corner, and then tap the red circle with the minus (-) sign next to the album you want to delete. Finally, tap the “Delete” button to confirm.
4. Can I recover a deleted photo album on iPhone 13?
If you accidentally delete a photo album on your iPhone 13, don’t worry, you can still recover it. In the Photos app, go to the “Albums” tab, scroll down to the “Other Albums” section, and look for the “Recently Deleted” album. Tap on it, select the album you want to recover, and tap “Recover” to restore it to its original location.
5. Is it possible to delete the default albums on iPhone 13?
Unfortunately, you cannot delete the default albums on iPhone 13, such as the “All Photos,” “Favorites,” or “Recently Added” albums. These albums are an integral part of the Photos app and cannot be removed. However, you can hide them by going to the “Albums” tab, tapping “Edit,” and unchecking the albums you want to hide.