
Welcome to the world of iPhone 13 photography! Capturing stunning photos and preserving precious memories has become easier than ever with the incredible camera capabilities of the iPhone 13. One handy feature that you may find very useful is the timer function. Whether you want to take a group selfie, capture a steady long-exposure shot, or simply want to be a part of the picture yourself, the timer feature allows you to set a countdown and capture the perfect shot without rushing to be in place. In this article, we will dive into the step-by-step process of setting the timer on your iPhone 13, ensuring that you never miss a moment. Let’s get started and unlock the full potential of your iPhone 13 camera!
Inside This Article
- Why Set a Timer on Photo iPhone 13
- Steps to Set Timer on Photo iPhone 13
- Additional Tips for Using Timer on Photo iPhone 13
- Conclusion
- FAQs
Why Set a Timer on Photo iPhone 13
Are you tired of always having to rush into a group photo or missing out on being part of a memorable moment? With the iPhone 13’s timer function, you can now take photos with ease and be part of the frame. Setting a timer on your iPhone 13 allows you to capture those precious moments without the need for someone else to hold the camera or rush to get into position.
Setting a timer on your iPhone 13 also provides you with the flexibility to experiment with different compositions and poses. Whether you are a solo traveler wanting to capture stunning landscapes or a group of friends trying to strike the perfect pose, the timer feature allows you to take your time and get the shot just right.
Moreover, using the timer on your iPhone 13 eliminates the need for a separate remote or self-timer app. The functionality is built right into the camera app, making it incredibly convenient and user-friendly. You can set the timer with just a few taps, ensuring you never miss out on capturing the perfect moment.
Another advantage of setting a timer on your iPhone 13 is that it helps reduce camera shake. When you press the shutter button manually, it can often result in slight camera movement, leading to blurry photos. By using the timer function, you can minimize this issue and capture sharper, more professional-looking images.
Lastly, setting a timer on your iPhone 13 gives you the freedom to be creative. It allows you to explore different photography techniques such as long exposures or capturing candid moments without alerting your subjects. With the timer feature, you can take your photography skills to the next level and unleash your artistic vision.
Steps to Set Timer on Photo iPhone 13
Are you tired of rushing to get into a group photo or missing out on being in the perfect shot? The timer function on the iPhone 13 can come to your rescue! With just a few simple steps, you can set a timer on your iPhone 13 to capture stunning, well-composed photos without the need for a selfie stick or relying on someone else to press the shutter button.
Here’s how you can set the timer on the photo iPhone 13 in just a few easy steps:
- Open the Camera App: Locate the camera app on your iPhone 13 and tap on it to open it. You can find the camera app icon on the home screen or in the bottom row of your iPhone’s dock.
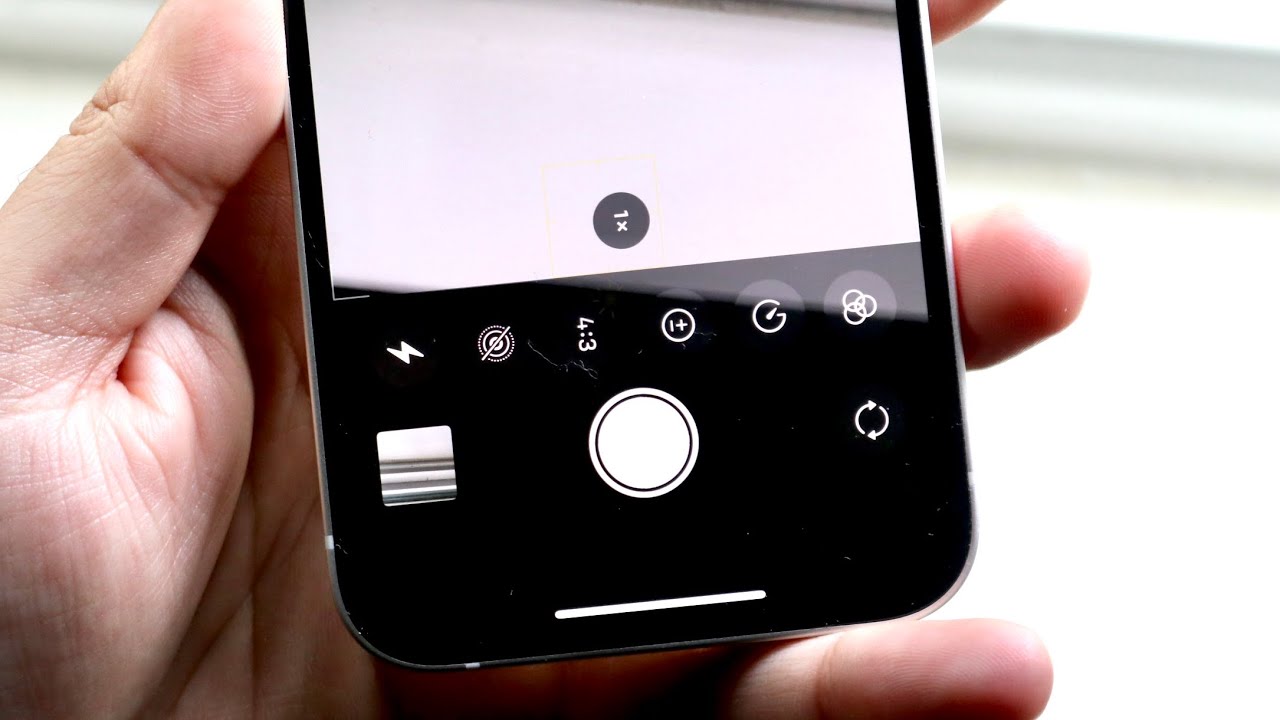
- Select the Timer Option: Once the camera app is open, look for the timer icon. It typically appears as a clock symbol and is located at the top of the screen, near the flash and Live Photos options. Tap on the timer icon to access the timer settings.
- Adjust the Timer Duration: When the timer options are displayed on your screen, you can choose the desired duration for the timer. The available options usually range from 3 seconds to 10 seconds. Tap on the duration you prefer, depending on how much time you need to position yourself in the photo.
- Compose your Shot: Now that you have set the timer duration, it’s time to compose your shot. Place your iPhone 13 on a stable surface or use a tripod to ensure the device remains steady. Frame your photo by adjusting the angle and zoom if necessary.
- Activate the Timer: Once you are satisfied with your composition, tap the on-screen shutter button. You will see a countdown timer appear on your screen, indicating how much time is left before the photo is captured. Use this time to get into position and strike a pose.
- Capture the Photo: When the countdown reaches zero, the iPhone 13 will automatically capture the photo. You can review the photo in the Photos app to make sure it turned out the way you wanted.
Now you can take group photos, selfies, or capture any other moment with ease using the timer function on your iPhone 13. No more rushing or missing out on being in the frame. Enjoy capturing beautiful memories with the convenience of setting a timer on your photo!
Additional Tips for Using Timer on Photo iPhone 13
If you’re looking to take better photos with your iPhone 13 using the timer function, here are some additional tips to keep in mind:
1. Use a tripod or steady surface: To avoid any camera shake or blurriness, it’s best to stabilize your iPhone by using a tripod or placing it on a steady surface. This will ensure that your photos come out sharp and clear.
2. Find the perfect angle and composition: Before setting the timer, spend some time finding the best angle and composition for your photo. Experiment with different perspectives and framing to capture the most interesting and visually appealing shot.
3. Use burst mode: If you’re unsure about the timing of a specific moment, consider using burst mode alongside the timer function. This allows your iPhone to capture a series of photos in rapid succession, increasing your chances of getting the perfect shot.
4. Experiment with different timer durations: While the default timer duration on the iPhone 13 is generally sufficient, don’t be afraid to experiment with different durations. Depending on the situation, you may find that a shorter or longer timer gives you the desired result.
5. Take advantage of live photos: The iPhone 13’s live photo feature allows you to capture a few seconds of video alongside your photo. This can add an extra dimension to your images and bring them to life. Consider using the timer function in combination with live photos for a dynamic and immersive photography experience.
6. Edit and enhance your photos: While the timer function helps take the photo, the editing and enhancement stage is where you can truly make your images shine. Take advantage of the built-in editing tools on your iPhone 13 or explore third-party apps to enhance colors, adjust exposure, and add filters to your photos.
7. Practice and experiment: Like any photographic technique, using the timer function on your iPhone 13 requires practice and experimentation. Don’t be discouraged if your first attempts don’t turn out as expected. Keep trying different settings, angles, and subjects to improve your skills and achieve the desired results.
By following these additional tips, you can make the most out of using the timer function on your iPhone 13 and elevate your photography to the next level. Whether you’re capturing stunning landscapes, group photos, or simply want to be in the frame yourself, the timer function is a valuable tool for creating memorable images.
Conclusion
Setting a timer on your iPhone 13’s camera can greatly improve your photography skills and help you capture the perfect shot. Whether you’re taking a selfie, a group photo, or a creative long exposure shot, the timer feature gives you the flexibility to set up your iPhone and get into position before the photo is taken.
By accessing the built-in camera app and selecting the timer option, you can easily set the desired delay before the photo is captured. This feature is especially handy when you want to include yourself in the picture or when you need a steady hand for long-exposure shots.
With a timer set, you can experiment with different angles, poses, and compositions, ensuring you have ample time to get it just right. So next time you want to take a photo using your iPhone 13, don’t forget to utilize the timer feature and elevate your photography game to new heights!
FAQs
Q1: Can I set a timer for taking photos on iPhone 13?
A1: Yes, you can set a timer for taking photos on iPhone 13. The built-in camera app provides a timer feature that allows you to delay capturing photos by a specified amount of time.
Q2: How do I set a timer for photos on iPhone 13?
A2: To set a timer for photos on iPhone 13, open the camera app and tap on the timer icon, represented by a clock. Choose the desired delay time, such as 3 seconds or 10 seconds, and then tap the shutter button. The camera will start a countdown, giving you enough time to get ready for the shot.
Q3: Can I change the timer duration for photos on iPhone 13?
A3: Yes, you can change the timer duration for photos on iPhone 13. When you tap on the timer icon in the camera app, you will see various options for the delay time. Select the duration that suits your needs, such as 2 seconds or 5 seconds, and the timer will adjust accordingly.
Q4: Is there a way to cancel the timer for photos on iPhone 13?
A4: Yes, you can cancel the timer for photos on iPhone 13. If you decide not to capture the photo after setting the timer, simply tap on the “Cancel” or “X” button that appears on the screen. This will cancel the countdown and allow you to take a photo instantly.
Q5: Can I use the timer feature for capturing multiple photos on iPhone 13?
A5: Unfortunately, the built-in timer feature on iPhone 13 allows you to capture only a single photo at a time. If you wish to capture multiple photos with a specific time interval, you may consider using third-party camera apps available on the App Store, which offer more advanced timer options.