
The Moto G is a popular and reliable smartphone that offers a fantastic user experience. However, there may come a time when you need to remove the SIM card from your Moto G. Whether you want to switch to a different carrier, replace a damaged SIM card, or simply troubleshoot connectivity issues, removing the SIM card is a necessary step. In this article, we will guide you on how to remove the SIM card from your Moto G, providing you with a step-by-step process to ensure a smooth and hassle-free experience. So, if you’re ready to learn the ropes on removing the SIM card from your Moto G, let’s get started!
Inside This Article
- Preparing to Remove the SIM Card
- Removing the SIM Card from Moto G
- Installing a New SIM Card in Moto G
- Conclusion
- FAQs
Preparing to Remove the SIM Card
Before you can remove the SIM card from your Moto G smartphone, it’s important to take a few necessary precautions to ensure a smooth and hassle-free process. Here are some steps to follow before diving into the removal process:
Step 1: Power Off Your Moto G
The first step is to power off your Moto G smartphone. This is a crucial step as it ensures that the device is completely turned off before you start handling the SIM card. To power off your Moto G, simply press and hold the power button until you see the power options on the screen. Then, select “Power off” to shut down the device.
Step 2: Gather the Necessary Tools
Next, gather the necessary tools for removing the SIM card from your Moto G. You will need a SIM card removal tool or a small paperclip. These tools will help you safely eject the SIM card tray from your device without causing any damage. If you don’t have a SIM card removal tool, a small paperclip bent into a straightened-out shape will work just fine.
Step 3: Find the SIM Card Tray
Locate the SIM card tray on your Moto G smartphone. It is usually located on the side of the device. Depending on the model, it can be on the top, bottom, or sides. Look for a small hole or a SIM card slot cover. This is where the SIM card tray is located, and you will need to access it to remove the SIM card.
Step 4: Remove the Phone Case (If Applicable)
If you have a phone case or cover on your Moto G, it’s a good idea to remove it before proceeding with the SIM card removal process. Removing the phone case will give you better access to the SIM card tray, making it easier to remove and replace the SIM card.
Step 5: Backup Your Data (Optional)
While removing the SIM card should not affect your data, it’s always a good idea to back up your important files and contacts, just in case. You can use cloud storage services or connect your Moto G to a computer and transfer your data to ensure that nothing is lost during the SIM card removal process.
Step 6: Ensure Clean Hands and Environment
Before handling the SIM card and the SIM card tray, it’s essential to have clean hands to prevent any dirt, dust, or smudges from interfering with the SIM card or the contacts. Additionally, working in a clean and well-lit environment will make it easier for you to see what you’re doing and avoid any accidental mishaps.
By following these preparatory steps, you will be ready to safely and efficiently remove the SIM card from your Moto G smartphone. Now that you have everything set up, let’s move on to the next step: removing the SIM card from Moto G.
Removing the SIM Card from Moto G
If you need to remove the SIM card from your Moto G smartphone, follow these simple steps:
- Begin by turning off your Moto G. This is an important step to ensure the safety of your device and the SIM card.
- Locate the SIM card tray on your Moto G. The SIM card tray is typically found on the side of the phone, either on the left or right side.
- Look for the small hole next to the SIM card tray. This is the SIM card tray ejector hole.
- Take the SIM ejector tool that came with your Moto G or use a small paperclip. Insert the tool or paperclip into the SIM card tray ejector hole and apply gentle pressure.
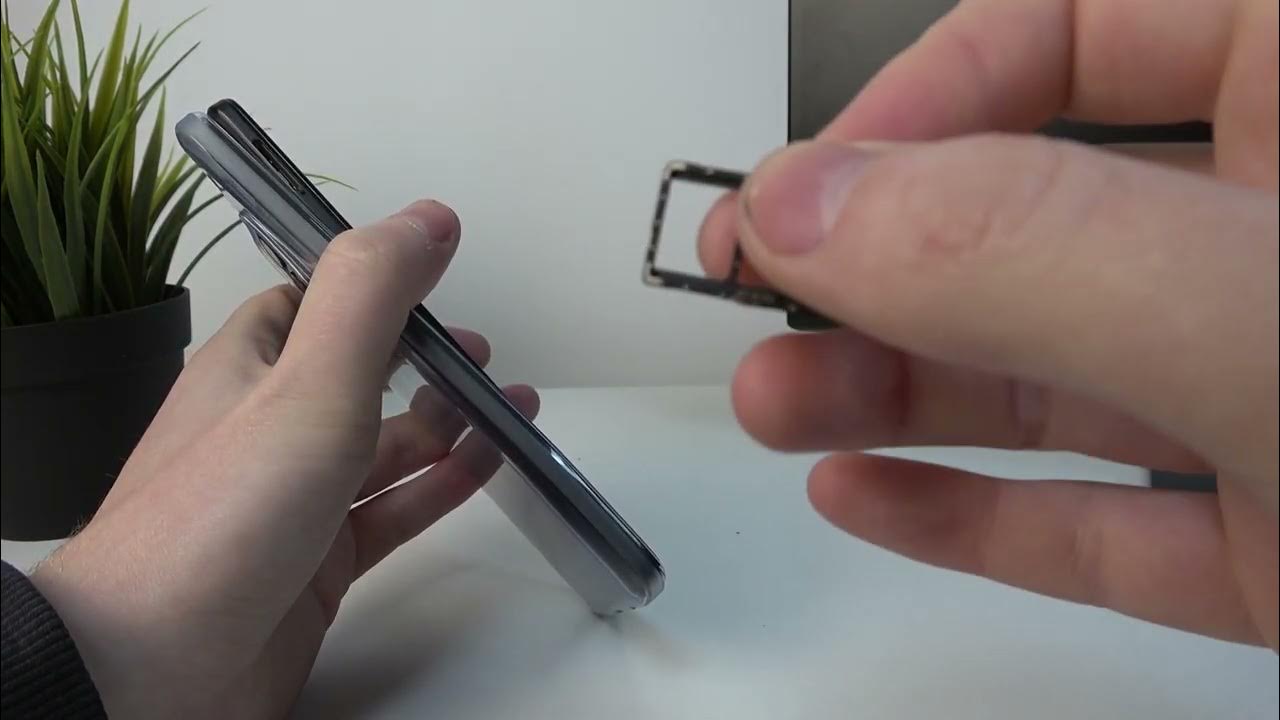
- The SIM card tray will pop out slightly. Gently pull the tray out of the device.
- Remove the SIM card from the tray by carefully sliding it out. Be cautious not to touch the golden contacts on the SIM card.
- Once you have removed the SIM card, you can safely close the SIM card tray by pushing it back into the device until it clicks into place.
- Your Moto G is now ready to be turned on again and used without the SIM card.
Remember to keep your SIM card in a safe place if you plan on reusing it or storing it for later use. It is essential to handle the SIM card with care to avoid any damage to the golden contacts or the device itself.
If you encounter any difficulties removing the SIM card or have any concerns, it is recommended to consult the user manual or contact customer support for assistance. They will be able to provide you with specific instructions or troubleshoot any issues you may encounter.
Installing a New SIM Card in Moto G
Once you’ve successfully removed the old SIM card from your Moto G, it’s time to install a new one. Follow the steps below to ensure a smooth and hassle-free process.
- Power off the device: Before you begin, make sure to power off your Moto G. This will prevent any potential damage to the phone or the SIM card during the installation process.
- Locate the SIM card tray: On the Moto G, the SIM card tray is usually located on the right side of the device. Look for a small hole or slot that matches the size of your SIM card.
- Insert the SIM card tool: To open the SIM card tray, you’ll need to insert the SIM card tool provided with your Moto G or a small paperclip. Gently push the tool into the hole or slot until the tray pops out.
- Place the SIM card: Carefully remove the new SIM card from its packaging. Align the notched corner of the card with the corresponding corner of the SIM card tray. Ensure the gold contacts on the card are facing down.
- Insert the SIM card tray: Once the SIM card is properly placed on the tray, carefully slide it back into the device. Make sure it is inserted all the way and sits flush with the edge of the phone.
- Power on the device: After successfully inserting the new SIM card, power on your Moto G. The device should recognize the card and establish a connection to the network.
Congratulations! You have successfully installed a new SIM card in your Moto G. You should now have access to cellular services and be able to make calls, send text messages, and use mobile data.
If you encounter any issues, such as the SIM card not being recognized or connection problems, double-check the insertion and alignment of the card. If the problem persists, you may need to contact your service provider for further assistance.
Conclusion
Removing the SIM card from your Moto G smartphone is a simple and straightforward process that can be done in a few easy steps. Whether you need to switch to a new SIM card, replace a damaged one, or troubleshoot connectivity issues, knowing how to remove the SIM card is essential.
By following the instructions provided in this article, you can confidently navigate the world of SIM cards and ensure a smooth and hassle-free experience with your Moto G. Remember to power off your phone before removing the SIM card, handle it with care, and store it in a safe place when not in use.
With the knowledge and skills to remove the SIM card, you can stay connected and make the most of your Moto G smartphone. So go ahead, give it a try, and enjoy uninterrupted communication and connectivity!
FAQs
1. Can I remove the SIM card from my Moto G smartphone?
Yes, you can remove the SIM card from your Moto G smartphone. SIM cards are used to connect your phone to a cellular network, allowing you to make calls, send messages, and access mobile data. If you need to switch SIM cards or replace a damaged SIM card, removing it from your Moto G is a simple process.
2. How do I remove the SIM card from my Moto G?
To remove the SIM card from your Moto G smartphone, follow these steps:
a. Locate the SIM tray on the side of your Moto G device.
b. Insert the SIM card ejection tool that came with your smartphone or use a small, sturdy paperclip.
c. Gently push the ejection tool into the small hole next to the SIM tray.
d. The tray will pop out slightly. Pull the tray out completely.
e. Carefully remove the SIM card from the tray.
f. Place the tray back into the Moto G device, ensuring it is securely in place.
3. Do I need to power off my Moto G before removing the SIM card?
It is generally recommended to power off your Moto G smartphone before removing the SIM card. By turning off the device, you minimize the risk of accidentally damaging the SIM card slot or harming the phone’s internal components. This step ensures a safe and smooth removal process.
4. Can I use any SIM card in my Moto G?
The Moto G smartphone is usually compatible with nano SIM cards. However, it is important to check with your mobile network provider to ensure that the specific SIM card you intend to use is supported by your device. Some SIM cards may not be compatible due to different network technologies or region-specific restrictions.
5. What should I do if my SIM card gets stuck in the Moto G?
If your SIM card gets stuck in the Moto G, remain calm and avoid using excessive force to remove it. Here’s what you can do:
a. Turn off your Moto G smartphone.
b. Use a small pair of tweezers or needle-nose pliers to gently grip the exposed part of the SIM card.
c. Gently pull the SIM card straight out, making sure to apply even pressure.
If you are unable to remove the SIM card yourself, consider visiting a professional technician or contacting the manufacturer’s customer support for assistance.