
Welcome to our guide on how to insert a SIM card in the Moto G Power. The Moto G Power is a fantastic smartphone known for its long-lasting battery life and powerful performance. But before you can start enjoying all its features, you need to know how to properly insert your SIM card.
Whether you’re switching to a new Moto G Power or replacing your old SIM card, this step-by-step guide will walk you through the process. We’ll show you how to locate the SIM card slot, what type of SIM card it requires, and how to insert it correctly. By the end of this article, you’ll be ready to get your Moto G Power up and running.
Inside This Article
- # How to Insert SIM Card in Moto G Power
- Step 1: Power off the Moto G Power
- Step 2: Locate the SIM card tray
- Step 3: Insert the SIM ejection tool into the small hole next to the tray
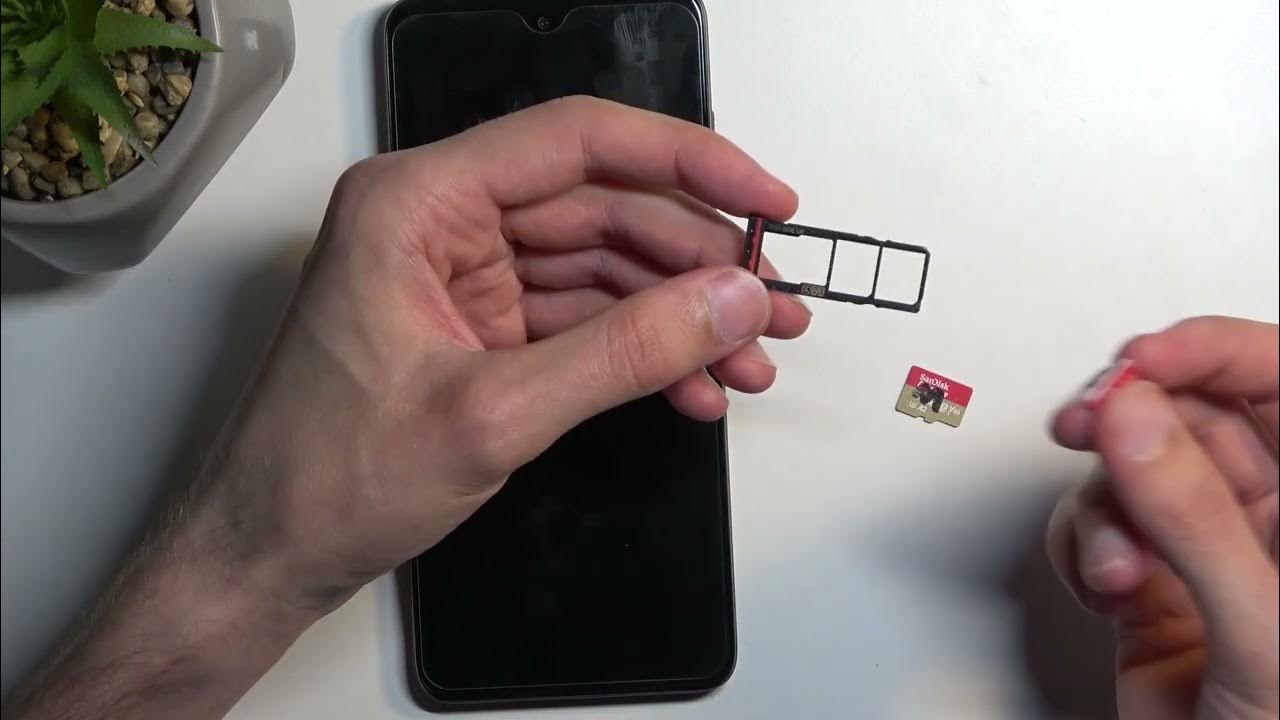
- Step 4: Remove the SIM card tray
- Step 5: Place the SIM card in the tray
- Step 6: Reinsert the SIM card tray into the Moto G Power
- Step 7: Power on the Moto G Power to complete the process
- Conclusion
- FAQs
# How to Insert SIM Card in Moto G Power
Are you wondering how to insert a SIM card in your Moto G Power? Look no further! In this guide, we will walk you through each step of the process, ensuring that you can enjoy all the features and benefits of your smartphone. So let’s get started!
Step 1: Power off the Moto G Power
The first step is to power off your Moto G Power. This is important to ensure the safety of your device and to prevent any damage.
Step 2: Locate the SIM card tray
Next, locate the SIM card tray on your Moto G Power. It is usually located on the side of the smartphone. Take a close look and you’ll find a small hole next to the tray.
Step 3: Insert the SIM ejection tool into the small hole next to the tray
To remove the SIM card tray, you will need to use the SIM ejection tool that came with your Moto G Power. Insert the tool into the small hole next to the tray and apply gentle pressure. This will eject the tray from the phone.
Step 4: Remove the SIM card tray
Once the tray is ejected, carefully pull it out from the phone. Be cautious not to damage the tray or the SIM card slot.
Step 5: Place the SIM card in the tray
Now it’s time to insert your SIM card. Take your SIM card and align it with the cutout on the tray. Ensure that the gold contacts of the SIM card are facing downwards.
Step 6: Reinsert the SIM card tray into the Moto G Power
Once your SIM card is properly placed on the tray, gently slide it back into the SIM card slot of your Moto G Power. Make sure it is securely inserted and aligned with the phone.
Step 7: Power on the Moto G Power to complete the process
Now that the SIM card is inserted, power on your Moto G Power and wait for it to establish a connection with your cellular network. Once connected, you’re all set to enjoy your phone’s features.
And that’s it! You have successfully inserted a SIM card in your Moto G Power. It’s a simple process that allows you to enjoy the convenience of using your phone for calls, texts, and data. If you ever need to switch SIM cards or remove the current one, just follow these steps in reverse. Happy exploring with your Moto G Power!
Step 1: Power off the Moto G Power
Before inserting a SIM card into your Moto G Power, the first step is to power off the device. By turning off the phone, you ensure that the internal components are not active during the SIM card insertion process. This prevents any potential damage that may occur.
To power off the Moto G Power, press and hold the power button located on the right side of the device. A menu will appear on the screen with several options. Tap on the “Power off” or “Turn off” option to shut down the phone.
Alternatively, you can also bring up the power menu by pressing and holding the power button along with the volume down button simultaneously. Once the menu appears, select the “Power off” or “Turn off” option to switch off the Moto G Power.
After you have powered off the device, you are now ready to proceed to the next step of inserting the SIM card into your Moto G Power.
Step 2: Locate the SIM card tray
Once you have powered off your Moto G Power, it is time to locate the SIM card tray. The SIM card tray is a small slot on the side of your device that houses the SIM card. To find it, look for a small opening with a pinhole next to it. This pinhole is where you will insert the SIM ejection tool.
Depending on the model of your Moto G Power, the location of the SIM card tray may vary. In most cases, you can find it on either the top or the side of the device. Take a moment to familiarize yourself with the design of your phone to determine the precise location of the SIM card tray.
When looking for the SIM card tray, avoid confusing it with other ports or buttons on your Moto G Power. It is essential to identify the correct slot to avoid any accidental damage to your device. If you are unsure about the location, refer to the user manual provided with your phone or consult the manufacturer’s website for guidance.
Step 3: Insert the SIM ejection tool into the small hole next to the tray
Once you have located the SIM card tray on your Moto G Power, it’s time to insert the SIM ejection tool into the small hole next to the tray. The SIM ejection tool is a small pin-like object that usually comes with your smartphone package. If you don’t have the tool, you can use a paperclip or a similar thin and pointy object.
Inserting the SIM ejection tool into the small hole is a crucial step as it will activate the mechanism that ejects the SIM card tray. Apply gentle pressure and make sure the tool goes all the way into the hole. You may feel a slight resistance, but do not force it as it might damage the tray or the phone.
Once the SIM ejection tool is securely inserted into the hole next to the tray, press down firmly. This will trigger the release of the SIM card tray, allowing it to slide out easily. Keep a firm grip on the tray to prevent it from popping out too forcefully.
If the tray does not slide out smoothly or there are any difficulties in ejecting it, double-check that the tool is properly inserted into the hole. Also, ensure that you’re pressing down firmly and evenly to release the tray. If the tray still doesn’t come out, try restarting the process from the beginning.
Remember to handle the SIM ejection tool with care and keep it in a safe place after use. It might come in handy if you ever need to insert or replace your SIM card in the future.
Step 4: Remove the SIM card tray
Now that you have located the SIM card tray in your Moto G Power, it’s time to remove it. This step is crucial as it allows you to access the SIM card slot and properly insert your SIM.
To remove the SIM card tray, you will need to use the SIM ejection tool that came with your device. This small metal pin-like tool is specifically designed to help you easily remove the tray without causing any damage to your smartphone.
Take the SIM ejection tool and insert it into the small hole next to the tray. Apply gentle pressure until you feel some resistance. This pressure will activate the internal mechanism and release the tray.
Once the tray is released, fully pull it out of the Moto G Power. Be careful not to apply too much force as it may damage the tray or cause other issues. Slow and steady is the name of the game here.
With the tray now removed, you will notice a rectangular slot where the SIM card will be placed. Take a moment to familiarize yourself with this slot and make sure there is no dirt or debris inside. If necessary, gently clean it with a soft, dry cloth.
Step 5: Place the SIM card in the tray
Now that you have removed the SIM card tray from your Moto G Power, it’s time to insert the SIM card into the tray. Follow these simple steps:
- Take your SIM card and carefully align it with the slot in the SIM card tray. Ensure that the gold contacts on the SIM card are facing downwards.
- Gently place the SIM card into the slot, making sure it fits snugly. You should feel a slight click when the card is properly inserted.
- Double-check to ensure that the SIM card is properly aligned and positioned in the tray.
It is essential to handle the SIM card with care to avoid any damage. Avoid bending or touching the gold contacts on the SIM card, as any damage to these contacts can hinder the device’s functionality.
Once you have successfully placed the SIM card in the tray, you can proceed to the next step of reinserting the tray into your Moto G Power.
Step 6: Reinsert the SIM card tray into the Moto G Power
Now that you have placed the SIM card in the tray, it’s time to reinsert the tray back into your Moto G Power. Follow these simple steps:
1. Hold the SIM card tray with the notch facing downwards.
2. Align the tray with the SIM card slot on the side of your Moto G Power. Make sure the tray is inserted straight and not at an angle.
3. Gently push the tray back into the device until it clicks into place. Be careful not to apply too much force, as this may damage the tray or the device.
4. Once the tray is securely inserted, give it a slight push inward to ensure it is fully seated.
5. Take a moment to double-check that the tray is properly aligned and flush with the device.
6. Congratulations! You have successfully reinserted the SIM card tray into your Moto G Power.
Remember, the SIM card tray also doubles as a microSD card tray, allowing you to expand the storage of your device. If you have a microSD card that you would like to insert, simply place it in the designated slot on the SIM card tray before reinserting it into your Moto G Power.
Now that the SIM card tray is back in place, you can power on your Moto G Power and enjoy a seamless cellular connection. Whether it’s making calls, sending texts, or surfing the internet, your smartphone is now ready to go.
Step 7: Power on the Moto G Power to complete the process
After successfully inserting the SIM card into your Moto G Power, it’s time to power on the device and complete the setup process. Here’s what you need to do:
1. Press and hold the power button located on the side of your Moto G Power. Give it a few seconds, and you will see the Moto logo appear on the screen.
2. Release the power button once you see the logo. Your Moto G Power will now boot up and begin the initial setup process.
3. Follow the on-screen instructions to configure your device settings, such as selecting your preferred language, connecting to Wi-Fi, and logging in to your Google account.
4. Once you have completed the initial setup, you can start exploring the features and functionalities of your Moto G Power.
5. Keep in mind that you may need to activate your SIM card with a compatible mobile carrier to use cellular data, make calls, and send texts. Check with your carrier for specific activation instructions.
By powering on your Moto G Power, you are initiating the final step in the SIM card installation process. Ensure that the device is fully charged before turning it on to avoid any interruptions during the setup.
Congratulations! You have successfully inserted the SIM card and powered on your Moto G Power. Now you can enjoy all the benefits and convenience of being connected on a reliable smartphone.
Inserting a SIM card into the Moto G Power is a straightforward process that allows you to unlock the full potential of your smartphone. By following the step-by-step instructions outlined in this article, you can ensure a seamless and hassle-free experience.
With the SIM card properly inserted, you will be able to make calls, send messages, and access the internet using your preferred mobile network. Whether you’re upgrading your device or simply need to replace your old SIM card, knowing how to insert a SIM card in the Moto G Power is an essential skill for every smartphone user.
Remember to handle the SIM card with care and ensure it is inserted correctly to avoid any potential damage. If you encounter any issues during the process, consult the user manual or seek assistance from a qualified professional.
Now that you have the knowledge, go ahead and insert that SIM card into your Moto G Power. Enjoy your fully connected smartphone experience!
FAQs
Q: How do I insert a SIM card in Moto G Power?
A: To insert a SIM card in Moto G Power, follow these steps:
1. Locate the SIM card tray, which is typically on the side of the phone.
2. Use the SIM ejector tool (included in the phone’s packaging) or a paperclip to gently push into the small hole next to the SIM card tray to pop it out.
3. Carefully place the SIM card into the tray, making sure it aligns with the notched corner.
4. Slide the tray back into the phone until it is securely in place.
It’s important to note that the exact steps may vary slightly depending on your specific phone model, so it’s always a good idea to consult the user manual for detailed instructions.
Q: Can I use any SIM card in Moto G Power?
A: Moto G Power is typically unlocked, meaning it can work with any compatible SIM card from a supported carrier. However, it’s always best to check with your carrier to ensure the compatibility of your SIM card with the phone.
Q: What type of SIM card does Moto G Power use?
A: Moto G Power uses a Nano-SIM card, which is the smallest SIM card size commonly used in smartphones today. Make sure your SIM card is the correct size to fit into the phone’s SIM card tray.
Q: How do I remove the SIM card from Moto G Power?
A: To remove the SIM card from Moto G Power, follow these steps:
1. Locate the SIM card tray, usually on the side of the phone.
2. Use the SIM ejector tool (included in the phone’s packaging) or a paperclip to gently push into the small hole next to the SIM card tray to pop it out.
3. Carefully pull the tray out of the phone.
4. Remove the SIM card from the tray by pushing it gently or using your fingernail to slide it out.
Once the SIM card is removed, you can reinsert it into another phone or store it safely for future use.
Q: Can I use Dual SIM cards in Moto G Power?
A: No, Moto G Power does not support Dual SIM cards. It has a single SIM card slot, allowing you to use one SIM card at a time.