
So, you’ve got yourself a brand new Moto G smartphone but now you’re wondering, how do you open it? Well, you’re in the right place! In this article, we’ll guide you through the steps to open your Moto G, whether it’s to insert a SIM card, access the battery, or perform any other task that requires removing the back cover. The Moto G is a popular Android smartphone known for its great features and affordable price point. Don’t worry, opening your Moto G is a straightforward process that anyone can do with a little know-how. So, let’s get started and unlock the secrets of opening your Moto G!
Inside This Article
- Removing the Back Cover
- Inserting the SIM Card
- Powering on the Moto G
- Inserting and Removing the Memory Card
- Conclusion
- FAQs
Removing the Back Cover
The back cover of a Moto G smartphone can be easily removed to access the internals of the device. Follow these steps to remove the back cover:
- Turn off your Moto G by pressing and holding the power button until the power-off options appear.
- Gently lay the phone face down on a soft surface to prevent scratching the screen.
- Locate the small indentation or groove on the lower part of the back cover.
- Insert your fingernail or a small pry tool into the groove, and then gently lift the cover away from the phone. Be careful not to apply too much pressure, as you don’t want to damage the cover or the phone.
- Once the cover is lifted, you can easily remove it by pulling it away from the phone.
With the back cover removed, you now have access to the battery, SIM card slot, and memory card slot, allowing you to customize or replace these components as needed.
Remember to handle the back cover with care when removing and reattaching it, as it helps protect the internal components of your Moto G smartphone.
Inserting the SIM Card
One of the essential tasks when setting up your new Moto G smartphone is inserting the SIM card. The SIM card is the small piece of plastic that contains important information, such as your phone number and network data. Follow these simple steps to insert the SIM card into your Moto G:
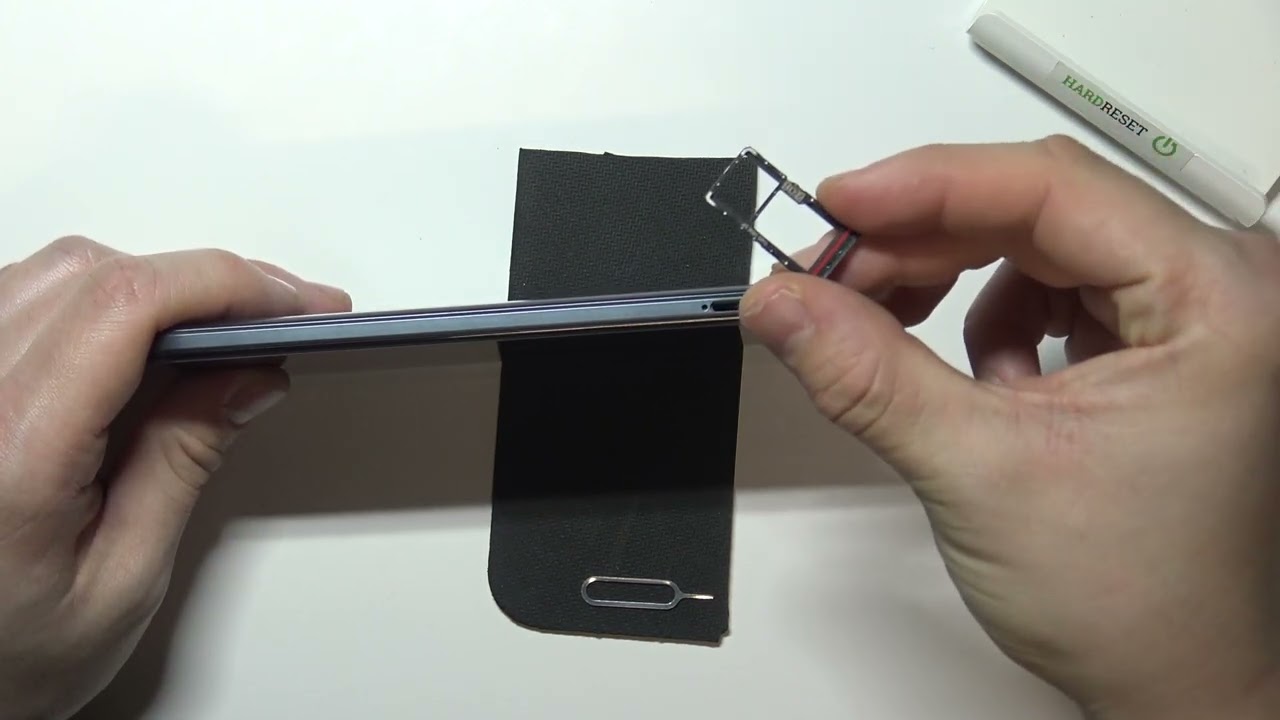
- Locate the SIM card tray: The SIM card tray is usually located on the side or top of your Moto G smartphone. Look for a small hole or a slot with an ejector pin logo.
- Insert the SIM card ejector pin: Take the SIM card ejector pin that came with your Moto G and insert it into the hole or slot of the SIM card tray. Apply a bit of pressure to push down, and the tray should pop out.
- Remove the SIM card tray: Gently pull the SIM card tray out of the smartphone. Be careful not to force it or bend it, as this can damage the tray or SIM card.
- Place the SIM card: Take your SIM card and align the notch or corner with the designated area on the SIM card tray. Ensure that the gold contacts on the SIM card are facing down.
- Reinsert the SIM card tray: Carefully slide the SIM card tray back into the Moto G smartphone until it is fully inserted. Make sure it is securely in place.
- Power on your Moto G: Now that the SIM card is inserted, you can power on your Moto G by pressing and holding the power button until the device turns on.
Once your Moto G smartphone is powered on, it should detect the SIM card and establish a connection to your network. If prompted, follow any additional setup instructions to complete the SIM card activation process.
Having your SIM card properly inserted is crucial for accessing cellular networks and making phone calls. By following these simple steps, you can ensure that your Moto G is ready to go and connected to your network in no time.
Powering on the Moto G
Once you have inserted the SIM card and secured the back cover, you’re ready to power on your Moto G and embark on your smartphone journey. The process is simple and straightforward, allowing you to quickly get started with your new device.
To power on the Moto G, locate the power button, typically positioned on the right side of the device. It may have a textured or slightly raised surface to make it easier to locate by touch. Press and hold the power button for a few seconds until you see the Motorola logo appear on the screen.
As the Moto G boots up, you’ll see the familiar Android startup animation and the device will begin to initialize its operating system. This may take a few moments, so be patient and let the device complete its startup process.
Once the startup process is complete, you’ll be greeted with the Moto G’s lock screen. Swipe up or enter your security pattern, PIN, or password to unlock the device and access your home screen.
At this point, you’re ready to explore the features and functionality of your Moto G. Take some time to familiarize yourself with the layout of the home screen, the app drawer, and the various pre-installed apps and widgets that come with the device.
Don’t forget to connect your Moto G to a Wi-Fi network or cellular data to enable internet access and download any necessary updates or apps. You can access the settings by swiping down from the top of the screen and tapping on the gear icon.
Now that your Moto G is powered on and ready to go, the possibilities are endless. Whether you’re using it for work, entertainment, or staying connected with loved ones, the Moto G offers a wide array of features and capabilities to enhance your smartphone experience.
So go ahead, power on your Moto G and start exploring all the amazing things this device has to offer!
Inserting and Removing the Memory Card
The memory card is a crucial component in expanding the storage capacity of your Moto G smartphone. It allows you to efficiently store and access your files, such as photos, videos, and documents. Whether you need to insert a memory card for the first time or remove it for upgrading or transferring data, here’s a step-by-step guide to help you through the process.
Inserting the Memory Card:
- Power off your Moto G smartphone.
- Locate the memory card slot, which is usually situated on the side of the device. You may need to consult your phone’s user manual for specific instructions.
- Gently insert the memory card into the slot, ensuring that the gold contacts on the card align with the corresponding contacts inside the slot.
- Once the card is fully inserted, you should feel a slight click or resistance indicating that it is securely in place.
- Power on your Moto G phone and wait for it to recognize the memory card. You may also need to format the card if prompted.
Removing the Memory Card:
- Power off your Moto G smartphone and locate the memory card slot.
- Look for the small notch or groove near the card slot. This is where you can insert your fingernail or a small tool to push the memory card out.
- Gently apply pressure to eject the memory card from the slot. Be careful not to use excessive force, as this may damage both the card and the slot.
- Once the card is partially pushed out, you can carefully remove it by pulling it out with your fingers.
Important Notes:
- Before inserting or removing the memory card, ensure that your Moto G smartphone is powered off to prevent any potential data loss or damage.
- Handle the memory card with care to avoid static electricity, moisture, or physical damage.
- Always follow the manufacturer’s instructions and recommendations regarding the type and capacity of memory cards compatible with your Moto G model.
- Remember to regularly backup your important files to avoid losing data in case of memory card failure.
By following these simple steps, you can easily insert and remove the memory card on your Moto G smartphone. This allows you to expand your storage capacity and conveniently manage your files, giving you more flexibility and freedom with your device.
Conclusion
The Moto G is a highly versatile and user-friendly smartphone that offers a seamless experience for its users. Whether you’re new to smartphones or a seasoned tech enthusiast, the Moto G’s user-friendly design and intuitive interface make it easy to navigate and enjoy all its features.
With its impressive performance, long-lasting battery life, and stunning display, the Moto G stands out as a top choice among budget-friendly smartphones. Its sleek design, advanced camera capabilities, and reliable connectivity options further enhance its appeal.
Whether you’re using the Moto G for work or entertainment purposes, its powerful specifications and accessibility features ensure a smooth and enjoyable user experience. From multitasking to gaming to capturing memories with high-quality photos, the Moto G delivers on all fronts.
Overall, the Moto G is a standout smartphone in its price range, offering an array of features and functionalities that cater to the needs of users across various use case scenarios. Its combination of affordability, performance, and user-friendly design makes it a top contender for those in search of a reliable smartphone without breaking the bank.
FAQs
1. How do you open Moto G?
To open Moto G, locate the small opening on the device’s side. Insert the SIM eject tool, or a paper clip, into the hole and gently press until the SIM tray pops out. Carefully remove the SIM tray and you can access the SIM card slot. Insert the SIM card into the slot and reinsert the tray back into the device. Moto G is now ready to be powered on.
2. Can I replace the battery in Moto G?
No, the battery in Moto G is not user-replaceable. The device comes with a built-in battery that is designed to last for a long time. If you are experiencing battery-related issues, it is recommended to reach out to a certified technician or the manufacturer for assistance.
3. How do I take a screenshot on Moto G?
To take a screenshot on Moto G, simultaneously press and hold the Power button and the Volume Down button until you see a capture animation or hear a shutter sound. The screenshot will be saved in the Screenshots folder in the Gallery app or the Photos app, depending on your device’s settings.
4. Is Moto G waterproof?
Some Moto G models, such as the Moto G7 Power and Moto G8 Power, come with an IPx2 water-repellent coating. This means they can withstand minimal exposure to water, such as light rain or accidental splashes. However, they are not fully waterproof or submersible. It is important to avoid immersing the device in water or exposing it to excessive moisture.
5. How do I perform a factory reset on Moto G?
To perform a factory reset on Moto G, go to the Settings app and select System > Reset > Factory data reset. Make sure to back up any important data before initiating the reset, as it will erase all user data and restore the device to its original factory settings.