
Anyone who has a smartphone probably owns (or borrows) an account for streaming services such as Netflix or Hulu. Nowadays, it is not unusual for someone to spend their leisure time bingeing on TV shows or watching different videos on YouTube. That said, a lot of people have been digging that movie house vibe to be able to relax even further. Of course, it would be a shame if you could only watch on your phone’s six-inch screen, so a smartphone projector or a DIY projector is essential to complete the experience.
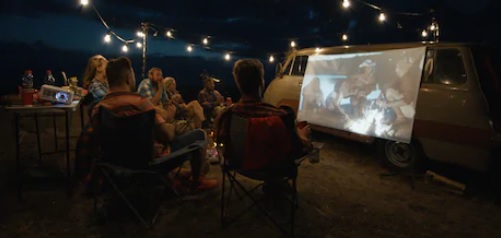
A phone projector is a convenient device that lets you flash your screen on a flat surface. These things can come as battery-operated or wired like the Nebula Capsule or the Sony Portable Pico. By using one, you would be able to watch movies on a larger area like your bedroom wall.
Not all people could readily get this device, though, so we will also learn today how to make a projector. A DIY projector is a much cheaper alternative with a lighter build. Essentially, it also has the same functions.
Here’s what you will need:
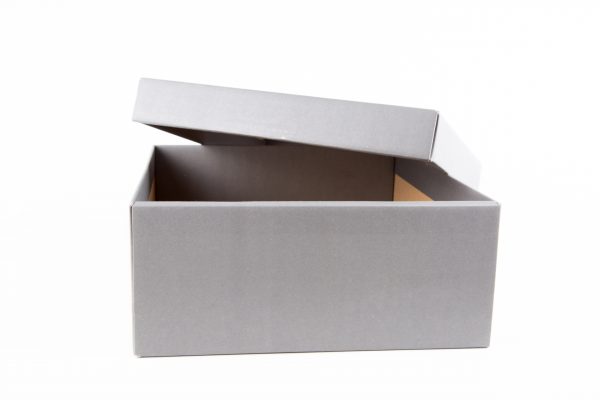
- 1 shoebox
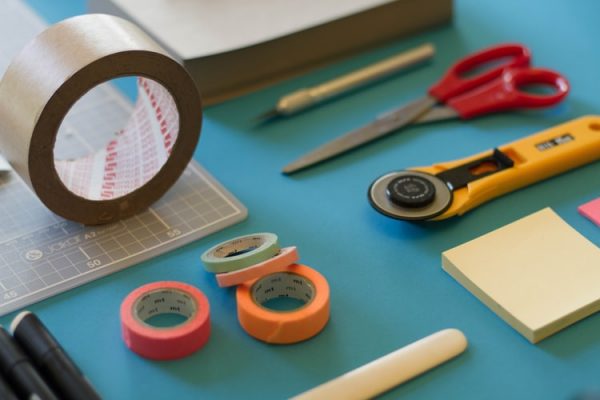
- 2 cardboards
- 1 magnifying glass
- Glue gun
- Old phone case
- Scissors and box cutters
- Black sheets of paper or black spray paint
How to Make a DIY Projector
The DIY projector has three parts: the body, the lens, and the phone stand. The body is the largest part but the easiest one to do. The lens is where most of the science takes place. Finally, the projector’s phone stand is something that is built differently. Compared to your usual phone stand or a phone cup holder, the one you’ll be using for the projector is more upright.
Doing each part before assembling the whole phone projector will make your life ten times easier.
Making the Body of a DIY Projector
Step 1: Gather all the materials.
First things first, you have to make sure that you’ve gathered all the materials that we listed above. For the shoebox and the cardboards, make sure to get something that could fit and hold your phone. Your black sheets of paper or spray paint should also be enough to cover the inner part of the shoebox. Finally, if you are buying a magnifying glass, be sure to remove the handle because we won’t have any use for it.
Also, if you’re not comfortable using scissors, cutters, and glue guns, ask someone to help you (better safe than sorry).
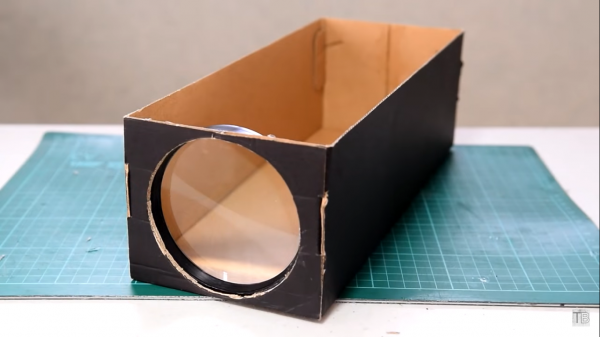
Step 2: Cut one of the narrow sides of the shoebox.
We will start off making the body by cutting one of the narrow sides of the shoebox. Be sure not to damage or overcut the piece you’re taking away because you’ll use that later. That small panel is where you will be attaching your lens later.
Step 3: Blackout the inside of the shoebox.
Using the paper or the spray paint, cover the inner part of the box black. By blacking all the inner panels, the light coming out of your phone would be more directed towards the only exit, which is the magnifying lens you will be installing later.
Alternatively, you could also use foil as a cover instead of the paper or paint.
Making the Lens
Step 4: Cut a hole on the piece of the shoebox you cut out in Step 2.
Remember that narrow piece of the shoebox you cut out earlier? Well, you’ll need that for this part of your DIY projector.
Place your magnifying glass on top of the cutout and trace the outer part of the glass to create an outline. Once you’re done with this, get your scissors or cutters and cut the hole. Remember to cut tightly inside the outline to ensure a tighter fit when you slot in the lens again later.
Step 5: Attach the magnifying glass using a glue gun.
Slot in the magnifying glass inside the hole that you made on the piece of the box. Using a glue gun, attach it, and make sure that it is secured. Also, make sure that the lens is leveled in every angle to avoid any image distortions later on.
Now, remember that a glue gun takes time to harden so just keep an eye on your project. Again, if you’re not comfortable in using this equipment, ask somebody to help.
Step 6: Attach this part back to the shoebox.
Once that piece is done, attach it back to where it was originally on the shoebox. Use a glue gun to do that but, alternatively, you may also use duct tape or packaging tape. Well, if you really want to use tape, make sure that your lens won’t wobble. It would not hurt to use both a glue gun and tape.
Making the Phone Stand
Step 7: Using two separate cardboard pieces, make a T-shaped stand.
The third part of this projector for your phone is a phone stand. We made an article about creating your DIY phone stand, but there are some things we have to take note of.
Unlike your usual phone stand, the one you will be creating for your projector has to be upright at 90 degrees. Remember that we are dealing with optics here so a slight error in angle might lead to image distortions.
Your phone stand has to be T-shaped with a wide enough base to support the weight of your phone. Connect the two cardboards to form the stand. Try using a book’s edge to guide you into making the pieces perpendicular to each other.
Step 8: Attach your old phone case to one side of the stand.
This is one of the most exciting parts. Once your phone stand’s structure is done, grab an old phone case and attach it on one side of the upright cardboard. You could use your glue gun to attach it or perhaps pieces of double-sided adhesives for a cleaner look.
Alternatively, instead of attaching your phone case, you could also simply make stoppers on the base of the stand. Just be sure that your stoppers could keep your phone perpendicular to the base to avoid image distortions.
This is the choice you would want to go for if you are aware that you won’t be the only one using the projector. Then again, why not just make more, right?
Assembling the DIY Phone Projector
Step 9: Play a movie on your phone and place it inside the case UPSIDE DOWN.
Now that your phone stand is good to go and your projector body with the lens attached ready, all there’s left to do is to set up the whole thing.
Start off by playing something on your phone and placing it on the stand. Now, rotate your phone’s screen to make it look like you are watching the movie upside down. This is an important step that makes watching through your projector possible.
Once you’re done with this, place the phone stand inside the smartphone projector’s body. You will notice that your projector will be flashing your phone in the correct position despite flipping it earlier. There is a really interesting science behind this that we’ll be discussing later.
Step 10: Move the phone stand closer or farther from the lens to focus the projection.
When you are setting up, enlarging the projection must always come before focusing. To make the projection larger or smaller, all you have to do is to adjust the distance between the projector and the wall you are flashing onto.
If you move closer to the wall, the projection will get smaller and sharper. Of course, moving away from the wall would result in a larger projection. Just find the size of the screen you are comfortable in and worry about the focusing later.
Next, you have to focus the projection for a clearer picture. For this, all you need to do is to move your phone closer or farther away from the lens. Take note that you may have to compromise a little of the projection size to achieve a clearer image. These two things highly depend on your phone’s screen size so just try to work your way around it.
Also, try placing a marker once you’ve found the right placing of the projector and the phone stand. This will help you set up the projector faster the next time you use it.
How to Add Your Personal Touch
One of the best parts about this homemade projector is that you could easily build it on your own. With that said, you could also customize it to your liking. Once you finish the structure, you could add your own functional and aesthetic designs.
There are a number of things to try out. For instance, you could use a pull-out type shoebox instead of the usual shoebox at home. With a pull-out shoebox, you wouldn’t have to make a stand anymore since an actual part of the box can be moved. Simply attach your phone case on one side and the magnifying glass on the other.
There are a lot of things that you can add to your projector to make it better. For example, a couple of well-placed holes would enable you to slot in different wires. These wires could include charging cables and aux cords for speakers.
After some time, your phone might heat up and that is something that we do not want to happen often. With that said, making room for a cooling system like a small fan would not be a bad idea.
You could also create a stand for the projector itself or perhaps you could add ceiling hooks for higher placement. The sky really is the limit for this one so do not be afraid to add in your own designs.
After all, it is your projector.
How It Works
Now that you know how to make a projector, you might be interested in some of the science behind it. In particular, you might be asking why you needed to place your phone upside down or why focusing the projection worked that way. Well, the answer is physics.
Your phone needs to be flipped because magnifying glasses are made out of convex lenses. Through this shape, magnifying glasses have the ability to distort an image of an object placed in front of them. The kind of distortion that the magnifying glass could produce would depend on the distance of the object from the lens itself. This distance is called focal length and the more the glass is curved, the greater the magnification is.
If you place an object near the magnifying glass, the image will be distorted to look larger on the side of the viewer. On the other hand, by placing an object farther away from the glass, convex lenses are unable to fully reflect the light. This is why images end up being projected upside down instead of the fully replicated imagery.
The same concept about light and convex lenses applies to focus on an image. If you place the phone just close enough, the magnifying glass would be able to capture as much light as it can. The result is a sharper projection.
Make Every Day a Movie Date
A DIY projector is a compact version of a smartphone projector. The former is made out of cheap materials that are readily available at home, while the latter is more like a miniature version of an LCD projector.
With a projector this size, you could go anywhere and set up a movie — even in your car. Both of these devices are great for movie dates and can turn a simple night into a movie night. In fact, building the projector itself could be a part of the bonding time already!
Now you know how to make a projector out of a shoebox. If you do not have the budget for an actual phone projector yet, this can be a good alternative. In the end, making a projector yourself is an easy but really fulfilling activity.