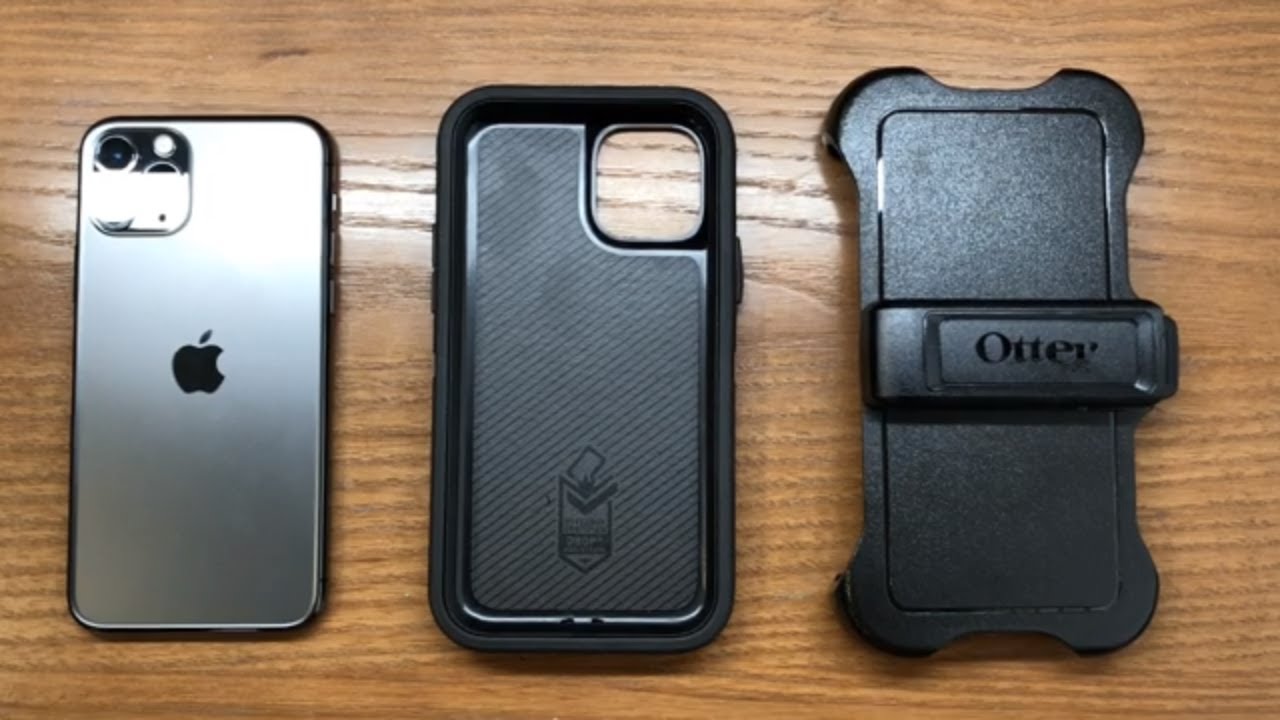
To install OtterBox Defender Pro iPhone 11 correctly, start by removing the outer slip cover from the hard plastic shell, then separate the shell halves, place your iPhone 11 into the bottom shell, snap the top shell into place, and finally wrap the slip cover back around the assembled case. This official five-step process ensures full protection without damaging your phone or the case components.
Before you begin
Clean your iPhone 11 screen and back with a microfiber cloth to remove dust and debris. The package includes a holster for portability and quick access. For visual reference, OtterBox provides a dedicated Defender Series Pro iPhone Installation Video and an Apple Case Instructions page with downloadable instruction sheets.
Step 1: Remove the outer slip cover
Take the assembled case and remove the outer silicone slip cover from the hard plastic shell. This exposes the inner shell so you can access the snaps that hold the two halves together.
Step 2: Separate the shell halves
Locate the arrows on the shell and release each snap along all four sides to separate the two halves. Work carefully around the perimeter to avoid damaging the plastic tabs.
Step 3: Place your iPhone 11 in the bottom shell
Place your iPhone 11 into the bottom half of the shell, carefully aligning the camera cutout and side buttons with the case openings. Verify that each button and port lines up correctly before proceeding.
Step 4: Snap the top shell into place
Place the top shell onto the phone and press firmly along all edges until each snap is securely engaged. Listen for clicks along every side to confirm a complete seal.
Step 5: Wrap the slip cover around the shell
Stretch the slip cover over the assembled shell and press around all edges to seat it properly in every groove and notch. Ensure the silicone is fully seated around the camera bump, buttons, and charging port.
Final checks and wireless charging
Test all buttons, ports, and the camera to confirm full functionality. The case is Qi wireless charging compatible, so it does not need to be removed for charging. If you later need screen protector application and repair, the case's built-in screen protector covers the display, but you can also apply a separate tempered glass protector underneath if desired.
Frequently Asked Questions
Does the OtterBox Defender Pro for iPhone 11 require any tools for installation?
No tools are needed. The case is designed for hand installation only, following the five-step process described above.
Will the OtterBox Defender Pro work with a screen protector already on my iPhone 11?
Yes, the case is compatible with most screen protectors, though the built-in screen protector provides coverage on its own. If you use an additional protector, ensure it does not lift the case edges.
Is the OtterBox Defender Pro for iPhone 11 compatible with other iPhone models?
No, OtterBox documents this case as compatible only with the iPhone 11. It does not support iPhone 11 Pro, iPhone 11 Pro Max, or any Android devices.
Can I remove the built-in screen protector from the OtterBox Defender Pro?
The built-in screen protector is integrated into the case design and is not removable. For separate screen protector application and repair, apply a third-party protector before installing the case.
Can I customize the appearance of my OtterBox Defender Pro for iPhone 11?
OtterBox offers a selection of color options for the Defender Pro series.
Does the OtterBox Defender Pro interfere with wireless charging?
No, the case is Qi wireless charging compatible, so you can charge your iPhone 11 wirelessly without removing the case.