
Welcome to our comprehensive guide on how to add a new Fitbit to your account! Fitbit is a popular brand known for its wide range of fitness trackers, smartwatches, and other wearable devices. Whether you’re upgrading to a new Fitbit model or are a first-time user, we’ve got you covered. In this article, we will walk you through the step-by-step process of adding a new Fitbit device to your account, ensuring a seamless transition and access to all the features and benefits offered by Fitbit. From setting up your Fitbit app to syncing your device, we will provide you with all the information and tips you need to start tracking your fitness goals and enjoying the perks of your new Fitbit device. So, let’s dive in and get your Fitbit up and running!
Inside This Article
- Before You Begin
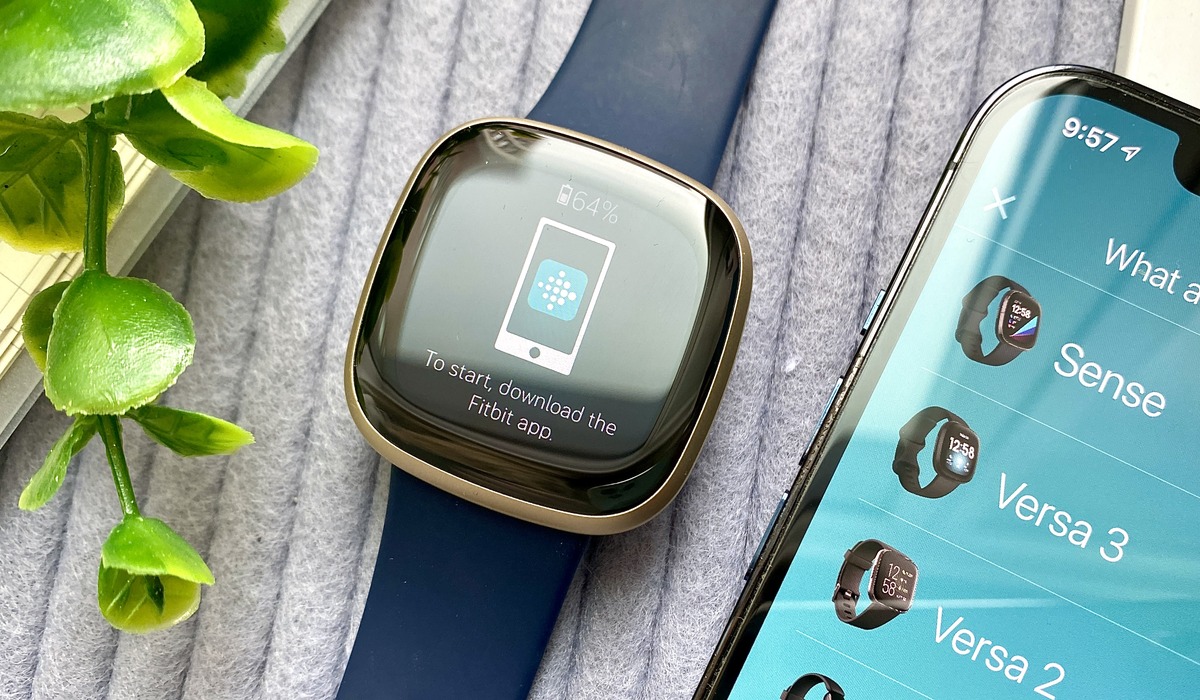
- Step 1: Download the Fitbit App
- Step 2: Launch the Fitbit App
- Step 3: Tap on the Profile Icon
- Step 4: Go to the Account Settings
- Step 5: Select “Set Up a New Device”
- Step 6: Choose Your Fitbit Model
- Step 7: Follow the On-screen Instructions
- Step 8: Complete the Device Setup
- Troubleshooting Tips
- Conclusion
- FAQs
Before You Begin
Before adding a new Fitbit to your account, there are a few things you need to consider:
1. Compatibility: Make sure that the Fitbit model you have is compatible with the Fitbit app. Check the official Fitbit website or consult the user manual to confirm if your device is supported.
2. Internet Connection: Ensure that you have a stable internet connection on your mobile device. Adding a new Fitbit requires downloading the Fitbit app and syncing it with your Fitbit device. A reliable internet connection will ensure a smooth setup process.
3. Charge Your Fitbit: It is essential to have enough battery life on your Fitbit device. Before adding your new Fitbit to your account, charge it fully or at least to a sufficient level to complete the setup process without interruptions.
4. Sign in to Your Fitbit Account: If you already have a Fitbit account, sign in using your email and password. If you don’t have an account yet, you will need to create one before adding your Fitbit device.
By taking these steps into consideration, you can ensure a seamless process when adding a new Fitbit to your account. Now, let’s proceed to the next steps to complete the setup.
Step 1: Download the Fitbit App
In order to add a new Fitbit device to your account, the first step is to download the official Fitbit app. The Fitbit app is available for free on both iOS and Android devices. Visit the App Store or Google Play Store and search for “Fitbit”. Once you find the Fitbit app, tap on the download button and wait for the installation process to complete.
The Fitbit app is essential for setting up and managing your Fitbit devices. It allows you to track your daily activity, monitor your sleep patterns, set goals, and sync your data to the Fitbit cloud, among other features. Make sure to download the latest version of the app to ensure compatibility with your new Fitbit device.
After the app finishes installing, locate the Fitbit app icon on your device’s home screen or app drawer and tap on it to launch the app. If it’s your first time using the app, you will be prompted to create a Fitbit account. Follow the on-screen instructions to set up your account, providing your email address and choosing a password.
Once you’ve created your Fitbit account or logged into your existing account, you’re ready to move on to the next step of adding your new Fitbit device to your account.
Step 2: Launch the Fitbit App
Now that you have successfully downloaded the Fitbit app onto your smartphone, it’s time to launch it and get started with adding your new Fitbit device to your account. Here are the steps you need to follow:
1. Locate the Fitbit app icon on your device’s home screen or app drawer and tap on it to open the application.
2. Once the app launches, you will be prompted to log in to your Fitbit account. Enter your login credentials, including your username or email address and password. If you don’t have a Fitbit account yet, you can create one by selecting the “Sign Up” option.
3. After logging in, you will be taken to the Fitbit app’s main interface. This is where you can access various features and settings for your Fitbit device, as well as view your activity data and progress.
4. Take a moment to familiarize yourself with the app’s layout and navigation. You will notice several tabs or menu options at the bottom of the screen, such as Dashboard, Challenges, Community, and Account. These tabs provide easy access to different sections of the app.
5. At this point, your Fitbit app is ready to connect with your new device. Make sure your device is nearby and turned on, as the app will search for any compatible Fitbit devices in the vicinity.
6. The app will display a list of available Fitbit devices. Tap on the specific model or name of your new Fitbit device to begin the pairing process. If you are unsure about the model of your device, refer to the packaging or the device itself for identification.
7. Once you have selected your Fitbit device, the app will initiate the pairing process. This involves establishing a Bluetooth connection between your smartphone and the Fitbit device.
8. Follow the on-screen instructions provided by the app to complete the pairing process. This may involve pressing a button on your Fitbit device, verifying a passcode, or confirming the connection on both the device and app.
9. Once the pairing process is successful, you will receive a confirmation message on the app, indicating that your device has been added to your Fitbit account.
Now that you have launched the Fitbit app and added your new Fitbit device to your account, you are one step closer to enjoying all the features and benefits that your Fitbit device has to offer. Proceed to the next step to continue the setup process and customize your device settings.
Step 3: Tap on the Profile Icon
Once you have downloaded and launched the Fitbit app on your mobile device, the next step to add a new Fitbit to your account is to tap on the profile icon. This icon is usually located in the top left or top right corner of the app’s main screen.
When you tap on the profile icon, a dropdown menu or a new screen will appear, giving you access to various options and settings related to your Fitbit account. This is where you can manage your personal information, set goals, track your activity, and much more.
By tapping on the profile icon, you are signaling to the Fitbit app that you want to access your account settings, which will eventually lead you to the option of adding a new device.
It’s important to note that in some versions of the Fitbit app, the profile icon may be represented by a silhouette of a person or may have your name or initials displayed instead. Regardless of the specific icon, the function remains the same – to provide you with a gateway to your account settings.
So, go ahead and locate the profile icon on your Fitbit app, tap on it, and get one step closer to adding a new Fitbit device to your account.
Step 4: Go to the Account Settings
Once you have launched the Fitbit app on your mobile device, the next step is to navigate to the Account Settings. This is where you will find the option to add a new Fitbit to your account.
To access the Account Settings, tap on the profile icon located at the top right corner of the app’s main screen. It typically looks like a silhouette of a person or may be represented by your profile picture if you have already set one up.
After tapping on the profile icon, a drop-down menu will appear. Look for the “Account Settings” option and tap on it to proceed.
Once you are in the Account Settings section, you can manage various aspects of your Fitbit account, including your personal information, device settings, connected apps, and more.
Now that you have successfully reached the Account Settings section, you are one step closer to adding a new Fitbit to your account. Continue following the next steps to complete the process seamlessly.
Step 5: Select “Set Up a New Device”
After launching the Fitbit app and accessing your account settings, it’s time to set up your new device. To do this, navigate to the “Set Up a New Device” option. This step is crucial as it allows the app to guide you through the setup process specifically designed for your Fitbit model.
When you select “Set Up a New Device,” the Fitbit app will present you with a list of Fitbit models to choose from. This includes popular devices such as Fitbit Versa, Fitbit Charge, and Fitbit Inspire. Make sure to select the correct model that matches the Fitbit device you are trying to add to your account.
Once you have selected the appropriate Fitbit model, the app will initiate the device setup process. This step involves pairing your Fitbit device with your smartphone or tablet. The app will provide detailed instructions on how to complete the pairing process seamlessly.
During the setup process, the Fitbit app will request permission to access certain device features, such as GPS or notifications. It’s important to grant these permissions to ensure that you can enjoy the full functionality of your Fitbit device and track your fitness activities accurately.
Follow the on-screen instructions provided by the Fitbit app to establish the connection between your Fitbit device and your mobile device. The app will guide you through each step, making it simple and straightforward to add your Fitbit device to your account.
Once the setup process is complete, you can start exploring the various features and settings of your Fitbit device through the app. This includes customizing your clock face, setting goals, tracking your workouts, and monitoring your sleep patterns.
Remember, if you encounter any issues during the device setup process, refer to the troubleshooting tips provided in the Fitbit app or visit the Fitbit support website for further assistance.
Step 6: Choose Your Fitbit Model
After launching the Fitbit app and accessing your account settings, it’s time to choose the Fitbit model you want to add to your account. Fitbit offers a wide range of models, each with its own features and capabilities. Whether you’re looking for a basic activity tracker or a more advanced smartwatch, Fitbit has a model to suit your needs.
When selecting a Fitbit model, consider factors such as your preferred style, budget, and desired functionalities. Fitbit models vary in design, from sleek and minimalistic to sporty and rugged, allowing you to choose the one that fits your personal style and preferences.
Additionally, take into account the features you’re looking for in a Fitbit device. If you’re primarily interested in tracking your fitness activities, you might opt for a model with advanced activity tracking sensors, heart rate monitoring, and built-in GPS.
On the other hand, if you’re looking for more smartwatch-like capabilities, such as receiving notifications, checking emails, and controlling music playback, you may want to choose a Fitbit model with these features.
Fitbit offers models such as the Fitbit Charge, Fitbit Inspire, Fitbit Versa, and Fitbit Ionic, to name a few. Each model has its own unique set of features, so take the time to read product descriptions, user reviews, and compare specifications to make an informed decision.
It’s also worth considering any specific needs or preferences you may have. For example, if you prefer a device with long battery life, look for a Fitbit model that offers extended battery backup. If you enjoy swimming or other water-based activities, ensure that the Fitbit model you choose is water-resistant or swim-friendly.
Once you have decided on the Fitbit model that best suits your needs, you are ready to proceed to the next step of the setup process.
Step 7: Follow the On-screen Instructions
After selecting your Fitbit model in the previous step, you will now be prompted to follow the on-screen instructions to successfully add your new Fitbit device to your account. These instructions may vary depending on the Fitbit model you have chosen, but they are designed to be user-friendly and easy to follow.
Firstly, make sure that your new Fitbit device is fully charged and in close proximity to your smartphone or tablet. This will ensure a smooth and seamless setup process.
Next, the app will guide you through the process of connecting your Fitbit device to your smartphone or tablet via Bluetooth. This is essential for syncing your device with the Fitbit app and accessing all its features.
During this step, you may be asked to enable certain permissions or grant access to your device’s location services. These permissions are necessary for the Fitbit app to track your activity accurately and provide you with personalized insights.
The on-screen instructions will also prompt you to create or log into your Fitbit account. This account will serve as your personal hub for tracking your fitness goals, accessing detailed activity stats, and connecting with other Fitbit users.
Once you have completed the login or account creation process, the app will proceed to pair your Fitbit device with your account. This is done by generating a unique code or passkey that you need to enter into the app.
Be sure to follow the on-screen instructions carefully to ensure the successful pairing of your device. If you encounter any difficulties or error messages during this step, refer to the troubleshooting tips provided by Fitbit or contact their customer support for assistance.
Once your device and account are successfully paired, you can customize your personal preferences and settings such as display language, notification preferences, and goals. These settings can be adjusted later through the app’s settings menu.
Lastly, take a moment to explore the various features and functions of your new Fitbit device. Familiarize yourself with the different screens, buttons, and gestures to make the most out of your fitness tracking experience.
Congratulations! You have successfully completed the on-screen instructions to add your new Fitbit device to your account. You are now ready to start tracking your fitness journey and enjoying the benefits of your Fitbit device.
Step 8: Complete the Device Setup
Once you have followed the on-screen instructions and successfully paired your new Fitbit device with your account, it’s time to complete the device setup. This step ensures that your Fitbit is fully synced and ready to use with all the features and functions it offers.
The device setup process may vary slightly depending on the Fitbit model you have chosen, but the general steps remain the same. Here are some key steps to complete the device setup:
- Personalize Your Fitbit: After pairing your device, you will have the opportunity to personalize it according to your preferences. This includes setting display options, choosing clock faces, and selecting the type of information you want to see on your Fitbit screen.
- Synchronize Your Data: To make sure your Fitbit is up to date, it is essential to synchronize it with your account. This allows your Fitbit to track your activities accurately and provide you with real-time data. The synchronization process may take a few minutes, so be patient and ensure your device has a stable internet connection.
- Explore Fitbit Features: Take some time to explore the various features and functions of your new Fitbit device. This includes checking out the different workout modes, setting goals, using the sleep tracking feature, and accessing the Fitbit app to track your progress over time.
- Set Reminders and Notifications: Customize your Fitbit to send you reminders and notifications for various activities, including movement reminders, goal achievements, and call and text notifications. This helps you stay motivated and informed throughout your fitness journey.
- Connect with Friends: Fitbit offers a social aspect that allows you to connect with friends and family who also use Fitbit devices. You can challenge each other, compare stats, and provide each other with support and motivation. Take advantage of this feature to enhance your fitness experience.
By completing the device setup, you ensure that your Fitbit device is fully integrated with your account and optimized for your personal fitness goals. Now it’s time to start using your Fitbit and enjoy all the benefits it has to offer.
Troubleshooting Tips
While setting up a new Fitbit device is usually a smooth process, there may be instances where you encounter some issues along the way. Here are some troubleshooting tips to help you overcome common problems:
1. Ensure a Stable Internet Connection: One of the main reasons for setup issues is a weak or unstable internet connection. Make sure you have a strong Wi-Fi or mobile data connection before proceeding with the setup process.
2. Restart Your Fitbit Device: If you’re experiencing difficulties during setup, try restarting your Fitbit device. Simply turn it off and then on again to see if it resolves the issue.
3. Update the Fitbit App: Ensure that you’re using the latest version of the Fitbit app on your smartphone. Updating the app can fix any compatibility issues and provide a smoother setup experience.
4. Reset Your Fitbit Device: If your Fitbit device is still not working properly, you may need to perform a factory reset. This can often resolve software glitches and connectivity problems. Check the Fitbit website or user manual for instructions on how to reset your specific model.
5. Check Your Account Credentials: Double-check that you’re entering the correct login credentials for your Fitbit account. Incorrect username or password information can prevent your device from being added to your account.
6. Disable VPN or Proxy Settings: If you’re using a VPN or proxy service on your smartphone, try disabling it temporarily during the setup process. VPNs and proxies can sometimes interfere with device connectivity.
7. Contact Fitbit Support: If you have followed all the troubleshooting steps and are still experiencing issues, it’s best to reach out to Fitbit support for further assistance. They have a team of experts who can help troubleshoot specific problems and provide tailored solutions.
Remember, troubleshooting tips can vary depending on the specific issue you’re facing. If none of the above steps resolve your problem, it’s always a good idea to refer to the Fitbit support resources for more detailed troubleshooting guidance.
Adding a new Fitbit to your account is a straightforward process that allows you to fully unlock the potential of your fitness tracking device. By following the steps outlined in this article, you can seamlessly connect your Fitbit to your account and start monitoring your activity, tracking your progress, and achieving your health and fitness goals.
Whether you just purchased a new Fitbit or received one as a gift, taking the time to set it up correctly ensures that you can make the most of its features and functionalities. The Fitbit app provides a user-friendly interface that allows you to sync your device, customize your settings, and access detailed insights into your activity and sleep patterns.
With the ability to track your steps, calories burned, heart rate, and sleep quality, a Fitbit is a valuable companion on your journey to a healthier lifestyle. By adding a new Fitbit to your account, you can effortlessly stay motivated and accountable as you work towards your fitness goals.
FAQs
Q: How do I add a new Fitbit to my account?
To add a new Fitbit to your account, follow these steps:
1. Open the Fitbit mobile app on your smartphone.
2. Tap on the profile icon in the upper-left corner.
3. Select the option to “Set Up a Device.”
4. Choose the type of Fitbit device you have and tap on it.
5. Follow the on-screen instructions to complete the setup process and connect the new Fitbit device to your account.
6. Once connected, you can customize the device settings and sync it with your Fitbit account.
Q: Can I have multiple Fitbit devices connected to the same account?
Yes, you can connect multiple Fitbit devices to the same Fitbit account. This allows you to track your activity and health data using different Fitbit devices interchangeably. To add a new device, follow the steps mentioned in the previous FAQ.
Q: Will adding a new Fitbit erase my data from the previous device?
No, adding a new Fitbit device to your account will not erase any data from your previous device. Your data will remain intact and can be accessed through the Fitbit app or website, regardless of the device you use. The new Fitbit device will simply sync with your existing account and display the most up-to-date information.
Q: How do I switch between my Fitbit devices?
To switch between Fitbit devices, follow these steps:
1. Open the Fitbit mobile app on your smartphone.
2. Tap on the profile icon in the upper-left corner.
3. Scroll down and select “Set Up a Device.”
4. Choose the Fitbit device you want to use and follow the on-screen instructions to connect it to your account.
5. Once connected, your new device will become the active device, and its data will be synced to your account.
Q: Can I use a different Fitbit model than the one I initially set up?
Yes, you can use a different Fitbit model than the one you initially set up. Fitbit devices are designed to connect to the same Fitbit account, regardless of the model. However, note that different models may offer different features and capabilities, so ensure that the Fitbit model you switch to meets your specific needs and preferences.