
Are you tired of seeing the wrong weather information on your iPad or iPhone Weather app? Perhaps you recently moved to a new location and your device still displays the weather for your old hometown. Don’t worry – we’ve got you covered! In this article, we will guide you through the process of changing the weather location on your iPad and iPhone running on iOS 16. By updating your weather location, you can ensure that you receive accurate and up-to-date weather forecasts for your current location. Whether you’re planning a weekend getaway or simply want to stay informed about the local weather conditions, follow our step-by-step instructions to easily change the weather location on your iPad and iPhone Weather app. Let’s get started!
Inside This Article
- How to Change Weather Location on iPad & iPhone Weather App in iOS 16
- Steps to Change Weather Location
- Troubleshooting Tips
- Additional Features and Customizations
- Conclusion
- FAQs
How to Change Weather Location on iPad & iPhone Weather App in iOS 16
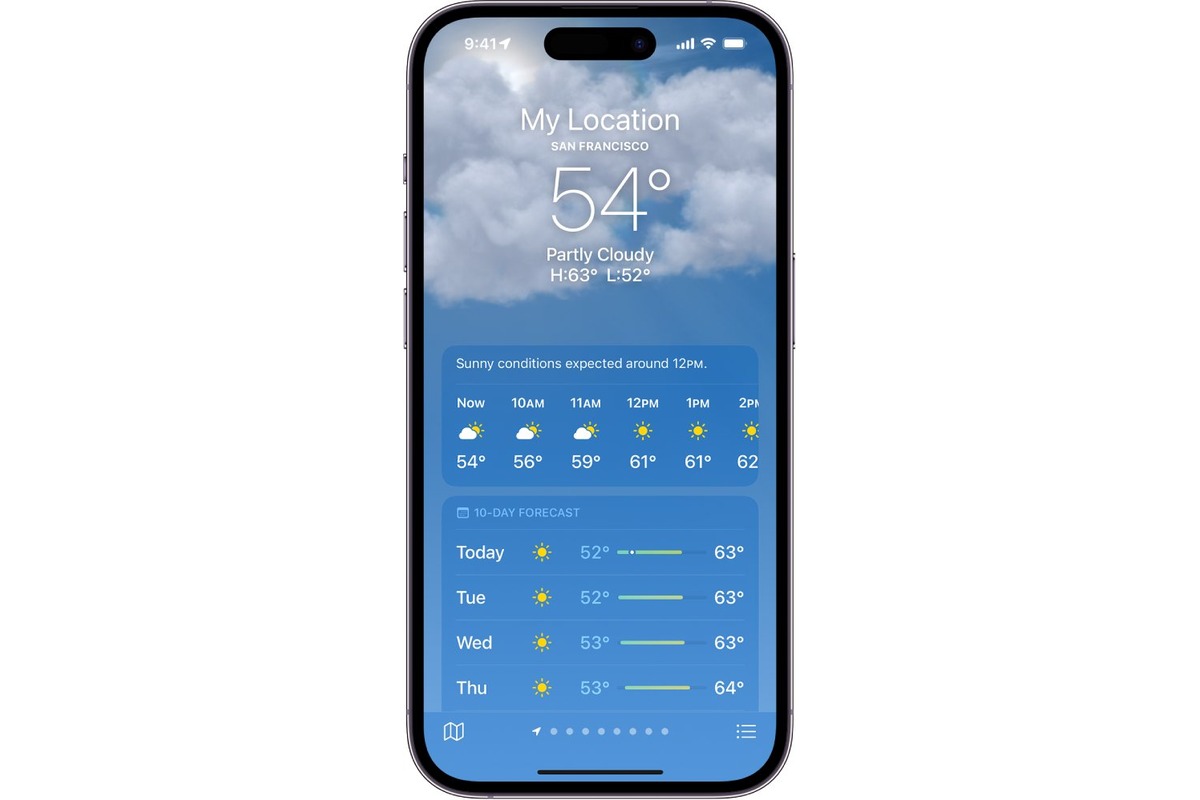
Are you tired of seeing the wrong weather forecast on your iPad or iPhone’s Weather app? Don’t worry, you can easily change the weather location to get accurate weather information in your area. In this article, we’ll walk you through the steps to change the weather location on the iPad and iPhone Weather app in iOS 16.
Whether you’re traveling or just want to stay up-to-date with the weather conditions in a different city, the Weather app in iOS 16 allows you to easily change the location settings. Here’s how you can do it:
- Open the Weather app on your iPad or iPhone. The app icon is a gray background with a white sun behind a cloud.
- At the bottom right corner of the screen, tap on the “More” tab, which is represented by three horizontal dots.
- In the “More” menu, tap on the “Locations” option.
- You will see a list of all the locations currently saved on your Weather app. To add a new location, tap on the “+” icon at the top right corner of the screen.
- Type in the name of the city or town you want to add as your new weather location. You can also include the state or country for more specific results.
- As you start typing, the Weather app will suggest matching locations. Select the correct location from the list.
- The new location will be added to your Weather app. You can now swipe left or right to view the weather conditions for different cities.
That’s it! You have successfully changed the weather location on your iPad or iPhone’s Weather app in iOS 16. Now you will receive accurate and up-to-date weather forecasts for your desired location.
If you are facing any issues with changing the weather location or if the app is not displaying the correct weather information, here are some troubleshooting tips to help you out:
- Make sure that your location services are turned on for the Weather app. Go to “Settings” > “Privacy” > “Location Services” and ensure that the toggle switch next to “Weather” is enabled.
- Check if you have a stable internet connection. The Weather app requires a reliable internet connection to fetch the latest weather data.
- If the app is still not displaying the correct weather information, try force-closing the app and reopening it. To force-close an app on an iPad or iPhone, swipe up from the bottom of the screen and pause in the middle of the screen. Then, swipe left or right to find the Weather app and swipe it up to close.
- If none of the above solutions work, you may need to update your iOS to the latest version. Sometimes, outdated software can cause compatibility issues with apps. Go to “Settings” > “General” > “Software Update” to check for any available updates.
In addition to changing the weather location, the Weather app in iOS 16 offers various customization options to enhance your weather experience. You can switch between different weather units (Celsius or Fahrenheit), enable or disable severe weather alerts, and even add multiple widgets on your home screen to quickly access weather information.
Now you know how to change the weather location on your iPad or iPhone’s Weather app in iOS 16. Enjoy accurate and reliable weather forecasts for your desired location, and make the most out of the customization options available in the app. Stay prepared and informed about the ever-changing weather conditions, no matter where you are!
Steps to Change Weather Location
One of the great features of the iPad and iPhone Weather app in iOS 16 is the ability to change the weather location. Whether you’re planning a trip or simply want to stay updated on the weather in a different location, you can easily adjust the settings to display the desired forecast. Here are the steps to change the weather location on your iPad or iPhone:
Accessing the iPad & iPhone Weather App
To begin, locate the Weather app on your iPad or iPhone. It is usually found on the home screen or in the app drawer. Once you’ve found the app, tap on it to open it.
Finding the Current Weather Location
Upon opening the Weather app, you will see the current weather location displayed at the top of the screen. It is typically based on your device’s current location, but it might also show a default location if the device’s location services are turned off.
Changing the Weather Location Manually
If you want to change the weather location manually, follow these steps:
- Scroll down in the Weather app until you reach the forecast section.
- Tap on the current weather location displayed at the top of the screen.
- A search bar will appear, allowing you to enter the desired location.
- Start typing the name of the location you want to change to.
- As you type, the Weather app will provide suggestions based on the entered text.
- Select the correct location from the suggestions to set it as the new weather location.
- The app will update the forecast based on the newly selected location.
Using the Device’s Location Services to Update the Weather Location Automatically
If you prefer the Weather app to update the weather location automatically based on your device’s location, ensure that the location services are enabled for the Weather app. Here’s how:
- Go to the Settings app on your iPad or iPhone.
- Scroll down and tap on “Privacy”.
- Next, tap on “Location Services”.
- Scroll down and find the Weather app in the app list.
- Tap on the Weather app to access its location settings.
- Select “While Using the App” or “Always” to allow the Weather app to access your device’s location.
With the location services enabled, the Weather app will update the weather location automatically based on your device’s current location.
By following these steps, you can easily change the weather location on your iPad or iPhone Weather app in iOS 16. Whether you prefer to manually enter the location or use the device’s location services, staying updated on the weather has never been easier.
Troubleshooting Tips
When it comes to changing the weather location on your iPad or iPhone, you may encounter some common issues. Here are a few troubleshooting tips to help you overcome these challenges and get your location settings just right.
Common issues while changing weather location
One common issue that users face is the inability to change the weather location on their device. This could be due to a variety of reasons, such as a glitch in the app or an incorrect setting. By following the steps below, you can address these issues and update your weather location accurately.
Checking device settings for location accuracy
The first step in troubleshooting location-related issues is to ensure that your device has accurate location settings. To do this, go to your device’s settings and navigate to the “Privacy” section. From there, select “Location Services” and make sure it is toggled on. Additionally, scroll down and verify if the Weather app has permission to access your location. If not, enable it by tapping on the Weather app and selecting “While Using the App” or “Always” for location access.
Restarting the app to resolve location update problems
If you’re still experiencing issues with updating the weather location, try restarting the Weather app. Simply close the app completely by swiping up from the bottom of your screen (or double-clicking the home button and swiping away the app on older devices). Once the app is closed, reopen it and check if the weather location has been updated correctly.
By following these troubleshooting tips, you can overcome common issues that arise when changing the weather location on your iPad or iPhone. Remember to check your device’s location settings and restart the app if necessary. With these steps, you’ll be able to enjoy accurate and up-to-date weather information on your device.
Additional Features and Customizations
When it comes to the Weather app in iOS 16, there are several additional features and customizations that can enhance your experience. Here are some of the key features:
Setting multiple weather locations for easy access: In iOS 16, you have the option to add multiple locations to the Weather app. This can be handy if you frequently travel or want to keep an eye on the weather conditions in different cities. Simply go to the “Locations” tab in the app, tap on the “+” button, and enter the desired location. You can then swipe left or right to switch between different locations with ease.
Customizing the weather app’s interface and display options: The Weather app in iOS 16 allows you to customize the interface and choose your preferred display options. You can change the temperature units from Celsius to Fahrenheit or vice versa by going to the app’s settings. Additionally, you can choose to display additional weather information, such as humidity, wind speed, and chance of precipitation. This enables you to tailor the app’s display to your specific weather needs.
Exploring advanced settings for personalized weather information: iOS 16 also introduces advanced settings that allow you to personalize the weather information presented in the app. You can enable severe weather alerts to receive notifications about extreme weather conditions in your selected locations. You can also choose to have the app display hourly weather forecasts or show the UV index for sun protection. These advanced settings give you a more comprehensive and personalized weather experience.
With these additional features and customizations, the Weather app in iOS 16 becomes a powerful tool for keeping track of the weather in multiple locations, customizing the display, and accessing personalized weather information. Whether you’re a frequent traveler or simply want to stay informed about the weather conditions around you, the Weather app in iOS 16 has got you covered.
Conclusion
The ability to change your weather location on the iPad and iPhone Weather app in iOS 16 offers a great deal of convenience and customization. By following the simple steps outlined above, you can ensure that the weather information displayed on your device is always accurate for your desired location.
Having access to accurate weather data is crucial for planning your day, whether it’s checking the temperature before heading out or knowing if you’ll need an umbrella. With the Weather app’s location change feature, you can effortlessly stay updated on the weather conditions in any location, near or far.
Don’t let the default weather location limit your forecast information. Take control of your weather experience on iOS 16 and enjoy accurate and personalized weather updates wherever you go.
FAQs
FAQ 1: How do I change the weather location on the iPad and iPhone Weather App in iOS 16?
To change the weather location on your iPad or iPhone running iOS 16, follow these steps:
1. Open the Weather App on your device.
2. Tap the search bar at the top of the screen.
3. Enter the name of the location you want to set.
4. As you type, the app will suggest locations. Tap on the one that matches your desired location.
5. The app will now display the weather information for the new location you selected.
FAQ 2: Can I change the default weather location on my iPad and iPhone Weather App?
Yes, you can change the default weather location on your iPad and iPhone Weather App. Follow the steps below:
1. Open the Weather App on your device.
2. Scroll down to find your current location.
3. Tap on the current location.
4. A list of saved locations will appear.
5. Tap on the “+” button to add a new location or tap on the “-” button to remove a location from your list.
6. You can rearrange the order of your saved locations by tapping and dragging the handle icon on the right side of each location.
7. The first location in your list will be set as the default weather location.
FAQ 3: How can I view the weather forecast for multiple locations on my iPad and iPhone?
To view the weather forecast for multiple locations on your iPad and iPhone, follow these steps:
1. Open the Weather App on your device.
2. Tap the search bar at the top of the screen.
3. Enter the name of the first location.
4. Tap on the suggested location to view its weather forecast.
5. To add another location, repeat steps 2-4.
6. Swipe left or right on the screen to switch between the weather forecasts of different locations.
FAQ 4: Can I get severe weather alerts on my iPad and iPhone Weather App?
Yes, you can receive severe weather alerts on your iPad and iPhone Weather App. Follow these steps to enable alerts:
1. Open the Settings App on your device.
2. Scroll down and tap on “Notifications”.
3. Scroll down and tap on “Weather”.
4. Toggle on the “Allow Notifications” feature.
5. You can further customize the alerts by choosing the alert style, sounds, and other options.
6. Once enabled, you will receive severe weather alerts for your selected locations.
FAQ 5: How can I add additional weather information to the iPad and iPhone Weather App in iOS 16?
To add additional weather information to your iPad and iPhone Weather App, follow these steps:
1. Open the Weather App on your device.
2. Scroll down to the bottom of the screen and tap on the three dots icon.
3. A menu will appear with options like “Add Current Location,” “Add a City,” and “Settings”.
4. Tap on “Add a City”.
5. Enter the name of the location you want to add and select it from the suggestions.
6. The app will now display the weather information for the newly added location.