
Connecting a monitor to a docking station is an essential step to optimize your work or gaming setup. Whether you’re using a laptop or a desktop, a docking station provides a convenient way to expand your display capabilities and connect multiple peripherals with ease.
But how exactly do you connect a monitor to a docking station? In this article, we will guide you through the process step by step, ensuring that you can make the most out of your docking station and enjoy a seamless dual-screen experience. From understanding the necessary cables to adjusting the display settings, we’ve got you covered.
So, if you’re ready to enhance your productivity and immerse yourself in a larger viewing experience, let’s dive in and learn how to connect a monitor to a docking station.
Inside This Article
- Common types of monitor connectors
- Step 1: Choosing the appropriate cable
- Step 2: Connecting the cable to the docking station
- Step 3: Connecting the other end of the cable to the monitor
- Conclusion
- FAQs
Common types of monitor connectors
When it comes to connecting a monitor to a docking station, one of the first things you need to consider is the type of connector used by your monitor. There are several common types of monitor connectors, each with its own unique features and compatibility. Let’s take a look at some of the most popular ones:
1. HDMI: HDMI (High-Definition Multimedia Interface) is one of the most common and widely used monitor connectors. It supports both high-definition video and audio signals, making it an ideal choice for connecting monitors to docking stations. HDMI connectors are typically found on most modern monitors and docking stations.
2. DisplayPort: DisplayPort is another popular monitor connector that offers high-definition video and audio transmission. It has a compact design and supports higher resolutions and refresh rates compared to HDMI. Many newer monitors and docking stations feature DisplayPort connectors, making it a versatile choice for connecting your monitor.
3. VGA: VGA (Video Graphics Array) is an older type of monitor connector that is still in use today, although its popularity has dwindled in recent years. VGA connectors are analog and support lower resolutions compared to HDMI and DisplayPort. However, if your monitor or docking station only has a VGA port, you can still connect them using a VGA cable.
4. DVI: DVI (Digital Visual Interface) is a connector that comes in different versions, including DVI-D (digital), DVI-A (analog), and DVI-I (integrated digital/analog). DVI connectors can transmit both digital and analog signals, making them compatible with a wider range of monitors and docking stations. However, DVI does not support audio transmission.
5. Thunderbolt: Thunderbolt is a high-speed data and video interface that combines DisplayPort and PCI Express technologies. It provides fast transmission speeds and allows you to daisy chain multiple devices, such as monitors and external hard drives, using a single Thunderbolt port on your docking station. Thunderbolt connectors are typically found on Apple products but are also available on some Windows-based devices.
6. USB-C: USB-C is a newer and more versatile connector that supports both data and video transmission. Many modern laptops and monitors now come equipped with USB-C ports, allowing for easy connectivity and enhanced compatibility. With the right adapter or cable, you can connect your monitor to a docking station using a USB-C connector.
7. Other connectors: In addition to the connectors mentioned above, there are other less common monitor connectors, such as Mini DisplayPort, DVI-I, and HDMI mini/micro. These connectors are typically found on specific devices and may require additional adapters or cables to connect to a docking station.
Now that you are familiar with the common types of monitor connectors, you can choose the appropriate cable and confidently connect your monitor to your docking station. Remember to check the compatibility of your monitor and docking station before making a connection to ensure a seamless and reliable setup.
Step 1: Choosing the appropriate cable
When connecting a monitor to a docking station, the first step is to choose the appropriate cable. The type of cable you need will depend on the available ports on both the docking station and the monitor. Here are some common types of monitor connectors to consider:
- HDMI: High-Definition Multimedia Interface (HDMI) cables are a popular choice for connecting monitors to docking stations. They support both video and audio signals and provide excellent picture quality.
- VGA: Video Graphics Array (VGA) cables are an older type of connector that use analog signals. While they may not offer the best image quality compared to HDMI or DisplayPort, VGA cables are widely compatible and can be a reliable choice for older monitors or docking stations without HDMI ports.
- DisplayPort: DisplayPort cables offer high-quality video and audio transmission and are commonly used for connecting monitors to docking stations. They have a smaller form factor than VGA cables and can support higher resolutions and refresh rates.
- DVI: Digital Visual Interface (DVI) cables are another option for connecting monitors. They come in different varieties, including DVI-D (digital-only), DVI-I (digital and analog), and DVI-A (analog-only). DVI cables are suitable for older monitors or devices that do not support HDMI or DisplayPort connections.
It is important to check the available ports on your docking station and the corresponding ports on your monitor to ensure compatibility. Additionally, consider the maximum resolution and refresh rate supported by both the docking station and the monitor when choosing the appropriate cable.
Step 2: Connecting the cable to the docking station
Once you have selected the appropriate cable for connecting your monitor to the docking station, the next step is to actually connect the cable to the docking station. Follow these simple instructions to ensure a successful connection:
1. Make sure both your docking station and your monitor are powered off. This step is crucial to prevent any electrical issues or potential damage to the devices.
2. Locate the video output ports on the docking station. These ports are usually labeled HDMI, DisplayPort, VGA, or DVI. The type of port will depend on the specific model and brand of your docking station.
3. Take the cable you have chosen and insert one end into the corresponding video output port on the docking station. Ensure that the cable is securely inserted to establish a stable connection.
4. Gently tighten any screws or connectors on the cable to secure it in place. This step will prevent the cable from coming loose during use, ensuring a steady and uninterrupted display.
5. Now it’s time to connect the other end of the cable to your monitor. Locate the appropriate video input port on the back of your monitor. It may be labeled HDMI, DisplayPort, VGA, or DVI, depending on the monitor’s specifications.
6. Insert the other end of the cable into the video input port on the monitor. Just like with the docking station, ensure that the cable is securely connected to establish a proper link between the monitor and the docking station.
7. Ensure that all connections are secure by gently tugging on the cable. If it feels loose, repeat steps 3 and 6 to ensure a proper and secure connection.
8. Once all connections are secure, power on both the docking station and the monitor. Your monitor should now display the content from your connected device, allowing you to conveniently use your monitor in conjunction with your docking station.
By following these step-by-step instructions, you can easily connect your monitor to the docking station and enjoy a larger display for enhanced productivity and convenience. Now that you have successfully connected the cable to the docking station, let’s move on to the next step: connecting the other end of the cable to the monitor.
Step 3: Connecting the other end of the cable to the monitor
Now that you have successfully connected the cable to the docking station, it’s time to connect the other end to your monitor. Follow these simple steps to ensure a secure and stable connection:
1. Start by locating the corresponding port on your monitor. Most monitors have multiple ports, so look for the one that matches the cable you are using. Common types of monitor ports include HDMI, DisplayPort, VGA, and DVI.
2. Once you have identified the correct port, gently insert the cable connector. Make sure it is aligned correctly with the port to avoid any potential damage. Apply gentle pressure until the connector is securely inserted.
3. After connecting the cable to the monitor, tighten any screws or locking mechanisms that may be present. This will ensure a stable and reliable connection, preventing any accidental disconnections or signal interruptions.
4. Double-check both ends of the cable to ensure they are properly connected. Give them a slight jiggle to confirm they are securely in place.
5. Once the cable is connected, power on your monitor to test the connection. If everything is properly connected, you should see the display from your device appearing on the monitor screen.
6. If the display does not appear, make sure the monitor is set to the correct input source. Most monitors have an input selection button that allows you to switch between different input sources. Consult the monitor’s user manual for instructions on how to change the input source.
7. If you are still experiencing issues with the display, try disconnecting and reconnecting the cable to ensure a secure connection. Sometimes a loose connection can cause display problems.
By following these steps, you should be able to successfully connect the other end of the cable to your monitor. Enjoy the enhanced viewing experience and productivity that comes with using a docking station and a larger monitor!
Conclusion
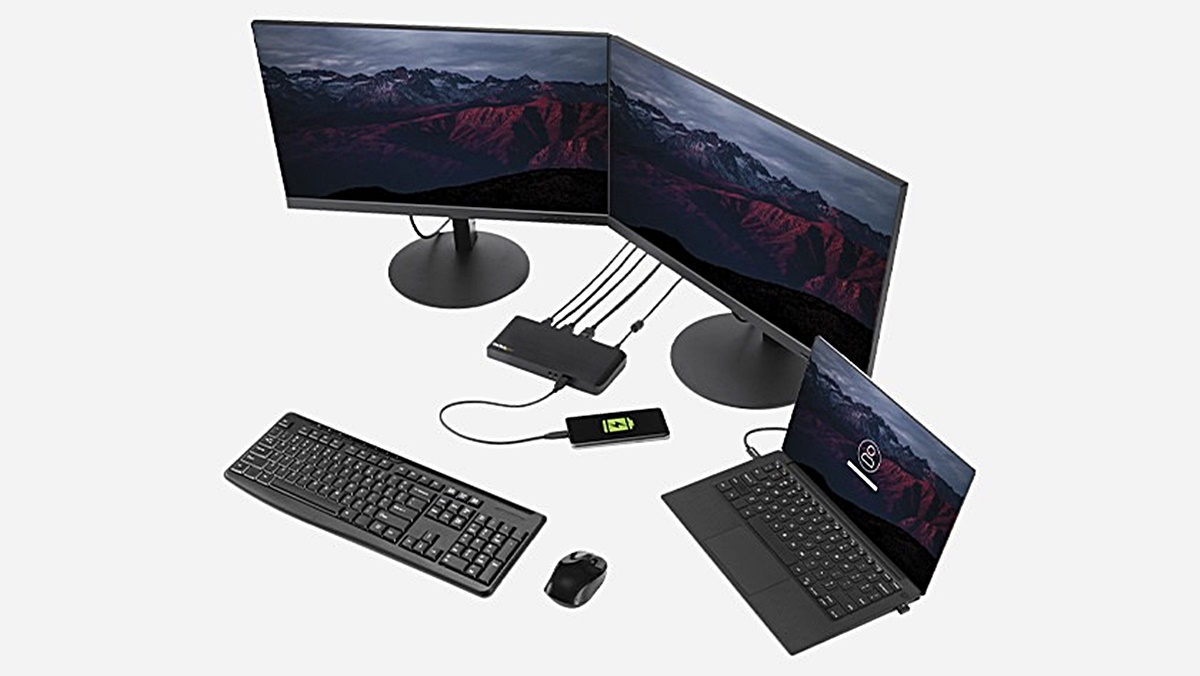
Connecting a monitor to a docking station offers a multitude of benefits, providing an enhanced and streamlined work experience. Whether you’re a professional in need of a dual-screen setup or a gamer looking for a larger display, a docking station is the perfect accessory to maximize your productivity and enjoyment.
By following the simple steps outlined in this guide, you can easily connect your monitor to a docking station without any hassle. With the convenience of a single connection point and the ability to connect multiple peripherals, a docking station eliminates clutter and cables from your workspace, creating a clean and organized environment.
Remember to ensure compatibility between your monitor and docking station, check for updated drivers, and adjust display settings if needed. With the right combination of hardware and software, you’ll be able to enjoy seamless connectivity and take full advantage of the added versatility that a docking station brings.
So, don’t hesitate to invest in a docking station and elevate your monitor setup to new heights. Experience the convenience, performance, and flexibility that comes with connecting your monitor to a docking station and unlock a whole new level of efficiency and enjoyment in your everyday tasks.
FAQs
- Q: Can I connect a monitor to a docking station?
- Q: What cables do I need to connect a monitor to a docking station?
- Q: How do I connect a monitor to a docking station?
- Q: What are the benefits of using a monitor with a docking station?
- Q: Can I connect multiple monitors to a docking station?
A: Yes, most docking stations have ports that allow you to connect a monitor. This can be done through HDMI, DisplayPort, or VGA ports, depending on the specific docking station model.
A: The type of cable you need depends on the ports available on your docking station and monitor. HDMI and DisplayPort cables are commonly used for high-definition connections, while VGA cables are used for older monitors or lower resolution displays.
A: The process of connecting a monitor to a docking station usually involves plugging one end of the cable into the monitor and the other end into the appropriate port on the docking station. Ensure that both devices are powered on and select the correct input source on the monitor to display content from the docking station.
A: Using a monitor with a docking station can greatly enhance your productivity and overall computing experience. Some of the benefits include having a larger screen for multitasking, a higher resolution display for better image quality, and the ability to extend or mirror your laptop screen.
A: Yes, many docking stations support multiple monitor setups. Depending on the model, you can connect multiple monitors using various combinations of HDMI, DisplayPort, and VGA ports. Check the specifications of your docking station to determine the maximum number of monitors it can support.