
Are you ready to take your virtual reality experience to the next level with your Oculus headset? If so, you’re in the right place! Connecting your Oculus app to your headset is a crucial step that allows you to access a wide range of virtual reality content, games, and experiences.
In this article, we’ll guide you through the process of connecting the Oculus app to your headset, ensuring that you can fully immerse yourself in the incredible world of virtual reality. Whether you’re a seasoned VR enthusiast or a newcomer, we’ve got you covered with step-by-step instructions and troubleshooting tips.
So, grab your Oculus headset and let’s get started on this exciting journey together!
Inside This Article
- What you will need
- Step 1: Install the Oculus App
- Step 2: Connect the Oculus App to your Headset
- Step 3: Set up your Oculus Account
- Step 4: Pair your Headset with the Oculus App
- Troubleshooting Tips
- Conclusion
- FAQs
What you will need
To connect the Oculus app to your headset, there are a few things you will need to have on hand:
- An Oculus-compatible headset: Before getting started, make sure you have an Oculus headset that is compatible with the Oculus app. The Oculus app is designed to work with a range of Oculus devices, including the Oculus Rift, Oculus Quest, and Oculus Go.
- A compatible device: You will need a smartphone or tablet that is compatible with the Oculus app. The Oculus app can be downloaded and installed on compatible iOS and Android devices.
- Internet connection: Make sure you have a stable internet connection. This is crucial for downloading and installing the Oculus app, as well as for pairing your headset with the app.
- Appropriate cables: Depending on the type of Oculus headset you have, you may need specific cables or adapters to connect your headset to your device. For example, the Oculus Rift requires an HDMI cable, while the Oculus Quest uses a USB-C cable.
- A clean and well-lit area: It is important to set up your Oculus headset in an area with ample lighting and minimal obstructions. This will ensure a smooth setup process and optimal tracking performance.
With these items ready, you are now well-equipped to connect the Oculus app to your headset and start enjoying the immersive virtual reality experience it offers.
Step 1: Install the Oculus App
Welcome to the first step in connecting your Oculus headset! Installing the Oculus App is the initial requirement to begin your virtual reality experience. Follow these simple instructions to get started.
Firstly, you will need a compatible device to run the Oculus App. The Oculus App is available for both iOS and Android platforms. Ensure that your device meets the minimum system requirements for a smooth and seamless installation process.
If you’re using an iOS device, head over to the App Store. Search for “Oculus” and click on the official Oculus App. Tap the “Install” button and wait for the app to download and install on your device. Once the installation is complete, you’re ready to move on to the next step.
For Android users, open the Google Play Store. Search for “Oculus” and select the Oculus App from the search results. Tap the “Install” button to begin the download and installation process. Once installed, you’re one step closer to connecting your Oculus headset.
Once the installation is complete, locate the Oculus App icon on your device’s home screen or in the app drawer. Tap on the icon to launch the app. The first time you open the Oculus App, you will be prompted to grant permissions for the app to access certain features of your device, such as the camera and storage. Accept these permissions to continue.
That’s it! You have successfully installed the Oculus App on your device. Now, you’re ready to move on to the next step and connect the app to your Oculus headset. Continue following the remaining steps to set up your Oculus account and pair your headset with the app.
Remember, if you encounter any issues during the installation process, refer to the troubleshooting tips section for assistance. Stay tuned for the next step in the process!
Step 2: Connect the Oculus App to your Headset
Once you have successfully installed the Oculus App on your smartphone, the next step is to connect it to your Oculus headset. This will allow you to control the settings, browse the Oculus Store, and access a wide range of VR experiences.
To connect the Oculus App to your headset, follow these simple steps:
- Make sure your headset is powered on and within range of your smartphone.
- Launch the Oculus App on your smartphone.
- Tap on the gear icon in the bottom right corner of the app to access the settings.
- Select the “Devices” tab from the menu.
- Tap on the “Pair New Device” option.
- You will now see a list of available devices. Look for your Oculus headset in the list and tap on it.
- Follow the on-screen instructions to complete the pairing process.
Once the pairing is complete, your Oculus App will be connected to your headset. You can now start exploring the variety of VR content available on the Oculus platform.
It’s important to note that the exact steps may vary slightly depending on the model of your Oculus headset. However, the general process remains the same – launching the app, accessing the settings, and pairing the device.
If you encounter any issues during the pairing process, refer to the troubleshooting tips section or reach out to Oculus support for assistance.
Step 3: Set up your Oculus Account
Setting up your Oculus account is essential to fully enjoy all the features and functionalities of your Oculus headset. When you create an account, you gain access to the Oculus store, where you can download and purchase a wide variety of virtual reality experiences, games, and applications.
Follow these simple steps to set up your Oculus account:
- Open the Oculus app on your mobile device.
- Tap on the “Sign Up” or “Create Account” option.
- Fill in the required information, including your name, email address, and password. Make sure to choose a strong password to protect your account.
- Read and accept the terms of service and privacy policy.
- Complete any additional verification steps, such as providing your date of birth and agreeing to age restrictions for certain content.
- Once you have filled in all the necessary information and agreed to the terms, tap on the “Create Account” button.
After creating your Oculus account, it’s time to personalize your profile and explore the vast library of virtual reality content available to you. You can add a profile picture, customize your bio, and even connect with friends who also use the Oculus platform.
Remember that your Oculus account and the content you purchase are tied to your specific device. This means that you can log in to your account on different headsets but will need to repurchase any content that is not cross-platform compatible.
By setting up your Oculus account, you open the door to a world of immersive experiences, social connections, and endless entertainment possibilities. So don’t hesitate—create your account now and start enjoying the full potential of your Oculus headset!
Step 4: Pair your Headset with the Oculus App
Once you have installed the Oculus App and connected your headset to your device, the next step is to pair your headset with the app. This is an important step that establishes a connection between your headset and the app, allowing you to fully utilize the features and functionalities of your Oculus device.
To pair your headset with the Oculus App, follow these simple steps:
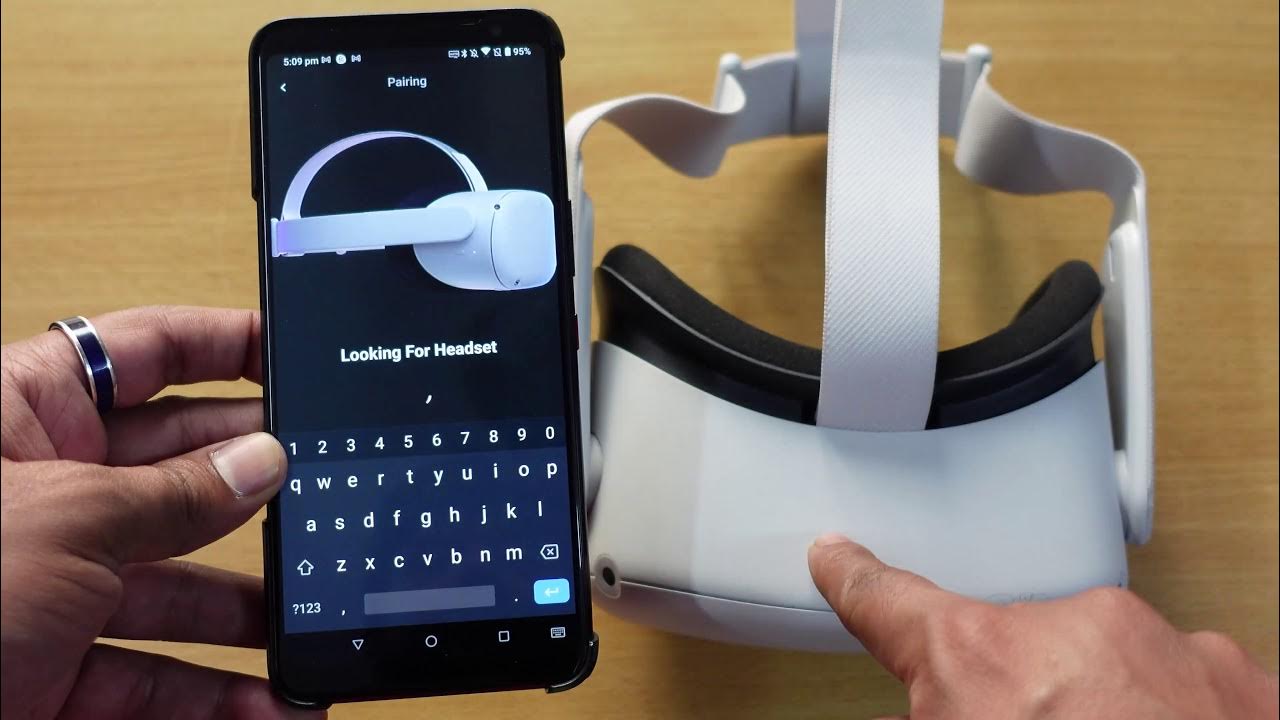
1. Launch the Oculus App: Open the Oculus App on your device. It should automatically detect your headset and display the pairing prompt. If the prompt doesn’t appear, you can manually initiate the pairing process by going to the Settings menu in the app.
2. Confirm the Pairing: Once the app detects your headset, a pairing request will be displayed on both your device and the headset. Make sure that the pairing code shown on your device matches the one displayed on the headset. If they match, select the option to confirm the pairing.
3. Complete the Pairing: After confirming the pairing, the Oculus App will establish a secure connection with your headset. This process may take a few moments, so be patient. Once the pairing is complete, you will receive a notification confirming the successful connection.
4. Personalize your Settings: Now that your headset is paired with the Oculus App, you can customize your settings and preferences. This includes adjusting the display resolution, sound settings, and other options to optimize your VR experience. Take some time to explore the settings and make any necessary adjustments.
5. Enjoy your VR Experience: With your headset successfully paired with the Oculus App, you are now ready to dive into the exciting world of virtual reality. Explore a wide range of immersive games, apps, and experiences available on the Oculus platform. Have fun and make the most out of your virtual reality journey!
Remember, maintaining a strong and stable connection between your headset and the Oculus App is crucial for a seamless and enjoyable VR experience. If you encounter any issues with the pairing process or face connectivity problems, refer to the troubleshooting section for helpful tips.
Troubleshooting Tips
Experiencing difficulties connecting your Oculus app to your headset? Don’t worry, we’ve got you covered! Here are some troubleshooting tips to help you resolve any connection issues:
-
Check your Wi-Fi Connection: Make sure your smartphone and headset are connected to the same Wi-Fi network. A stable internet connection is crucial for the app and headset to communicate with each other.
-
Restart the App and Headset: Sometimes, a simple restart can work wonders. Close the Oculus app, power off the headset, and then turn everything back on. This can help refresh the connection and resolve any temporary glitches.
-
Update the App and Firmware: Outdated software can cause compatibility issues. Ensure that both the Oculus app on your smartphone and the firmware on your headset are up to date. Visit the app store or the Oculus website for any available updates.
-
Reset Network Settings: If you’re still experiencing connection problems, try resetting the network settings on your smartphone. This can help clear any network-related issues and establish a fresh connection.
-
Check Firewall Settings: If you have a firewall enabled on your smartphone or computer, it may be blocking the Oculus app from connecting to the headset. Temporarily disable the firewall or add an exception for the Oculus app.
-
Clear App Cache: Over time, the Oculus app’s cache can accumulate, leading to performance issues. Clearing the app cache can help improve its functionality. In your smartphone settings, navigate to the app settings, find the Oculus app, and clear its cache.
-
Reinstall the App: If none of the above troubleshooting steps have resolved the issue, consider uninstalling and reinstalling the Oculus app. This can help eliminate any potential software issues that might be preventing the app from connecting to the headset.
-
Contact Oculus Support: If you’ve exhausted all troubleshooting options and are still unable to connect the app to your headset, reach out to Oculus Support. They have a team of experts who can guide you through more advanced troubleshooting steps and provide personalized assistance.
By following these troubleshooting tips, you’ll be well on your way to connecting your Oculus app to your headset and immersing yourself in the world of virtual reality.
Conclusion
Connecting the Oculus app to your headset is essential for a seamless and immersive virtual reality experience. By following these steps, you can ensure that your device is properly linked and ready to explore the vast library of games and experiences available.
Remember to have your headset charged and turned on, enable Bluetooth on your mobile device, and make sure you are using the latest version of the Oculus app. With a stable internet connection, you can effortlessly connect the app to your headset and begin your VR journey.
Whether you are a gamer, a visual artist, or simply someone curious about the world of virtual reality, connecting the Oculus app to your headset opens up a whole new realm of possibilities. So, don your headset, explore the virtual worlds, and get ready to be amazed by what awaits you.
FAQs
1. How do I connect the Oculus app to my headset?
To connect the Oculus app to your headset, follow these steps:
- Ensure that your phone is connected to the same Wi-Fi network as your Oculus headset.
- Open the Oculus app on your phone.
- Tap on the “Devices” tab at the bottom.
- Select your headset from the list of available devices.
- Follow the on-screen instructions to complete the pairing process.
2. Can I connect my Oculus app to multiple headsets?
No, currently the Oculus app can only connect to one headset at a time. If you want to connect a different headset, you will need to disconnect the current one first.
3. Do I need the Oculus app to use my headset?
Yes, the Oculus app is required to set up and manage your Oculus headset. The app allows you to download new games and experiences, manage settings, and connect with friends.
4. What should I do if the Oculus app is not detecting my headset?
If the Oculus app is not detecting your headset, try the following troubleshooting steps:
- Make sure that your phone and headset are both connected to the same Wi-Fi network.
- Restart your phone and headset.
- Ensure that the Oculus app and firmware on your headset are both up to date.
- Reset your Wi-Fi router and try again.
- Contact Oculus support for further assistance if the issue persists.
5. Can I control my headset through the Oculus app?
Yes, the Oculus app allows you to control certain functions of your headset. You can navigate through menus, adjust settings, and even launch games and apps directly from the app.