
The iPad, an innovation that revolutionized the way we use technology, has become an essential part of our daily lives. From streaming videos and playing games to staying connected through social media, our reliance on this portable device is undeniable. However, over time, the battery life of the iPad may start to deteriorate, leading to shorter usage time and frustration. In such cases, replacing the iPad battery is the ideal solution to restore its power and performance. In this comprehensive guide, we will walk you through the step-by-step process of replacing your iPad battery, ensuring that you can continue enjoying your favorite apps and features without any interruptions. So, if you’re ready to give your iPad a new lease of life, let’s dive into the world of iPad battery replacement.
Inside This Article
- Background Information
- Tools and Materials Needed
- Step 1: Power off the iPad and prepare the workspace
- Step 2: Remove the iPad screen
- Step 3: Disconnect the old battery
- Step 4: Install the new battery
- Step 5: Reconnect the screen and test the iPad
- Step 6: Put everything back together
- Tips and Precautions
- Conclusion
- FAQs
Background Information
Replacing the battery of an iPad is a common task that many users may need to undertake at some point. Over time, the battery of an iPad can degrade, leading to reduced performance and shorter battery life. In some cases, the battery may even stop holding a charge altogether. Fortunately, replacing the battery is a relatively straightforward process that can be done with the right tools and a bit of patience. In this guide, we will walk you through the step-by-step process of replacing the battery in an iPad.
It’s important to note that replacing the battery yourself may void any warranty or service agreements you have with the manufacturer or retailer. If your iPad is still under warranty, it’s best to check with the manufacturer or authorized service center before attempting any repairs yourself.
Additionally, it’s essential to ensure that you have the correct replacement battery for your specific iPad model. Different iPad models may require different types of batteries, so be sure to check the model number and specifications of your iPad before purchasing a replacement battery.
Lastly, it’s worth mentioning that the process of replacing the battery can vary slightly depending on the iPad model. While the steps outlined in this guide should apply to most iPad models, there may be minor differences in the placement of screws or connectors. Always refer to the specific instructions for your iPad model to ensure an accurate and successful battery replacement.
Tools and Materials Needed
Before you begin the process of replacing the battery on your iPad, it’s essential to gather all the necessary tools and materials. Having everything prepared in advance will ensure a smooth and hassle-free battery replacement. Here are the tools and materials you’ll need:
- Screwdriver set: You’ll require a precision screwdriver set with various screwdriver heads. This will allow you to remove the screws holding the iPad together and access the battery compartment.
- Prying tool: A plastic prying tool or an opening tool will help you gently lift and detach the iPad screen without causing any damage.
- New replacement battery: Purchase a high-quality replacement battery that is specifically designed for your iPad model. Ensure that it matches the specifications and voltage requirements of your device.
- Adhesive strips: These specialized adhesive strips are used to secure the new battery in place within the iPad. They provide a strong and secure bond to prevent any movement or damage.
- Tweezers: Opt for a pair of fine-tipped tweezers, as they will be helpful in maneuvering delicate connectors and cables within the iPad.
- Microfiber cloth: Keep a microfiber cloth handy to wipe away any fingerprints or smudges on the iPad screen during the process.
- Heat gun or hairdryer: A heat gun or a hairdryer can be used to soften any adhesive holding the iPad screen in place. This will make it easier to lift the screen without causing damage.
- Anti-static wrist strap: It’s important to use an anti-static wrist strap to prevent any static electricity from damaging the sensitive internal components of the iPad.
- Plastic container: Find a small plastic container or tray to keep track of the screws and small parts removed from the iPad during the battery replacement process. This will prevent them from getting lost or mixed up.
With these tools and materials at your disposal, you’ll be ready to tackle the battery replacement process efficiently and effectively. Make sure to have a clean and well-lit workspace to carry out the procedure without any distractions. Now that you have all the necessary tools and materials, let’s move on to the step-by-step process of replacing the battery on your iPad.
Step 1: Power off the iPad and prepare the workspace
Before you begin the battery replacement process, it is crucial to ensure that the iPad is powered off. This will prevent any potential damage while handling the device. To power off the iPad, press and hold the power button located at the top or side of the device (depending on the model) until the power off slider appears on the screen. Slide the power off slider to the right, and the iPad will shut down completely.
Once the iPad is powered off, it’s time to prepare your workspace. Find a clean and well-lit area where you can comfortably work on the device. Make sure you have a flat surface to place the iPad and enough space to keep the necessary tools and components within reach. It’s a good idea to lay down a soft cloth or towel to protect the iPad’s screen from scratches or accidental damage during the process.
Additionally, gather all the tools and materials you will need for the battery replacement. This typically includes a screwdriver set with small Philips and flathead screwdrivers, a plastic opening tool or guitar pick, and a replacement battery compatible with your iPad model. It’s important to use the right tools to prevent any damage to the iPad’s components or unnecessary hassle during the process.
Once you have powered off the iPad and set up your workspace with the necessary tools and materials, you are ready to proceed to the next step. It’s essential to have a calm and focused mindset throughout the battery replacement process, as it requires precision and attention to detail. Follow the remaining steps carefully to successfully replace the iPad battery and restore its power and performance.
Step 2: Remove the iPad screen
Removing the iPad screen is a critical step in replacing the battery. Follow these steps carefully to ensure a successful screen removal:
1. Start by disconnecting any power source and turning off the iPad completely. This will prevent any accidental damage or data loss during the screen removal process.
2. Gather the necessary tools for screen removal. You will need a small Phillips screwdriver, a plastic pry tool, and a suction cup. These tools are essential for safely detaching the screen without causing any damage.
3. Locate the screws that secure the screen. In most iPads, there are two screws near the charging port and two more near the speakers. Use the small Phillips screwdriver to carefully remove these screws.
4. Once the screws are removed, insert the plastic pry tool between the screen and the body of the iPad. Gently run the tool along the edges to loosen the adhesive that holds the screen in place. Be patient and take your time to avoid any accidental damage.
5. Attach the suction cup to the screen. Position it near the home button or any edge with enough space. Apply gentle pressure to create a seal and then pull the suction cup upwards. This will help lift the screen away from the body of the iPad.
6. As you lift the screen with the suction cup, continue using the plastic pry tool to gently separate the adhesive holding the screen in place. Work your way around the edges until the screen is completely detached.
7. Once the screen is free from the adhesive, carefully lift it up and prop it against something sturdy. Be cautious not to strain any cables that may still be connected.
That’s it! You have successfully removed the iPad screen. Now you can proceed to the next step of disconnecting the old battery. Remember to handle the screen with care to prevent any cracks or damage.
Step 3: Disconnect the old battery
Disconnecting the old battery is a crucial step in replacing the iPad battery. Follow these steps carefully to ensure a safe and successful disconnect:
1. Begin by locating the battery connector, which is typically located near the center of the iPad.
2. Use a plastic spudger tool or a small pry tool to gently lift the battery connector from its socket. Be careful not to apply too much pressure or force, as this can damage the connector or the internal components of the iPad.
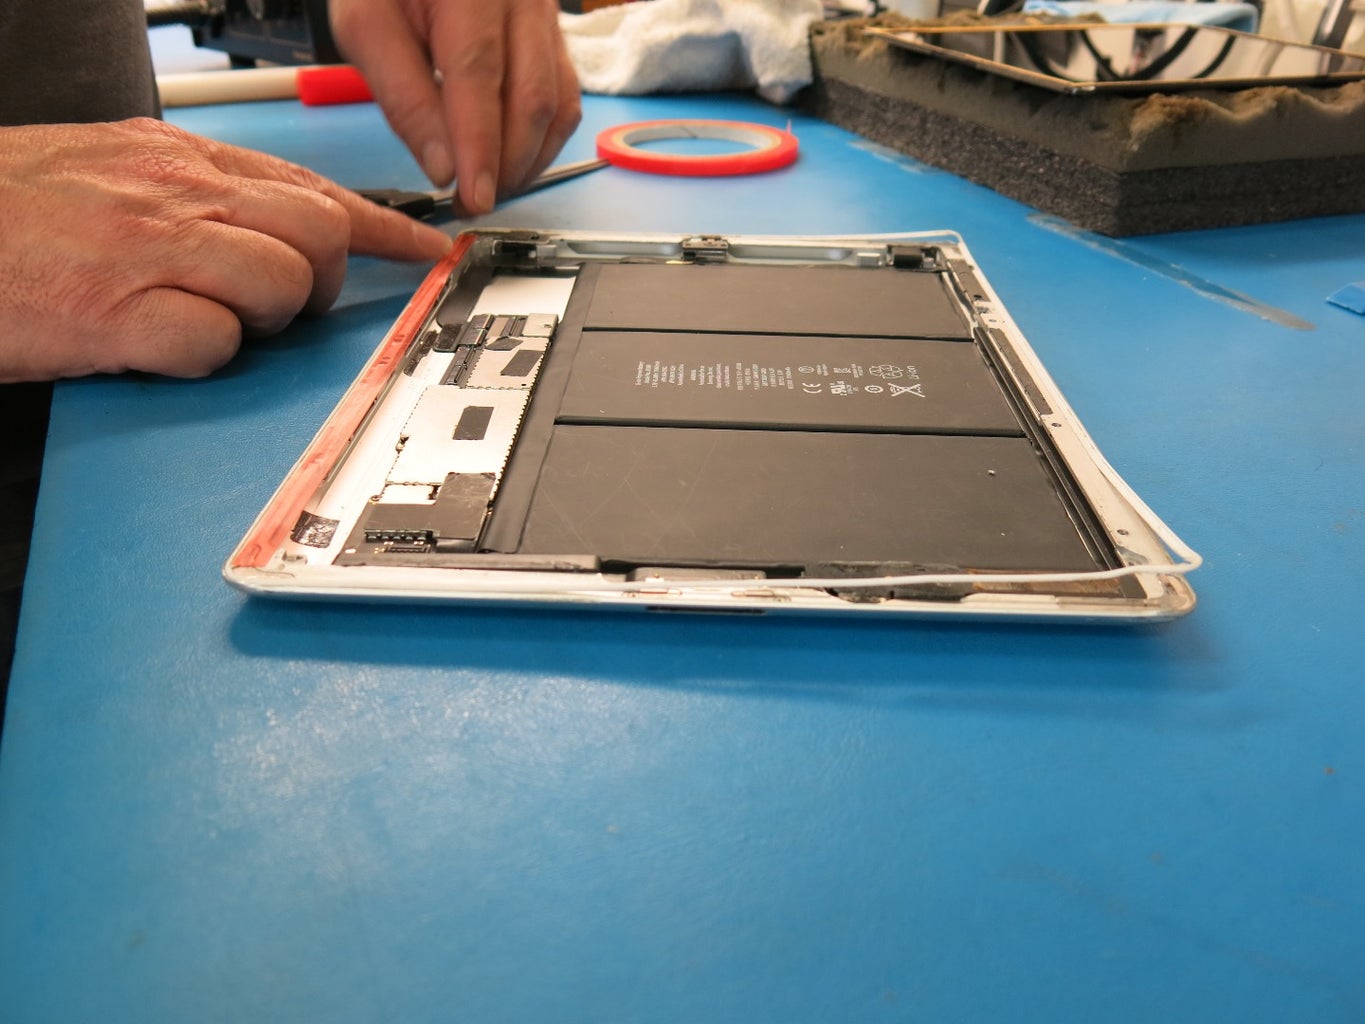
3. Once the battery connector is disconnected, you can proceed with removing the old battery from the iPad. Take note of the adhesive strips or tabs that may be securing the battery in place.
4. Carefully lift the old battery out of the iPad, ensuring that you do not bend or puncture it. If the battery is stuck, you can use a plastic opening tool to gently pry it away from the adhesive strips.
5. Once the old battery is removed, place it aside in a safe and dry location. It is essential to handle and dispose of old batteries properly, as they can be hazardous if mishandled.
6. Before proceeding to install the new battery, take a moment to clean the battery connector and the surrounding area with a soft, lint-free cloth. This helps ensure a clean connection and optimal performance for the new battery.
Now that the old battery is disconnected, you can move on to the next step of installing the new battery. Be sure to follow the instructions carefully and take necessary precautions throughout the battery replacement process.
Step 4: Install the new battery
Now that you have successfully disconnected the old battery, it’s time to install the new one. Follow these steps carefully to ensure a smooth installation process:
- Inspect the new battery: Before installing the new battery, make sure to inspect it for any visible damage or defects. Ensure that it matches the specifications of your iPad model and is compatible with your device.
- Align the new battery: Carefully place the new battery in its designated spot inside the iPad, ensuring that the connectors align with the respective ports on the device. The connectors should fit snugly and securely in their positions.
- Reconnect the battery: Gently reconnect the new battery’s connectors to their corresponding ports on the iPad’s logic board. Take your time to ensure that each connector is properly inserted and secured. Be mindful not to force or bend any connectors as it may cause damage.
- Secure the battery: Once the connectors are firmly in place, secure the battery using the adhesive or clips provided. Make sure it is securely fastened to prevent any movement or disconnection during use.
- Test the connection: Before proceeding, it’s essential to test the battery connection. Reconnect the iPad’s display and power it on. Check if the battery is being recognized and if the device is functioning properly. If there are any issues, double-check the battery connection and make any necessary adjustments.
- Replace any protective covers: If your iPad has any protective covers or plates for the battery, carefully reinstall them. Ensure they are correctly aligned and securely fastened to provide proper protection.
With the new battery successfully installed and tested, you’re one step closer to reviving your iPad. Now, you can proceed to the final step of putting everything back together.
Step 5: Reconnect the screen and test the iPad
After successfully installing the new battery, it’s time to reconnect the screen and test your iPad to ensure everything is working correctly. Follow these steps to complete the process:
- Gently align the screen over the frame and carefully connect the display cables back to the logic board. Make sure each cable is securely attached and in the correct position. Take your time to avoid damaging any components.
- Once the cables are connected, slowly lower the screen into place, ensuring it sits flush with the iPad’s body. Apply even pressure to the edges to ensure a proper fit.
- Power on your iPad by pressing and holding the power button. If all connections are secure, you should see the Apple logo appear on the screen.
- After the iPad boots up, unlock it and test the touch functionality across the screen. Tap and swipe various areas to ensure the touch response is smooth and accurate. If you encounter any issues, double-check the connections and try again.
- Next, test the display quality. Open up different applications and websites to evaluate if the screen looks vibrant, without any dead pixels or strange artifacts.
- Additionally, check the audio output by playing a video or listening to a song. Ensure the audio is clear and at an appropriate volume.
- If everything appears to be functioning properly, congratulations, you have successfully replaced the battery and reconnected the screen! You can now proceed to the final step.
However, if you encounter any issues during the testing process, it’s essential to troubleshoot and identify the problem. Double-check the connections to ensure they are secure and properly aligned. If necessary, repeat the steps from the beginning to confirm that all components are properly installed.
Remember, patience is key during these delicate procedures. Take your time and be meticulous with your work to ensure the best possible outcome.
Step 6: Put everything back together
After successfully installing the new battery, it’s time to put everything back together and get your iPad up and running again. Follow these steps to complete the reassembly process:
1. Start by carefully aligning the iPad screen with the body. Make sure the connectors are properly lined up.
2. Gently press the screen back into place, starting from the top and working your way down. Apply even pressure to avoid damaging the display.
3. Once the screen is secure, reinsert the screws that hold it in place. Use a screwdriver to tighten them, but be cautious not to overtighten.
4. Next, reattach any connectors and cables that were detached during the battery replacement process. Take your time to ensure each one is properly seated and fully connected.
5. Carefully place any additional components such as the camera module, speaker, or microphone back into their respective slots.
6. Double-check that all the screws and connectors are securely fastened, and there are no loose or misplaced components.
7. Finally, power on your iPad to make sure everything is functioning correctly. If the device boots up without any issues, congratulations! You have successfully replaced the battery and reassembled your iPad.
It’s worth noting that putting everything back together may require some patience and attention to detail. Take your time, follow the steps carefully, and refer to any documentation or guides specific to your particular iPad model if needed. If you encounter any difficulties or something doesn’t seem right, don’t hesitate to seek professional assistance.
Now that you have successfully replaced your iPad’s battery and put everything back together, you can once again enjoy the full functionality of your device. Remember to dispose of the old battery properly and maintain your new battery according to the manufacturer’s guidelines to ensure its longevity.
Tips and Precautions
When it comes to replacing the battery on your iPad, it is essential to take certain tips and precautions into consideration. These will not only help you successfully complete the task but also ensure your safety and the longevity of your device. Here are some important tips and precautions to keep in mind:
- Read the instructions: Before you start the battery replacement process, thoroughly read the instructions provided by the manufacturer. This will give you a clear understanding of the steps involved and any specific precautions to take.
- Use the right tools: Make sure you have the necessary tools for the job. Improvising with improper tools can damage your iPad or lead to accidents. Invest in quality, compatible tools to avoid any mishaps.
- Disconnect the power source: Before you begin disassembling your iPad, make sure it is powered off and disconnected from any power source. This will minimize the risk of electrical shock during the battery replacement process.
- Handle the battery with care: Lithium-ion batteries are sensitive and can be dangerous if mishandled. Avoid touching the exposed circuitry on the battery or puncturing it. If the battery appears damaged or swollen, take extra precautions and consider seeking professional help.
- Take photos for reference: Before removing any components, take photos of the disassembly process. This will serve as a reference when putting everything back together. It’s easy to forget the exact placement of cables and connections, especially if it’s your first time replacing an iPad battery.
- Work in a clean and organized workspace: Minimize distractions and keep your workspace clean and organized. Small screws and components can easily get lost, so make sure to have a designated area for each part. This will also help you keep track of your progress as you go along.
- Follow the correct sequence: When removing and reconnecting components, follow the instructions carefully and adhere to the correct sequence. This will prevent any damage to the internal components and ensure that everything fits back together properly.
- Test before final assembly: Before fully reassembling your iPad, test it to ensure that everything is functioning correctly. Connect the screen and check if the battery charges and the device powers on without any issues. This will save you from the hassle of disassembling everything again if something is amiss.
- Consider professional help if unsure: If you are unsure or uncomfortable with the battery replacement process, it’s best to seek the assistance of a professional technician. They have the expertise and experience to handle the delicate task, reducing the risk of potential damage to your iPad.
By following these tips and precautions, you can confidently replace the battery on your iPad without any setbacks. Remember to prioritize safety and take your time throughout the process. With proper care, you can extend the life of your device and enjoy uninterrupted usage for years to come.
Conclusion
In conclusion, replacing the battery in your iPad can greatly extend its lifespan and improve its overall performance. With the right tools and a little bit of patience, you can easily replace the battery yourself and avoid the hassle and expense of taking it to a professional. Just remember to follow the step-by-step guide provided, ensuring that you take all necessary precautions to protect yourself and your device. By taking the time to replace your iPad battery, you can enjoy hours of uninterrupted use and keep your device running smoothly for years to come. So don’t let a dwindling battery hold you back, take the plunge and give your iPad a new lease on life!
FAQs
1. Can I replace the battery on my iPad?
Yes, you can replace the battery on your iPad. Apple offers battery replacement services for their devices, including iPads. You can either take your iPad to an authorized Apple service provider or contact Apple Support for further assistance.
2. How do I know if I need to replace my iPad battery?
There are several signs that indicate you may need to replace your iPad battery. These include a significantly reduced battery life, the iPad not holding a charge, or sudden shutdowns even when the battery level is not low. If you notice any of these issues, it’s a good idea to consider replacing the battery.
3. Can I replace the iPad battery myself?
While it is technically possible to replace the iPad battery yourself, it is generally recommended to have it done by a professional or authorized service provider. iPad batteries are not user-replaceable and require special tools and expertise. Attempting to do it yourself may result in damage to the device.
4. How much does it cost to replace an iPad battery?
The cost of replacing an iPad battery can vary depending on the model of the iPad and the service provider you choose. Apple offers battery replacement services for iPads starting at around $99. It’s best to contact Apple or an authorized service provider for specific pricing details.
5. How long does it take to replace an iPad battery?
The time it takes to replace an iPad battery can vary depending on the service provider and the availability of the battery. In most cases, it can be done within a few hours or even while you wait. However, it’s advisable to check with the service provider for an estimated time frame.