
Are you wondering how to replace the battery in your AirTag? Look no further, as we’ve got you covered. AirTags are incredible little devices that help you keep track of your belongings. However, like any electronic device, their batteries will eventually run out. But fear not, because replacing the battery in your AirTag is a quick and easy process. In this article, we will guide you through the steps to ensure that your AirTag continues to function flawlessly. Whether you’re a tech enthusiast or a novice, we’ve got all the information you need to keep your AirTag powered up and ready to go. So, let’s dive in and discover the simple yet essential process of replacing your AirTag battery.
Inside This Article
- Getting Started
- Opening the AirTag
- Removing the Old Battery
- Installing the New Battery
- Conclusion
- FAQs
Getting Started
Replacing the battery in your AirTag is a simple process that anyone can do. Here are a few things you’ll need to get started:
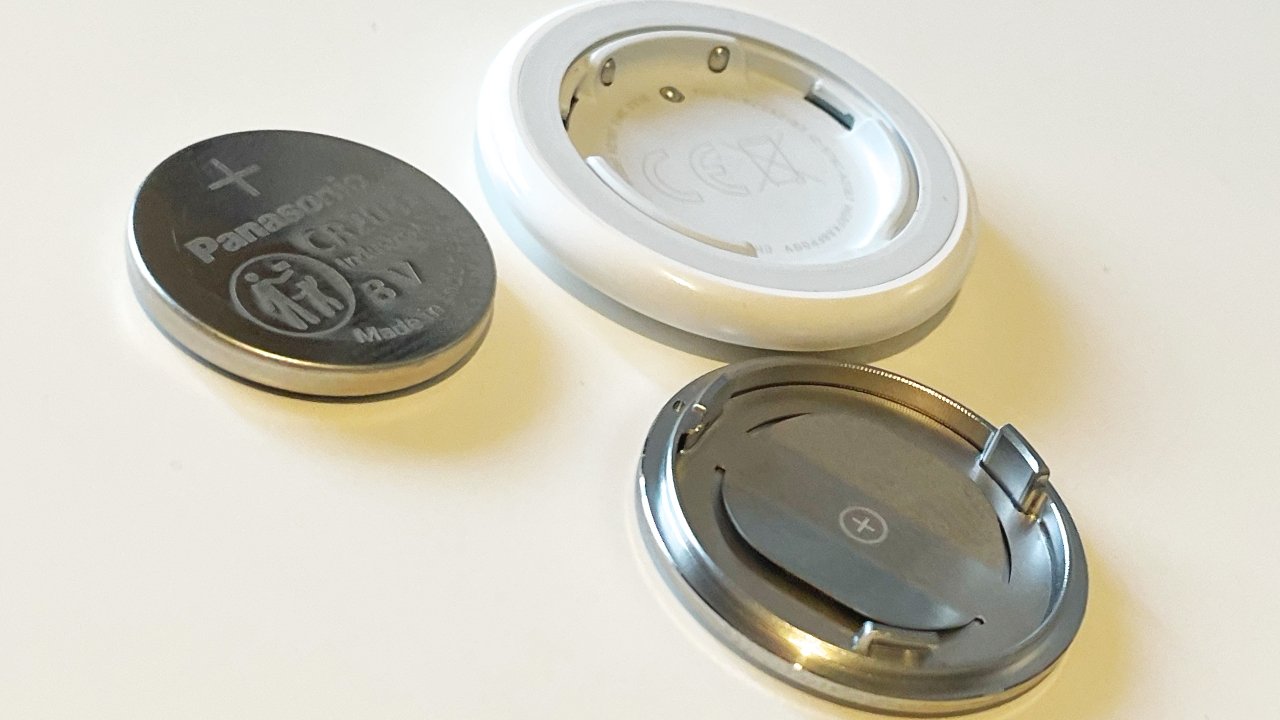
1. Replacement Battery: Before you begin, make sure you have a compatible replacement battery for your AirTag. The battery type required for an AirTag is a CR2032 coin cell battery, which is readily available at most electronics stores.
2. Clean Work Area: Find a clean and well-lit area to work on your AirTag. It’s important to have a clear working space to ensure that you don’t lose any small parts during the battery replacement process.
3. Small Tools: You may need a small set of tools such as a flathead screwdriver or a pair of tweezers to assist you in opening the AirTag and removing the old battery. These tools will help you handle the tiny components with ease and precision.
Once you have these essentials ready, you’re all set to replace the battery in your AirTag.
Opening the AirTag
Now that you have gathered all the tools needed and are ready to replace the battery in your AirTag, the first step is to open the device. Keep in mind that opening the AirTag requires a delicate touch and a bit of patience. Follow the steps below to safely open your AirTag:
1. Place the AirTag on a soft surface, such as a microfiber cloth, to prevent any scratches or damage to the device.
2. Locate the metal ring surrounding the AirTag. This ring is what holds the two halves of the AirTag together.
3. Using a pair of small, flathead screwdrivers or a pry tool specifically designed for electronic devices, carefully insert the tool into the small gap between the metal ring and the plastic casing of the AirTag.
4. Gently apply pressure to pry open the AirTag. Be mindful not to use excessive force, as this can cause damage to the internal components.
5. Once you have successfully opened the AirTag, you will see the battery compartment and the old battery in place.
It is worth noting that opening the AirTag may void any warranty or Apple support for the device. If your AirTag is still under warranty, it is recommended to contact Apple support for assistance before attempting to open it yourself.
Now that you have opened the AirTag, you can proceed to the next step of removing the old battery.
Removing the Old Battery
Once you have successfully opened the AirTag, you can now proceed to removing the old battery. Here’s a step-by-step guide to help you through the process:
- Identify the battery compartment: Take a close look at the inside of the AirTag. You will see a small circular compartment that holds the battery. It is usually located at the back or underneath the circuit board.
- Use a tool to carefully pry open the compartment: You will need a thin and small tool, such as a flathead screwdriver or a plastic pry tool, to gently pry open the battery compartment. Insert the tool into the seam of the compartment and apply gentle pressure to lift it up.
- Take out the old battery: Once the compartment is open, you will see the old battery. Carefully lift it out using your fingers or a pair of tweezers. Be mindful of any connectors or wires that may be attached to the old battery.
- Dispose of the old battery properly: Since the battery in the AirTag is likely to be a small coin cell battery, it is important to dispose of it safely and responsibly. Check your local regulations for proper battery disposal methods or drop it off at designated battery recycling points.
By following these steps, you will successfully remove the old battery from your AirTag. It’s essential to handle the process with care and avoid damaging any other components of the device.
Installing the New Battery
Once you have successfully opened the AirTag and removed the old battery, it’s time to install the new one. Follow these steps to ensure a proper installation:
- Prepare the new battery: Start by opening the packaging of the new battery. Carefully remove the adhesive cover from the battery, being mindful not to touch the exposed surfaces.
- Align the battery: Position the new battery inside the compartment, making sure the positive side (+) is facing up. Take a moment to ensure the battery is properly aligned with the contacts, as this is crucial for optimal functionality.
- Press down gently: Using your thumb or a small tool, gently press down on the battery to secure it in place. Apply enough pressure to ensure a tight fit, but be cautious not to damage the contacts or the battery itself.
- Replace the cover: If your AirTag has a cover or a lid, carefully place it back in its original position. Ensure that it is securely closed to protect the battery and internal components.
- Test the AirTag: Now that you have installed the new battery, it’s time to test your AirTag. Press the AirTag’s button to check if it lights up. If it does, congratulations! You have successfully replaced the battery.
It is important to note that different AirTag models may have slight variations in battery installation methods. Always refer to the manufacturer’s instructions for specific guidance.
Remember to properly dispose of the old battery in accordance with local regulations. Many stores and recycling centers have designated battery disposal areas to ensure environmentally friendly waste management.
Congratulations! You have successfully installed a new battery in your AirTag. This simple process ensures that your AirTag continues to function optimally and helps you keep track of your belongings.
Overall, replacing the battery on your AirTag is a straightforward process that can help ensure its smooth functioning. By following the steps mentioned in this article, you can easily swap out the old battery for a new one and continue using your AirTag to keep track of your valuable items.
It’s important to note that the battery life of an AirTag varies based on a variety of factors such as usage and settings. It’s a good practice to regularly check the battery level of your AirTag and replace it when necessary to avoid any disruptions in its functionality.
With the information provided in this article, you can confidently maintain and replace the battery on your AirTag whenever needed. So, go ahead and keep your belongings safe and secure with this handy tracking device!
FAQs
1. How do I know when the battery of my AirTag needs to be replaced?
When the battery of your AirTag is running low, you will receive a notification on your connected device. Additionally, you can check the battery level through the Find My app on your iPhone or iPad.
2. What type of battery does the AirTag use?
The AirTag uses a CR2032 coin cell battery, which is a widely available and commonly used type of battery.
3. How long does the battery of an AirTag last?
The battery life of an AirTag can vary depending on usage, but Apple claims that the battery should last up to one year with regular everyday usage.
4. How do I replace the battery in an AirTag?
To replace the battery in an AirTag, follow these steps:
– Locate the cover on the back of the AirTag.
– Press down and twist the cover counterclockwise to remove it.
– Take out the old battery and discard it properly.
– Insert a new CR2032 coin cell battery with the positive side facing up.
– Place the cover back on the AirTag and twist it clockwise until it is securely tightened.
5. Where can I purchase replacement batteries for my AirTag?
You can find CR2032 coin cell batteries at most electronics stores, online retailers, and even in some grocery stores. Alternatively, you can purchase them from Apple’s online store or authorized resellers.